标签:
搭建QQ聊天通信的程序:(1)基于 networkcomms.net 创建一个WPF聊天客户端服务器应用程序
原文地址(英文):http://www.networkcomms.net/creating-a-wpf-chat-client-server-application/
注意:本教程是相当广泛的,如果你是在短请也看到我们的东西 开始 和 如何在几分钟内创建一个客户端服务器应用程序 教程。
注2:本例中包括,明显延长进一步证明功能,在包中包含的示例 包下载 。
在我们开始之前确保您已经安装了Visual Studio 2010中表达或晚,这应该有 .net4.0 或更高版本。
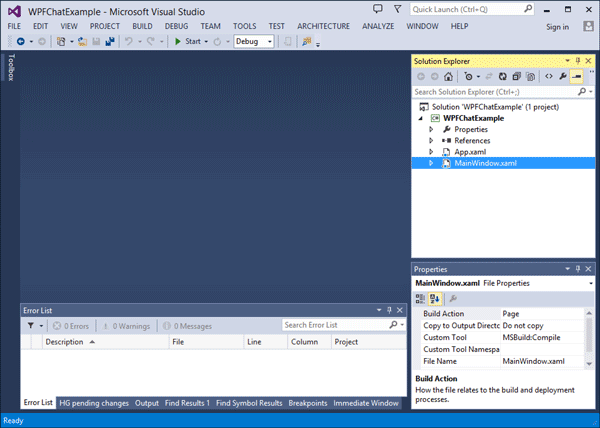
新鲜的visual studio创建应用程序命名为“WPFChatExample”

“WPFChatExample”WPF应用程序包含一个引用NetworkComms完成.net DLL。
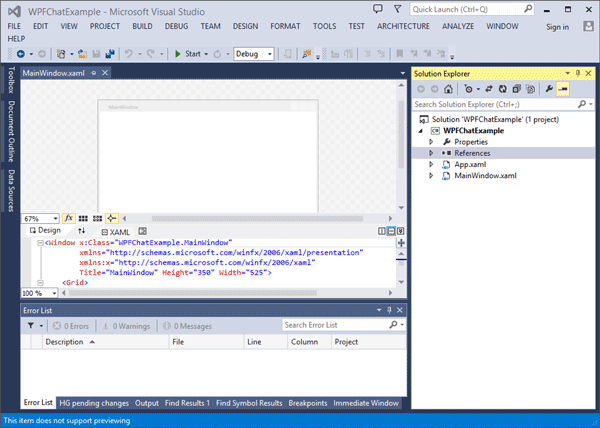
开放的主窗口。 xaml文件显示‘设计’和‘xaml”。

 1 <Window x:Class="WPFChatExample.MainWindow"
 2         xmlns="http://schemas.microsoft.com/winfx/2006/xaml/presentation"
 3         xmlns:x="http://schemas.microsoft.com/winfx/2006/xaml"
 4         Title="NetworkComms .Net WPF Chat Example" Height="341" Width="512" Background="#FF7CA0FF" ResizeMode="CanMinimize">
 5     <Grid>
 6         <TextBox Height="23" HorizontalAlignment="Left" Margin="68,8,0,0" Name="serverIP" VerticalAlignment="Top" Width="97" />
 7         <Label Content="Server IP:" Height="28" HorizontalAlignment="Left" Margin="8,6,0,0" Name="label1" VerticalAlignment="Top" />
 8         <TextBox Height="23" HorizontalAlignment="Left" Margin="199,8,0,0" Name="serverPort" VerticalAlignment="Top" Width="47" />
 9         <Label Content="Port:" Height="28" HorizontalAlignment="Left" Margin="166,6,0,0" Name="label2" VerticalAlignment="Top" />
10         <TextBox Height="231" HorizontalAlignment="Left" Margin="11,38,0,0" Name="chatBox" VerticalAlignment="Top" Width="356" IsReadOnly="True" VerticalScrollBarVisibility="Visible" />
11         <Label Content="Messages from:" Height="28" HorizontalAlignment="Left" Margin="369,84,0,0" Name="label3" VerticalAlignment="Top" Width="98" />
12         <TextBox Height="161" HorizontalAlignment="Left" Margin="373,108,0,0" Name="messagesFrom" VerticalAlignment="Top" Width="117" IsReadOnly="True" VerticalScrollBarVisibility="Auto" />
13         <Label Content="Local Name:" Height="28" HorizontalAlignment="Left" Margin="293,7,0,0" Name="label4" VerticalAlignment="Top" />
14         <TextBox Height="23" HorizontalAlignment="Left" Margin="373,8,0,0" Name="localName" VerticalAlignment="Top" Width="117" />
15         <Label Content="Message:" Height="28" HorizontalAlignment="Left" Margin="5,272,0,0" Name="label5" VerticalAlignment="Top" />
16         <TextBox Height="23" HorizontalAlignment="Left" Margin="62,274,0,0" Name="messageText" VerticalAlignment="Top" Width="305" />
17         <Button Content="Send" Height="23" HorizontalAlignment="Left" Margin="373,274,0,0" Name="sendMessageButton" VerticalAlignment="Top" Width="117"/>
18         <CheckBox Content="Enable Server" Height="16" HorizontalAlignment="Left" Margin="377,44,0,0" x:Name="enableServer" VerticalAlignment="Top"/>
19         <CheckBox Content="Use Encryption" Height="16" HorizontalAlignment="Left" Margin="377,65,0,0" Name="useEncryptionBox" VerticalAlignment="Top"/>
20     </Grid>
21 </Window>
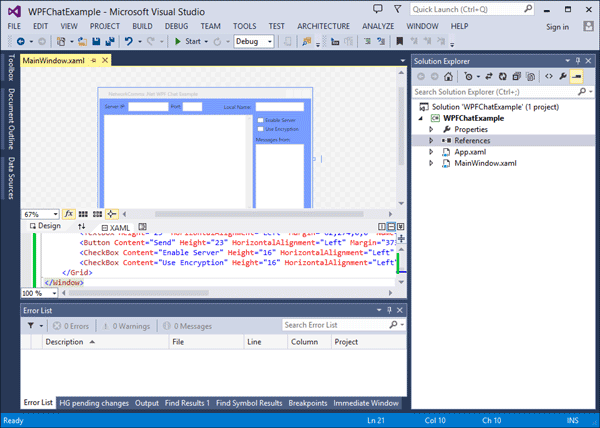
后复制粘贴的例子xaml代码设计窗口现在应该显示的基本布局。
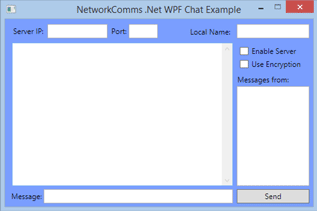
WPF聊天应用程序的例子。 所有的布局元素添加了但是没有任何功能。
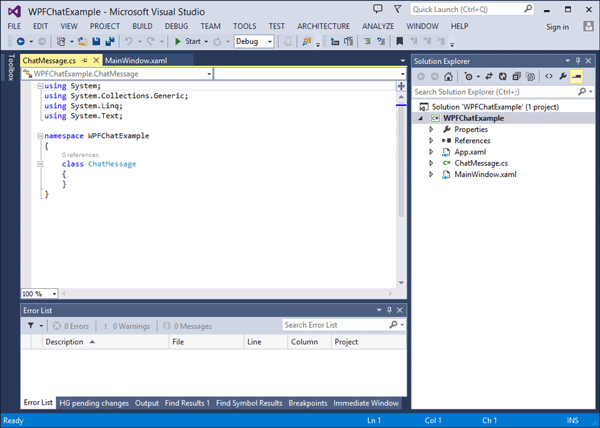
这个新类,名为“ChatMessage.cs”。 这将是用作聊天信息的包装器。
 1 using System;
 2 using System.Collections.Generic;
 3 using System.Linq;
 4 using System.Text;
 5
 6 //我们需要包括以下三本类的命名空间
 7 using NetworkCommsDotNet;
 8 using NetworkCommsDotNet.Tools;
 9 using ProtoBuf;
10
11 namespace WPFChatExample
12 {
13     /// <summary>
14     /// A wrapper class for the messages that we intend to send and receive.
15     /// The [ProtoContract] attribute informs NetworkComms .Net that we intend to
16     /// serialise(连载) (turn into bytes) this object. At the base level the
17     /// serialisation(连载) is performed by protobuf.net.
18     /// </summary>
19     [ProtoContract]
20     class ChatMessage
21     {
22         /// <summary>
23         /// chatmessage标识源.
24         /// We use this variable as the constructor for the ShortGuid.
25         /// The [ProtoMember(1)] attribute informs the serialiser that when
26         /// an object of type ChatMessage is serialised we want to include this variable
27         /// </summary>
28         [ProtoMember(1)]
29         string _sourceIdentifier;
30
31         /// <summary>
32         /// The source identifier is accessible as a ShortGuid
33         /// </summary>
34         public ShortGuid SourceIdentifier { get { return new ShortGuid(_sourceIdentifier); } }
35
36         /// <summary>
37         /// The name of the source of this ChatMessage.
38         /// We use shorthand declaration, get and set.
39         /// The [ProtoMember(2)] attribute informs the serialiser that when
40         /// an object of type ChatMessage is serialised we want to include this variable
41         /// </summary>
42         [ProtoMember(2)]
43         public string SourceName { get; private set; }
44
45         /// <summary>
46         /// The actual message.
47         /// </summary>
48         [ProtoMember(3)]
49         public string Message { get; private set; }
50
51         /// <summary>
52         /// The index of this message. Every message sent by a particular source
53         /// has an incrementing(增值) index.
54         /// </summary>
55         [ProtoMember(4)]
56         public long MessageIndex { get; private set; }
57
58         /// <summary>
59         /// The number of times this message has been relayed.
60         /// </summary>
61         [ProtoMember(5)]
62         public int RelayCount { get; private set; }
63
64         /// <summary>
65         /// We must include a private constructor to be used by the deserialisation step.
66         /// </summary>
67         private ChatMessage() { }
68
69         /// <summary>
70         /// Create a new ChatMessage
71         /// </summary>
72         /// <param name="sourceIdentifier">The source identifier</param>
73         /// <param name="sourceName">The source name</param>
74         /// <param name="message">The message to be sent</param>
75         /// <param name="messageIndex">The index of this message</param>
76         public ChatMessage(ShortGuid sourceIdentifier, string sourceName, string message, long messageIndex)
77         {
78             this._sourceIdentifier = sourceIdentifier;
79             this.SourceName = sourceName;
80             this.Message = message;
81             this.MessageIndex = messageIndex;
82             this.RelayCount = 0;
83         }
84
85         /// <summary>
86         /// Increment the relay count variable
87         /// </summary>
88         public void IncrementRelayCount()
89         {
90             RelayCount++;
91         }
92     }
93 }
 1 using System;
 2 using System.Collections.Generic;
 3 using System.Linq;
 4 using System.Text;
 5 using System.Windows;
 6 using System.Windows.Controls;
 7 using System.Windows.Data;
 8 using System.Windows.Documents;
 9 using System.Windows.Input;
10 using System.Windows.Media;
11 using System.Windows.Media.Imaging;
12 using System.Windows.Navigation;
13 using System.Windows.Shapes;
14
15 namespace WPFChatExample
16 {
17     /// <summary>
18     /// Interaction logic for MainWindow.xaml
19     /// </summary>
20     public partial class MainWindow : Window
21     {
22         public MainWindow()
23         {
24             InitializeComponent();
25         }
26     }
27 }
1 //We need to include the following namespaces
2 using System.Net;
3 using NetworkCommsDotNet;
4 using NetworkCommsDotNet.DPSBase;
5 using NetworkCommsDotNet.Tools;
6 using NetworkCommsDotNet.Connections;
7 using NetworkCommsDotNet.Connections.TCP;
 1 #region Private Fields
 2 /// <summary>
 3 /// Dictionary to keep track of which peer messages have already been written to the chat window
 4 /// </summary>
 5 Dictionary<ShortGuid, ChatMessage> lastPeerMessageDict = new Dictionary<ShortGuid, ChatMessage>();
 6
 7 /// <summary>
 8 /// The maximum number of times a chat message will be relayed
 9 /// </summary>
10 int relayMaximum = 3;
11
12 /// <summary>
13 /// An optional encryption key to use should one be required.
14 /// This can be changed freely but must obviously be the same
15 /// for both sender and receiver.
16 /// </summary>
17 string encryptionKey = "ljlhjf8uyfln23490jf;m21-=scm20--iflmk;";
18
19 /// <summary>
20 /// A local counter used to track the number of messages sent from
21 /// this instance.
22 /// </summary>
23 long messageSendIndex = 0;
24 #endregion
 1 /// <summary>
 2 /// Append the provided message to the chatBox text box.
 3 /// </summary>
 4 /// <param name="message"></param>
 5 private void AppendLineToChatBox(string message)
 6 {
 7     //To ensure we can successfully append to the text box from any thread
 8     //we need to wrap the append within an invoke action.
 9     chatBox.Dispatcher.BeginInvoke(new Action<string>((messageToAdd) =>
10     {
11         chatBox.AppendText(messageToAdd + "\n");
12         chatBox.ScrollToEnd();
13     }), new object[] { message });
14 }
15
16 /// <summary>
17 /// Refresh the messagesFrom text box using the recent message history.
18 /// </summary>
19 private void RefreshMessagesFromBox()
20 {
21     //We will perform a lock here to ensure the text box is only
22     //updated one thread at  time
23     lock (lastPeerMessageDict)
24     {
25         //Use a linq expression to extract an array of all current users from lastPeerMessageDict
26         string[] currentUsers = (from current in lastPeerMessageDict.Values orderby current.SourceName select current.SourceName).ToArray();
27
28         //To ensure we can successfully append to the text box from any thread
29         //we need to wrap the append within an invoke action.
30         this.messagesFrom.Dispatcher.BeginInvoke(new Action<string[]>((users) =>
31         {
32             //First clear the text box
33             messagesFrom.Text = "";
34
35             //Now write out each username
36             foreach (var username in users)
37                 messagesFrom.AppendText(username + "\n");
38         }), new object[] { currentUsers });
39     }
40 }
 1 /// <summary>
 2 /// Send any entered message when we click the send button.
 3 /// </summary>
 4 /// <param name="sender"></param>
 5 /// <param name="e"></param>
 6 private void SendMessageButton_Click(object sender, RoutedEventArgs e)
 7 {
 8     SendMessage();
 9 }
10
11 /// <summary>
12 /// Send any entered message when we press enter or return
13 /// </summary>
14 /// <param name="sender"></param>
15 /// <param name="e"></param>
16 private void MessageText_KeyUp(object sender, KeyEventArgs e)
17 {
18     if (e.Key == Key.Enter || e.Key == Key.Return)
19         SendMessage();
20 }
21
22 /// <summary>
23 /// Toggle encryption
24 /// </summary>
25 /// <param name="sender"></param>
26 /// <param name="e"></param>
27 private void UseEncryptionBox_CheckedToggle(object sender, RoutedEventArgs e)
28 {
29     if (useEncryptionBox.IsChecked != null && (bool)useEncryptionBox.IsChecked)
30     {
31         RijndaelPSKEncrypter.AddPasswordToOptions(NetworkComms.DefaultSendReceiveOptions.Options, encryptionKey);
32         NetworkComms.DefaultSendReceiveOptions.DataProcessors.Add(DPSManager.GetDataProcessor<RijndaelPSKEncrypter>());
33     }
34     else
35         NetworkComms.DefaultSendReceiveOptions.DataProcessors.Remove(DPSManager.GetDataProcessor<RijndaelPSKEncrypter>());
36 }
37
38 /// <summary>
39 /// Correctly shutdown NetworkComms .Net when closing the WPF application
40 /// </summary>
41 /// <param name="sender"></param>
42 /// <param name="e"></param>
43 private void Window_Closing(object sender, System.ComponentModel.CancelEventArgs e)
44 {
45     //Ensure we shutdown comms when we are finished
46     NetworkComms.Shutdown();
47 }
48
49 /// <summary>
50 /// Toggle whether the local application is acting as a server
51 /// </summary>
52 /// <param name="sender"></param>
53 /// <param name="e"></param>
54 private void EnableServer_Toggle(object sender, RoutedEventArgs e)
55 {
56     //Enable or disable the local server mode depending on the checkbox IsChecked value
57     if (enableServer.IsChecked != null && (bool)enableServer.IsChecked)
58         ToggleServerMode(true);
59     else
60         ToggleServerMode(false);
61 }
 1 /// <summary>
 2 /// Wrap the functionality required to enable/disable the local application server mode
 3 /// </summary>
 4 /// <param name="enableServer"></param>
 5 private void ToggleServerMode(bool enableServer)
 6 {
 7     if (enableServer)
 8     {
 9         //Start listening for new incoming TCP connections
10         //Parameters ensure we listen across all adaptors using a random port
11         Connection.StartListening(ConnectionType.TCP, new IPEndPoint(IPAddress.Any, 0));
12
13         //Write the IP addresses and ports that we are listening on to the chatBox
14         chatBox.AppendText("Listening for incoming TCP connections on:\n");
15         foreach (IPEndPoint listenEndPoint in Connection.ExistingLocalListenEndPoints(ConnectionType.TCP))
16             chatBox.AppendText(listenEndPoint.Address + ":" + listenEndPoint.Port + "\n");
17     }
18     else
19     {
20         NetworkComms.Shutdown();
21         chatBox.AppendText("Server disabled. No longer accepting connections and all existing connections have been closed.");
22     }
23 }
 1 /// <summary>
 2 /// Performs whatever functions we might so desire when we receive an incoming ChatMessage
 3 /// </summary>
 4 /// <param name="header">The PacketHeader corresponding with the received object</param>
 5 /// <param name="connection">The Connection from which this object was received</param>
 6 /// <param name="incomingMessage">The incoming ChatMessage we are after</param>
 7 private void HandleIncomingChatMessage(PacketHeader header, Connection connection, ChatMessage incomingMessage)
 8 {
 9     //We only want to write a message once to the chat window
10     //Because we allow relaying and may receive the same message twice
11     //we use our history and message indexes to ensure we have a new message
12     lock (lastPeerMessageDict)
13     {
14         if (lastPeerMessageDict.ContainsKey(incomingMessage.SourceIdentifier))
15         {
16             if (lastPeerMessageDict[incomingMessage.SourceIdentifier].MessageIndex < incomingMessage.MessageIndex)
17             {
18                 //If this message index is greater than the last seen from this source we can safely
19                 //write the message to the ChatBox
20                 AppendLineToChatBox(incomingMessage.SourceName + " - " + incomingMessage.Message);
21
22                 //We now replace the last received message with the current one
23                 lastPeerMessageDict[incomingMessage.SourceIdentifier] = incomingMessage;
24             }
25         }
26         else
27         {
28             //If we have never had a message from this source before then it has to be new
29             //by definition
30             lastPeerMessageDict.Add(incomingMessage.SourceIdentifier, incomingMessage);
31             AppendLineToChatBox(incomingMessage.SourceName + " - " + incomingMessage.Message);
32         }
33     }
34
35     //Once we have written to the ChatBox we refresh the MessagesFromWindow
36     RefreshMessagesFromBox();
37
38     //This last section of the method is the relay function
39     //We start by checking to see if this message has already been relayed
40     //the maximum number of times
41     if (incomingMessage.RelayCount < relayMaximum)
42     {
43         //If we are going to relay this message we need an array of
44         //all other known connections
45         var allRelayConnections = (from current in NetworkComms.GetExistingConnection() where current != connection select current).ToArray();
46
47         //We increment(增量) the relay count before we send
48         incomingMessage.IncrementRelayCount();
49
50         //We will now send the message to every other connection
51         foreach (var relayConnection in allRelayConnections)
52         {
53             //We ensure we perform the send within a try catch
54             //To ensure a single failed send will not prevent the
55             //relay to all working connections.
56             try { relayConnection.SendObject("ChatMessage", incomingMessage); }
57             catch (CommsException) { /* Catch the comms exception, ignore and continue */ }
58         }
59     }
60 }
 1 /// <summary>
 2 /// Performs whatever functions we might so desire when an existing connection is closed.
 3 /// </summary>
 4 /// <param name="connection">The closed connection</param>
 5 private void HandleConnectionClosed(Connection connection)
 6 {
 7     //We are going to write a message to the ChatBox when a user disconnects
 8     //We perform the following within a lock so that threads proceed one at a time
 9     lock (lastPeerMessageDict)
10     {
11         //Extract the remoteIdentifier from the closed connection
12         ShortGuid remoteIdentifier = connection.ConnectionInfo.NetworkIdentifier;
13
14         //If at some point we received a message with this identifier we can
15         //include the source name in the disconnection message.
16         if (lastPeerMessageDict.ContainsKey(remoteIdentifier))
17             AppendLineToChatBox("Connection with ‘" + lastPeerMessageDict[remoteIdentifier].SourceName + "‘ has been closed.");
18         else
19             AppendLineToChatBox("Connection with ‘" + connection.ToString() + "‘ has been closed.");
20
21         //Last thing is to remove this entry from our message history
22         lastPeerMessageDict.Remove(connection.ConnectionInfo.NetworkIdentifier);
23     }
24
25     //Refresh the messages from box to reflect this disconnection
26     RefreshMessagesFromBox();
27 }
下一个方法将用于发送任何消息,我们创建:
 1 /// <summary>
 2 /// Send our message.
 3 /// </summary>
 4 private void SendMessage()
 5 {
 6     //If we have tried to send a zero length string we just return
 7     if (messageText.Text.Trim() == "") return;
 8
 9     //We may or may not have entered some server connection information
10     ConnectionInfo serverConnectionInfo = null;
11     if (serverIP.Text != "")
12     {
13         try { serverConnectionInfo = new ConnectionInfo(serverIP.Text.Trim(), int.Parse(serverPort.Text)); }
14         catch (Exception)
15         {
16             MessageBox.Show("Failed to parse the server IP and port. Please ensure it is correct and try again", "Server IP & Port Parse Error", MessageBoxButton.OK);
17             return;
18         }
19     }
20
21     //We wrap everything we want to send in the ChatMessage class we created
22     ChatMessage messageToSend = new ChatMessage(NetworkComms.NetworkIdentifier, localName.Text, messageText.Text, messageSendIndex++);
23
24     //We add our own message to the message history in-case it gets relayed back to us
25     lock (lastPeerMessageDict) lastPeerMessageDict[NetworkComms.NetworkIdentifier] = messageToSend;
26
27     //We write our own message to the chatBox
28     AppendLineToChatBox(messageToSend.SourceName + " - " + messageToSend.Message);
29
30     //We refresh the MessagesFrom box so that it includes our own name
31     RefreshMessagesFromBox();
32
33     //We clear the text within the messageText box.
34     this.messageText.Text = "";
35
36     //If we provided server information we send to the server first
37     if (serverConnectionInfo != null)
38     {
39         //We perform the send within a try catch to ensure the application continues to run if there is a problem.
40         try { TCPConnection.GetConnection(serverConnectionInfo).SendObject("ChatMessage", messageToSend); }
41         catch (CommsException) { MessageBox.Show("A CommsException occurred while trying to send message to " + serverConnectionInfo, "CommsException", MessageBoxButton.OK); }
42     }
43
44     //If we have any other connections we now send the message to those as well
45     //This ensures that if we are the server everyone who is connected to us gets our message
46     var otherConnectionInfos = (from current in NetworkComms.AllConnectionInfo() where current != serverConnectionInfo select current).ToArray();
47     foreach (ConnectionInfo info in otherConnectionInfos)
48     {
49         //We perform the send within a try catch to ensure the application continues to run if there is a problem.
50         try { TCPConnection.GetConnection(info).SendObject("ChatMessage", messageToSend); }
51         catch (CommsException) { MessageBox.Show("A CommsException occurred while trying to send message to " + info, "CommsException", MessageBoxButton.OK); }
52     }
53 }
 1 public MainWindow()
 2 {
 3     InitializeComponent();
 4
 5     //Write the IP addresses and ports that we are listening on to the chatBox
 6     chatBox.AppendText("Initialised WPF chat example.");
 7
 8     //Add a blank line after the initialisation output
 9     chatBox.AppendText("\n");
10
11     //Set the default Local Name box using to the local host name
12     localName.Text = HostInfo.HostName;
13
14     //Configure NetworkComms .Net to handle and incoming packet of type ‘ChatMessage‘
15     //e.g. If we receive a packet of type ‘ChatMessage‘ execute the method ‘HandleIncomingChatMessage‘
16     NetworkComms.AppendGlobalIncomingPacketHandler<ChatMessage>("ChatMessage", HandleIncomingChatMessage);
17
18     //Configure NetworkComms .Net to perform an action when a connection is closed
19     //e.g. When a connection is closed execute the method ‘HandleConnectionClosed‘
20     NetworkComms.AppendGlobalConnectionCloseHandler(HandleConnectionClosed);
21 }
1 <Window x:Class="WPFChatExample.MainWindow"
2         xmlns="http://schemas.microsoft.com/winfx/2006/xaml/presentation"
3         xmlns:x="http://schemas.microsoft.com/winfx/2006/xaml"
4         Title="NetworkComms .Net WPF Chat Example" Height="341" Width="512" Background="#FF7CA0FF" ResizeMode="CanMinimize">
<Button Content="Send" Height="23" HorizontalAlignment="Left" Margin="373,274,0,0" Name="sendMessageButton" VerticalAlignment="Top" Width="117" />
这里以下排版不是很好,太晚了看花眼了,请参照原文(英文)
1 <Button Content="Send" Height="23" HorizontalAlignment="Left" Margin="373,274,0,0" Name="sendMessageButton" VerticalAlignment="Top" Width="117" Click="SendMessageButton_Click"/>
这里以下排版不是很好,太晚了看花眼了,请参照原文(英文)
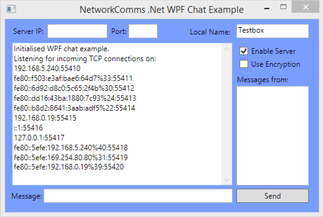
完成应用程序的示例输出本地服务器后启用。

最基本的连接配置。 应用程序B已选定的应用程序服务器。

另一个基本的连接配置。 应用程序B已选定的应用程序服务器。 应用C也选择的应用程序服务器。
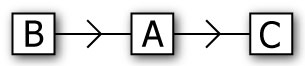
一个更先进的连接配置。 应用程序B已选定的应用程序服务器。 C应用程序已经选择的应用程序服务器。

最先进的连接配置使用三个客户。 选择应用程序B作为其服务器应用程序。 C应用程序B已经选定的应用程序服务器。 应用程序选择C应用程序的服务器。

搭建QQ聊天通信的程序:(1)基于 networkcomms.net 创建一个WPF聊天客户端服务器应用程序 (1)
标签:
原文地址:http://www.cnblogs.com/endv/p/5904387.html
