标签:
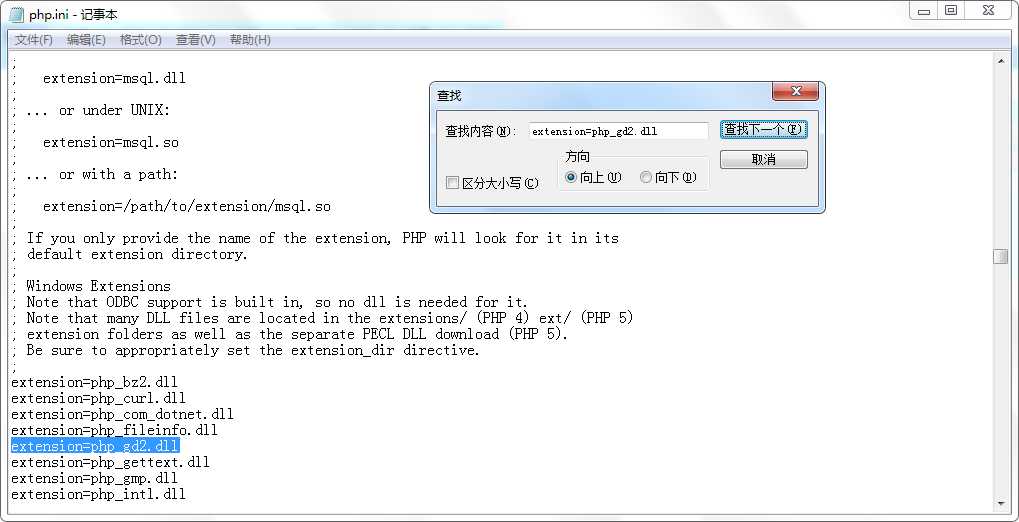
1.确认php中GD库是否开启
在PHP配置文件php.ini中查找extension=php_gd2.dll,去掉前边的(分号) ‘;‘ 即可,一般php是默认开启的

2.绘画步骤
3.示例
为了方便演示,先了解后两步
输出图像:
1 header("Content-Type: image/jpeg");//设置响应头信息为一个jpeg的图片
2 imagejpeg($im);//输出一个jpeg图片
3
4 header("Content-Type: image/png");//设置响应头信息为一个png的图片
5 imagepng($im);//输出一个png图片
6
7 //输出到指定文件中(另存为)
8 imagepng($im,"**.png");
销毁图像(解除占用的资源):
1 bool imagedestroy ( resource $image )//销毁一图像
创建一个画布:
1 //创建一个基于256色的画布
2 $img=imagecreate(400,400);
3 echo $img;
显示效果:

1 //新建一个真彩色图像
2 $img=imagecreatetruecolor(400,400);
3 echo $img;
显示效果:

其他的方式:
//还有基于某个图片的画布
imagecreatefromgif( string filename )
imagecreatefrompng( string filename )
imagecreatefromjpeg( string filename )
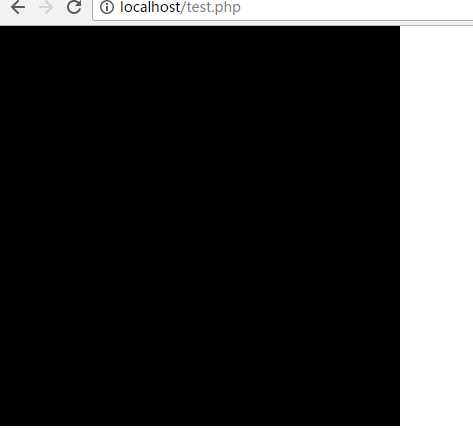
真彩和256色画布的显示区别-----真彩的会默认填充黑色的画布
<?php
    //创建一个基于256色的画布
    $img1=imagecreate(400,400);
    $img2=imagecreatetruecolor(400,400);
    // 输出图像
    header(‘content-type:image/png‘);
    // imagepng($img1);
    imagepng($img2);
    // 销毁图像,解除占用的资源
    // imagedestroy($img1);
    imagedestroy($img2);
?>
显示效果:

*开始绘画
<?php
    //分配定义颜色
        $red = imagecolorallocate($im,255,0,0); //分配一个颜色

        //填充背景
        bool imagefill(resource image,int x,int y, int color ); //填充背景

        //画点
        bool imagesetpixel(resource image,int x,int y,int color );//画一个像素点

        //画一个线段的函数
        bool imageline ( resource image, int x1, int y1, int x2, int y2, int color )

        //画矩形框(不填充)
        bool imagerectangle ( resource image, int x1, int y1, int x2, int y2, int color )
        //画矩形框(填充)
        bool imagefilledrectangle ( resource image, int x1, int y1, int x2, int y2, int color )

        //绘制多边形
        bool imagepolygon ( resource image, array points, int num_points, int color )
        bool imagefilledpolygon ( resource image, array points, int num_points, int color )

        //绘制椭圆(正圆)
        imageellipse ( resource image, int cx, int cy, int w, int h, int color )
        imagefilledellipse ( resource image, int cx, int cy, int w, int h, int color )

        //绘制圆弧(可填充)
        imagearc ( resource image, int cx, int cy, int w, int h, int s, int e, int color, int style )
        imagefilledarc ( resource image, int cx, int cy, int w, int h, int s, int e, int color, int style )

        //绘制字串
        bool imagestring ( resource image, int font, int x, int y, string s, int col )
        bool imagestringup ( resource image, int font, int x, int y, string s, int col )

        //绘制字符
        imagechar


        //绘制文本:
        *array imagettftext ( resource image, float size, float angle, int x, int y, int color, string fontfile, string text )

        //当上面的字体出现乱码时,使用下面的函数转换编码
        string iconv ( string in_charset, string out_charset, string str )

        $name="张三";
        $str = iconv("ISO8859-1","UTF-8",$name);
        $str = iconv("GBK","UTF-8",$name);
        $str = iconv("GB2312","UTF-8",$name);


        //图片的裁剪、合成、缩放
        **bool imagecopyresampled ( resource dst_image, resource src_image, int dst_x, int dst_y, int src_x, int src_y, int dst_w, int dst_h, int src_w, int src_h )

        * imagesx — 取得图像宽度
        * imagesy — 取得图像高度
        * array getimagesize ( string $filename [, array &$imageinfo ] )  取得图像大小
?>
综合代码示例:
 1 <?php
 2     // 创建画布
 3     $img=imagecreatetruecolor(1000,1000);
 4     // 创建颜色
 5     $red=imagecolorallocate($img,255,0,0);
 6     $blue=imagecolorallocate($img, 0, 0, 255);
 7     $green=imagecolorallocate($img, 0, 255, 0);
 8     $gray=imagecolorallocate($img, 200, 200, 200);
 9
10     //填充颜色
11     imagefill($img,100,0,$gray);
12     //创建一个点
13     imagesetpixel($img, 20, 20, $red);
14     // 随机创建1000个点
15     for($i=0;$i<1000;$i++){
16         imagesetpixel($img, rand(0,1000), rand(0,1000), $red);
17     }
18     //输出线段
19     imageline($img, 0, 0, 200, 200, $blue);
20     //输出矩形
21     imagerectangle($img, 200, 200, 400, 400, $blue);//不填充
22     imagefilledrectangle($img, 200, 400, 400, 600, $blue);//填充
23     //绘制多边形   imagefilledpolygon----填充
24     imagepolygon($img, array(0,0,100,200,300,200), 3, $blue);
25     //绘制椭圆(正圆)
26     imageellipse($img, 600, 600, 200, 200, $blue);
27     imagefilledellipse($img, 800, 600, 200, 200, $blue);
28     // 绘制字符串
29     imagestring($img, 15, 600, 200, "string", $blue);//水平
30     imagestringup($img, 15, 600, 200, "string", $blue);//垂直
31     // 绘制字符
32     imagechar($img, 5, 800, 200, ‘H‘, $blue);
33     imagecharup($img, 5, 800, 200, ‘H‘, $blue);
34     //绘制文本
35     imagettftext($img, 20, 0, 500, 500, $blue, ‘bb.ttc‘, ‘this is string!‘);
36     /*当上面的字体出现乱码时,使用下面的函数转换编码
37     string iconv ( string in_charset, string out_charset, string str )*/
38     //imagecopyresampled($img, "dd.jpg", 200, 200, 200, 200, 200, 200, 200, 200);
39     //输出图像
40     header(‘content-type:image/png‘);
41     imagepng($img);
42     //销毁图像
43     imagedestroy($img);
44 ?>
难重点:
标签:
原文地址:http://www.cnblogs.com/zhengfengyun/p/5905734.html