标签:
1.说明:Idea 下,项目对应于 Eclipse 下的 workspace,Module 对应于 Eclipse 下的项目。Idea 下,新添加的项目既可以单独作为一个 Project,也可以作为一个 Project 下的 Module。
2.本篇文章介绍内容:
(1)如何在 Project 新建 Hibernate Module。
(2)如何添加 jar 包到 Module 下。
(3)如何添加 hibernate.cfg.xml,以及如何自定义模板。
(4)如何添加 Entity.hbm.xml 文件,以及自动生成实体。
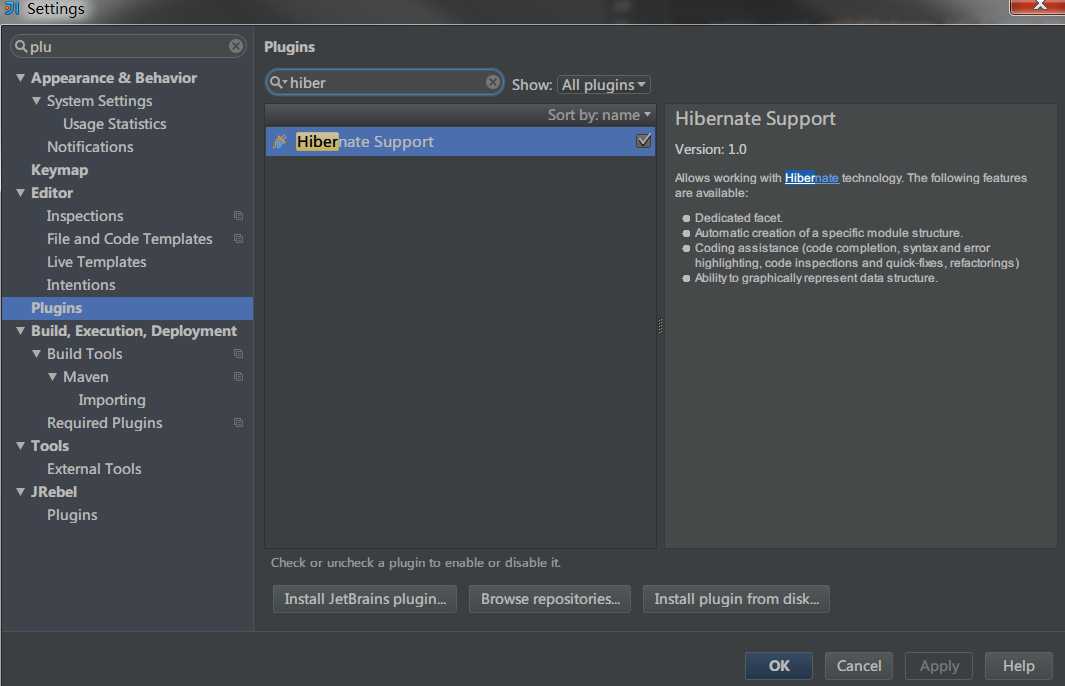
3.在最开始前,添加 Hibernate 的插件。
4.如何在 Project 下新建 Hibernate Module。
(1)新建一个空项目。
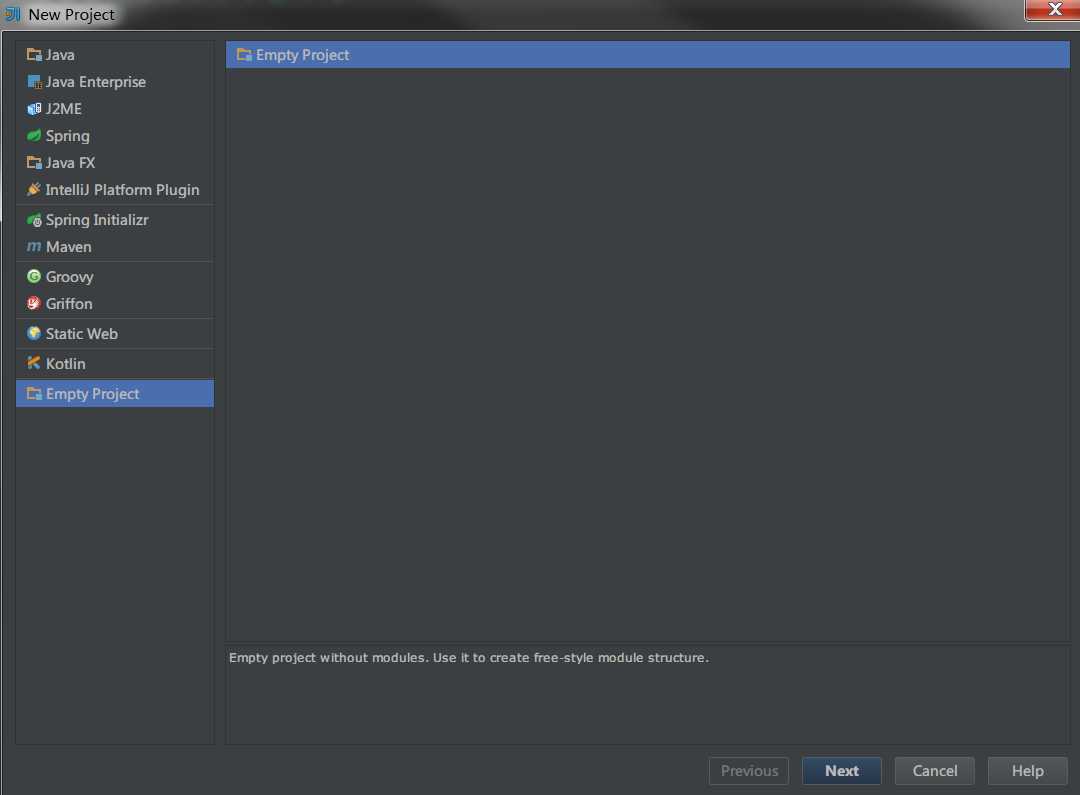
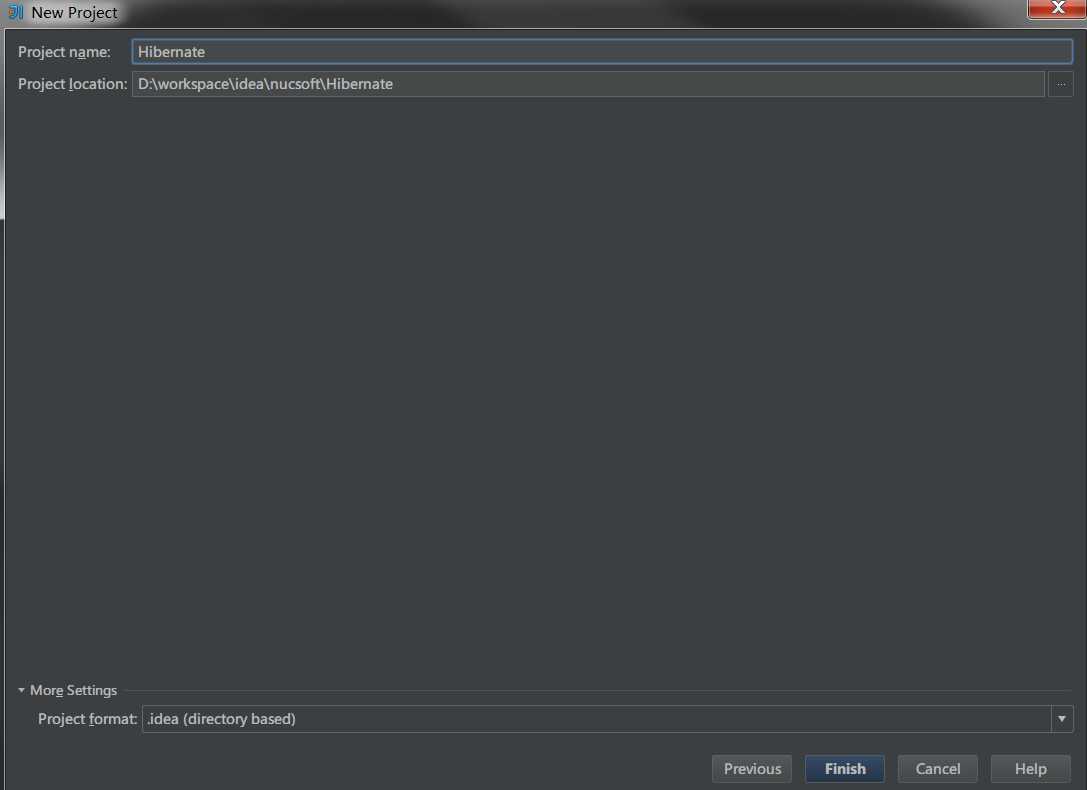
(2)点击 Finish 之后,会弹出 Module 结构图。
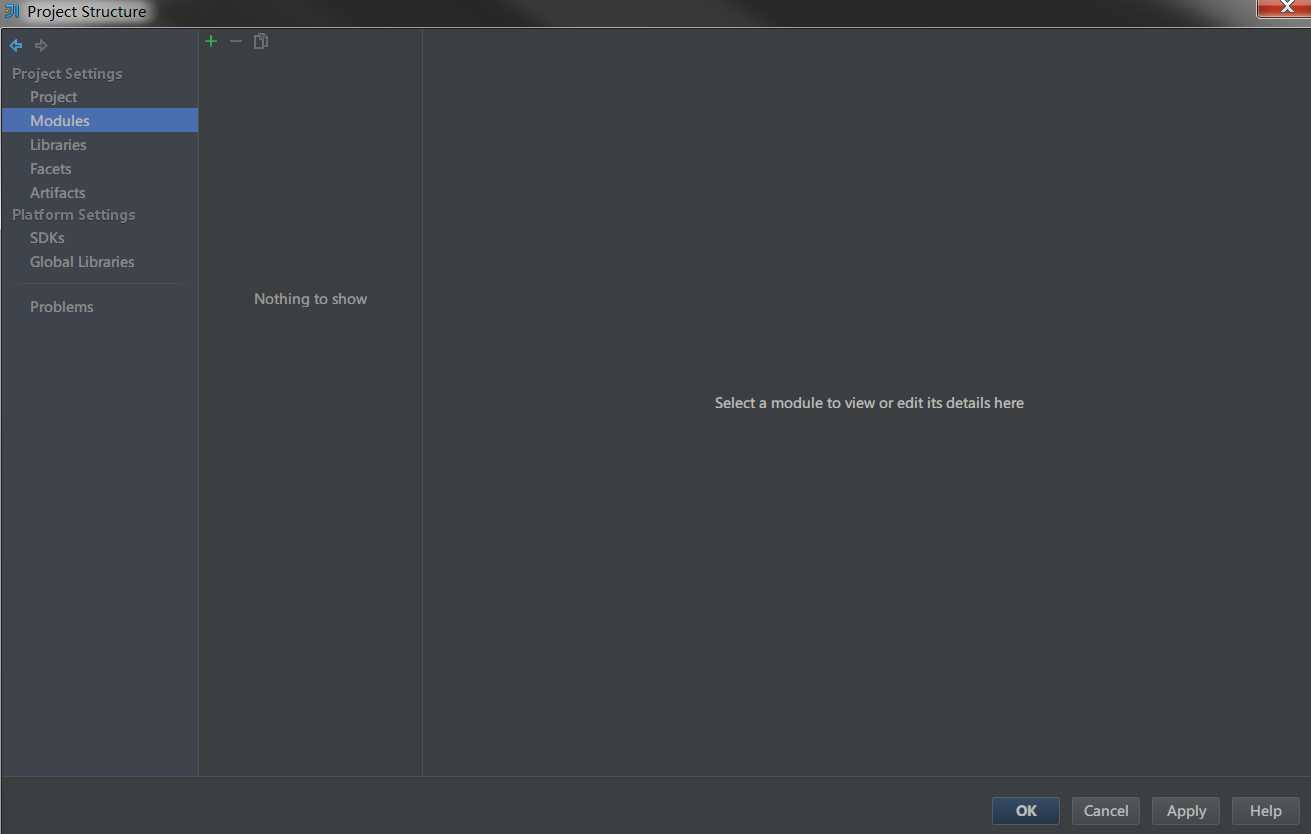
(3)新建 Hibernate Framework 的 Module。
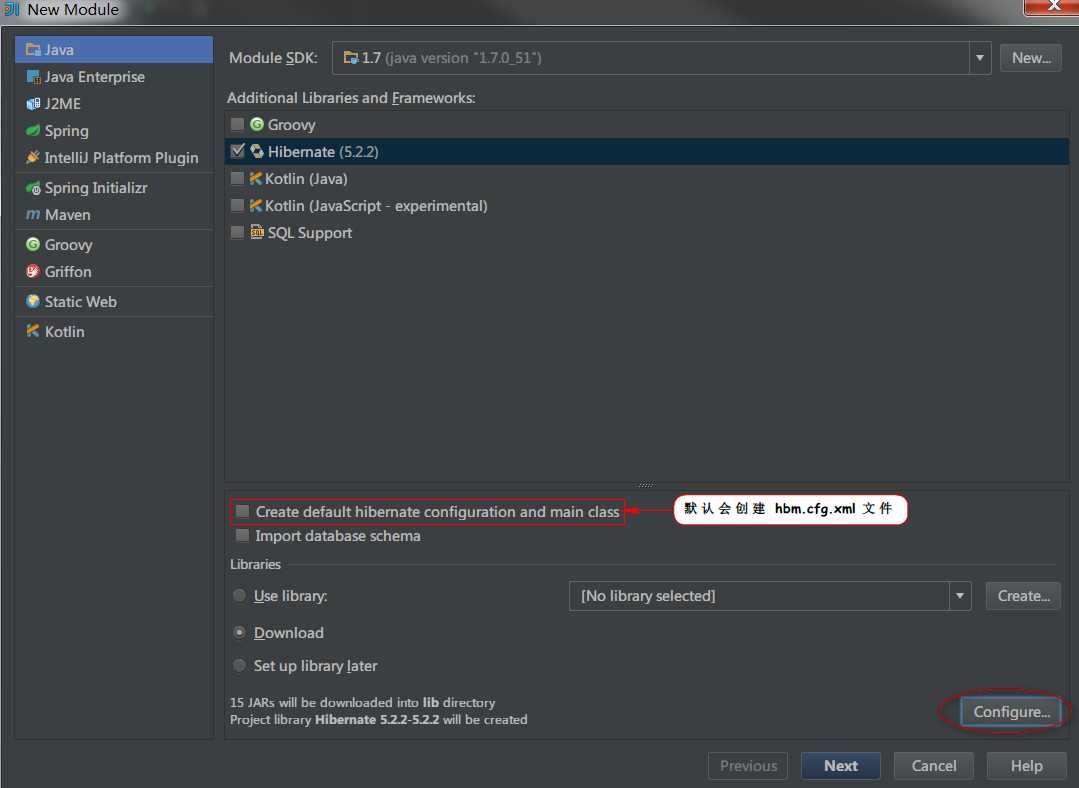
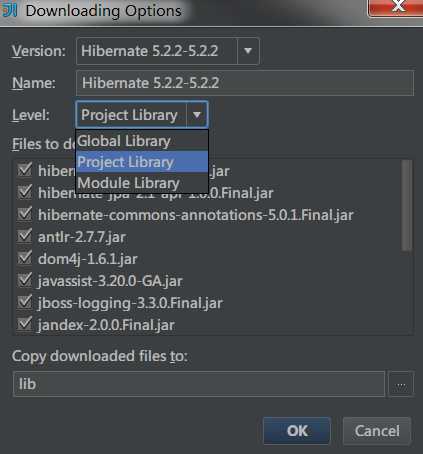
说明:第一处表红的地方选择后会默认创建 hbm.cfg.cml 文件以及一个测试类,点击 Configure 会弹出第二张图,需要注意的是 level 的选择。
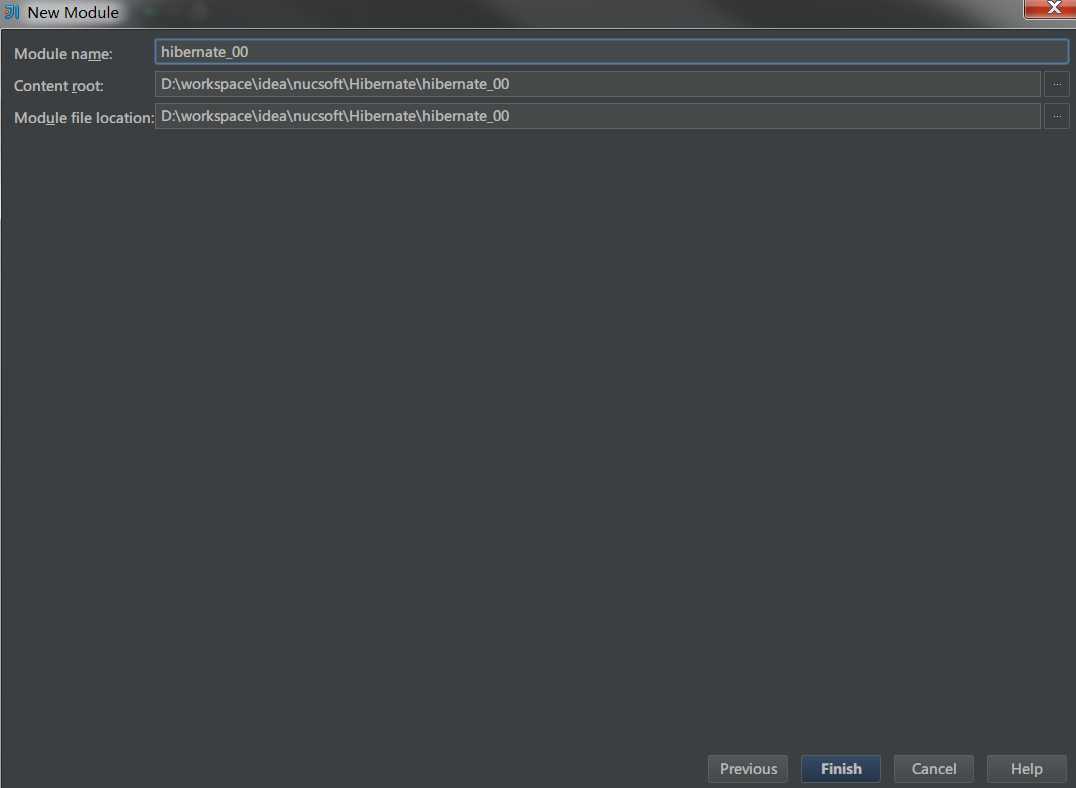
(4)创建完成。
5.如何添加 jar 包到 Module 下。
(1)打开 Project Structure 。
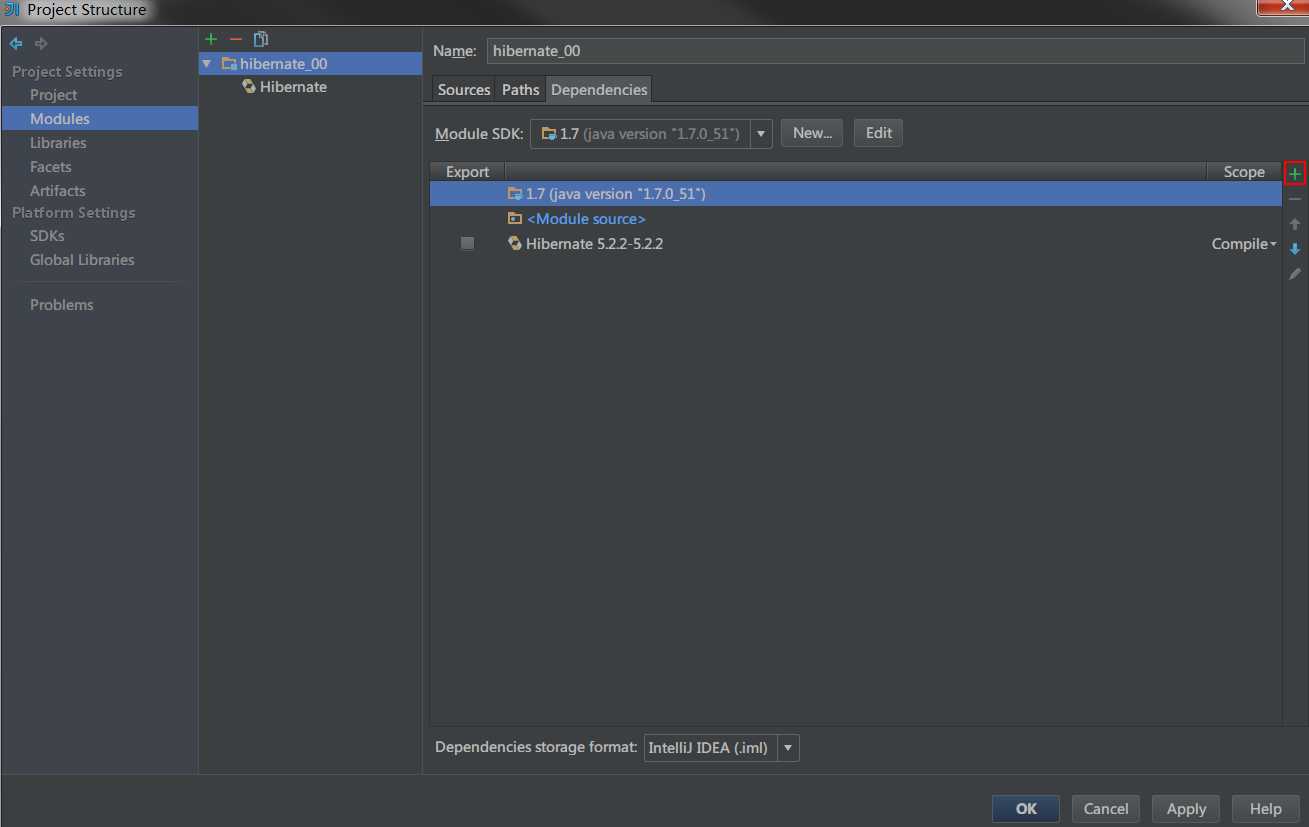
(2)选择 library。选择从 maven 从下载。
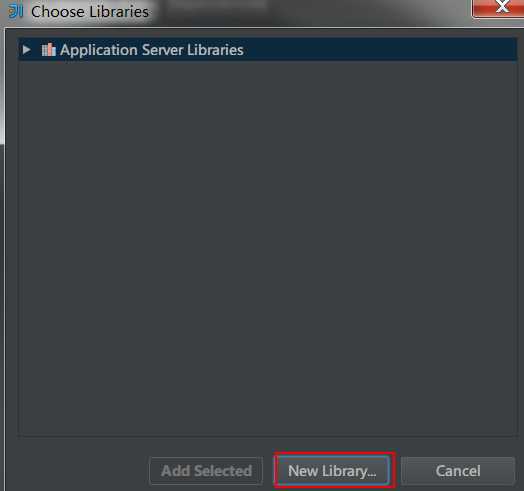
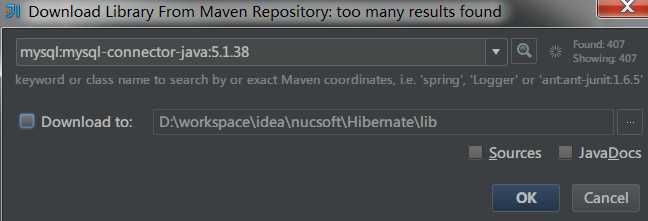
(3)点击 OK 后,会弹出 Configure Library 的弹窗,同样注意 level 的选取。
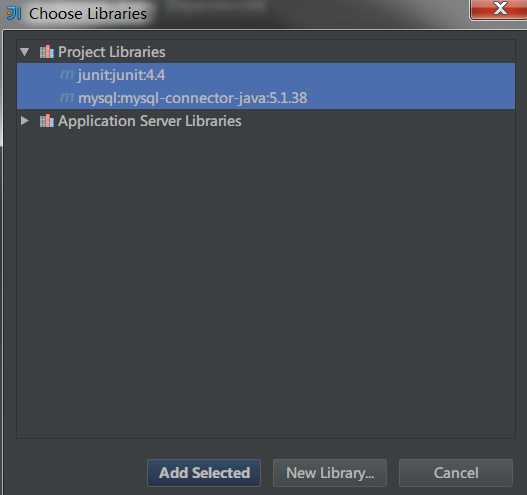
(4)选中添加的 Jar 包,点击 Add Selected 按钮完成添加。
6.如何添加 hibernate.cfg.xml,以及如何自定义模板。
(1)若在新建 Module 的时候没有选择创建 hibernate.cfg.xml 文件,可以通过如下的方式来添加。
(2)点开 Project Structure
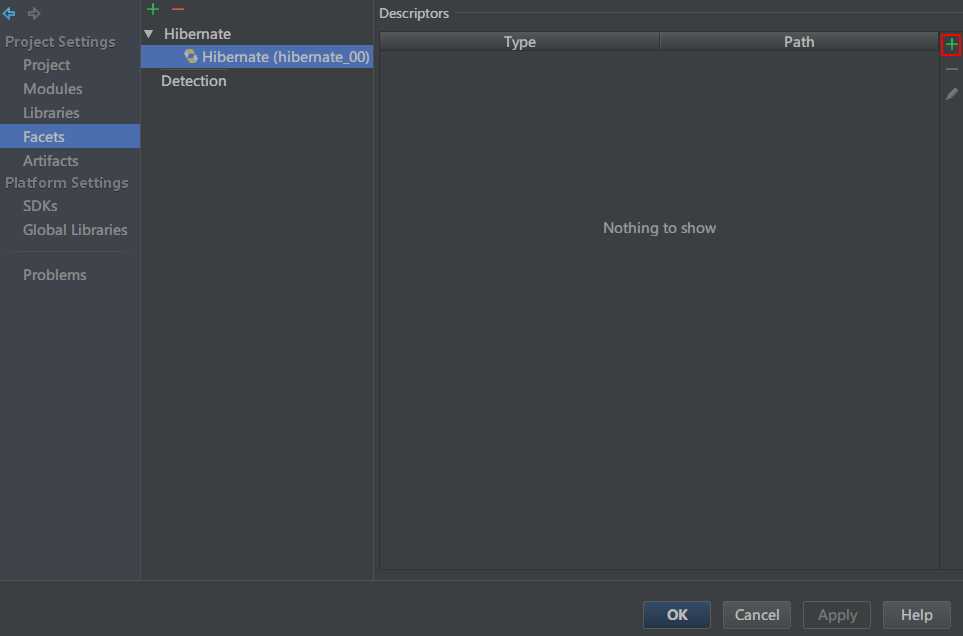
点击加号,选择 hibernate.cfg.xml。
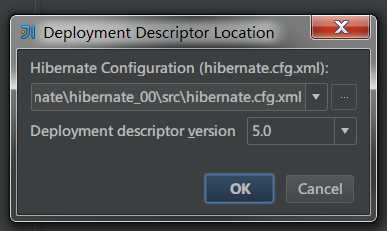
(3)默认添加的 hibernate.cfg.xml。
<?xml version=‘1.0‘ encoding=‘utf-8‘?>
<!DOCTYPE hibernate-configuration PUBLIC
    "-//Hibernate/Hibernate Configuration DTD//EN"
    "http://www.hibernate.org/dtd/hibernate-configuration-3.0.dtd">
<hibernate-configuration>
  <session-factory>
    <property name="connection.url"/>
    <property name="connection.driver_class"/>
    <property name="connection.username"/>
    <property name="connection.password"/>
    <!-- DB schema will be updated if needed -->
    <!-- <property name="hbm2ddl.auto">update</property> -->
  </session-factory>
</hibernate-configuration>
(4)自定义模板。
如果觉着 Idea 给添加的 hibernate.cfg.xml 不太友好的话,可以通过自定义模板的方式来添加适合自己的文件。
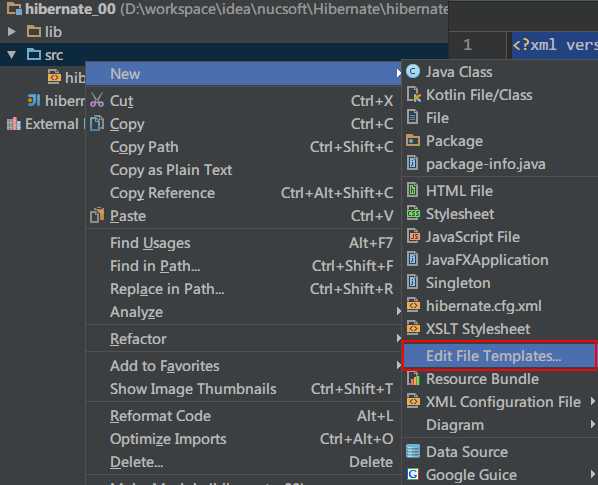
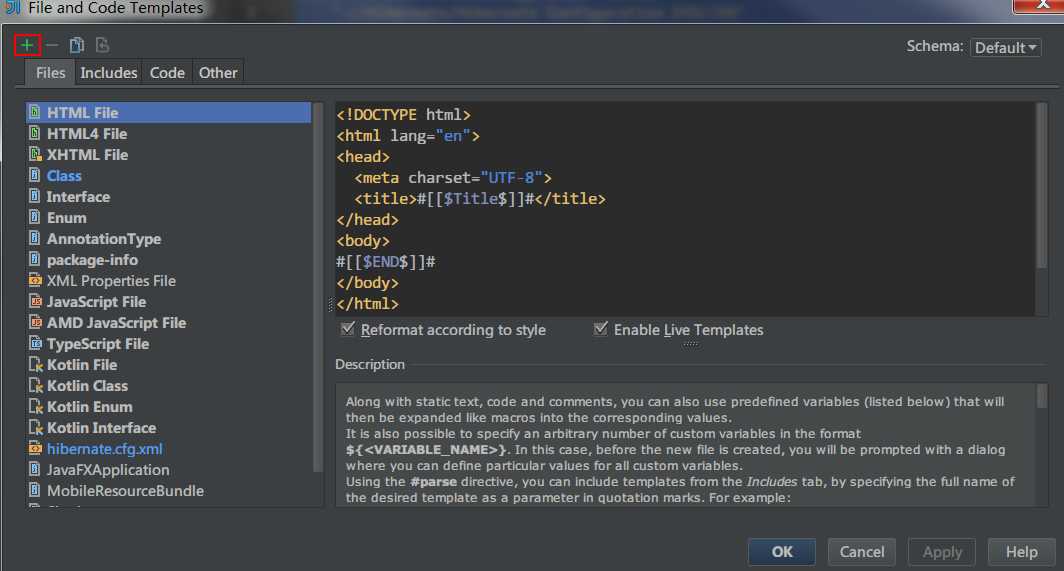
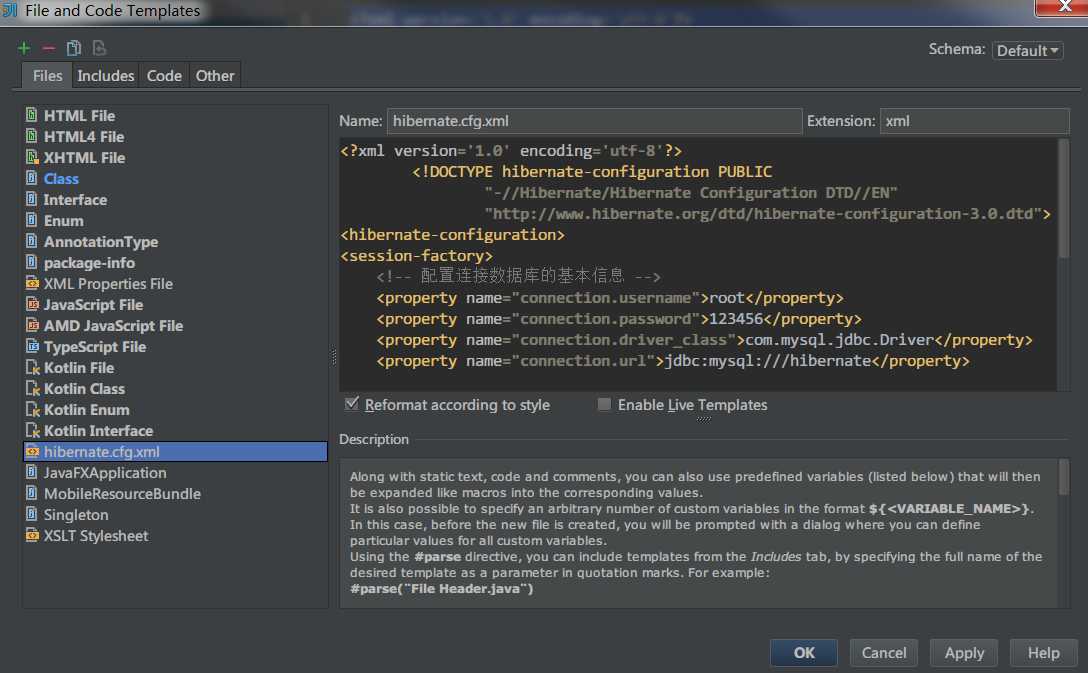
点击 OK 之后就可以使用添加的 hibernate.cfg.xml。
7.如何添加 Entity.hbm.xml 文件,以及自动生成实体。
(1)说明:在 Eclipse 下,添加 Hibernate tool 后,可以根据已经创建的实体去创建对应的 Entity.hbm.xml 文件,然后在程序启动的时候,
会在数据库生成对应的表信息。而在 Idea 下,是根据表和 hibernate.cfg.xml 去创建的实体和 Entity.hbm.xml 文件,至于能否根据实体
去创建 Entity.hbm.xml 和表信息,现在还没有探索出来,探索出来时再进行补充,也希望知道的童鞋告诉我,谢谢。
(2)在 hibernate.cfg.xml 文件中配置连接数据库基本信息,以及 Hibernate 基本信息和自动生成数据表策略。
<?xml version=‘1.0‘ encoding=‘utf-8‘?>
<!DOCTYPE hibernate-configuration PUBLIC
        "-//Hibernate/Hibernate Configuration DTD//EN"
        "http://www.hibernate.org/dtd/hibernate-configuration-3.0.dtd">
<hibernate-configuration>
    <session-factory>
        <!-- 配置连接数据库的基本信息 -->
        <property name="connection.username">root</property>
        <property name="connection.password">123456</property>
        <property name="connection.driver_class">com.mysql.jdbc.Driver</property>
        <property name="connection.url">jdbc:mysql:///hibernate</property>

        <!-- 配置 Hibernate 的基本信息 -->
        <property name="dialect">org.hibernate.dialect.MySQLInnoDBDialect</property>
        <property name="show_sql">true</property>
        <property name="format_sql">true</property>
        <!-- 指定自动生成数据表的策略 -->
        <property name="hbm2ddl.auto">update</property>

    </session-factory>
</hibernate-configuration>
(3)点击 Persistance 视图(View-ToolWindow-Persistance 或 直接点击快捷方式)

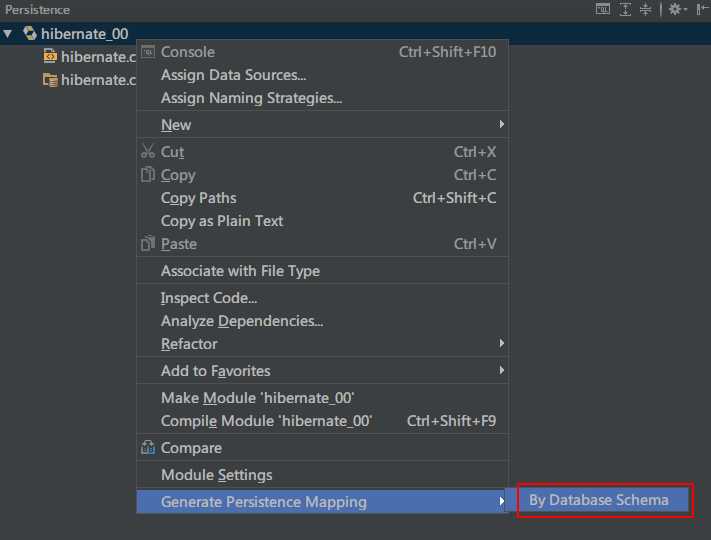
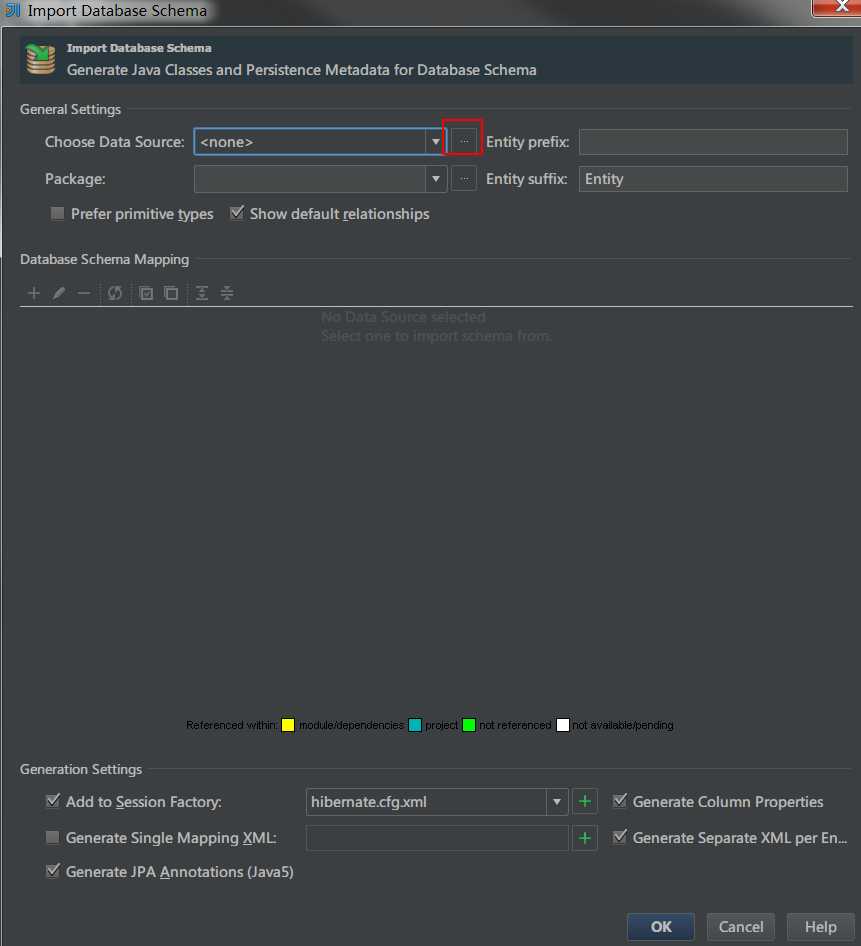
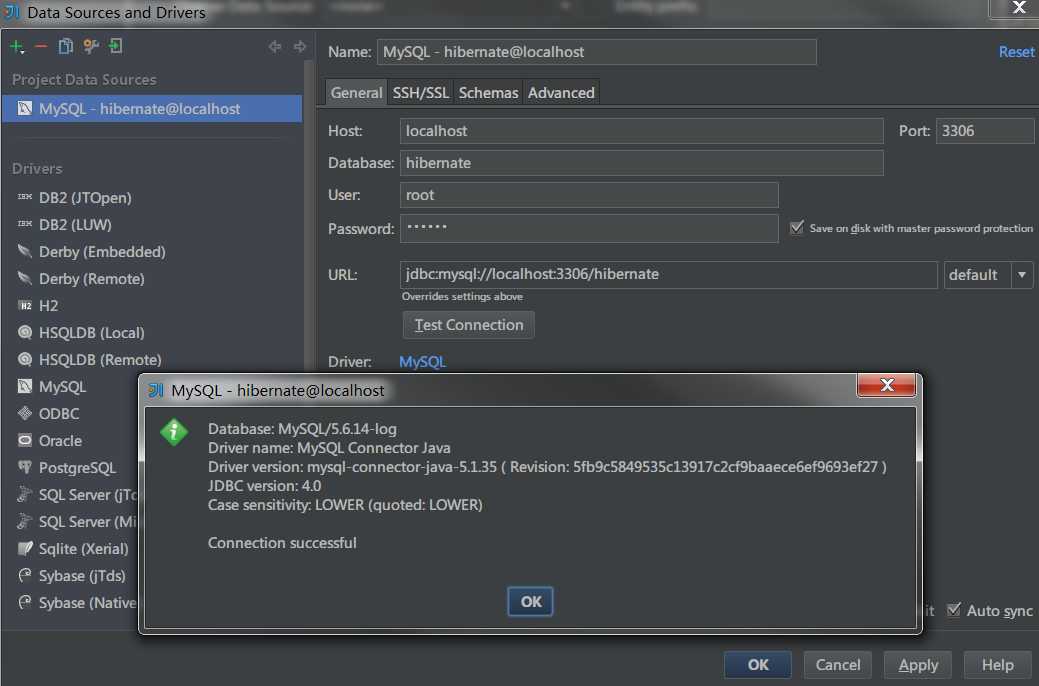
如果没有已经创建的 data source ,可以通过点击标红的按钮进行添加。如:
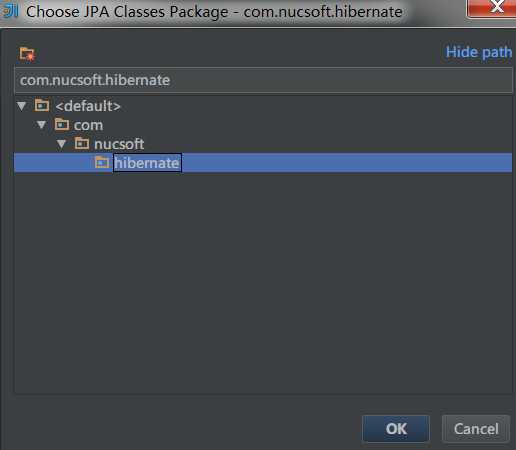
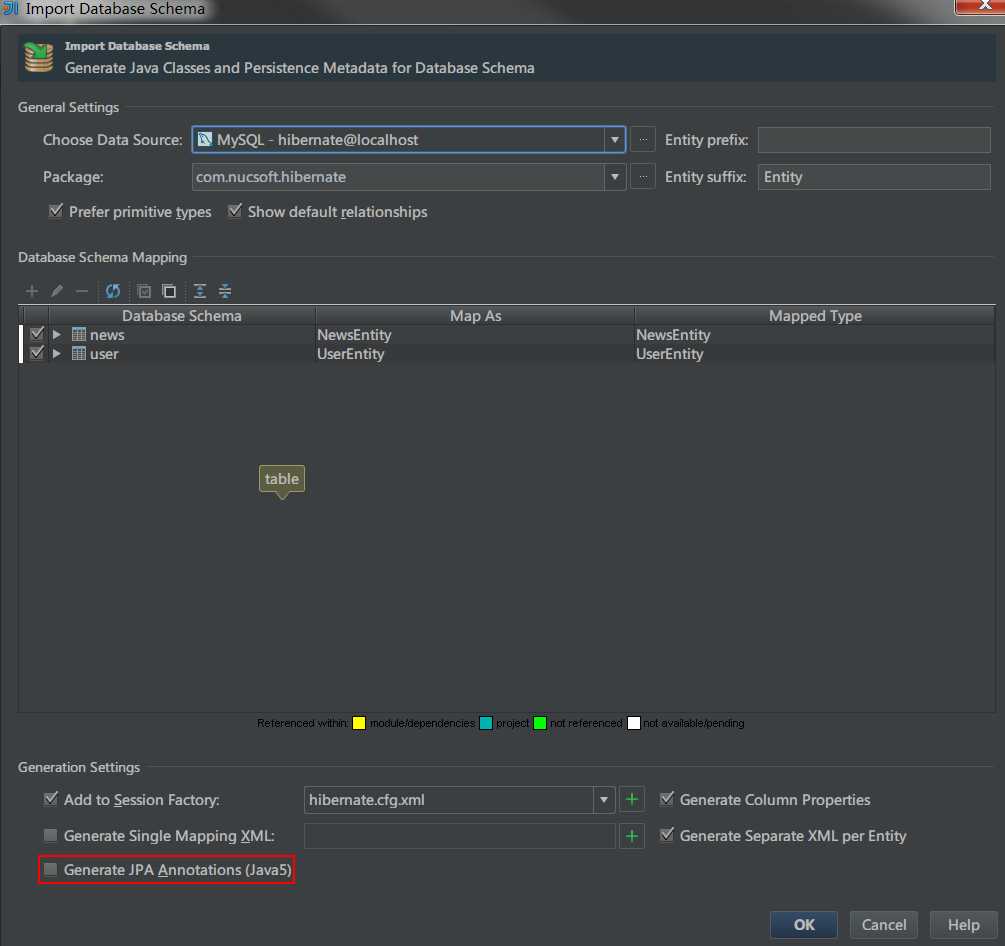
在不勾选 JPA Annotations 的情况下,生成的实体不含 JPA 注解。如:

/**
 * @author solverpeng
 * @create 2016-09-28-14:11
 */
public class NewsEntity {
    private int id;
    private String name;

    public int getId() {
        return id;
    }

    public void setId(int id) {
        this.id = id;
    }

    public String getName() {
        return name;
    }

    public void setName(String name) {
        this.name = name;
    }

    @Override
    public boolean equals(Object o) {
        if(this == o) {
            return true;
        }
        if(o == null || getClass() != o.getClass()) {
            return false;
        }

        NewsEntity that = (NewsEntity) o;

        if(id != that.id) {
            return false;
        }
        if(name != null ? !name.equals(that.name) : that.name != null) {
            return false;
        }

        return true;
    }

    @Override
    public int hashCode() {
        int result = id;
        result = 31 * result + (name != null ? name.hashCode() : 0);
        return result;
    }
}
对应的 NewsEntity.hbm.xml 文件

<?xml version=‘1.0‘ encoding=‘utf-8‘?>
<!DOCTYPE hibernate-mapping PUBLIC
    "-//Hibernate/Hibernate Mapping DTD 3.0//EN"
    "http://www.hibernate.org/dtd/hibernate-mapping-3.0.dtd">
<hibernate-mapping>

    <class name="com.nucsoft.hibernate.NewsEntity" table="news" schema="hibernate">
        <id name="id">
            <column name="id" sql-type="int(11)"/>
        </id>
        <property name="name">
            <column name="name" sql-type="varchar(50)" length="50"/>
        </property>
    </class>
</hibernate-mapping>
在勾选 JPA Annotations 的情况下,生成的实体包含 JPA 注解。如:

/**
 * @author solverpeng
 * @create 2016-09-28-14:16
 */
@Entity
@Table(name = "news", schema = "hibernate", catalog = "")
public class NewsEntity {
    private Integer id;
    private String name;

    @Id
    @Column(name = "id", nullable = false)
    public Integer getId() {
        return id;
    }

    public void setId(Integer id) {
        this.id = id;
    }

    @Basic
    @Column(name = "name", nullable = false, length = 50)
    public String getName() {
        return name;
    }

    public void setName(String name) {
        this.name = name;
    }

    @Override
    public boolean equals(Object o) {
        if(this == o) {
            return true;
        }
        if(o == null || getClass() != o.getClass()) {
            return false;
        }

        NewsEntity that = (NewsEntity) o;

        if(id != null ? !id.equals(that.id) : that.id != null) {
            return false;
        }
        if(name != null ? !name.equals(that.name) : that.name != null) {
            return false;
        }

        return true;
    }

    @Override
    public int hashCode() {
        int result = id != null ? id.hashCode() : 0;
        result = 31 * result + (name != null ? name.hashCode() : 0);
        return result;
    }
}
注意: Gennerate Separate XML per Entity 这个选项,意思是为每一个 Entity 生成一个 hbm.xml 文件。
在勾选 Genernate JPA Annotations 选项的情况下,可以不勾选它。但是如果没有勾选 Genernate JPA Annotations 选项,需要勾选 Gennerate Separate XML per Entity。
8.总结:
介绍了 Intellij Idea 下如何新建 Hibernate 项目以及如何生成配置信息。事实上,Idea 还能完成表和表之间关系的处理,和 hql 语句的测试,关于这两个方面,在以后的文章中进行探索说明。
同样也介绍了 Module 的新建。
9.题外篇
如何添加别的框架?如上面添加了 Hibernate 框架,那么如何再添加 Spring 框架呢?
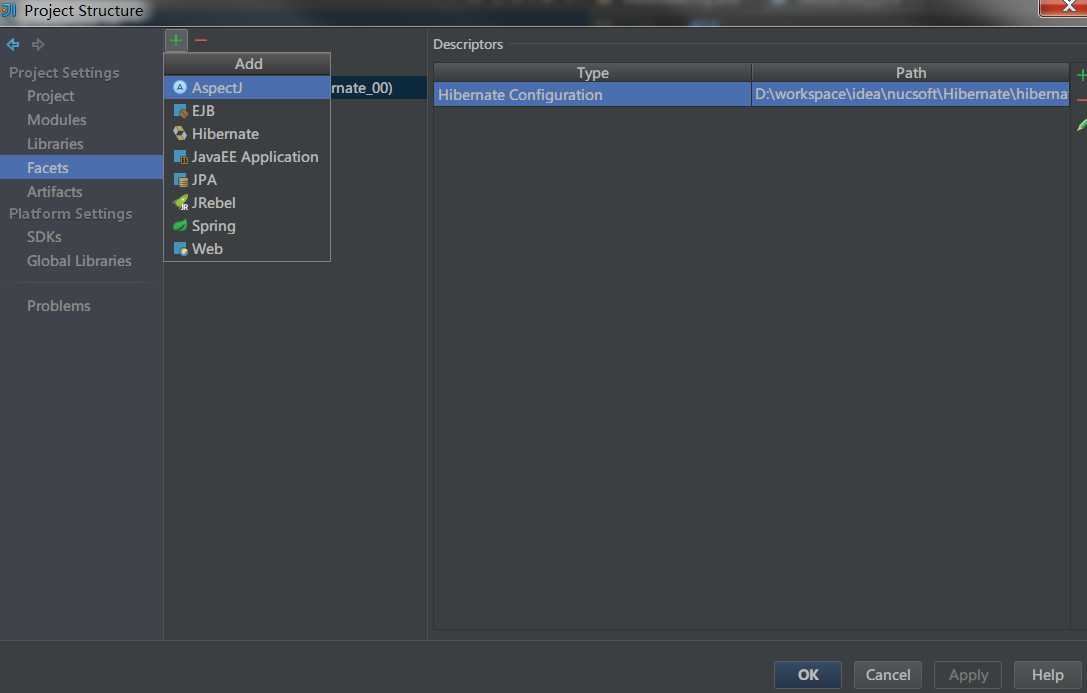
看图说话,可以通过此种方式来添加。
Intellij Idea 15 下新建 Hibernate 项目以及如何添加配置
标签:
原文地址:http://www.cnblogs.com/solverpeng/p/5915823.html