标签:
我们知道 UITabBarController 对象,可以通过使用该对象,用户可以切换不同的屏幕。当要切换的各个屏幕之间没有相互依存关系的时候,该对象可以很好的完成任务。但是当多个屏幕互有关系的时候,就要使用另一种控制器 UINavigationController 。 事实上,基本上在所有的 APP 中,必不可少的两种控制器。
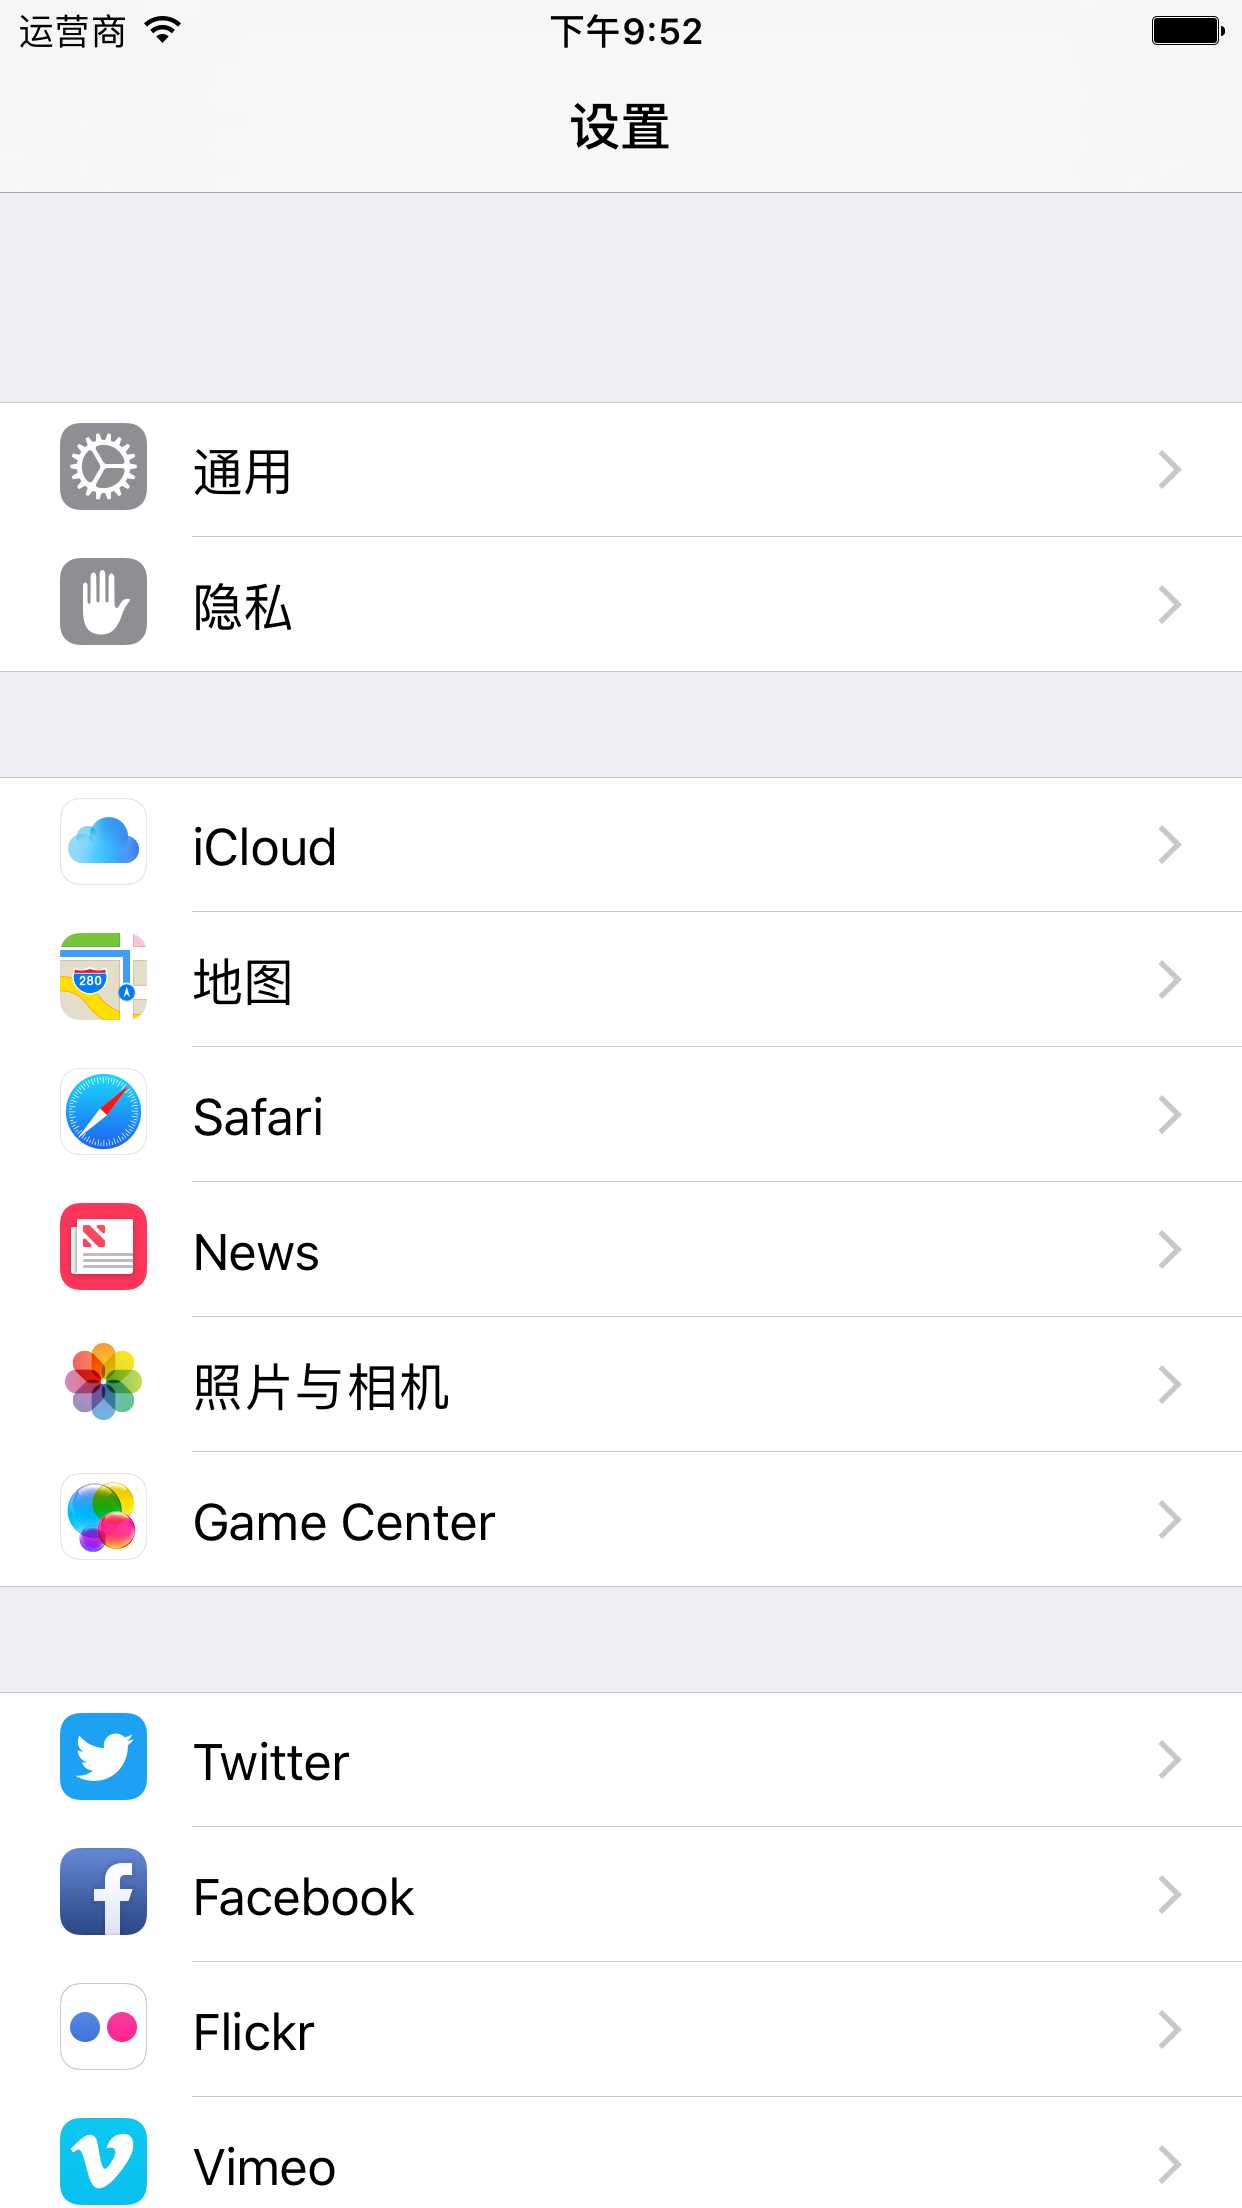
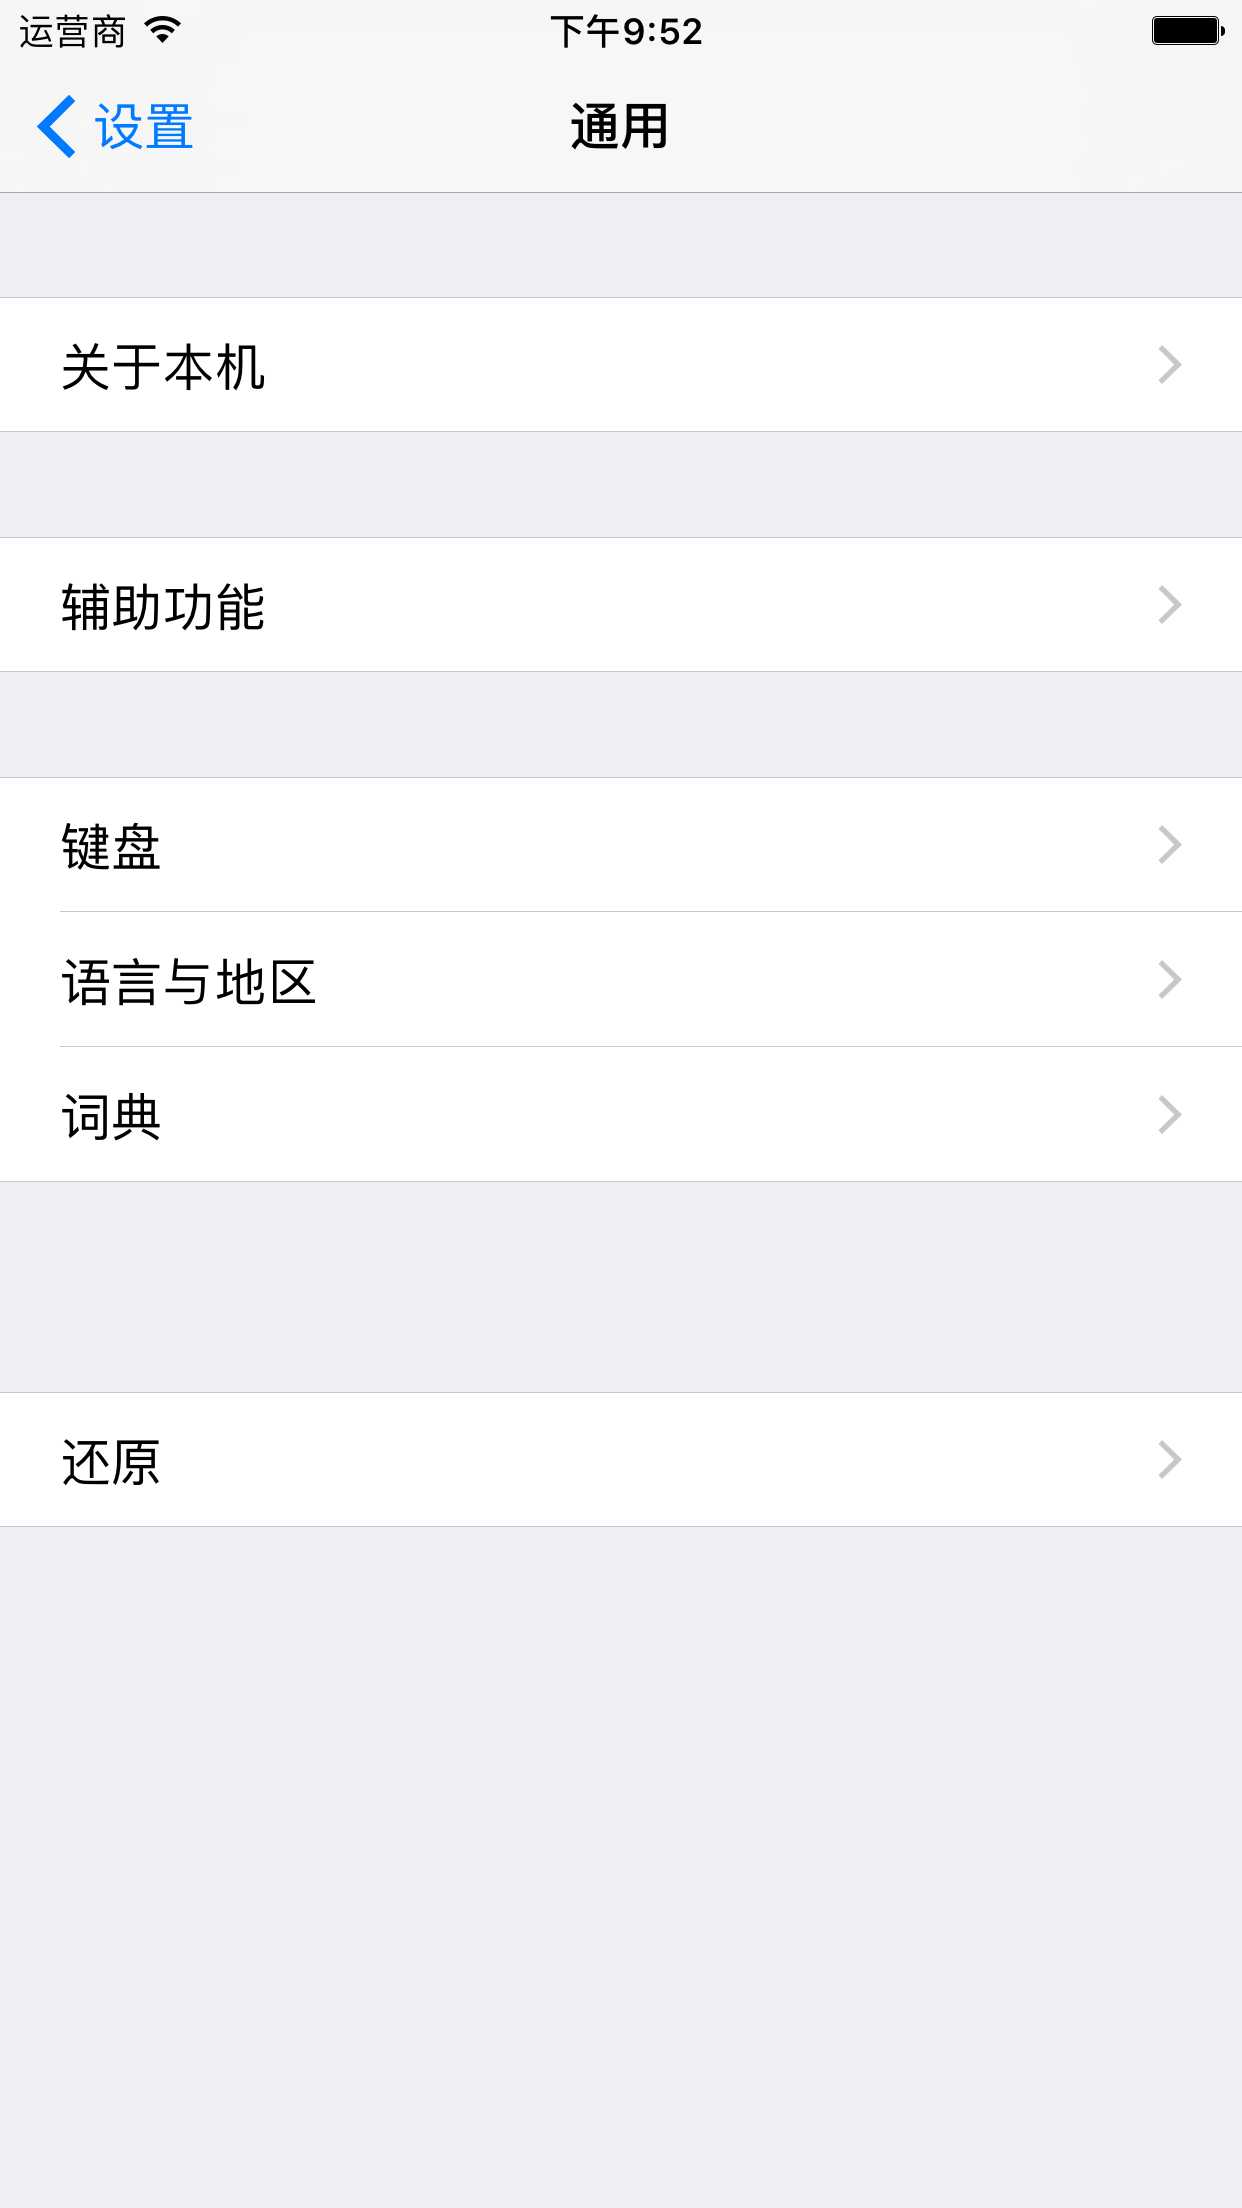
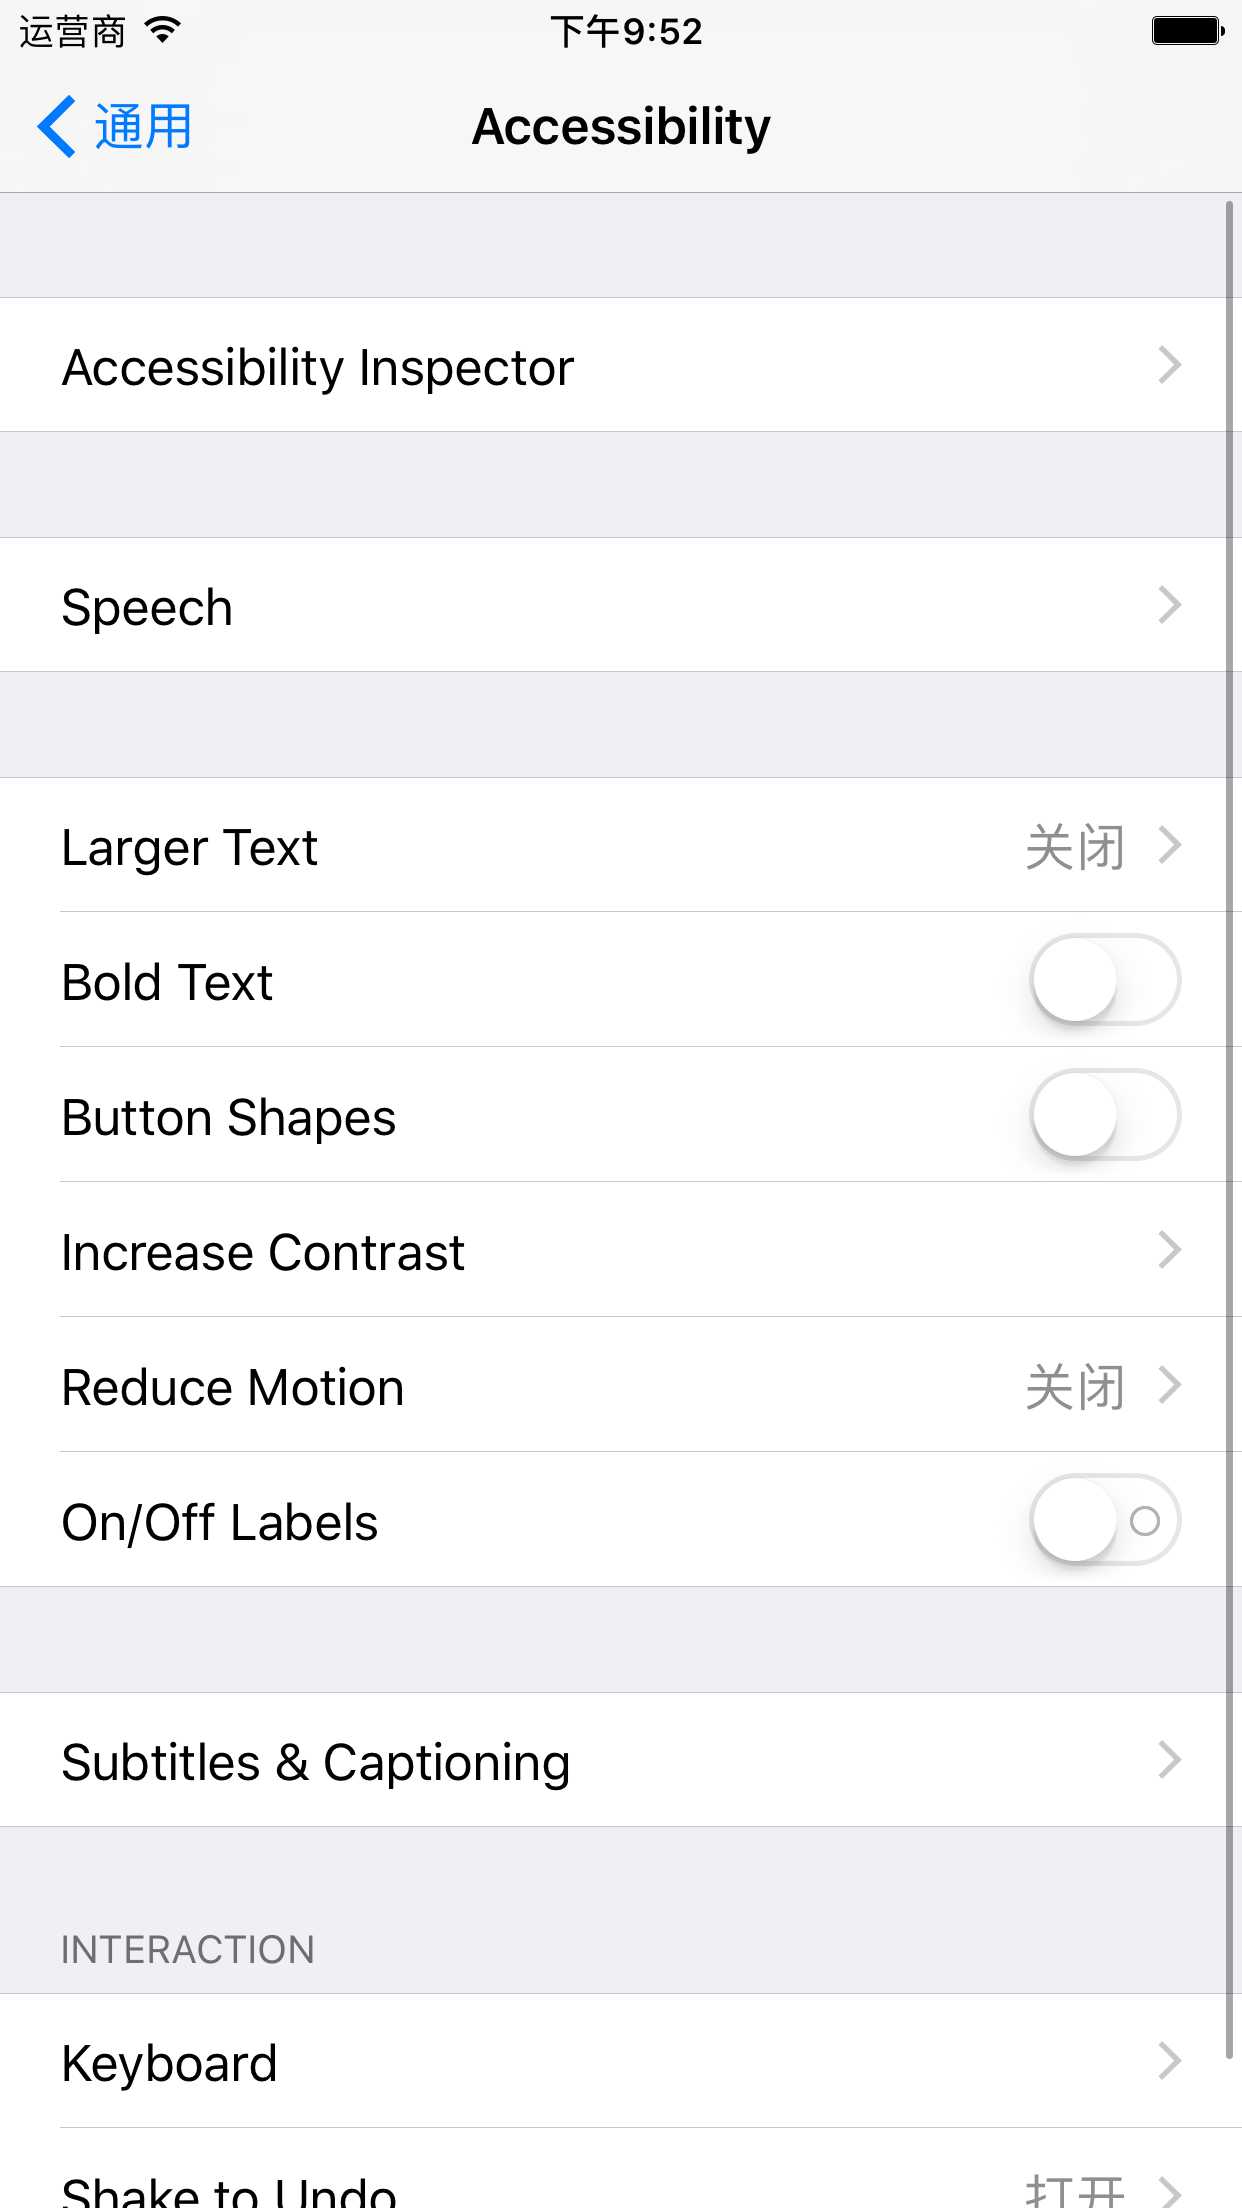
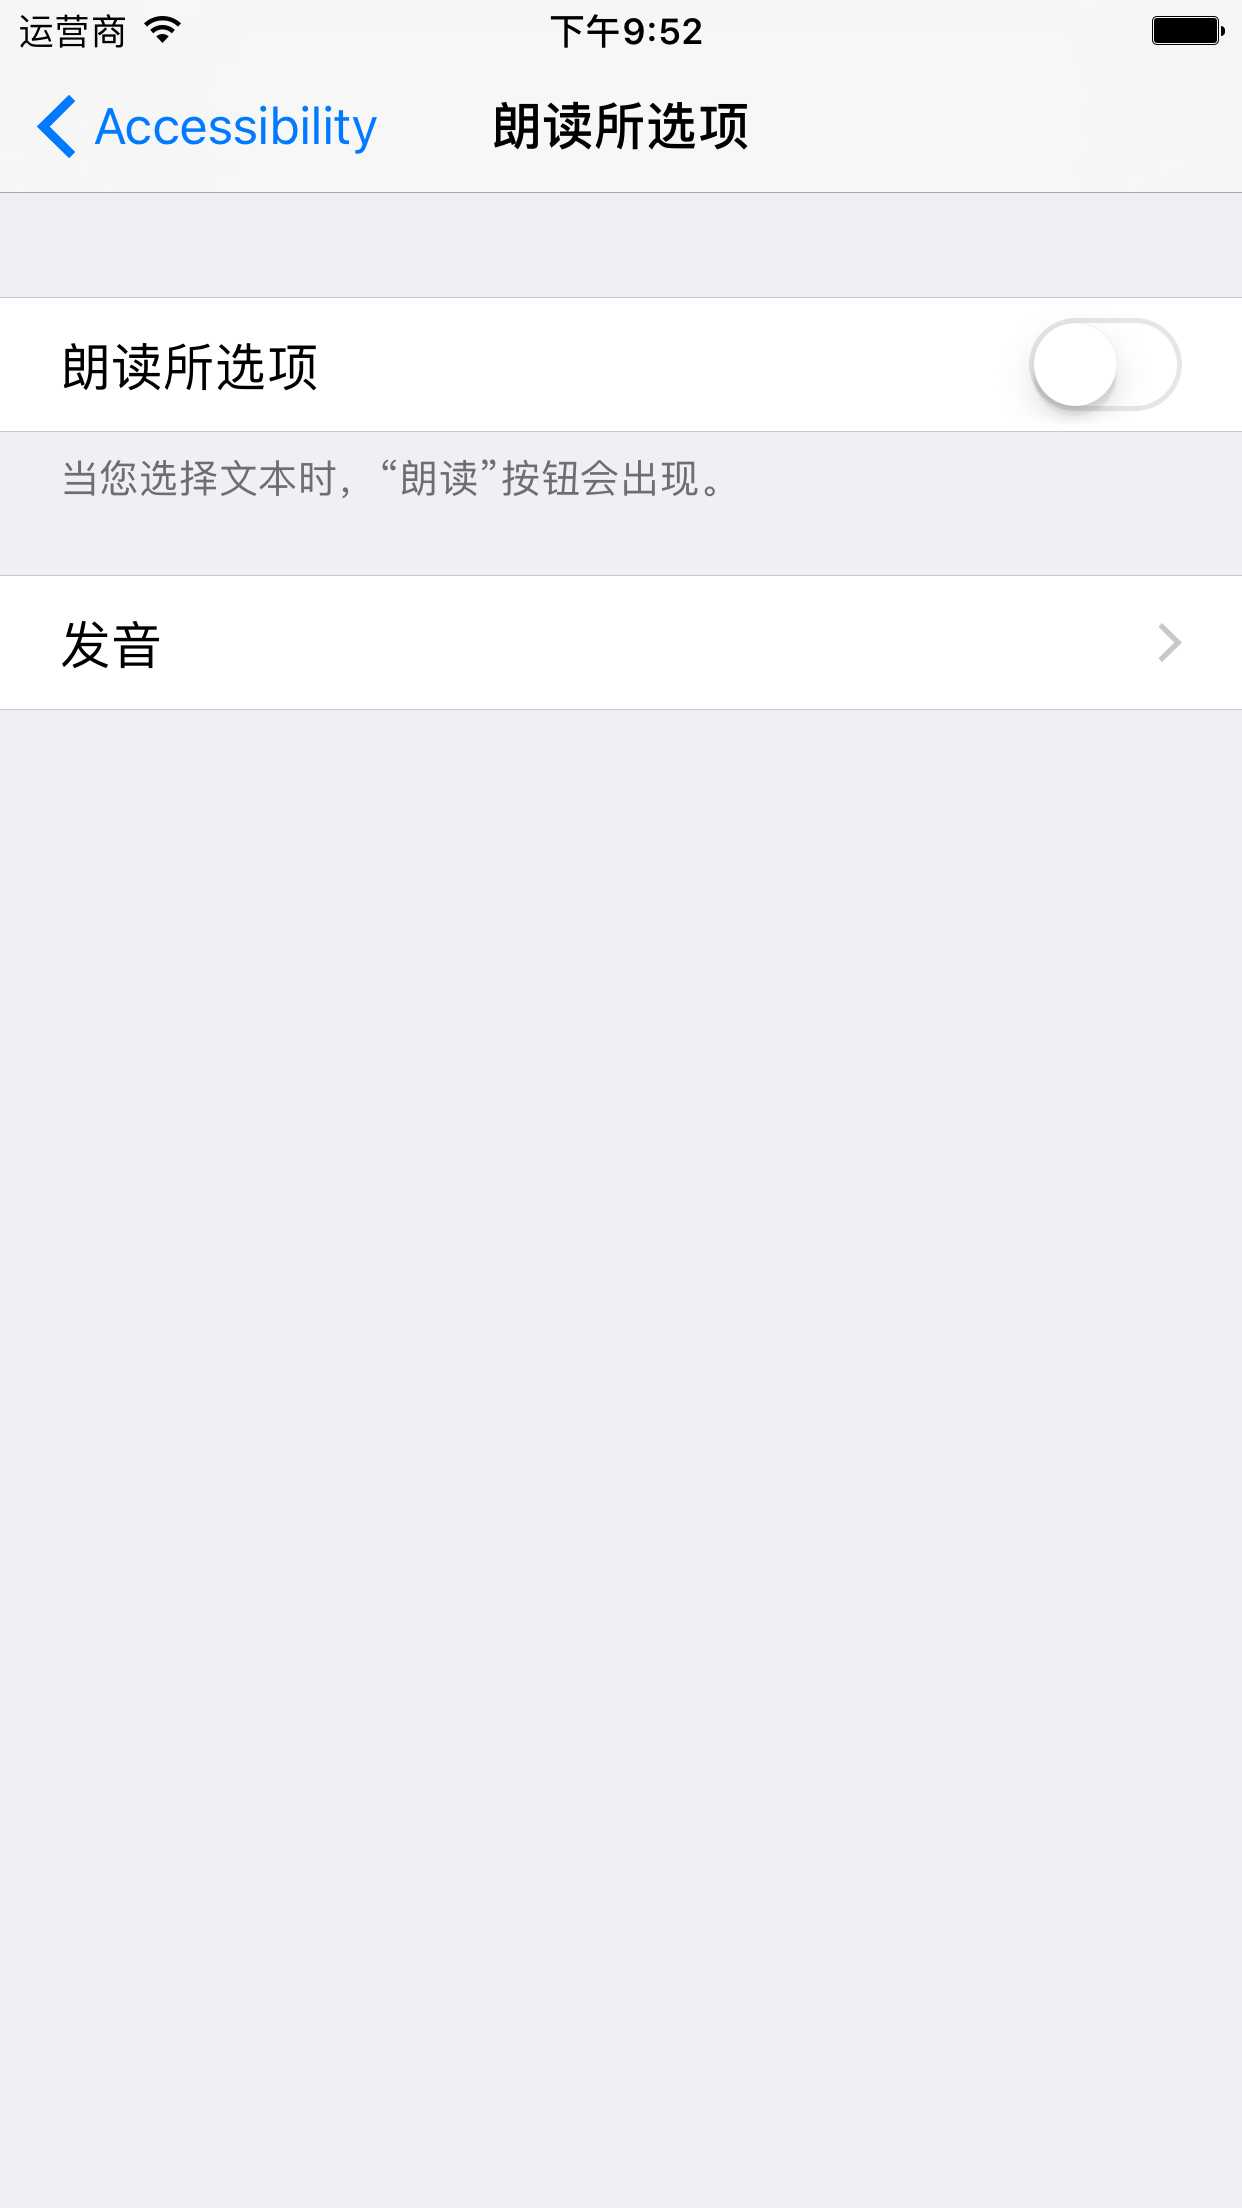
我们以 iOS 自带的 设置 应用为例,设置应用拥有多个互有关联的窗口,我们称之为这种界面为 垂直界面 。
下面我们将使用 UINavigationController 对象将 JXHomepwner 对象加入到 垂直界面 。项目地址
当某个应用通过 UINavigationController 对象显示多个屏幕的信息时,相应的 UINavigationController 对象会以栈的形式保存所有屏幕的信息。这里的栈是一个数组对象,保存的都是 UIViewController 对象。一个 UIViewController 对象的视图对应一个屏幕。只用位于栈顶的 UIViewController 对象,其视图才是可见的。
初始化 UINavigationController 对象时,需要传入一个 UIViewController 对象。这个 UIViewController 对象将成为 UINavigationController 对象的 根视图控制器(root view controller),且根视图控制器将永远位于栈底。应用可以在运行时向 UINavigationController 的栈底压入更多的视图控制器。
将某个视图控制器压入 UINavigationController 对象的栈时,新加入的视图控制器的视图会从窗口右侧推入。出栈时, UINavigationController 对象会移除位于栈顶的视图控制器,其视图会向窗口右侧推出,然后用户会看见仅次于栈顶位置的视图控制器的视图。
类似于 UITabBarController 对象, UINavigationController 对象有一个名为 viewControllers 的属性,指向一个负责保存视图控制器的数组对象。在这个数组对象中,根视图控制器是第一个对象。当应用将某个视图控制器压入栈后,UINavigationController 对象会将新加入的对象加在 viewControllers 数组的末尾。因此,该数组中的最后一个视图控制器会位于栈的顶部。UINavigationController 对象的 topViewController 属性是一个指针,指向当前位于栈顶的视图控制器。
UINavigationController 是 UIViewController 的子类,所以 UINavigationController 对象也有自己的视图。该对象的视图有两个子视图:一个是 UINavigationBar 对象,另一个是 topViewController 的视图。和其他视图控制器一样,可以将 UINavigationController 对象设置为 UIWindow 对象的 rootViewController ,从而将该对象的视图作为子视图加入窗口。
首先为项目添加一个 UINavigationController 对象。
#import "AppDelegate.h"
#import "JXItemsViewController.h"
@interface AppDelegate ()

@end

@implementation AppDelegate


- (BOOL)application:(UIApplication *)application didFinishLaunchingWithOptions:(NSDictionary *)launchOptions {

    self.window = [[UIWindow alloc] initWithFrame:[UIScreen mainScreen].bounds];

    // 添加初始化代码
    // 创建 JXItemsViewController 对象
    JXItemsViewController * itemsViewController = [[JXItemsViewController alloc] init];

    // 将 JXItemsViewController 的标示图加入窗口
    self.window.rootViewController = itemsViewController;

    // 将 UINavigationController 对象设置为 UIWindow 对象的根视图控制器。
    // 这样就可以将 UINavigationController 对象的视图添加到屏幕中
    UINavigationController * navController = [[UINavigationController alloc] initWithRootViewController:itemsViewController];
    self.window.rootViewController = navController;

    self.window.backgroundColor = [UIColor whiteColor];

    [self.window makeKeyAndVisible];
    return YES;
}
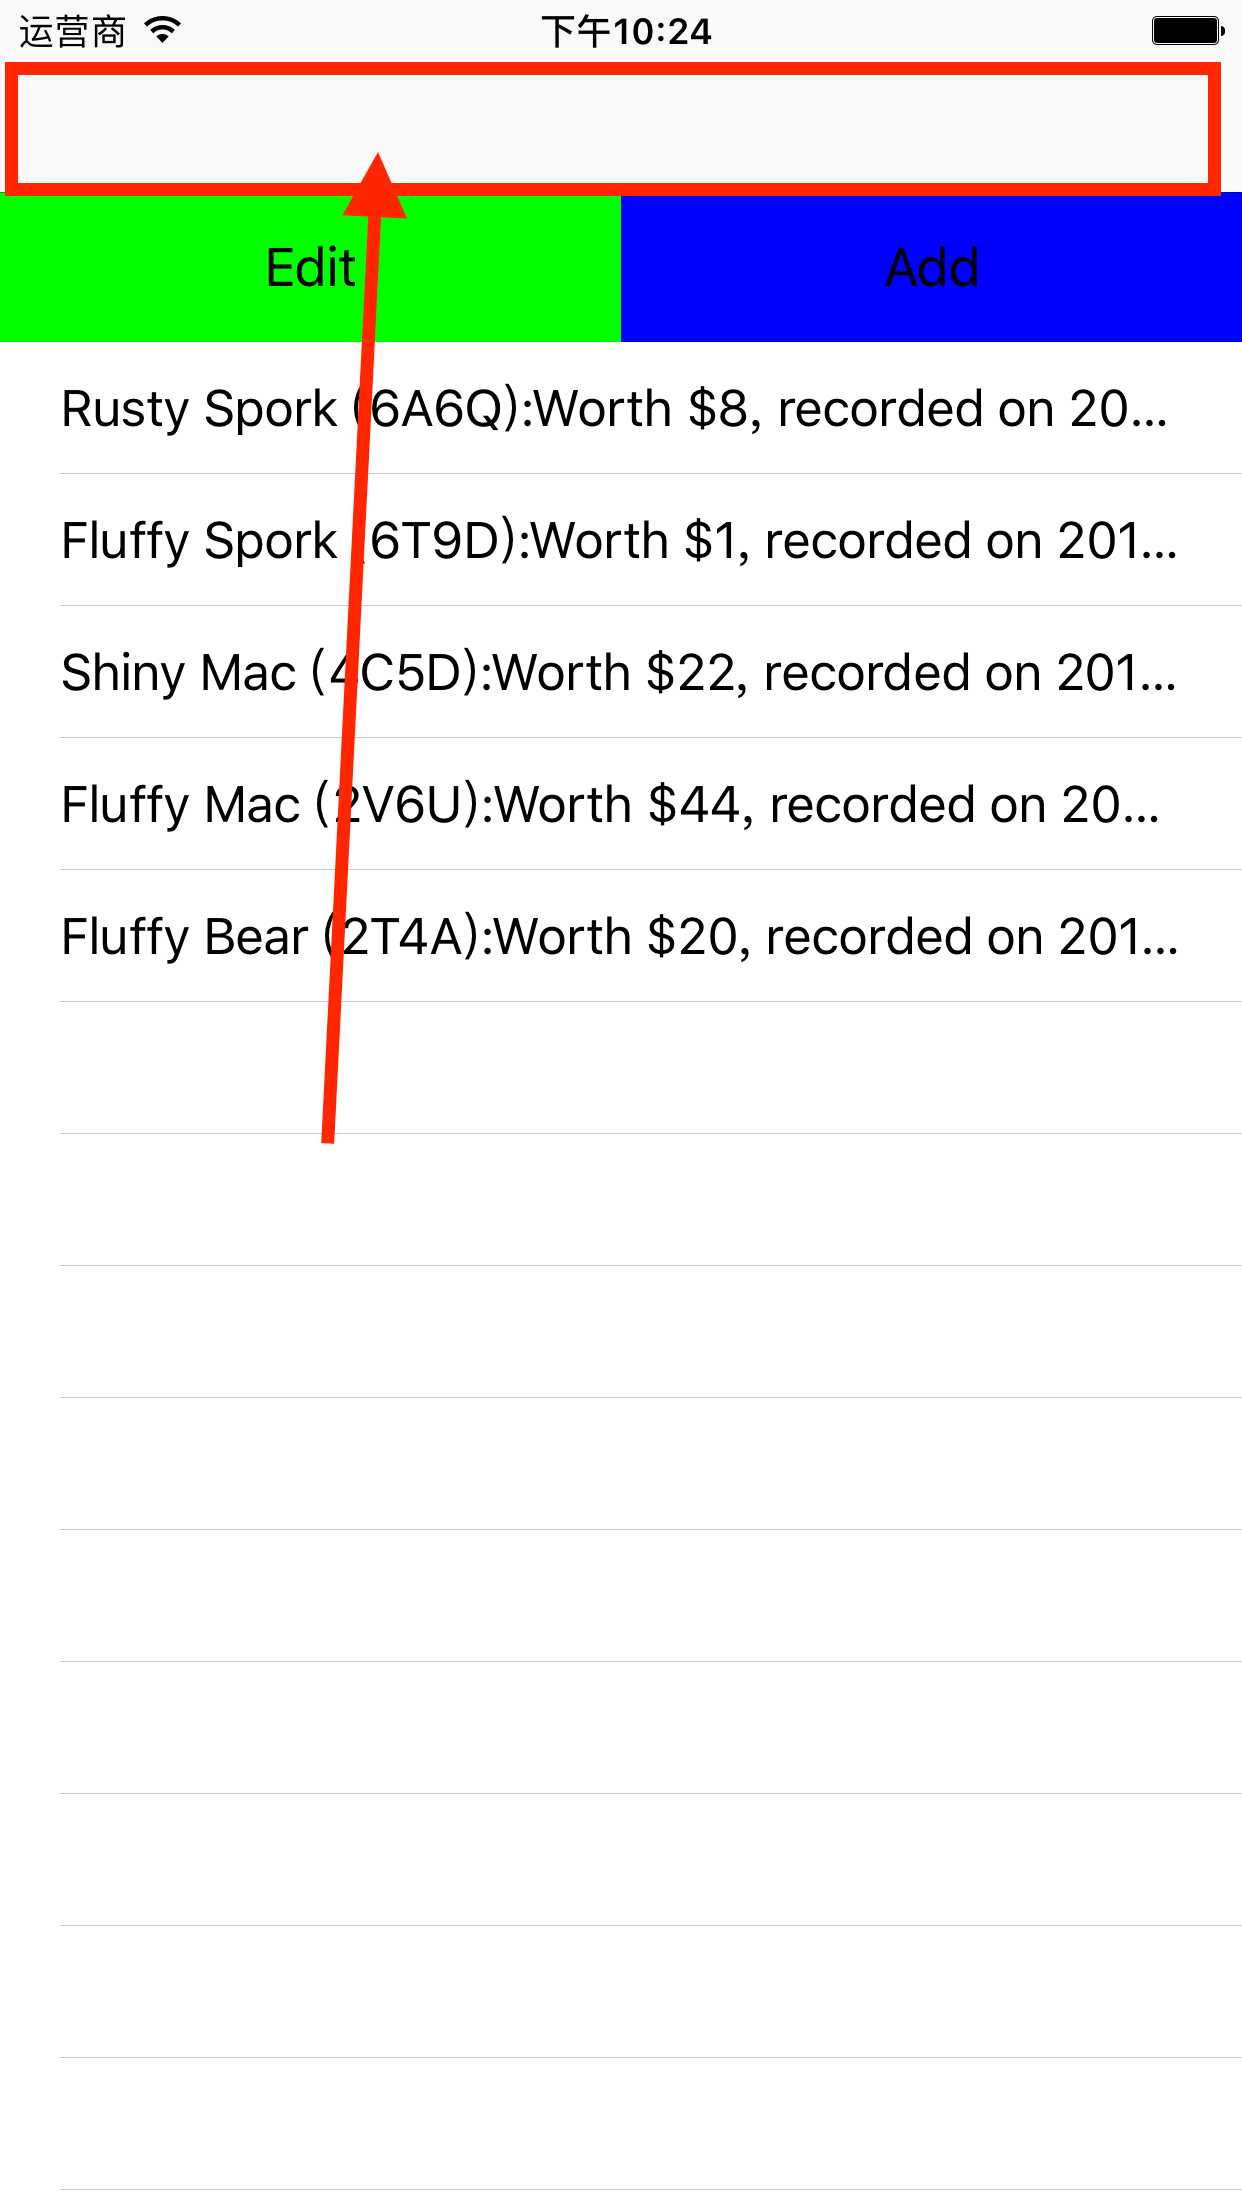
构建并运行,除了屏幕顶部新出现的 UINavigationController 对象,真个应用看上去跟之前没有任何差别。JXItemsViewController 对象的视图大小会发生变化以适应带 UINavigationBar 对象的屏幕。这项工作是由 UINavigationController 完成的。
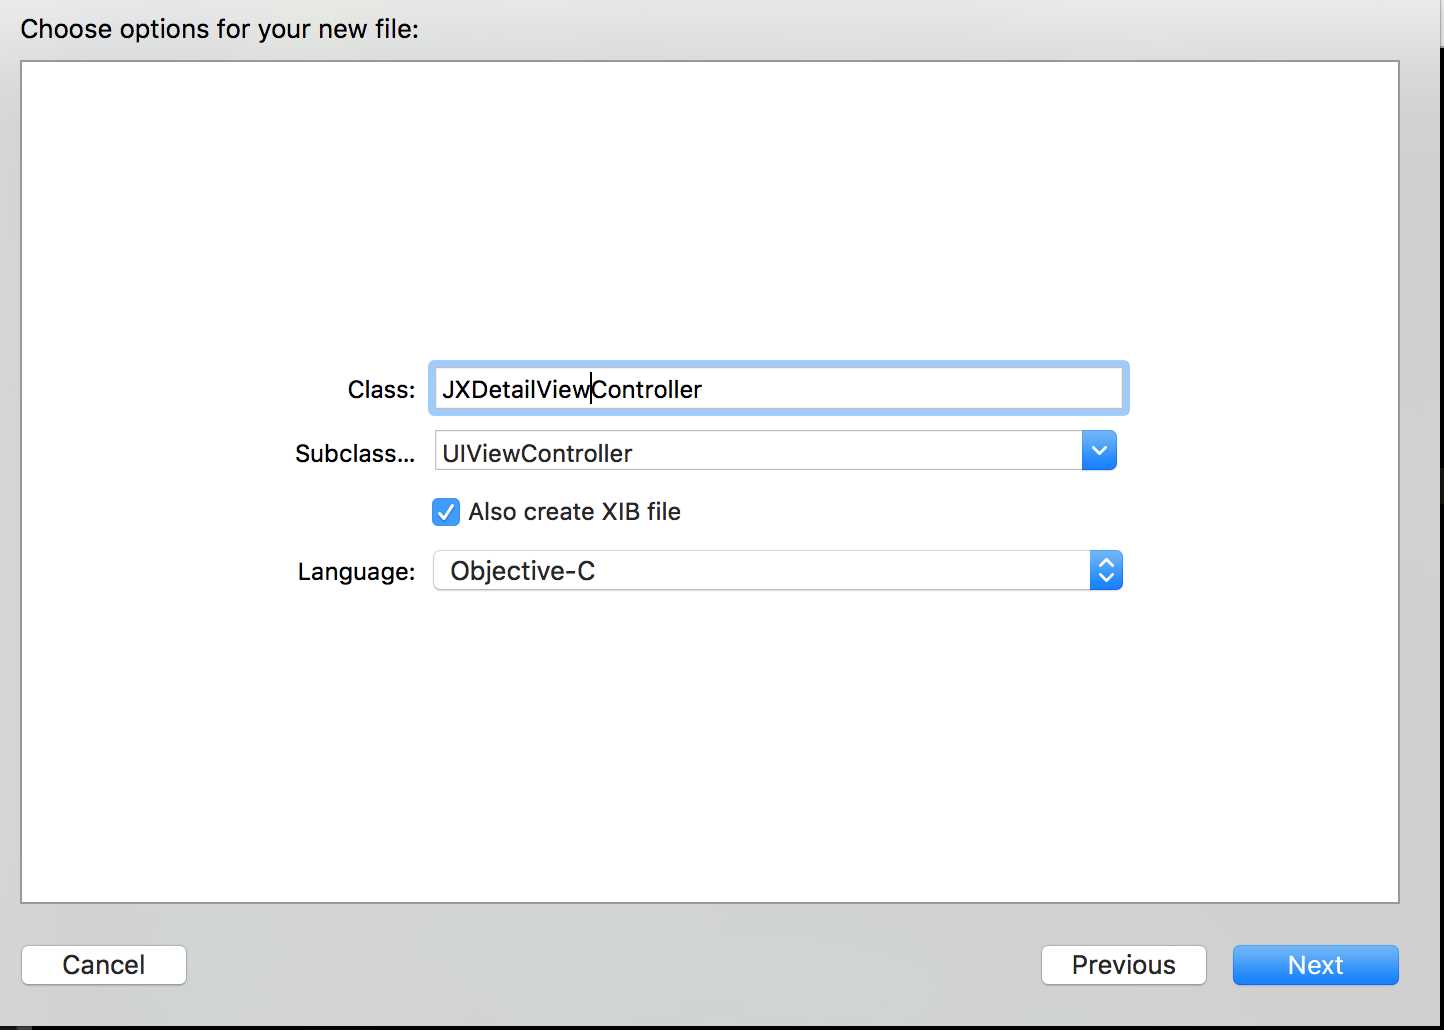
要让 JXHomepwner 的 UINavigationController 对象真正的发挥作用,还要将另一个视图控制器压入 UINavigationController 对象的栈中。创建新的控制器,同时勾选 XIB。
下面我们需要为应用添加功能:当用户点击 UITableView 对象中的某个表格行时,应用需要显示一个新的屏幕。针对选中的 JXItem 对象的每一个属性,这个心得屏幕都要显示一个可以编辑的文本框。负责显示 JXItem 对象信息的视图应该由 JXDetailViewController 控制。
为了显示 JXItem 对象的四个属性,需要在 JXDetialViewController 中为每一个属性创建一个视图并声明相应的插座变量。
创建关联时,需要执行独立三步:1.在头文件中声明插座变量。2.在 XIB 文件中设置界面。3.在 XIB 文件中创建关联。
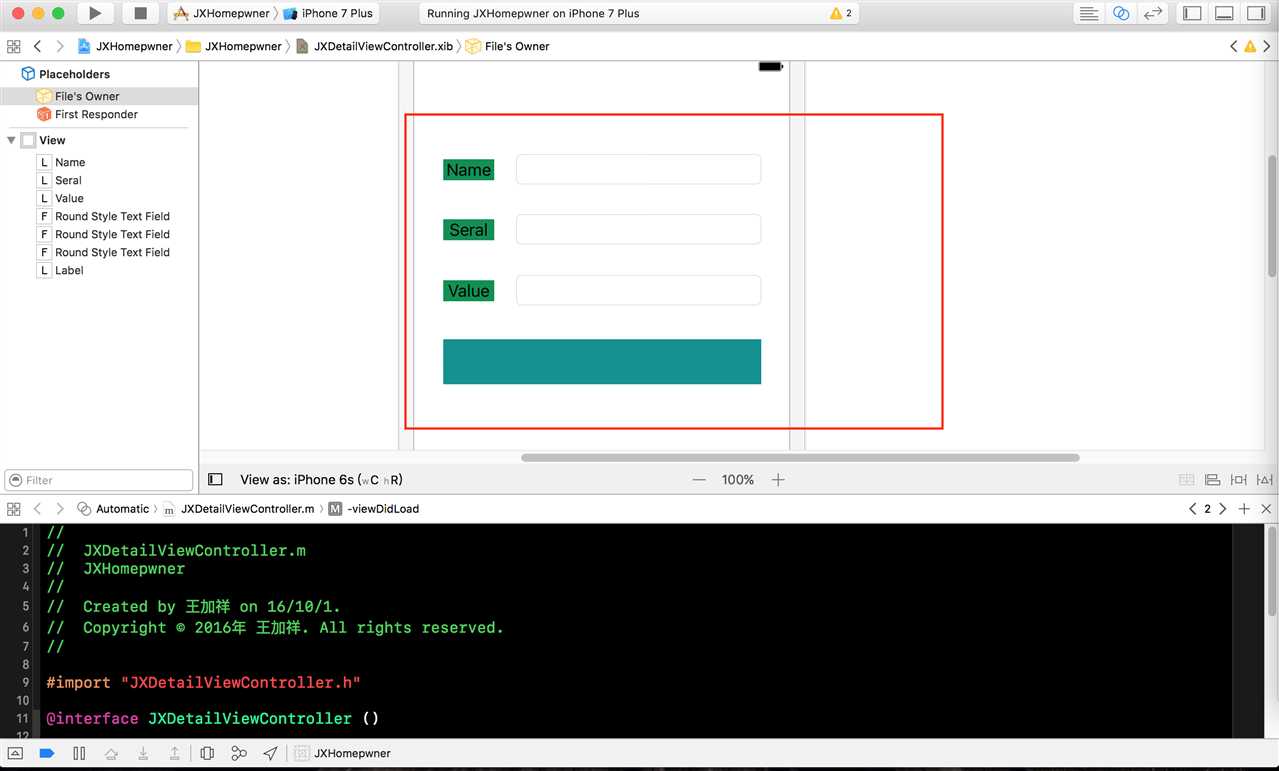
设置视图的时候请注意不要将这些子视图放置在 view 最顶端。在视图控制器中,view 会衬于 UINavigationBar 的下方,导致 UINavigationBar 会遮挡 view 最顶端的内容(对于 UITabBar 也是同样的情况,因此也不要将子视图放置在 view 的最低端)。关联后的代码。
#import "JXDetailViewController.h"

@interface JXDetailViewController ()
@property (weak, nonatomic) IBOutlet UITextField *nameField;
@property (weak, nonatomic) IBOutlet UITextField *seriaNumberField;
@property (weak, nonatomic) IBOutlet UITextField *valueField;
@property (weak, nonatomic) IBOutlet UILabel *dateLabel;

@end

@implementation JXDetailViewController

- (void)viewDidLoad {
    [super viewDidLoad];


}

@end
设置 XIB 文件时,要确保其中的关联都是正确的,这点非常重要。产生错误关联常见的原因为:我们修改了某个插座变量的便令名,但是没有更新 XIB 文件中的相应关联;或者我们彻底删除了某个插座变量,但是没有删除 XIB 文件中的相应关联。
下面要在 xib 中创建针对每一个 UITextField 对象,将其 delegate 属性关联至 File‘s Owner (按住 Control , 从 UITextField 对象拖拽置 File‘s Owner ,然后选择弹出菜单中的 delegate)。
前面我们已经加入了一个 UINavigationController 对象。下面我们就需要将我们所需的对象组合在一起。
将视图控制器压入栈
如果想要完成目标,就需要创建 JXDetailViewController 对象。但是我们需要知道如何,何时,在哪里创建这个控制器。所以这个 UINavigationController 对象的 viewControllers 数组是动态的:一开始只有一个根视图,应用需要根据情况来推出新的视图控制器。因此,应用需要某个对象来负责创建 JXDetailViewController 对象,并将新的创建的对象压入 UINavigationController 对象的栈。
这个负责创建 JXDetailViewController 对象的对象需要满足两个条件:首先,因为该对象是 UITableView 对象的委托,所以当用户点击 UITableView 对象的某个表格行时,JXItemsViewController 对象就会收到
- (void)tableView:(UITableView *)tableView didSelectRowAtIndexPath:(NSIndexPath *)indexPath
其次,凡是加入了某个 UINavigationController 对象的栈的视图控制器,都可以向自己发送 navigationController 消息,以得到指向该对象的指针。因为应用会将 JXItemsViewController 对象设置为 UINavigationController 对象的根视图控制器,所以 JXItemsViewController 对象会一直停留在 UINavigationController 对象的栈中,从而使JXItemsViewController 对象总能得到指向响应 UINavigationController 的指针。
因此,应该由 JXItemsViewController 对象负责创建 JXDetailViewController 对象并将其加入到 UINavigationController 对象的栈中。
#import "JXItemsViewController.h"
#import "JXItem.h"
#import "JXItemStore.h"
#import "JXDetailViewController.h"

@interface JXItemsViewController ()
/** 头部视图 */
@property (nonatomic,weak) UIView * headerView;
/** 编辑按钮 */
@property (nonatomic,strong) UIButton * editButton;

/** 增加按钮 */
@property (nonatomic,strong) UIButton * addButton;

@end

@implementation JXItemsViewController

- (instancetype)init {
    // 调用父类的指定初始化方法
    self = [super initWithStyle:UITableViewStylePlain];
    if (self) {
        for (NSInteger i=0; i<5; i++) {
            [[JXItemStore sharedStore] createItem];
        }
    }
    return self;
}

- (instancetype)initWithStyle:(UITableViewStyle)style {
    return [self init];
}
- (void)viewDidLoad {
    [super viewDidLoad];

    // 向控制器注册
    [self.tableView registerClass:[UITableViewCell class]
           forCellReuseIdentifier:@"UITableViewCell"];


    // 加载头视图
    [self headerView];
}

#pragma mark - Table view data source


- (NSInteger)tableView:(UITableView *)tableView numberOfRowsInSection:(NSInteger)section {
    return [[[JXItemStore sharedStore] allItem] count];
}

- (UITableViewCell *)tableView:(UITableView *)tableView cellForRowAtIndexPath:(NSIndexPath *)indexPath {
    // 创建 UITableViewCell 对象,风格使用默认风格
    UITableViewCell * cell = [tableView dequeueReusableCellWithIdentifier:@"UITableViewCell"
                                                             forIndexPath:indexPath];
    // 获取 allItem 的第 n 个 JXItem 对象
    // 然后将该 JXItem 对象的描述信息赋值给 UITableViewCell 对象的 textLabel
    // 这里的 n 是该 UITableViewCell 对象所对应的表格索引
    NSArray * items = [[JXItemStore sharedStore] allItem];
    JXItem * item = items[indexPath.row];

    cell.textLabel.text = [item description];
    return cell;
}

/**
 *  删除行
 *
 *  @param tableView    对象
 *  @param editingStyle 操作
 *  @param indexPath    操作的行数
 */
- (void)tableView:(UITableView *)tableView
commitEditingStyle:(UITableViewCellEditingStyle)editingStyle
forRowAtIndexPath:(NSIndexPath *)indexPath {

    // 如果tableView请求的是删除对象
    if (editingStyle == UITableViewCellEditingStyleDelete) {

        // 取出需要删除的对象
        NSArray * items = [[JXItemStore sharedStore] allItem];
        JXItem * item = items[indexPath.row];

        // 删除对象
        [[JXItemStore sharedStore] removeItem:item];

        // 刷新表格
        [tableView deleteRowsAtIndexPaths:@[indexPath] withRowAnimation:UITableViewRowAnimationFade];
    }

}
/**
 *  移动行
 *
 *  @param tableView            对象
 *  @param sourceIndexPath      需要移动的行
 *  @param destinationIndexPath 目标行
 */
- (void)tableView:(UITableView *)tableView
moveRowAtIndexPath:(NSIndexPath *)sourceIndexPath
      toIndexPath:(NSIndexPath *)destinationIndexPath {

    [[JXItemStore sharedStore] moveItemAtIndex:sourceIndexPath.row
                                       toIndex:destinationIndexPath.row];
}

#pragma mark - UITalbeViewDelegate
- (void)tableView:(UITableView *)tableView didSelectRowAtIndexPath:(NSIndexPath *)indexPath {
    JXDetailViewController * detailController = [[JXDetailViewController alloc] init];
    // 将新创建的控制器压入到导航控制器对象栈中
    [self.navigationController pushViewController:detailController animated:YES];
}

#pragma mark - 懒加载
- (UIView *)headerView{
    if (_headerView == nil) {
        UIView * headerView = [[UIView alloc] initWithFrame:CGRectMake(0, 0, self.view.bounds.size.width, 50)];
        // 设置头部视图
        self.tableView.tableHeaderView = headerView;
        headerView.backgroundColor = [UIColor cyanColor];
        [headerView addSubview:self.editButton];
        [headerView addSubview:self.addButton];
        _headerView = headerView;
    }
    return _headerView;
}

- (UIButton *)editButton{
    if (_editButton == nil) {
        _editButton = [UIButton buttonWithType:UIButtonTypeCustom];
        _editButton.frame = CGRectMake(0, 0, self.view.bounds.size.width / 2, 50);
        [_editButton setTitle:@"Edit" forState:UIControlStateNormal];
        _editButton.backgroundColor = [UIColor greenColor];
        [_editButton setTitleColor:[UIColor blackColor] forState:UIControlStateNormal];
        [_editButton addTarget:self action:@selector(editClick:) forControlEvents:UIControlEventTouchDown];
    }
    return _editButton;
}

- (UIButton *)addButton{
    if (_addButton == nil) {
        UIButton * addButton = [UIButton buttonWithType:UIButtonTypeCustom];
        addButton.frame = CGRectMake(self.view.bounds.size.width / 2, 0, self.view.bounds.size.width / 2, 50);
        [addButton setTitle:@"Add" forState:UIControlStateNormal];
        addButton.backgroundColor = [UIColor blueColor];
        [addButton setTitleColor:[UIColor blackColor] forState:UIControlStateNormal];
        [addButton addTarget:self action:@selector(addClick:) forControlEvents:UIControlEventTouchDown];
        _addButton = addButton;
    }
    return _addButton;
}

#pragma mark - 点击事件
- (void)editClick:(UIButton *)sender {
    if (self.isEditing) { // 如果是编辑状态,取消编辑

        // 更改文字
        [sender setTitle:@"Edit" forState:UIControlStateNormal];

        // 取消编辑
        [self setEditing:NO animated:YES];
    } else {

        // 更改文字
        [sender setTitle:@"Done" forState:UIControlStateNormal];

        // 开始编辑
        [self setEditing:YES animated:YES];
    }
}

/**
 *  添加表格时,必须保证 UITableView 对象当前显示的行数与数据源的提供的行数相同。
 *  所以,在添加之前,必须先创建一个新的 JXItem 对象并加入到 JXItemStore 中
 *
 *  @param sender 按钮
 */
- (void)addClick:(UIButton *)sender {

    // 创建新的 JXItem 对象,并加入到 JXItemStore 中
    JXItem * newItem = [[JXItemStore sharedStore] createItem];

    // 获取新的对象在 allItem 数组中的索引
    NSInteger lastRow = [[[JXItemStore sharedStore] allItem] indexOfObject:newItem];
    NSIndexPath * indexPath = [NSIndexPath indexPathForRow:lastRow inSection:0];

    // 将新航插入 UITableView 对象
    [self.tableView insertRowsAtIndexPaths:@[indexPath] withRowAnimation:UITableViewRowAnimationBottom];

    [self.tableView scrollToRowAtIndexPath:indexPath atScrollPosition:UITableViewScrollPositionBottom animated:NO];
}
@end
视图控制器之间的数据传递
下面为push进来的控制器设置显示内容。
首先为 JXDetailViewController 添加一个属性,用来保存指定的 JXItem 对象。当用户点击 UITableView 对象中的某个行时,JXItemsViewController 对象应该将选中的 JXItem 对象传给即将压入栈的 JXDetailViewController 对象。得到 JXItem 对象后,JXDetailViewController 对象就可以针对相应的 JXItem 属性设置所有的 UITextField 对象。
#import <UIKit/UIKit.h>

@class JXItem;

@interface JXDetailViewController : UIViewController

/** 接收参数 */
@property (nonatomic,strong) JXItem * item;

@end
#import "JXDetailViewController.h"
#import "JXItem.h"

@interface JXDetailViewController ()
@property (weak, nonatomic) IBOutlet UITextField *nameField;
@property (weak, nonatomic) IBOutlet UITextField *seriaNumberField;
@property (weak, nonatomic) IBOutlet UITextField *valueField;
@property (weak, nonatomic) IBOutlet UILabel *dateLabel;

@end

@implementation JXDetailViewController

- (void)viewDidLoad {
    [super viewDidLoad];

    JXItem * item = self.item;

    self.nameField.text = item.itemName;
    self.seriaNumberField.text = item.itemName;
    self.valueField.text = [NSString stringWithFormat:@"%ld",item.valueInDollars];

    // 创建 NSDdateFoemateter 对象,用于将 NSDate 对象转换成简单的日期字符串
    static NSDateFormatter * dateFormatter = nil;
    if (!dateFormatter) {
        dateFormatter = [[NSDateFormatter alloc] init];
        dateFormatter.dateStyle = NSDateFormatterMediumStyle;
        dateFormatter.timeStyle = NSDateFormatterNoStyle;
    }

    // 将转换后得到的日期字符串设置为 dateLabel 的标题
    self.dateLabel.text = [dateFormatter stringFromDate:item.createDate];
}

@end
#import "JXItemsViewController.h"
#import "JXItem.h"
#import "JXItemStore.h"
#import "JXDetailViewController.h"

@interface JXItemsViewController ()
/** 头部视图 */
@property (nonatomic,weak) UIView * headerView;
/** 编辑按钮 */
@property (nonatomic,strong) UIButton * editButton;

/** 增加按钮 */
@property (nonatomic,strong) UIButton * addButton;

@end

@implementation JXItemsViewController

- (instancetype)init {
    // 调用父类的指定初始化方法
    self = [super initWithStyle:UITableViewStylePlain];
    if (self) {
        for (NSInteger i=0; i<5; i++) {
            [[JXItemStore sharedStore] createItem];
        }
    }
    return self;
}

- (instancetype)initWithStyle:(UITableViewStyle)style {
    return [self init];
}
- (void)viewDidLoad {
    [super viewDidLoad];

    // 向控制器注册
    [self.tableView registerClass:[UITableViewCell class]
           forCellReuseIdentifier:@"UITableViewCell"];


    // 加载头视图
    [self headerView];
}

#pragma mark - Table view data source


- (NSInteger)tableView:(UITableView *)tableView numberOfRowsInSection:(NSInteger)section {
    return [[[JXItemStore sharedStore] allItem] count];
}

- (UITableViewCell *)tableView:(UITableView *)tableView cellForRowAtIndexPath:(NSIndexPath *)indexPath {
    // 创建 UITableViewCell 对象,风格使用默认风格
    UITableViewCell * cell = [tableView dequeueReusableCellWithIdentifier:@"UITableViewCell"
                                                             forIndexPath:indexPath];
    // 获取 allItem 的第 n 个 JXItem 对象
    // 然后将该 JXItem 对象的描述信息赋值给 UITableViewCell 对象的 textLabel
    // 这里的 n 是该 UITableViewCell 对象所对应的表格索引
    NSArray * items = [[JXItemStore sharedStore] allItem];
    JXItem * item = items[indexPath.row];

    cell.textLabel.text = [item description];
    return cell;
}

/**
 *  删除行
 *
 *  @param tableView    对象
 *  @param editingStyle 操作
 *  @param indexPath    操作的行数
 */
- (void)tableView:(UITableView *)tableView
commitEditingStyle:(UITableViewCellEditingStyle)editingStyle
forRowAtIndexPath:(NSIndexPath *)indexPath {

    // 如果tableView请求的是删除对象
    if (editingStyle == UITableViewCellEditingStyleDelete) {

        // 取出需要删除的对象
        NSArray * items = [[JXItemStore sharedStore] allItem];
        JXItem * item = items[indexPath.row];

        // 删除对象
        [[JXItemStore sharedStore] removeItem:item];

        // 刷新表格
        [tableView deleteRowsAtIndexPaths:@[indexPath] withRowAnimation:UITableViewRowAnimationFade];
    }

}
/**
 *  移动行
 *
 *  @param tableView            对象
 *  @param sourceIndexPath      需要移动的行
 *  @param destinationIndexPath 目标行
 */
- (void)tableView:(UITableView *)tableView
moveRowAtIndexPath:(NSIndexPath *)sourceIndexPath
      toIndexPath:(NSIndexPath *)destinationIndexPath {

    [[JXItemStore sharedStore] moveItemAtIndex:sourceIndexPath.row
                                       toIndex:destinationIndexPath.row];
}

#pragma mark - UITalbeViewDelegate
- (void)tableView:(UITableView *)tableView didSelectRowAtIndexPath:(NSIndexPath *)indexPath {
    JXDetailViewController * detailController = [[JXDetailViewController alloc] init];

    NSArray * items = [[JXItemStore sharedStore] allItem];
    JXItem * selectedItem = items[indexPath.row];
    // 将选中的JXItem 对象赋给 DetailViewController 对象
    detailController.item = selectedItem;
    // 将新创建的控制器压入到导航控制器对象栈中
    [self.navigationController pushViewController:detailController animated:YES];
}

#pragma mark - 懒加载
- (UIView *)headerView{
    if (_headerView == nil) {
        UIView * headerView = [[UIView alloc] initWithFrame:CGRectMake(0, 0, self.view.bounds.size.width, 50)];
        // 设置头部视图
        self.tableView.tableHeaderView = headerView;
        headerView.backgroundColor = [UIColor cyanColor];
        [headerView addSubview:self.editButton];
        [headerView addSubview:self.addButton];
        _headerView = headerView;
    }
    return _headerView;
}

- (UIButton *)editButton{
    if (_editButton == nil) {
        _editButton = [UIButton buttonWithType:UIButtonTypeCustom];
        _editButton.frame = CGRectMake(0, 0, self.view.bounds.size.width / 2, 50);
        [_editButton setTitle:@"Edit" forState:UIControlStateNormal];
        _editButton.backgroundColor = [UIColor greenColor];
        [_editButton setTitleColor:[UIColor blackColor] forState:UIControlStateNormal];
        [_editButton addTarget:self action:@selector(editClick:) forControlEvents:UIControlEventTouchDown];
    }
    return _editButton;
}

- (UIButton *)addButton{
    if (_addButton == nil) {
        UIButton * addButton = [UIButton buttonWithType:UIButtonTypeCustom];
        addButton.frame = CGRectMake(self.view.bounds.size.width / 2, 0, self.view.bounds.size.width / 2, 50);
        [addButton setTitle:@"Add" forState:UIControlStateNormal];
        addButton.backgroundColor = [UIColor blueColor];
        [addButton setTitleColor:[UIColor blackColor] forState:UIControlStateNormal];
        [addButton addTarget:self action:@selector(addClick:) forControlEvents:UIControlEventTouchDown];
        _addButton = addButton;
    }
    return _addButton;
}

#pragma mark - 点击事件
- (void)editClick:(UIButton *)sender {
    if (self.isEditing) { // 如果是编辑状态,取消编辑

        // 更改文字
        [sender setTitle:@"Edit" forState:UIControlStateNormal];

        // 取消编辑
        [self setEditing:NO animated:YES];
    } else {

        // 更改文字
        [sender setTitle:@"Done" forState:UIControlStateNormal];

        // 开始编辑
        [self setEditing:YES animated:YES];
    }
}

/**
 *  添加表格时,必须保证 UITableView 对象当前显示的行数与数据源的提供的行数相同。
 *  所以,在添加之前,必须先创建一个新的 JXItem 对象并加入到 JXItemStore 中
 *
 *  @param sender 按钮
 */
- (void)addClick:(UIButton *)sender {

    // 创建新的 JXItem 对象,并加入到 JXItemStore 中
    JXItem * newItem = [[JXItemStore sharedStore] createItem];

    // 获取新的对象在 allItem 数组中的索引
    NSInteger lastRow = [[[JXItemStore sharedStore] allItem] indexOfObject:newItem];
    NSIndexPath * indexPath = [NSIndexPath indexPathForRow:lastRow inSection:0];

    // 将新航插入 UITableView 对象
    [self.tableView insertRowsAtIndexPaths:@[indexPath] withRowAnimation:UITableViewRowAnimationBottom];

    [self.tableView scrollToRowAtIndexPath:indexPath atScrollPosition:UITableViewScrollPositionBottom animated:NO];
}
@end
虽然我们已经成功的将数据传入到下一个控制器中,但是当屏幕返回 JXItemsViewController 对象后,UITableView 对象不会根据用户修改来显示更新内容。
视图的显示和消失
当 UINavigationController 对象切换视图时,其包含的两个 UIViewController 对象会分别收到 viewWillDisappear: 消息和 viewWillAppear: 消息。即将出栈的 UIViewController 对象会收到 viewWillDisappear: 消息,即将入栈的 UIViewController 对象会收到 viewWillAppear: 消息。
当某个 JXDetailViewController 对象退出栈时,应该将各个 UITextField 对象的值赋给 JXItem 对象的相应属性。覆盖 viewWillDisappear: 和 viewWillAppear: 时,必须先调用其父类实现。
#import "JXDetailViewController.h"
#import "JXItem.h"

@interface JXDetailViewController ()
@property (weak, nonatomic) IBOutlet UITextField *nameField;
@property (weak, nonatomic) IBOutlet UITextField *seriaNumberField;
@property (weak, nonatomic) IBOutlet UITextField *valueField;
@property (weak, nonatomic) IBOutlet UILabel *dateLabel;

@end

@implementation JXDetailViewController

- (void)viewWillDisappear:(BOOL)animated {
    [super viewWillDisappear:animated];

    // 取消当前的第一响应对象
    [self.view endEditing:YES];

    // 将修改保存到 JXItem
    JXItem * item = self.item;
    item.itemName = self.nameField.text;
    item.serialnumber = self.seriaNumberField.text;
    item.valueInDollars = [self.valueField.text integerValue];
}
- (void)viewDidLoad {
    [super viewDidLoad];

    JXItem * item = self.item;

    self.nameField.text = item.itemName;
    self.seriaNumberField.text = item.itemName;
    self.valueField.text = [NSString stringWithFormat:@"%ld",item.valueInDollars];

    // 创建 NSDdateFoemateter 对象,用于将 NSDate 对象转换成简单的日期字符串
    static NSDateFormatter * dateFormatter = nil;
    if (!dateFormatter) {
        dateFormatter = [[NSDateFormatter alloc] init];
        dateFormatter.dateStyle = NSDateFormatterMediumStyle;
        dateFormatter.timeStyle = NSDateFormatterNoStyle;
    }

    // 将转换后得到的日期字符串设置为 dateLabel 的标题
    self.dateLabel.text = [dateFormatter stringFromDate:item.createDate];
}

@end
当点击 UINavigationBar 对象上的返回按钮时,需要进行的操作
#import "JXItemsViewController.h"
#import "JXItem.h"
#import "JXItemStore.h"
#import "JXDetailViewController.h"

@interface JXItemsViewController ()
/** 头部视图 */
@property (nonatomic,weak) UIView * headerView;
/** 编辑按钮 */
@property (nonatomic,strong) UIButton * editButton;

/** 增加按钮 */
@property (nonatomic,strong) UIButton * addButton;

@end

@implementation JXItemsViewController

- (instancetype)init {
    // 调用父类的指定初始化方法
    self = [super initWithStyle:UITableViewStylePlain];
    if (self) {
        for (NSInteger i=0; i<5; i++) {
            [[JXItemStore sharedStore] createItem];
        }
    }
    return self;
}

- (instancetype)initWithStyle:(UITableViewStyle)style {
    return [self init];
}

- (void)viewWillAppear:(BOOL)animated {
    [super viewWillAppear:animated];
    [self.tableView reloadData];
}

- (void)viewDidLoad {
    [super viewDidLoad];

    // 向控制器注册
    [self.tableView registerClass:[UITableViewCell class]
           forCellReuseIdentifier:@"UITableViewCell"];


    // 加载头视图
    [self headerView];
}

#pragma mark - Table view data source


- (NSInteger)tableView:(UITableView *)tableView numberOfRowsInSection:(NSInteger)section {
    return [[[JXItemStore sharedStore] allItem] count];
}

- (UITableViewCell *)tableView:(UITableView *)tableView cellForRowAtIndexPath:(NSIndexPath *)indexPath {
    // 创建 UITableViewCell 对象,风格使用默认风格
    UITableViewCell * cell = [tableView dequeueReusableCellWithIdentifier:@"UITableViewCell"
                                                             forIndexPath:indexPath];
    // 获取 allItem 的第 n 个 JXItem 对象
    // 然后将该 JXItem 对象的描述信息赋值给 UITableViewCell 对象的 textLabel
    // 这里的 n 是该 UITableViewCell 对象所对应的表格索引
    NSArray * items = [[JXItemStore sharedStore] allItem];
    JXItem * item = items[indexPath.row];

    cell.textLabel.text = [item description];
    return cell;
}

/**
 *  删除行
 *
 *  @param tableView    对象
 *  @param editingStyle 操作
 *  @param indexPath    操作的行数
 */
- (void)tableView:(UITableView *)tableView
commitEditingStyle:(UITableViewCellEditingStyle)editingStyle
forRowAtIndexPath:(NSIndexPath *)indexPath {

    // 如果tableView请求的是删除对象
    if (editingStyle == UITableViewCellEditingStyleDelete) {

        // 取出需要删除的对象
        NSArray * items = [[JXItemStore sharedStore] allItem];
        JXItem * item = items[indexPath.row];

        // 删除对象
        [[JXItemStore sharedStore] removeItem:item];

        // 刷新表格
        [tableView deleteRowsAtIndexPaths:@[indexPath] withRowAnimation:UITableViewRowAnimationFade];
    }

}
/**
 *  移动行
 *
 *  @param tableView            对象
 *  @param sourceIndexPath      需要移动的行
 *  @param destinationIndexPath 目标行
 */
- (void)tableView:(UITableView *)tableView
moveRowAtIndexPath:(NSIndexPath *)sourceIndexPath
      toIndexPath:(NSIndexPath *)destinationIndexPath {

    [[JXItemStore sharedStore] moveItemAtIndex:sourceIndexPath.row
                                       toIndex:destinationIndexPath.row];
}

#pragma mark - UITalbeViewDelegate
- (void)tableView:(UITableView *)tableView didSelectRowAtIndexPath:(NSIndexPath *)indexPath {
    JXDetailViewController * detailController = [[JXDetailViewController alloc] init];

    NSArray * items = [[JXItemStore sharedStore] allItem];
    JXItem * selectedItem = items[indexPath.row];
    // 将选中的JXItem 对象赋给 DetailViewController 对象
    detailController.item = selectedItem;
    // 将新创建的控制器压入到导航控制器对象栈中
    [self.navigationController pushViewController:detailController animated:YES];
}

#pragma mark - 懒加载
- (UIView *)headerView{
    if (_headerView == nil) {
        UIView * headerView = [[UIView alloc] initWithFrame:CGRectMake(0, 0, self.view.bounds.size.width, 50)];
        // 设置头部视图
        self.tableView.tableHeaderView = headerView;
        headerView.backgroundColor = [UIColor cyanColor];
        [headerView addSubview:self.editButton];
        [headerView addSubview:self.addButton];
        _headerView = headerView;
    }
    return _headerView;
}

- (UIButton *)editButton{
    if (_editButton == nil) {
        _editButton = [UIButton buttonWithType:UIButtonTypeCustom];
        _editButton.frame = CGRectMake(0, 0, self.view.bounds.size.width / 2, 50);
        [_editButton setTitle:@"Edit" forState:UIControlStateNormal];
        _editButton.backgroundColor = [UIColor greenColor];
        [_editButton setTitleColor:[UIColor blackColor] forState:UIControlStateNormal];
        [_editButton addTarget:self action:@selector(editClick:) forControlEvents:UIControlEventTouchDown];
    }
    return _editButton;
}

- (UIButton *)addButton{
    if (_addButton == nil) {
        UIButton * addButton = [UIButton buttonWithType:UIButtonTypeCustom];
        addButton.frame = CGRectMake(self.view.bounds.size.width / 2, 0, self.view.bounds.size.width / 2, 50);
        [addButton setTitle:@"Add" forState:UIControlStateNormal];
        addButton.backgroundColor = [UIColor blueColor];
        [addButton setTitleColor:[UIColor blackColor] forState:UIControlStateNormal];
        [addButton addTarget:self action:@selector(addClick:) forControlEvents:UIControlEventTouchDown];
        _addButton = addButton;
    }
    return _addButton;
}

#pragma mark - 点击事件
- (void)editClick:(UIButton *)sender {
    if (self.isEditing) { // 如果是编辑状态,取消编辑

        // 更改文字
        [sender setTitle:@"Edit" forState:UIControlStateNormal];

        // 取消编辑
        [self setEditing:NO animated:YES];
    } else {

        // 更改文字
        [sender setTitle:@"Done" forState:UIControlStateNormal];

        // 开始编辑
        [self setEditing:YES animated:YES];
    }
}

/**
 *  添加表格时,必须保证 UITableView 对象当前显示的行数与数据源的提供的行数相同。
 *  所以,在添加之前,必须先创建一个新的 JXItem 对象并加入到 JXItemStore 中
 *
 *  @param sender 按钮
 */
- (void)addClick:(UIButton *)sender {

    // 创建新的 JXItem 对象,并加入到 JXItemStore 中
    JXItem * newItem = [[JXItemStore sharedStore] createItem];

    // 获取新的对象在 allItem 数组中的索引
    NSInteger lastRow = [[[JXItemStore sharedStore] allItem] indexOfObject:newItem];
    NSIndexPath * indexPath = [NSIndexPath indexPathForRow:lastRow inSection:0];

    // 将新航插入 UITableView 对象
    [self.tableView insertRowsAtIndexPaths:@[indexPath] withRowAnimation:UITableViewRowAnimationBottom];

    [self.tableView scrollToRowAtIndexPath:indexPath atScrollPosition:UITableViewScrollPositionBottom animated:NO];
}
@end
构建并运行。即可更改信息。
UINavigationBar 目前没有显示任何内容,下面我们设置一些显示内容。
UIViewController 对象有一个名为 navigationItem 的属性,类型为 UINavigationItem 。和 UINavigationBar 不同,UINavigaitonItem 不是 UIView 的子类,不能再屏幕上显示。UINavigationItem 对象的作用是为 UINavigationBar 对象提供绘图所需的内容。当某个 UIViewController 对象成为 UINavigationController 的栈顶控制器对象时,UINavigationBar 对象就会访问该 UIViewController 对象的 navigationItem 。
UINavigationItem 对象默认是空,设置方式为
#import "JXItemsViewController.h"
#import "JXItem.h"
#import "JXItemStore.h"
#import "JXDetailViewController.h"

@interface JXItemsViewController ()
/** 头部视图 */
@property (nonatomic,weak) UIView * headerView;
/** 编辑按钮 */
@property (nonatomic,strong) UIButton * editButton;

/** 增加按钮 */
@property (nonatomic,strong) UIButton * addButton;

@end

@implementation JXItemsViewController

- (instancetype)init {
    // 调用父类的指定初始化方法
    self = [super initWithStyle:UITableViewStylePlain];
    if (self) {
        UINavigationItem * navItem = self.navigationItem;
        navItem.title = @"JXHomepwner";

        for (NSInteger i=0; i<5; i++) {
            [[JXItemStore sharedStore] createItem];
        }
    }
    return self;
}


- (void)viewWillAppear:(BOOL)animated {
    [super viewWillAppear:animated];
    [self.tableView reloadData];
}

- (void)viewDidLoad {
    [super viewDidLoad];

    // 向控制器注册
    [self.tableView registerClass:[UITableViewCell class]
           forCellReuseIdentifier:@"UITableViewCell"];


    // 加载头视图
    [self headerView];
}

#pragma mark - Table view data source


- (NSInteger)tableView:(UITableView *)tableView numberOfRowsInSection:(NSInteger)section {
    return [[[JXItemStore sharedStore] allItem] count];
}

- (UITableViewCell *)tableView:(UITableView *)tableView cellForRowAtIndexPath:(NSIndexPath *)indexPath {
    // 创建 UITableViewCell 对象,风格使用默认风格
    UITableViewCell * cell = [tableView dequeueReusableCellWithIdentifier:@"UITableViewCell"
                                                             forIndexPath:indexPath];
    // 获取 allItem 的第 n 个 JXItem 对象
    // 然后将该 JXItem 对象的描述信息赋值给 UITableViewCell 对象的 textLabel
    // 这里的 n 是该 UITableViewCell 对象所对应的表格索引
    NSArray * items = [[JXItemStore sharedStore] allItem];
    JXItem * item = items[indexPath.row];

    cell.textLabel.text = [item description];
    return cell;
}

/**
 *  删除行
 *
 *  @param tableView    对象
 *  @param editingStyle 操作
 *  @param indexPath    操作的行数
 */
- (void)tableView:(UITableView *)tableView
commitEditingStyle:(UITableViewCellEditingStyle)editingStyle
forRowAtIndexPath:(NSIndexPath *)indexPath {

    // 如果tableView请求的是删除对象
    if (editingStyle == UITableViewCellEditingStyleDelete) {

        // 取出需要删除的对象
        NSArray * items = [[JXItemStore sharedStore] allItem];
        JXItem * item = items[indexPath.row];

        // 删除对象
        [[JXItemStore sharedStore] removeItem:item];

        // 刷新表格
        [tableView deleteRowsAtIndexPaths:@[indexPath] withRowAnimation:UITableViewRowAnimationFade];
    }

}
/**
 *  移动行
 *
 *  @param tableView            对象
 *  @param sourceIndexPath      需要移动的行
 *  @param destinationIndexPath 目标行
 */
- (void)tableView:(UITableView *)tableView
moveRowAtIndexPath:(NSIndexPath *)sourceIndexPath
      toIndexPath:(NSIndexPath *)destinationIndexPath {

    [[JXItemStore sharedStore] moveItemAtIndex:sourceIndexPath.row
                                       toIndex:destinationIndexPath.row];
}

#pragma mark - UITalbeViewDelegate
- (void)tableView:(UITableView *)tableView didSelectRowAtIndexPath:(NSIndexPath *)indexPath {
    JXDetailViewController * detailController = [[JXDetailViewController alloc] init];

    NSArray * items = [[JXItemStore sharedStore] allItem];
    JXItem * selectedItem = items[indexPath.row];
    // 将选中的JXItem 对象赋给 DetailViewController 对象
    detailController.item = selectedItem;
    // 将新创建的控制器压入到导航控制器对象栈中
    [self.navigationController pushViewController:detailController animated:YES];
}

#pragma mark - 懒加载
- (UIView *)headerView{
    if (_headerView == nil) {
        UIView * headerView = [[UIView alloc] initWithFrame:CGRectMake(0, 0, self.view.bounds.size.width, 50)];
        // 设置头部视图
        self.tableView.tableHeaderView = headerView;
        headerView.backgroundColor = [UIColor cyanColor];
        [headerView addSubview:self.editButton];
        [headerView addSubview:self.addButton];
        _headerView = headerView;
    }
    return _headerView;
}

- (UIButton *)editButton{
    if (_editButton == nil) {
        _editButton = [UIButton buttonWithType:UIButtonTypeCustom];
        _editButton.frame = CGRectMake(0, 0, self.view.bounds.size.width / 2, 50);
        [_editButton setTitle:@"Edit" forState:UIControlStateNormal];
        _editButton.backgroundColor = [UIColor greenColor];
        [_editButton setTitleColor:[UIColor blackColor] forState:UIControlStateNormal];
        [_editButton addTarget:self action:@selector(editClick:) forControlEvents:UIControlEventTouchDown];
    }
    return _editButton;
}

- (UIButton *)addButton{
    if (_addButton == nil) {
        UIButton * addButton = [UIButton buttonWithType:UIButtonTypeCustom];
        addButton.frame = CGRectMake(self.view.bounds.size.width / 2, 0, self.view.bounds.size.width / 2, 50);
        [addButton setTitle:@"Add" forState:UIControlStateNormal];
        addButton.backgroundColor = [UIColor blueColor];
        [addButton setTitleColor:[UIColor blackColor] forState:UIControlStateNormal];
        [addButton addTarget:self action:@selector(addClick:) forControlEvents:UIControlEventTouchDown];
        _addButton = addButton;
    }
    return _addButton;
}

#pragma mark - 点击事件
- (void)editClick:(UIButton *)sender {
    if (self.isEditing) { // 如果是编辑状态,取消编辑

        // 更改文字
        [sender setTitle:@"Edit" forState:UIControlStateNormal];

        // 取消编辑
        [self setEditing:NO animated:YES];
    } else {

        // 更改文字
        [sender setTitle:@"Done" forState:UIControlStateNormal];

        // 开始编辑
        [self setEditing:YES animated:YES];
    }
}

/**
 *  添加表格时,必须保证 UITableView 对象当前显示的行数与数据源的提供的行数相同。
 *  所以,在添加之前,必须先创建一个新的 JXItem 对象并加入到 JXItemStore 中
 *
 *  @param sender 按钮
 */
- (void)addClick:(UIButton *)sender {

    // 创建新的 JXItem 对象,并加入到 JXItemStore 中
    JXItem * newItem = [[JXItemStore sharedStore] createItem];

    // 获取新的对象在 allItem 数组中的索引
    NSInteger lastRow = [[[JXItemStore sharedStore] allItem] indexOfObject:newItem];
    NSIndexPath * indexPath = [NSIndexPath indexPathForRow:lastRow inSection:0];

    // 将新航插入 UITableView 对象
    [self.tableView insertRowsAtIndexPaths:@[indexPath] withRowAnimation:UITableViewRowAnimationBottom];

    [self.tableView scrollToRowAtIndexPath:indexPath atScrollPosition:UITableViewScrollPositionBottom animated:NO];
}
@end
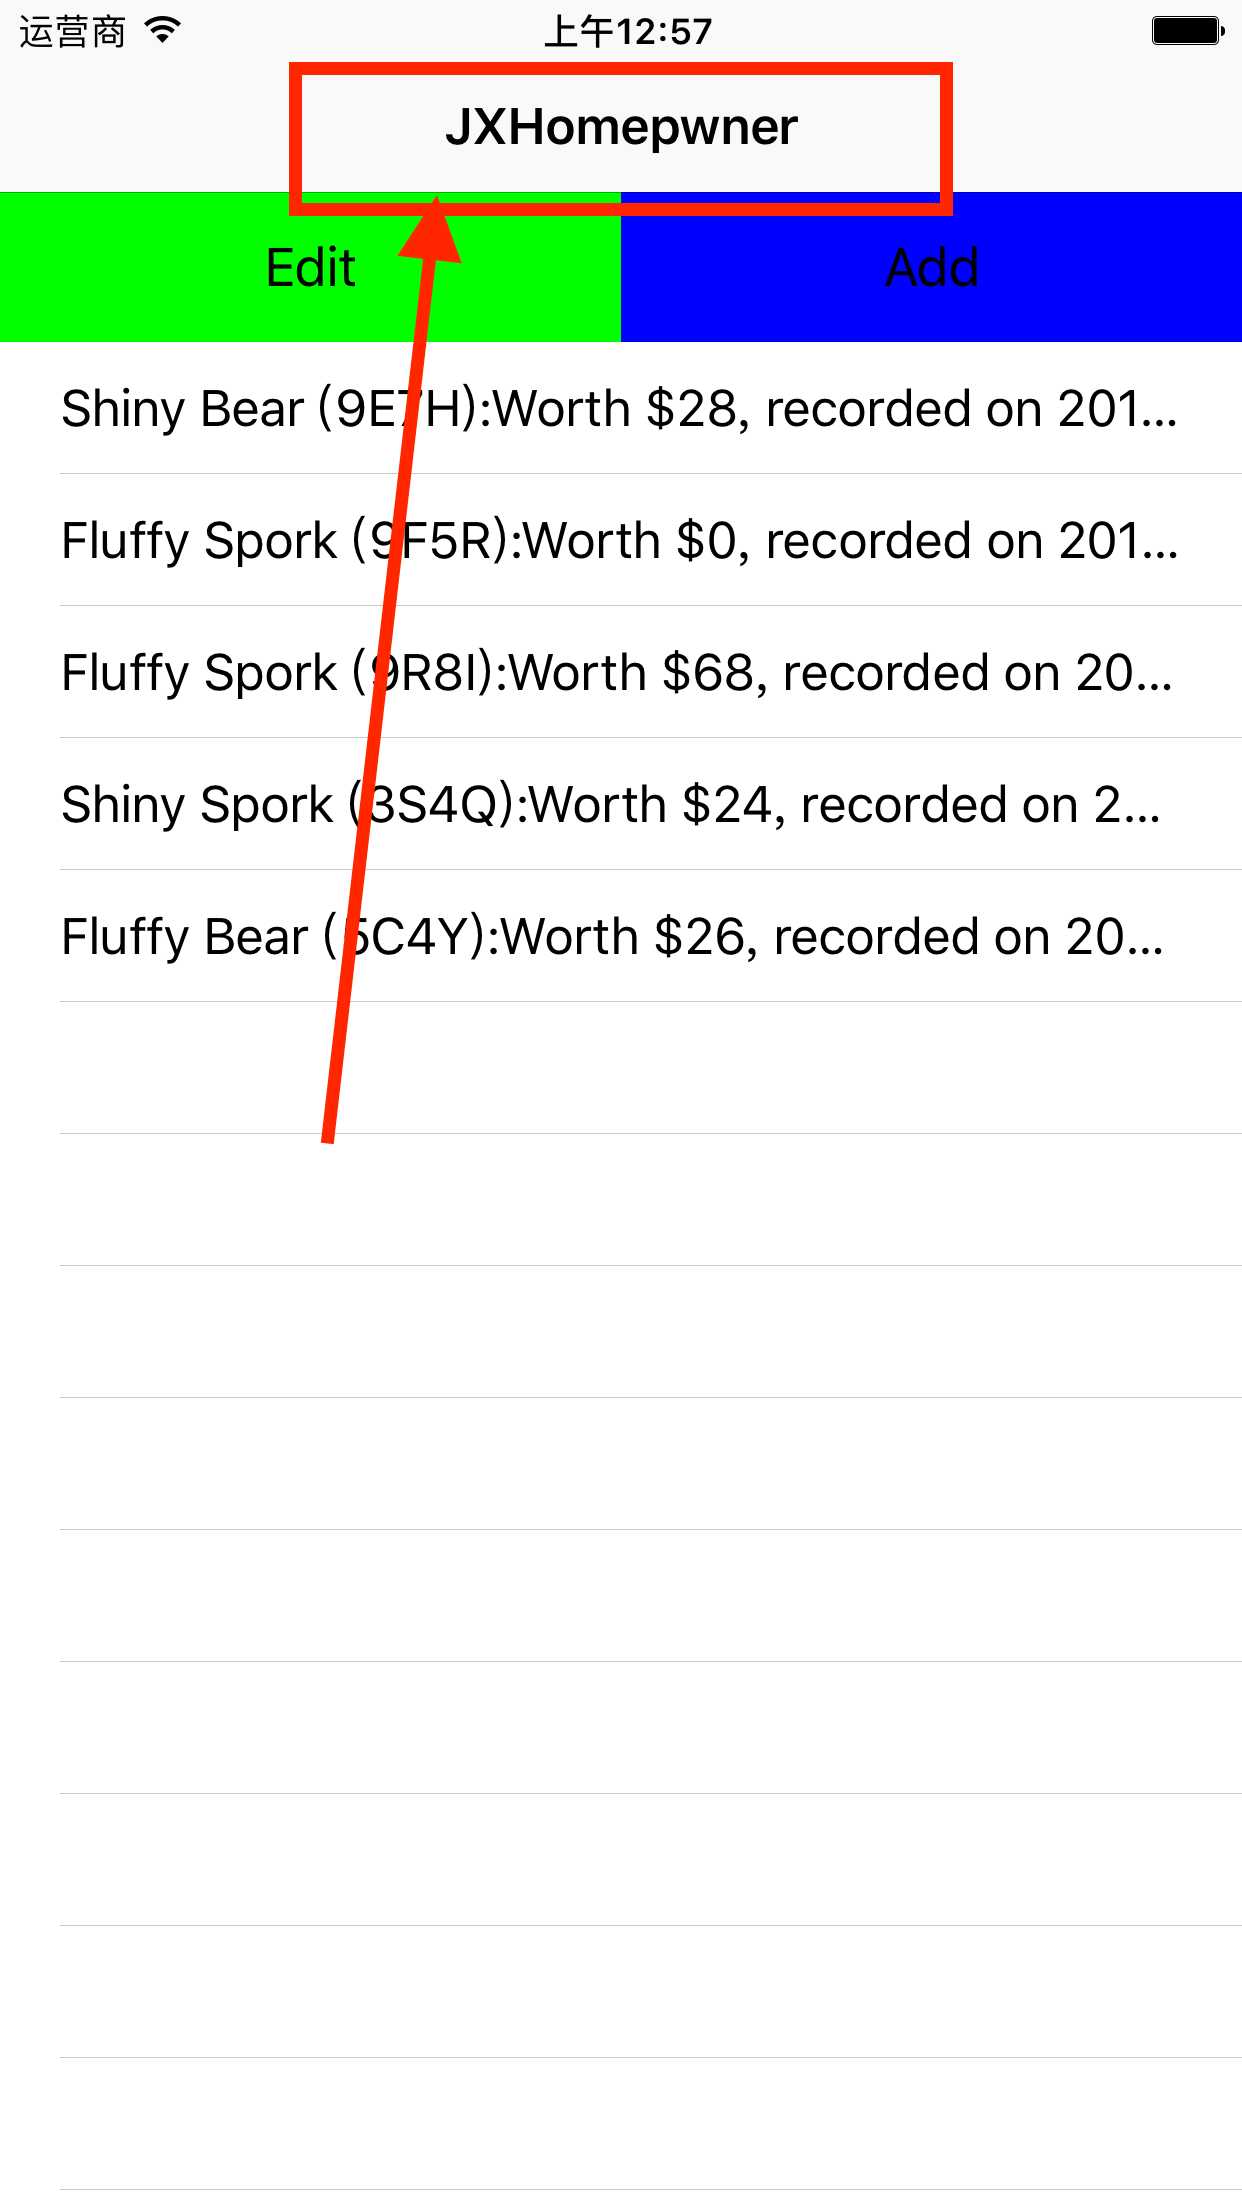
构建并运行;UINavigationBar 对象会显示我们设置的标题。添加一个新的控制器(选中表格行),UINavigationBar 对象的标题会消失,所以下面我们要继续设置。
#import "JXDetailViewController.h"
#import "JXItem.h"

@interface JXDetailViewController ()
@property (weak, nonatomic) IBOutlet UITextField *nameField;
@property (weak, nonatomic) IBOutlet UITextField *seriaNumberField;
@property (weak, nonatomic) IBOutlet UITextField *valueField;
@property (weak, nonatomic) IBOutlet UILabel *dateLabel;

@end

@implementation JXDetailViewController

- (void)viewWillDisappear:(BOOL)animated {
    [super viewWillDisappear:animated];

    // 取消当前的第一响应对象
    [self.view endEditing:YES];

    // 将修改保存到 JXItem
    JXItem * item = self.item;
    item.itemName = self.nameField.text;
    item.serialnumber = self.seriaNumberField.text;
    item.valueInDollars = [self.valueField.text integerValue];
}
- (void)viewDidLoad {
    [super viewDidLoad];

    JXItem * item = self.item;

    self.nameField.text = item.itemName;
    self.seriaNumberField.text = item.itemName;
    self.valueField.text = [NSString stringWithFormat:@"%ld",item.valueInDollars];

    // 创建 NSDdateFoemateter 对象,用于将 NSDate 对象转换成简单的日期字符串
    static NSDateFormatter * dateFormatter = nil;
    if (!dateFormatter) {
        dateFormatter = [[NSDateFormatter alloc] init];
        dateFormatter.dateStyle = NSDateFormatterMediumStyle;
        dateFormatter.timeStyle = NSDateFormatterNoStyle;
    }

    // 将转换后得到的日期字符串设置为 dateLabel 的标题
    self.dateLabel.text = [dateFormatter stringFromDate:item.createDate];
}

- (void)setItem:(JXItem *)item {
    _item = item;
    self.navigationItem.title = _item.itemName;
}
@end
UINavigationItem 对象除了可以设置标题字符串外,还可以设置若干其他的界面属性。包括 : leftBarButtonItem 、 rightBarButtonItem 和 titleView 。其中 leftBarButtonItem 和 rightBarButtonItem 都是指向 UIBarButtonItem 对象的指针,该对象包含显示某种特殊按钮所需要的信息,这种按钮只能在 UINavigationBar 对象或 UIToolbar 对象中使用。
类似于 UINavigationItem ,UIBarButtonItem 也不是 UIView 的子类。UINavigationItem 对象封装了一些设置信息,以便于 UINavigationBar 在运行时可以正确显示该对象。同样,UIBarButtonItem 对象封装了关于如何在 UINavigationBar 显示单个按钮的信息,UINavigationBar 对象会根据 UIBarButtonItem 对象中的信息显示相应的按钮。(UIToolbar 与 UINavigationBar 一样,也是通过 UIBarButtonItem 对象来显示按钮的。)
除了 leftBarButtonItem 和 rightBarButtonItem ,UINavigationItem 对象的第三个界面属性 titleView 。UINavigationBar 对象包含两种标题显示模式。第一种是显示一个简单的字符串。第二种模式是显示一个视图。两种模式不能共存。如果需要在 UINavigationBar 对象正中显示一个复杂界面,就可以先创建拥有自定义视图(例如 UIButton 对象、UISlider 对象、UIImageView 对象等)的视图控制器,然后为该对象的 titleView 赋值,并指向这个自定义视图。
下面让 UINavigationBar 对象显示一个按钮:当 JXItemsViewController 对象位于栈顶时,在 UINavigationBar 对象的右端显示一个按钮。当用户点击这个按钮时,为UITableView 对象增加一个新的表格。
为了能在用户点击 UINavigationBar 对象中的按钮时触发指定的方法,必须为相应的 UIBarButtonItem 对象设置目标-动作对。
#import "JXItemsViewController.h"
#import "JXItem.h"
#import "JXItemStore.h"
#import "JXDetailViewController.h"

@interface JXItemsViewController ()
/** 头部视图 */
@property (nonatomic,weak) UIView * headerView;
/** 编辑按钮 */
@property (nonatomic,strong) UIButton * editButton;

/** 增加按钮 */
@property (nonatomic,strong) UIButton * addButton;

@end

@implementation JXItemsViewController

- (instancetype)init {
    // 调用父类的指定初始化方法
    self = [super initWithStyle:UITableViewStylePlain];
    if (self) {
        UINavigationItem * navItem = self.navigationItem;
        navItem.title = @"JXHomepwner";

        // 创建新的 UIBarButtonItem 对象
        // 将其目标对象设置为当前对象,将其多做方法设置为指定方法
        UIBarButtonItem * bdi = [[UIBarButtonItem alloc] initWithBarButtonSystemItem:UIBarButtonSystemItemAdd target:self action:@selector(addClick:)];
        // 为 UINavigationItem 对象的 rightBarButtonItem 属性赋值
        // 指向新创建的 UIBarButtonItem 对象
        navItem.rightBarButtonItem = bdi;

        for (NSInteger i=0; i<5; i++) {
            [[JXItemStore sharedStore] createItem];
        }
    }
    return self;
}


- (void)viewWillAppear:(BOOL)animated {
    [super viewWillAppear:animated];
    [self.tableView reloadData];
}

- (void)viewDidLoad {
    [super viewDidLoad];

    // 向控制器注册
    [self.tableView registerClass:[UITableViewCell class]
           forCellReuseIdentifier:@"UITableViewCell"];


    // 加载头视图
    [self headerView];
}

#pragma mark - Table view data source


- (NSInteger)tableView:(UITableView *)tableView numberOfRowsInSection:(NSInteger)section {
    return [[[JXItemStore sharedStore] allItem] count];
}

- (UITableViewCell *)tableView:(UITableView *)tableView cellForRowAtIndexPath:(NSIndexPath *)indexPath {
    // 创建 UITableViewCell 对象,风格使用默认风格
    UITableViewCell * cell = [tableView dequeueReusableCellWithIdentifier:@"UITableViewCell"
                                                             forIndexPath:indexPath];
    // 获取 allItem 的第 n 个 JXItem 对象
    // 然后将该 JXItem 对象的描述信息赋值给 UITableViewCell 对象的 textLabel
    // 这里的 n 是该 UITableViewCell 对象所对应的表格索引
    NSArray * items = [[JXItemStore sharedStore] allItem];
    JXItem * item = items[indexPath.row];

    cell.textLabel.text = [item description];
    return cell;
}

/**
 *  删除行
 *
 *  @param tableView    对象
 *  @param editingStyle 操作
 *  @param indexPath    操作的行数
 */
- (void)tableView:(UITableView *)tableView
commitEditingStyle:(UITableViewCellEditingStyle)editingStyle
forRowAtIndexPath:(NSIndexPath *)indexPath {

    // 如果tableView请求的是删除对象
    if (editingStyle == UITableViewCellEditingStyleDelete) {

        // 取出需要删除的对象
        NSArray * items = [[JXItemStore sharedStore] allItem];
        JXItem * item = items[indexPath.row];

        // 删除对象
        [[JXItemStore sharedStore] removeItem:item];

        // 刷新表格
        [tableView deleteRowsAtIndexPaths:@[indexPath] withRowAnimation:UITableViewRowAnimationFade];
    }

}
/**
 *  移动行
 *
 *  @param tableView            对象
 *  @param sourceIndexPath      需要移动的行
 *  @param destinationIndexPath 目标行
 */
- (void)tableView:(UITableView *)tableView
moveRowAtIndexPath:(NSIndexPath *)sourceIndexPath
      toIndexPath:(NSIndexPath *)destinationIndexPath {

    [[JXItemStore sharedStore] moveItemAtIndex:sourceIndexPath.row
                                       toIndex:destinationIndexPath.row];
}

#pragma mark - UITalbeViewDelegate
- (void)tableView:(UITableView *)tableView didSelectRowAtIndexPath:(NSIndexPath *)indexPath {
    JXDetailViewController * detailController = [[JXDetailViewController alloc] init];

    NSArray * items = [[JXItemStore sharedStore] allItem];
    JXItem * selectedItem = items[indexPath.row];
    // 将选中的JXItem 对象赋给 DetailViewController 对象
    detailController.item = selectedItem;
    // 将新创建的控制器压入到导航控制器对象栈中
    [self.navigationController pushViewController:detailController animated:YES];
}

#pragma mark - 懒加载
- (UIView *)headerView{
    if (_headerView == nil) {
        UIView * headerView = [[UIView alloc] initWithFrame:CGRectMake(0, 0, self.view.bounds.size.width, 50)];
        // 设置头部视图
        self.tableView.tableHeaderView = headerView;
        headerView.backgroundColor = [UIColor cyanColor];
        [headerView addSubview:self.editButton];
        [headerView addSubview:self.addButton];
        _headerView = headerView;
    }
    return _headerView;
}

- (UIButton *)editButton{
    if (_editButton == nil) {
        _editButton = [UIButton buttonWithType:UIButtonTypeCustom];
        _editButton.frame = CGRectMake(0, 0, self.view.bounds.size.width / 2, 50);
        [_editButton setTitle:@"Edit" forState:UIControlStateNormal];
        _editButton.backgroundColor = [UIColor greenColor];
        [_editButton setTitleColor:[UIColor blackColor] forState:UIControlStateNormal];
        [_editButton addTarget:self action:@selector(editClick:) forControlEvents:UIControlEventTouchDown];
    }
    return _editButton;
}

- (UIButton *)addButton{
    if (_addButton == nil) {
        UIButton * addButton = [UIButton buttonWithType:UIButtonTypeCustom];
        addButton.frame = CGRectMake(self.view.bounds.size.width / 2, 0, self.view.bounds.size.width / 2, 50);
        [addButton setTitle:@"Add" forState:UIControlStateNormal];
        addButton.backgroundColor = [UIColor blueColor];
        [addButton setTitleColor:[UIColor blackColor] forState:UIControlStateNormal];
        [addButton addTarget:self action:@selector(addClick:) forControlEvents:UIControlEventTouchDown];
        _addButton = addButton;
    }
    return _addButton;
}

#pragma mark - 点击事件
- (void)editClick:(UIButton *)sender {
    if (self.isEditing) { // 如果是编辑状态,取消编辑

        // 更改文字
        [sender setTitle:@"Edit" forState:UIControlStateNormal];

        // 取消编辑
        [self setEditing:NO animated:YES];
    } else {

        // 更改文字
        [sender setTitle:@"Done" forState:UIControlStateNormal];

        // 开始编辑
        [self setEditing:YES animated:YES];
    }
}

/**
 *  添加表格时,必须保证 UITableView 对象当前显示的行数与数据源的提供的行数相同。
 *  所以,在添加之前,必须先创建一个新的 JXItem 对象并加入到 JXItemStore 中
 *
 *  @param sender 按钮
 */
- (void)addClick:(UIButton *)sender {

    // 创建新的 JXItem 对象,并加入到 JXItemStore 中
    JXItem * newItem = [[JXItemStore sharedStore] createItem];

    // 获取新的对象在 allItem 数组中的索引
    NSInteger lastRow = [[[JXItemStore sharedStore] allItem] indexOfObject:newItem];
    NSIndexPath * indexPath = [NSIndexPath indexPathForRow:lastRow inSection:0];

    // 将新航插入 UITableView 对象
    [self.tableView insertRowsAtIndexPaths:@[indexPath] withRowAnimation:UITableViewRowAnimationBottom];

    [self.tableView scrollToRowAtIndexPath:indexPath atScrollPosition:UITableViewScrollPositionBottom animated:NO];
}
@end
接着我么设置天极爱一个编辑按钮,用来替换 Edit 按钮。
#import "JXItemsViewController.h"
#import "JXItem.h"
#import "JXItemStore.h"
#import "JXDetailViewController.h"

@interface JXItemsViewController ()
/** 头部视图 */
@property (nonatomic,weak) UIView * headerView;
/** 编辑按钮 */
@property (nonatomic,strong) UIButton * editButton;

/** 增加按钮 */
@property (nonatomic,strong) UIButton * addButton;

@end

@implementation JXItemsViewController

- (instancetype)init {
    // 调用父类的指定初始化方法
    self = [super initWithStyle:UITableViewStylePlain];
    if (self) {
        UINavigationItem * navItem = self.navigationItem;
        navItem.title = @"JXHomepwner";

        // 创建新的 UIBarButtonItem 对象
        // 将其目标对象设置为当前对象,将其多做方法设置为指定方法
        UIBarButtonItem * bdi = [[UIBarButtonItem alloc] initWithBarButtonSystemItem:UIBarButtonSystemItemAdd target:self action:@selector(addClick:)];
        // 为 UINavigationItem 对象的 rightBarButtonItem 属性赋值
        // 指向新创建的 UIBarButtonItem 对象
        navItem.rightBarButtonItem = bdi;

        UIBarButtonItem * edit = [[UIBarButtonItem alloc] initWithBarButtonSystemItem:UIBarButtonSystemItemEdit target:self action:@selector(editClick:)];
        navItem.leftBarButtonItem = edit;

        for (NSInteger i=0; i<5; i++) {
            [[JXItemStore sharedStore] createItem];
        }
    }
    return self;
}


- (void)viewWillAppear:(BOOL)animated {
    [super viewWillAppear:animated];
    [self.tableView reloadData];
}

- (void)viewDidLoad {
    [super viewDidLoad];

    // 向控制器注册
    [self.tableView registerClass:[UITableViewCell class]
           forCellReuseIdentifier:@"UITableViewCell"];


    // 加载头视图
    [self headerView];
}

#pragma mark - Table view data source


- (NSInteger)tableView:(UITableView *)tableView numberOfRowsInSection:(NSInteger)section {
    return [[[JXItemStore sharedStore] allItem] count];
}

- (UITableViewCell *)tableView:(UITableView *)tableView cellForRowAtIndexPath:(NSIndexPath *)indexPath {
    // 创建 UITableViewCell 对象,风格使用默认风格
    UITableViewCell * cell = [tableView dequeueReusableCellWithIdentifier:@"UITableViewCell"
                                                             forIndexPath:indexPath];
    // 获取 allItem 的第 n 个 JXItem 对象
    // 然后将该 JXItem 对象的描述信息赋值给 UITableViewCell 对象的 textLabel
    // 这里的 n 是该 UITableViewCell 对象所对应的表格索引
    NSArray * items = [[JXItemStore sharedStore] allItem];
    JXItem * item = items[indexPath.row];

    cell.textLabel.text = [item description];
    return cell;
}

/**
 *  删除行
 *
 *  @param tableView    对象
 *  @param editingStyle 操作
 *  @param indexPath    操作的行数
 */
- (void)tableView:(UITableView *)tableView
commitEditingStyle:(UITableViewCellEditingStyle)editingStyle
forRowAtIndexPath:(NSIndexPath *)indexPath {

    // 如果tableView请求的是删除对象
    if (editingStyle == UITableViewCellEditingStyleDelete) {

        // 取出需要删除的对象
        NSArray * items = [[JXItemStore sharedStore] allItem];
        JXItem * item = items[indexPath.row];

        // 删除对象
        [[JXItemStore sharedStore] removeItem:item];

        // 刷新表格
        [tableView deleteRowsAtIndexPaths:@[indexPath] withRowAnimation:UITableViewRowAnimationFade];
    }

}
/**
 *  移动行
 *
 *  @param tableView            对象
 *  @param sourceIndexPath      需要移动的行
 *  @param destinationIndexPath 目标行
 */
- (void)tableView:(UITableView *)tableView
moveRowAtIndexPath:(NSIndexPath *)sourceIndexPath
      toIndexPath:(NSIndexPath *)destinationIndexPath {

    [[JXItemStore sharedStore] moveItemAtIndex:sourceIndexPath.row
                                       toIndex:destinationIndexPath.row];
}

#pragma mark - UITalbeViewDelegate
- (void)tableView:(UITableView *)tableView didSelectRowAtIndexPath:(NSIndexPath *)indexPath {
    JXDetailViewController * detailController = [[JXDetailViewController alloc] init];

    NSArray * items = [[JXItemStore sharedStore] allItem];
    JXItem * selectedItem = items[indexPath.row];
    // 将选中的JXItem 对象赋给 DetailViewController 对象
    detailController.item = selectedItem;
    // 将新创建的控制器压入到导航控制器对象栈中
    [self.navigationController pushViewController:detailController animated:YES];
}

#pragma mark - 懒加载
- (UIView *)headerView{
    if (_headerView == nil) {
        UIView * headerView = [[UIView alloc] initWithFrame:CGRectMake(0, 0, self.view.bounds.size.width, 50)];
        // 设置头部视图
        self.tableView.tableHeaderView = headerView;
        headerView.backgroundColor = [UIColor cyanColor];
        [headerView addSubview:self.editButton];
        [headerView addSubview:self.addButton];
        _headerView = headerView;
    }
    return _headerView;
}

- (UIButton *)editButton{
    if (_editButton == nil) {
        _editButton = [UIButton buttonWithType:UIButtonTypeCustom];
        _editButton.frame = CGRectMake(0, 0, self.view.bounds.size.width / 2, 50);
        [_editButton setTitle:@"Edit" forState:UIControlStateNormal];
        _editButton.backgroundColor = [UIColor greenColor];
        [_editButton setTitleColor:[UIColor blackColor] forState:UIControlStateNormal];
        [_editButton addTarget:self action:@selector(editClick:) forControlEvents:UIControlEventTouchDown];
    }
    return _editButton;
}

- (UIButton *)addButton{
    if (_addButton == nil) {
        UIButton * addButton = [UIButton buttonWithType:UIButtonTypeCustom];
        addButton.frame = CGRectMake(self.view.bounds.size.width / 2, 0, self.view.bounds.size.width / 2, 50);
        [addButton setTitle:@"Add" forState:UIControlStateNormal];
        addButton.backgroundColor = [UIColor blueColor];
        [addButton setTitleColor:[UIColor blackColor] forState:UIControlStateNormal];
        [addButton addTarget:self action:@selector(addClick:) forControlEvents:UIControlEventTouchDown];
        _addButton = addButton;
    }
    return _addButton;
}

#pragma mark - 点击事件
- (void)editClick:(UIButton *)sender {
- (void)editClick:(UIBarButtonItem *)sender {
    if (self.isEditing) { // 如果是编辑状态,取消编辑

        // 更改文字
        [sender setTitle:@"Edit" forState:UIControlStateNormal];

        // 取消编辑
        [self setEditing:NO animated:YES];
    } else {

        // 更改文字
        [sender setTitle:@"Done" forState:UIControlStateNormal];

        // 开始编辑
        [self setEditing:YES animated:YES];
    }
}

/**
 *  添加表格时,必须保证 UITableView 对象当前显示的行数与数据源的提供的行数相同。
 *  所以,在添加之前,必须先创建一个新的 JXItem 对象并加入到 JXItemStore 中
 *
 *  @param sender 按钮
 */
- (void)addClick:(UIButton *)sender {

    // 创建新的 JXItem 对象,并加入到 JXItemStore 中
    JXItem * newItem = [[JXItemStore sharedStore] createItem];

    // 获取新的对象在 allItem 数组中的索引
    NSInteger lastRow = [[[JXItemStore sharedStore] allItem] indexOfObject:newItem];
    NSIndexPath * indexPath = [NSIndexPath indexPathForRow:lastRow inSection:0];

    // 将新航插入 UITableView 对象
    [self.tableView insertRowsAtIndexPaths:@[indexPath] withRowAnimation:UITableViewRowAnimationBottom];

    [self.tableView scrollToRowAtIndexPath:indexPath atScrollPosition:UITableViewScrollPositionBottom animated:NO];
}
@end
构建并运行

iOS UINavigationController(内容根据iOS编程编写)
标签:
原文地址:http://www.cnblogs.com/wang-com/p/5926612.html