标签:cli tar 静态属性 mit 条件判断 strong cal ble href
深究angularJS系列 - 第二弹,在初步了解了Angular的基础上,进一步的针对Angular的控制器和作用域问题深入探究O(∩_∩)O~~
Angular控制器
控制器(Controller)的理解
控制器(Controller)的结构
1 .controller("控制器的名字",function($scoppe){
2     ......
3 })
说明:
1.控制器的命名:
业务名(view模块名)+Controller 见名之意,以登录(login)为例
1 .controller("loginController",function(类1,类2,...){
2     ......
3 })
2.Angular中的$:
$:Angular内部类的标识,可借此区分一个类是angular的内部类,还是自定的类 如:
1 $scope
2 $rootScope
3.Angular中类的声明:
Angular里面不能直接的类进行实例化调用,只能先声明后使用 如:
1 .controller("oneCtrl",function($scope){  //类先声明
2     $scope.msg = "helle controller!";
3 })
4
5 .controller("twoCtrl",function(){  //类没声明,会报错
6     var s = new $scope();     //直接的类进行实例化
7   $scope.msg = "helle controller!";
8 })
4.Angular中控制器与view是一对一的:
 1 <body>
 2      <div ng-controller="one">{{goods}}</div>
 3      <div ng-controller="two">{{goods}}</div>
 4 <script>
 5     (function(){
 6         var son = angular.module("one",[]);
 7         son.controller("oneCtrl",function($scope){
 8             $scope.goods="one goods"
 9         });
10         var grandson = angular.module("two",[]);
11         grandson.controller("twoCtrl",function($scope){
12             $scope.goods="two goods"
13         });
14     })()
15 </script>
5.Angular中控制器的继承关系:
当Controller之间出现嵌套关系的时候,内层继承外层的变量 如:
 1 <!DOCTYPE html>
 2 <html lang="en" ng-app="demo">
 3 <head>
 4     <meta charset="UTF-8">
 5     <title>控制器之间的继承</title>
 6     <meta name="viewport" content="width=device-width,initial-scale=1.0,user-scalable=no">
 7     <link rel="stylesheet" href="../bootstrap.css">
 8 </head>
 9 <body>
10 <div class="well" ng-controller="oneCtrl">
11     {{msg}}
12     <div  class="well" ng-controller="twoCtrl">
13         {{msg}}
14         <div class="well"  ng-controller="threeCtrl">
15             {{msg}}
16         </div>
17     </div>
18 </div>
19 <script src="../angular.js"></script>
20 <script>
21     (function(){
22         angular.module("demo",[])
23             //当我们的html元素出现嵌套关系的时候,内层继承外层的变量
24             .controller("oneCtrl",function($scope){
25                 $scope.msg = "helle one!"
26
27             })
28             .controller("twoCtrl",function($scope){
29 //              $scope.msg = "helle two!"
30             })
31             .controller("threeCtrl",function($scope){
32 //              $scope.msg = "helle three!"
33             })
34     })()
35 </script>
36 </body>
37 </html>
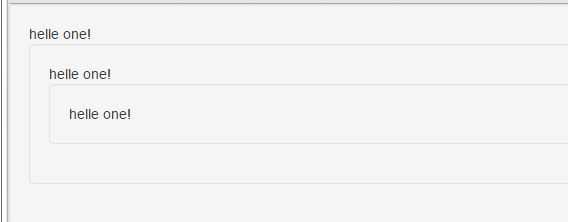
结果如下:

6.Angular中的注入器($injector)两种注入方式:
 1 <!DOCTYPE html>
 2 <html lang="en" ng-app="demo">
 3 <head>
 4     <meta charset="UTF-8">
 5     <title>demo</title>
 6     <meta name="viewport" content="width=device-width,initial-scale=1.0,user-scalable=no">
 7     <link rel="stylesheet" href="../bootstrap.css">
 8 </head>
 9 <body>
10 <div ng-controller="one">{{msg}}</div>
11 <div ng-controller="two">{{msg}}</div>
12 <script src="../angular.js"></script>
13 <script>
14     (function(){
15         angular.module("demo",[])
16             //第一种直接声明注入(有缺陷,在gulp,webpack打包时,会把function(a)的参数压缩掉,导致声明失败)
17             .controller("one",function($scope,$rootScope){
18                 //$injector
19                 $scope.msg = "hi";
20             })
21             //第二种经常采用以下写法
22             .controller("two",["$scope","$rootScope",function($s,$rs){
23                 $s.msg = "hello";
24             }])
25     })()
26 </script>
27 </body>
28 </html>
7.Angular中的run()方法:
run是Angular中的main方法,是 Angular 的入口方法
特点:run只会在angular生命周期内,只会调用一次
用于Angular中的条件判断,比如登录时的用户名和密码,只会调用一次存入localstorage,判断是否允许登录
 1 <!DOCTYPE html>
 2 <html lang="en" ng-app="demo">
 3 <head>
 4     <meta charset="UTF-8">
 5     <title>demo</title>
 6     <meta name="viewport" content="width=device-width,initial-scale=1.0,user-scalable=no">
 7     <link rel="stylesheet" href="../bootstrap.css">
 8 </head>
 9 <body>
10 <script src="../angular.js"></script>
11 <script>
12     (function(){
13         angular.module("demo",[])
14             //整个程序级别
15             .run(function(){
16                 console.log("hello run");
17                 //条件的判断 localstorage
18                 window.localStorage.setItem("ng","haha");
19             })
20     })()
21 </script>
22 </body>
23 </html>
Angular作用域
$rootScope类:
 1 <!DOCTYPE html>
 2 <html lang="en" ng-app="demo">
 3 <head>
 4     <meta charset="UTF-8">
 5     <title>$rootScope</title>
 6     <meta name="viewport" content="width=device-width,initial-scale=1.0,user-scalable=no">
 7     <link rel="stylesheet" href="../bootstrap.css">
 8 </head>
 9 <body>
10 <div class="well" ng-controller="oneCtrl">
11     {{msg}} {{txt}}
12     <div  class="well" ng-controller="twoCtrl">
13         {{msg}}{{txt}}
14         <div class="well"  ng-controller="threeCtrl">
15             {{msg}}{{txt}}
16         </div>
17     </div>
18 </div>
19 <script src="../angular.js"></script>
20 <script>
21     (function(){
22         angular.module("demo",[])
23             .controller("oneCtrl",function($scope,$rootScope){
24                 $scope.msg = "helle one!";
25
26             })
27             .controller("twoCtrl",function($scope){
28 //                    $scope.msg = "helle two!"
29             })
30             .controller("threeCtrl",function($scope,$rootScope){
31 //                    $scope.msg = "helle three!"
32                 $rootScope.txt = "hello root";
33             })
34     })()
35 </script>
36 </body>
37 </html>
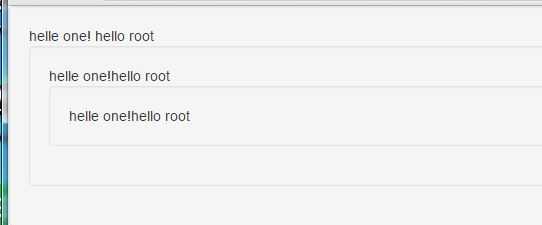
效果如下:

$scope类
1.作用域
如案例:$rootScope,$scope,var msg2 = "hello2"的不同作用域
 1 <!DOCTYPE html>
 2 <html lang="en" ng-app="demo">
 3 <head>
 4     <meta charset="UTF-8">
 5     <title>demo</title>
 6     <meta name="viewport" content="width=device-width,initial-scale=1.0,user-scalable=no">
 7     <link rel="stylesheet" href="../bootstrap.css">
 8 </head>
 9 <body >
10 <div ng-controller="one">
11     {{msg}}
12     {{msg2}}
13     {{txt}}
14 </div>
15 <div ng-controller="tow">
16     {{msg}}
17     {{txt}}
18 </div>
19 <script src="../angular.js"></script>
20 <script>
21     (function(){
22         angular.module("demo",[])
23             .controller("one",function($scope,$rootScope){
24                 $scope.msg = "hello";
25                 var msg2 = "hello2";
26                 $rootScope.txt = "hello3"
27             })
28             .controller("tow",function($scope){
29
30             })
31     })()
32 </script>
33 </body>
34 </html>
效果如下:

2.$scope事件数据传递
 1 <!DOCTYPE html>
 2 <html lang="en" ng-app="demo">
 3 <head>
 4     <meta charset="UTF-8">
 5     <title>demo</title>
 6     <meta name="viewport" content="width=device-width,initial-scale=1.0,user-scalable=no">
 7     <link rel="stylesheet" href="../bootstrap.css">
 8 </head>
 9 <body>
10 <div class="well" ng-controller="one">
11      {{msg}}
12     <div class="well" ng-controller="two">
13
14          <a class="btn btn-danger" ng-click="sendEvent()">sendEvent</a>
15         <div class="well" ng-controller="three">
16             {{msg}}
17         </div>
18     </div>
19 </div>
20 <script src="../angular.js"></script>
21 <script>
22     (function(){
23         angular.module("demo",[])
24             .controller("one",["$scope",function(s){
25                 s.$on("sendOne",function(event,data){
26                     s.msg = data;
27                 });
28             }])
29             .controller("two",["$scope",function(s){
30                 s.sendEvent = function(){
31                     s.$emit("sendOne","a gift from two ");
32                     s.$broadcast("sendThree","a command from two");
33                 }
34             }])
35             .controller("three",["$scope",function(s){
36                 s.$on("sendThree",function(event,data){
37                     s.msg = data;
38                 });
39             }])
40     })()
41 </script>
42 </body>
43 </html>
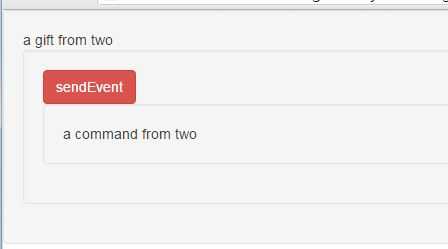
效果如下:

3.AngularJS在什么情况下才执行双向绑定?
dirty checking 绑定的值与上一次缓存中的值有没有变化,如果有变化,数据dirty,怎么才能知道绑定的值发生了变化呢?
当我们在$scope上面绑定一个属性的时候,angular就会在这个属性上添加一个$$watcher(): 多长时间后缓存一次数据。
$watcher会执行值的比较。当这次比较的值不相等的时候,表示watcher的值,需要进行数据同步
data $digest $watherlist date ->$wathe()->把model-view之间的数据进行更新同步
 1 <!DOCTYPE html>
 2 <html lang="en" ng-app="demo">
 3 <head>
 4     <meta charset="UTF-8">
 5     <title>demo</title>
 6     <meta name="viewport" content="width=device-width,initial-scale=1.0,user-scalable=no">
 7     <link rel="stylesheet" href="../bootstrap.css">
 8 </head>
 9 <body ng-controller="one">
10     <input type="text" ng-model="txt">  {{txt}}
11     {{date}}
12     <script src="../angular.js"></script>
13     <script>
14         (function(){
15             angular.module("demo",[])
16                 .controller("one",function($scope,$interval){
17                     $scope.date = new Date().toLocaleTimeString()
18                     //$interval(触发dirtychecking) == setInterval
19                     $interval(function(){
20                         $scope.date = new Date().toLocaleTimeString()
21                     },1000);
22                 })
23         })()
24     </script>
25 </body>
26 </html>
效果如下:

敬请留言指正补充交流!
(未完待续~~)
标签:cli tar 静态属性 mit 条件判断 strong cal ble href
原文地址:http://www.cnblogs.com/xiuhongbin/p/angular2.html