标签:plane 画线 变换 engine cli 恢复 ini 开启 target
思路:
在uinity中既可以将屏幕坐标转换为世界坐标,也可以将世界坐标转换为屏幕坐标。这样的话我们就可以通过判断物体在世界坐标转换为平幕坐标是否在鼠标框选的矩形区域坐标内,来判断物体是否在框选范围。
使用到的API:
GL:http://wiki.ceeger.com/script/unityengine/classes/gl/gl,用来实现在鼠标拖动时在屏幕中绘制出矩形区域。
Camera:http://wiki.ceeger.com/script/unityengine/classes/camera/camera.worldtoscreenpoint,将世界坐标转换为屏幕坐标
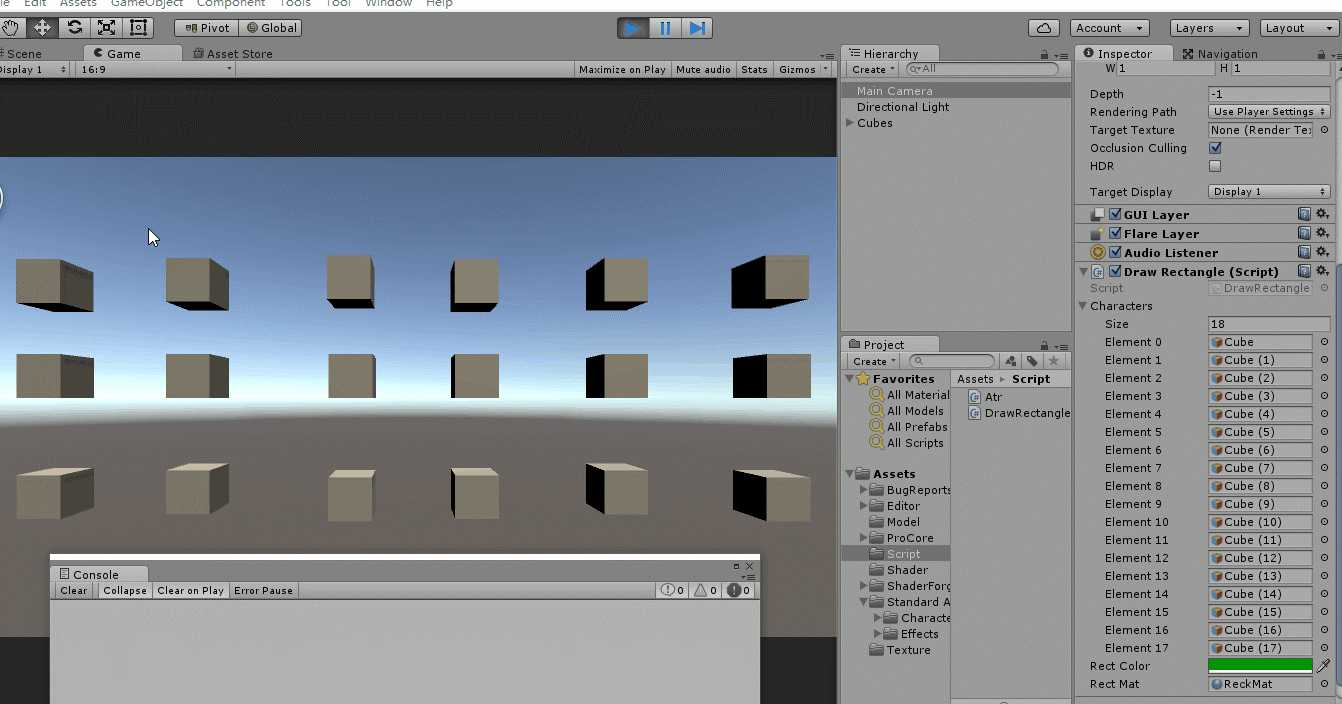
将可选取的对象放置在 characters集合中,rectMat的材质为使用sprite下的default类型的shader的材质即可。
using UnityEngine;
using System.Collections;
using System.Collections.Generic;

public class SelectObjects : MonoBehaviour
{

    public List<GameObject> characters;
    public Color rectColor = Color.green;

    private Vector3 start = Vector3.zero;//记下鼠标按下位置

   // private Material rectMat = null;//画线的材质 不设定系统会用当前材质画线 结果不可控
    public Material rectMat = null;//这里使用Sprite下的defaultshader的材质即可

    private bool drawRectangle = false;//是否开始画线标志

    // Use this for initialization

    void Start()
    {

//        rectMat = new Material("Shader \"Lines/Colored Blended\" {" +
//
//        "SubShader { Pass { " +
//
//        "    Blend SrcAlpha OneMinusSrcAlpha " +
//
//        "    ZWrite Off Cull Off Fog { Mode Off } " +
//
//        "    BindChannels {" +
//
//        "      Bind \"vertex\", vertex Bind \"color\", color }" +
//
//        "} } }");//生成画线的材质

        rectMat.hideFlags = HideFlags.HideAndDontSave;

        rectMat.shader.hideFlags = HideFlags.HideAndDontSave;//不显示在hierarchy面板中的组合,不保存到场景并且卸载Resources.UnloadUnusedAssets不卸载的对象。

    }


    void Update()
    {

        if (Input.GetMouseButtonDown(0))
        {

            drawRectangle = true;//如果鼠标左键按下 设置开始画线标志

            start = Input.mousePosition;//记录按下位置

        }
        else if (Input.GetMouseButtonUp(0))
        {

            drawRectangle = false;//如果鼠标左键放开 结束画线
            checkSelection(start,Input.mousePosition);
        }
    }


    void OnPostRender()
    {//画线这种操作推荐在OnPostRender()里进行 而不是直接放在Update,所以需要标志来开启

        if (drawRectangle)
        {

            Vector3 end = Input.mousePosition;//鼠标当前位置

            GL.PushMatrix();//保存摄像机变换矩阵,把投影视图矩阵和模型视图矩阵压入堆栈保存

            if (!rectMat)

                return;

            rectMat.SetPass(0);//为渲染激活给定的pass。

            GL.LoadPixelMatrix();//设置用屏幕坐标绘图

            GL.Begin(GL.QUADS);//开始绘制矩形

            GL.Color(new Color(rectColor.r, rectColor.g, rectColor.b, 0.1f));//设置颜色和透明度,方框内部透明

            //绘制顶点
            GL.Vertex3(start.x, start.y, 0);

            GL.Vertex3(end.x, start.y, 0);

            GL.Vertex3(end.x, end.y, 0);

            GL.Vertex3(start.x, end.y, 0);

            GL.End();


            GL.Begin(GL.LINES);//开始绘制线

            GL.Color(rectColor);//设置方框的边框颜色 边框不透明

            GL.Vertex3(start.x, start.y, 0);

            GL.Vertex3(end.x, start.y, 0);

            GL.Vertex3(end.x, start.y, 0);

            GL.Vertex3(end.x, end.y, 0);

            GL.Vertex3(end.x, end.y, 0);

            GL.Vertex3(start.x, end.y, 0);

            GL.Vertex3(start.x, end.y, 0);

            GL.Vertex3(start.x, start.y, 0);

            GL.End();

            GL.PopMatrix();//恢复摄像机投影矩阵

        }

    }

    //检测被选择的物体
    void checkSelection(Vector3 start, Vector3 end)
    {

        Vector3 p1 = Vector3.zero;

        Vector3 p2 = Vector3.zero;

        if (start.x > end.x)
        {//这些判断是用来确保p1的xy坐标小于p2的xy坐标,因为画的框不见得就是左下到右上这个方向的

            p1.x = end.x;

            p2.x = start.x;

        }

        else {

            p1.x = start.x;

            p2.x = end.x;

        }

        if (start.y > end.y)
        {

            p1.y = end.y;

            p2.y = start.y;

        }

        else {

            p1.y = start.y;

            p2.y = end.y;

        }

        foreach (GameObject obj in characters)
        {//把可选择的对象保存在characters数组里

            Vector3 location = Camera.main.WorldToScreenPoint(obj.transform.position);//把对象的position转换成屏幕坐标

            if (location.x < p1.x || location.x > p2.x || location.y < p1.y || location.y > p2.y

            || location.z < Camera.main.nearClipPlane || location.z > Camera.main.farClipPlane)//z方向就用摄像机的设定值,看不见的也不需要选择了

            {
                //disselecting(obj);//上面的条件是筛选 不在选择范围内的对象,然后进行取消选择操作,比如把物体放到default层,就不显示轮廓线了
                print("---"+obj.name);
            }

            else

            {
                //selecting(obj);//否则就进行选中操作,比如把物体放到画轮廓线的层去
                print("+++" + obj.name);

            }

        }

    }
}
效果:

标签:plane 画线 变换 engine cli 恢复 ini 开启 target
原文地址:http://www.cnblogs.com/Firepad-magic/p/6012957.html