标签:count() 数据 返回 启动 person header 逻辑 技术 实现
WebAPi作为接口请求的一种服务,当我们请求该服务时我们目标是需要快速获取该服务的数据响应,这种情况在大型项目中尤为常见,此时迫切需要提高WebAPi的响应机制,当然也少不了前端需要作出的努力,这里我们只讲述在大小型项目中如何利用后台逻辑尽可能最大限度提高WebAPi性能,我们从以下几个方面来进行阐述。
在.NET里面默认的序列化器是JavaScriptSrializer,都懂的,性能实在是差,后来出现了Json.NET,以至于在目前创建项目时默认用的序列化器是Json.NET,它被.NET开发者所广泛使用,它的强大和性能毋庸置疑,以至于现在Json.NET版本已经更新到9.0版本,但是在大型项目中一旦数据量巨大时,此时用Json.NET来序列化数据会略慢,这时我们就可以尝试用Jil,它里面的APi也足够我们用,我们讲述几个常用的APi并一起对比Json.NET来看看:
在Json.NET中是这样序列化的
JsonConvert.SerializeObject(obj)
而在Jil中序列化数据是这样的
JSON.Serialize(obj)
此时对于Jil序列化数据返回的字符串形式有两种
(1)直接接收
 object obj = new { Foo = 123, Bar = "abc" };
 string s = Jil.JSON.Serialize(obj)
(2)传递给StringWriter来接收
var obj = new { Foo = 123, Bar = "abc" };
var t = new StringWriter();
JSON.SerializeDynamic(obj, t);
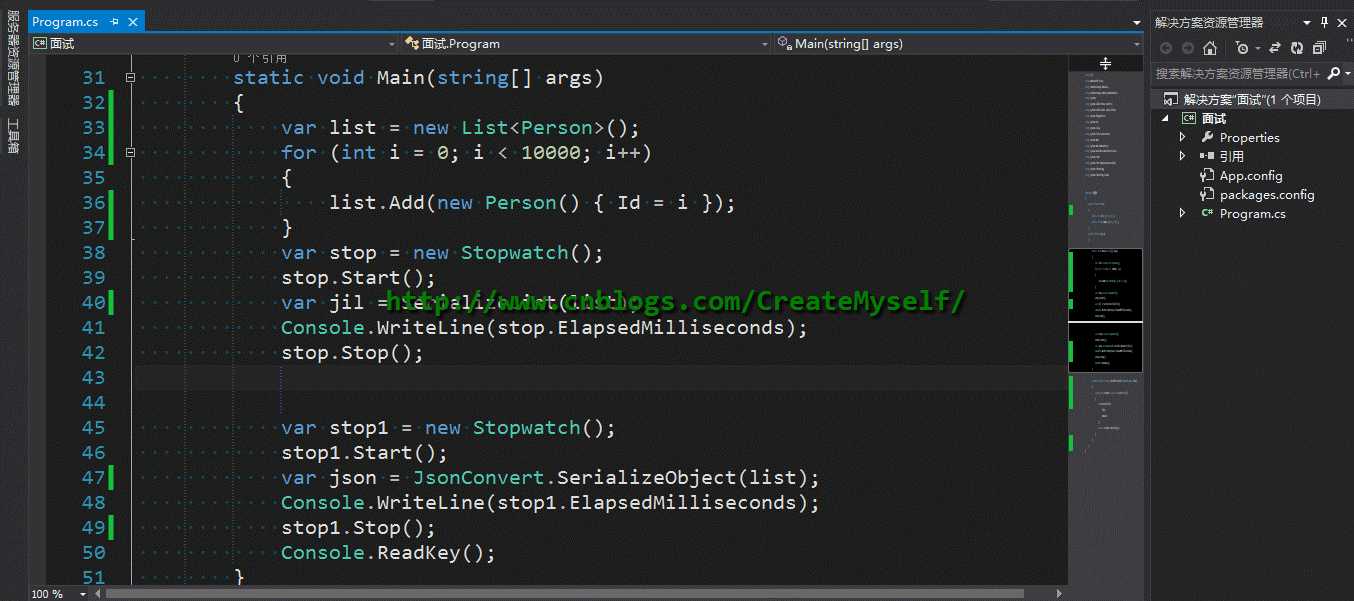
上述说到对于数据量巨大时用Jil其效率高于Json.NET,下来我们来验证序列化10000条数据
序列化类:
    public class Person
    {
        public int Id { get; set; }
        public string Name { get; set; }
    }
测试数据:
            var list = new List<Person>();
            for (int i = 0; i < 10000; i++)
            {
                list.Add(new Person(){ Id = i });
            }
            var stop = new Stopwatch();
            stop.Start();
            var jil = SerializeList(list);
            Console.WriteLine(stop.ElapsedMilliseconds);
            stop.Stop();

            var stop1 = new Stopwatch();
            stop1.Start();
            var json = JsonConvert.SerializeObject(list);
            Console.WriteLine(stop1.ElapsedMilliseconds);
            stop1.Stop();
Jil序列化封装:
        private static string SerializeList(List<Person> list)
        {
            using (var output = new StringWriter())
            {
                JSON.Serialize(
                    list,
                    output
                );
                return output.ToString();
            }
        }
我们来看看测试用例:
 此时利用Json.NET序列化数据明显优于Jil,但序列化数据为10万条数,Jil所耗时间会接近于Json.NET,当数据高于100万条数时这个时候就可以看出明显的效果,如下:

此时Jil序列化数据不到1秒,而利用Json.NET则需要足足接近3秒。
当将代码进行如下修改时,少量数据也是优于Json.NET,数据量越大性能越明显,感谢园友【calvinK】提醒:
            var list = new List<int>();
            for (int i = 0; i < 10000; i++)
            {
                list.Add(i);
            }

            var stop = new Stopwatch();
            stop.Start();
            for (var i = 0; i < 1000; i++)
            {
                var jil = SerializeList(list);

            }

            Console.WriteLine(stop.ElapsedMilliseconds);
            stop.Stop();
            var stop1 = new Stopwatch();
            stop1.Start();
            for (var i = 0; i < 1000; i++)
            {
                var json = JsonConvert.SerializeObject(list);

            }
            Console.WriteLine(stop1.ElapsedMilliseconds);
            stop1.Stop();
结果如下:

关于Jil的序列化还有一种则是利用JSON.SerializeDynamic来序列化那些在编译时期无法预测的类型。 至于反序列化也是和其序列化一一对应。
下面我们继续来看看Jil的其他特性。若在视图上渲染那些我们需要的数据,而对于实体中不必要用到的字段我们就需要进行过滤,此时我们用到Jil中的忽略属性。
[JilDirective(Ignore = true)]
我们来看看:
    public class Person
    {
        [JilDirective(Ignore = true)]
        public int Id { get; set; }
        public int Name { get; set; }
    }
            var jil = SerializeList(new Person() { Id = 1, Name = 123 } );
            Console.WriteLine(jil);

另外在Jil中最重要的属性则是Options,该属性用来配置返回的日期格式以及其他配置,若未用其属性默认利用Json.NET返回如【\/Date(143546676)\/】,我们来看下:
var jil = SerializeList(new Person() { Id = 1, Name = "123", Time = DateTime.Now });
进行如下设置:
               JSON.Serialize(
                    p,
                    output,
                    new Options(dateFormat: DateTimeFormat.ISO8601)
                );

有关序列化继承类时我们同样需要进行如下设置,否则无法进行序列化
new Options(dateFormat: DateTimeFormat.ISO8601, includeInherited: true)
Jil的性能绝对优于Json.NET,Jil一直在追求序列化的速度所以在更多可用的APi可能少于Json.NET或者说没有Json.NET灵活,但是足以满足我们的要求。
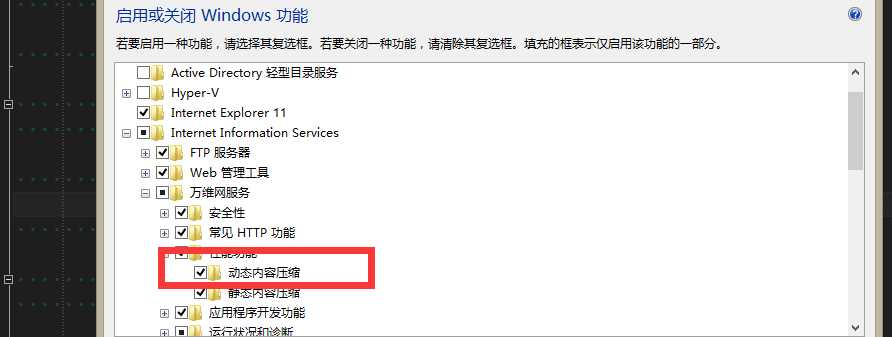
启动IIS动态内容压缩

利用现成的轮子,下载程序包【DotNetZip】即可,此时我们则需要在执行方法完毕后来进行内容的压缩即可,所以我们需要重写【 ActionFilterAttribute 】过滤器,在此基础上进行我们的压缩操作。如下:
    public class DeflateCompressionAttribute : ActionFilterAttribute
    {
        public override void OnActionExecuted(HttpActionExecutedContext actionContext)
        {
            var content = actionContext.Response.Content;
            var bytes = content == null ? null : content.ReadAsByteArrayAsync().Result;
            var compressContent = bytes == null ? new byte[0] : CompressionHelper.DeflateByte(bytes);
            actionContext.Response.Content = new ByteArrayContent(compressContent);
            actionContext.Response.Content.Headers.Remove("Content-Type");
            if (string.Equals(actionContext.Request.Headers.AcceptEncoding.First().Value, "deflate"))
                actionContext.Response.Content.Headers.Add("Content-encoding", "deflate");
            else
                actionContext.Response.Content.Headers.Add("Content-encoding", "gzip");
            actionContext.Response.Content.Headers.Add("Content-Type", "application/json;charset=utf-8");
            base.OnActionExecuted(actionContext);
        }

    }
利用DotNetZip进行快速压缩:
    public class CompressionHelper
    {
        public static byte[] DeflateByte(byte[] str)
        {
            if (str == null)
            {

                return null;

            }
            using (var output = new MemoryStream())
            {

                using (var compressor = new Ionic.Zlib.GZipStream(

                output, Ionic.Zlib.CompressionMode.Compress,

                Ionic.Zlib.CompressionLevel.BestSpeed))
                {

                    compressor.Write(str, 0, str.Length);

                }

                return output.ToArray();

            }

        }

    }
我们来对比看一下未进行内容压缩前后结果响应的时间以及内容长度,给出如下测试类:
        [HttpGet]
        [DeflateCompression]
        public async Task<IHttpActionResult> GetZipData()
        {
            Dictionary<object, object> dict = new Dictionary<object, object>();
            List<Employee> li = new List<Employee>();
            li.Add(new Employee { Id = "2", Name = "xpy0928", Email = "a@gmail.com" });
            li.Add(new Employee { Id = "3", Name = "tom", Email = "b@mail.com" });
            li.Add(new Employee { Id = "4", Name = "jim", Email = "c@mail.com" });
            li.Add(new Employee { Id = "5", Name = "tony",Email = "d@mail.com" });

            dict.Add("Details", li);return Ok(dict);

        }
结果运行错误:

这里应该是序列化出现问题,在有些浏览器返回的XML数据,我用的是搜狗浏览器,之前学习WebAPi时其返回的就是XML数据,我们试着将其返回为Json数据看看。
            var formatters = config.Formatters.Where(formatter =>
                 formatter.SupportedMediaTypes.Where(media =>
                 media.MediaType.ToString() == "application/xml" || media.MediaType.ToString() == "text/html").Count() > 0) //找到请求头信息中的介质类型
                 .ToList();

            foreach (var match in formatters)
            {
                config.Formatters.Remove(match);
            }
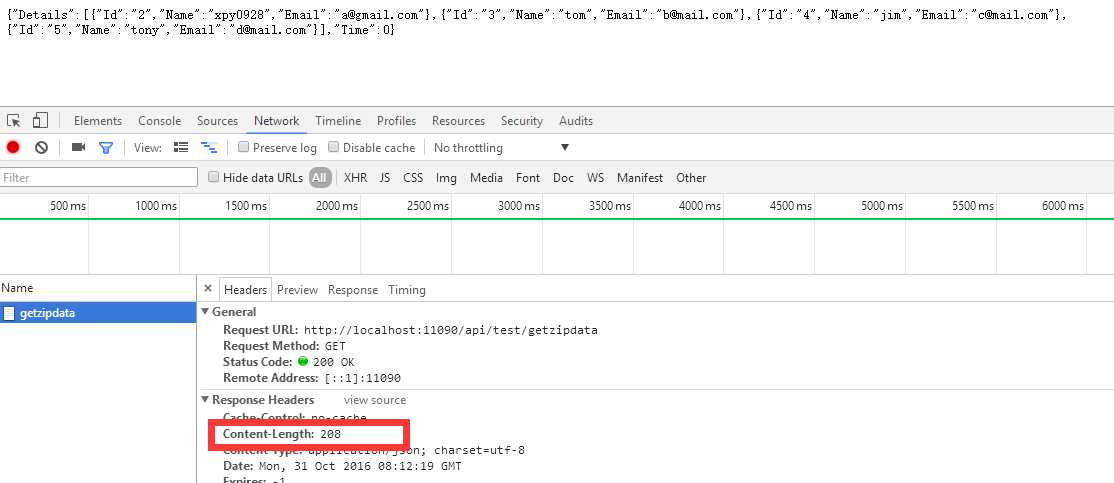
我们未将其压缩后响应的长度如下所示:

压缩后结果明显得到提升

接下来我们自定义用.NET内置的压缩模式来实现看看
既然响应的内容是通过HttpContent,我们则需要在重写过滤器ActionFilterAttribute的基础上来实现重写HttpContent,最终根据获取到浏览器支持的压缩格式对数据进行压缩并写入到响应流中即可。
    public class CompressContent : HttpContent
    {
        private readonly string _encodingType;
        private readonly HttpContent _originalContent;
        public CompressContent(HttpContent content, string encodingType = "gzip")
        {
            _originalContent = content;
            _encodingType = encodingType.ToLowerInvariant();
            Headers.ContentEncoding.Add(encodingType);
        }
        protected override bool TryComputeLength(out long length)
        {
            length = -1;
            return false;
        }
        protected override Task SerializeToStreamAsync(Stream stream, TransportContext context)
        {
            Stream compressStream = null;
            switch (_encodingType)
            {
                case "gzip":
                    compressStream = new GZipStream(stream, CompressionMode.Compress, true);
                    break;
                case "deflate":
                    compressStream = new DeflateStream(stream, CompressionMode.Compress, true);
                    break;
                default:
                    compressStream = stream;
                    break;
            }
            return _originalContent.CopyToAsync(compressStream).ContinueWith(tsk =>
            {
                if (compressStream != null)
                {
                    compressStream.Dispose();
                }
            });
        }
    }
重写过滤器特性
    public class CompressContentAttribute : ActionFilterAttribute
    {
        public override void OnActionExecuted(HttpActionExecutedContext context)
        {
            var acceptedEncoding = context.Response.RequestMessage.Headers.AcceptEncoding.First().Value;
            if (!acceptedEncoding.Equals("gzip", StringComparison.InvariantCultureIgnoreCase)
            && !acceptedEncoding.Equals("deflate", StringComparison.InvariantCultureIgnoreCase))
            {
                return;
            }
            context.Response.Content = new CompressContent(context.Response.Content, acceptedEncoding);
        }

    }
关于其响应结果对比则不再叙述,和上述利用DotNetZip结果一致。
当写压缩内容时,我发现一个问题,产生了疑问, context.Response.Content.Headers 和 context.Response.Headers 为何响应中有两个头Headers呢?,没有去细究这个问题,大概说说个人想法。
我们看看context.Response.Headers中的定义,其摘要如下:
        // 摘要:
        //     Gets a value that indicates if the HTTP response was successful.
        //
        // 返回结果:
        //     Returns System.Boolean.A value that indicates if the HTTP response was successful.
        //     true if System.Net.Http.HttpResponseMessage.StatusCode was in the range 200-299;
        //     otherwise false.
而context.Response.Content.Headers中的定义,其摘要如下:
        // 摘要:
        //     Gets the HTTP content headers as defined in RFC 2616.
        //
        // 返回结果:
        //     Returns System.Net.Http.Headers.HttpContentHeaders.The content headers as
        //     defined in RFC 2616.
对于Content.Headers中的Headers的定义是基于RFC 2616即Http规范,想必这么做的目的是将Http规范隔离开来,我们能够方便我们实现自定义代码或者设置有关响应头信息最终直接写入到Http的响应流中。我们更多的是操作Content.Headers所以将其区别开来,或许是出于此目的吧,有知道的园友可以给出合理的解释,这里只是我的个人揣测。
缓存大概是谈的最多的话题,当然也有大量的缓存组件供我们使用,这里只是就比较大的粒度来谈论这个问题,对于一些小的项目还是有一点作用,大的则另当别论。
当我们进行请求可以查看响应头中会有这样一个字段【Cache-Control】,如果我们未做任何处理当然则是其值为【no-cache】。在任何时期都不会进行缓存,都会重新进行请求数据。这个属性里面对应的值还有private/public、must-revalidate,当我们未指定max-age的值时且设置值为private、no-cache、must-revalidate此时的请求都会去服务器获取数据。这里我们首先了解下关于Http协议的基本知识。
【1】若设置为private,则其不能共享缓存意思则是不会在本地缓存页面即对于代理服务器而言不会复制一份,而如果对于用户而言其缓存更加是私有的,只是对于个人而言,用户之间的缓存相互独立,互不共享。若为public则说明每个用户都可以共享这一块缓存。对于这二者打个比方对于博客园的推送的新闻是公开的,则可以设置为public共享缓存,充分利用缓存。
【2】max-age则是缓存的过期时间,在某一段时间内不会去重新请求从服务器获取数据,直接在本地浏览器缓存中获取。
【3】must-revalidate从字面意思来看则是必须重新验证,也就是对于过期的数据进行重新获取新的数据,那么它到底什么时候用呢?归根结底一句话:must-revalidate主要与max-age有关,当设置了max-age时,同时也设置了must-revalidate,等缓存过期后,此时must-revalidate则会告诉服务器来获取最新的数据。也就是说当设置max-age = 0,must-revalidate = true时可以说是与no-cache = true等同。
下面我们来进行缓存控制:
    public class CacheFilterAttribute : ActionFilterAttribute
    {
        public int CacheTimeDuration { get; set; }
        public override void OnActionExecuted(HttpActionExecutedContext actionExecutedContext)
        {
            actionExecutedContext.Response.Headers.CacheControl = new CacheControlHeaderValue
            {
                MaxAge = TimeSpan.FromSeconds(CacheTimeDuration),
                MustRevalidate = true,
                Public = true
            };
        }
    }
添加缓存过滤特性:
        [HttpGet]
        [CompressContent]
        [CacheFilter(CacheTimeDuration = 100)]
        public async Task<IHttpActionResult> GetZipData()
        {
            var sw = new Stopwatch();
            sw.Start();
            Dictionary<object, object> dict = new Dictionary<object, object>();
            List<Employee> li = new List<Employee>();
            li.Add(new Employee { Id = "2", Name = "xpy0928", Email = "a@gmail.com" });
            li.Add(new Employee { Id = "3", Name = "tom", Email = "b@mail.com" });
            li.Add(new Employee { Id = "4", Name = "jim", Email = "c@mail.com" });
            li.Add(new Employee { Id = "5", Name = "tony", Email = "d@mail.com" });

            sw.Stop();

            dict.Add("Details", li);
            dict.Add("Time", sw.Elapsed.Milliseconds);

            return Ok(dict);

        }
结果如下:

当在大型项目中会出现并发现象,常见的情况例如注册,此时有若干个用户同时在注册时,则会导致当前请求阻塞并且页面一直无响应最终导致服务器崩溃,为了解决这样的问题我们需要用到异步方法,让多个请求过来时,线程池分配足够的线程来处理多个请求,提高线程池的利用率 !如下:
         public async Task<IHttpActionResult> Register(Employee model)
         {
            var result = await UserManager.CreateAsync(model);
            return Ok(result);
         }
本节我们从以上几方面讲述了在大小项目中如何尽可能最大限度来提高WebAPi的性能,使数据响应更加迅速,或许还有其他更好的解决方案,至少以上所述也可以作为一种参考,WebAPi一个很轻量的框架,你值得拥有,see u。
标签:count() 数据 返回 启动 person header 逻辑 技术 实现
原文地址:http://www.cnblogs.com/Leo_wl/p/6025164.html