标签:wpf com 顺序 png font blog button 补充 拉伸
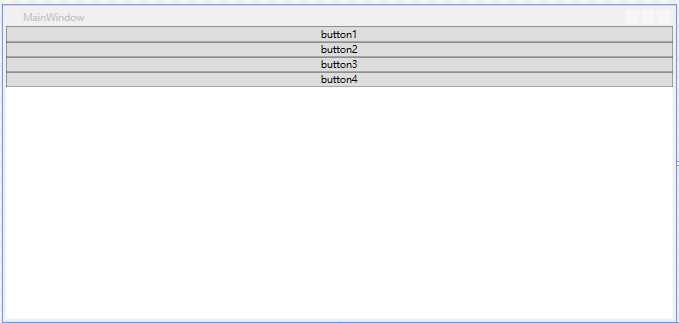
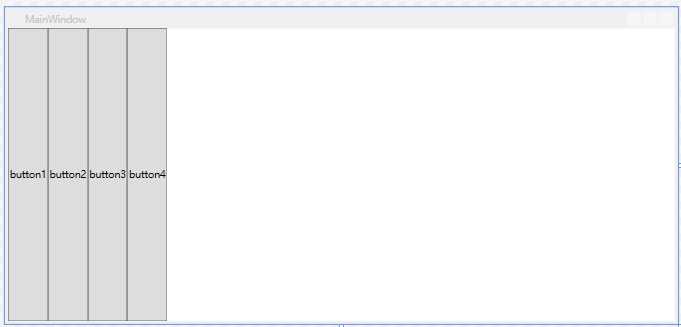
1、StackPanel:顾名思义 堆栈面板,通过Orientation属性设置子元素的布局排列方向为“Vertical”(垂直)和“Horizontal”(水平),不写其默认值为“Vertical”,当设置为“Vertical”时子元素会沿水平方向拉伸,反之设置为“Horizontal”时子元素会沿垂直方向拉伸。
1 <StackPanel>
2         <Button Content="button1"></Button>
3         <Button Content="button2"></Button>
4         <Button Content="button3"></Button>
5         <Button Content="button4"></Button>
6     </StackPanel>
效果图:
1 <StackPanel Orientation="Horizontal">
2         <Button Content="button1"></Button>
3         <Button Content="button2"></Button>
4         <Button Content="button3"></Button>
5         <Button Content="button4"></Button>
6     </StackPanel>
效果图:
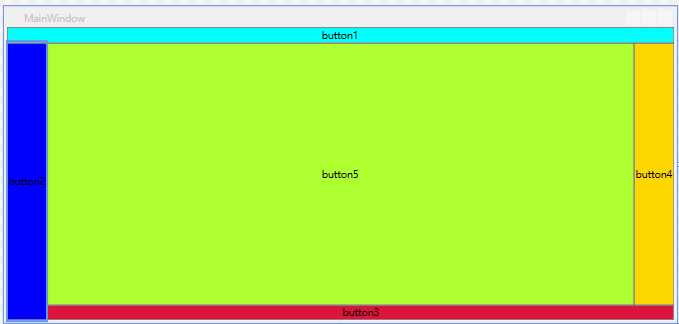
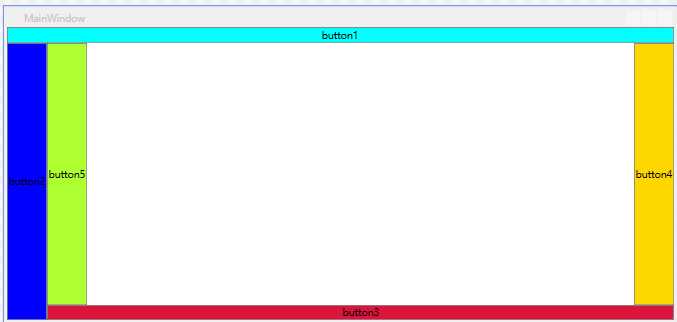
2、DockPanel:支持子元素停靠在面板的任意一条边上,通过附加属性Dock控制他们的停靠位置(Left、Top、Right、Bottom),填充空间按照“先到先得”的原则,最后一个加入面板的子元素将填满剩下的空间,如不想将最后加入面板的元素填满剩下的空间将属性LastChildFill值设为“False”,默认为“True”。
1  <DockPanel >
2         <Button Content="button1" DockPanel.Dock="Top" Background="Aqua"></Button>
3         <Button Content="button2" DockPanel.Dock="Left" Background="Blue"></Button>
4         <Button Content="button3" DockPanel.Dock="Bottom" Background="Crimson"></Button>
5         <Button Content="button4" DockPanel.Dock="Right" Background="Gold"></Button>
6         <Button Content="button5" Background="GreenYellow"></Button>
7     </DockPanel>
效果图:
1 <DockPanel LastChildFill="False">
2         <Button Content="button1" DockPanel.Dock="Top" Background="Aqua"></Button>
3         <Button Content="button2" DockPanel.Dock="Left" Background="Blue"></Button>
4         <Button Content="button3" DockPanel.Dock="Bottom" Background="Crimson"></Button>
5         <Button Content="button4" DockPanel.Dock="Right" Background="Gold"></Button>
6         <Button Content="button5" Background="GreenYellow"></Button>
7     </DockPanel>
效果图:
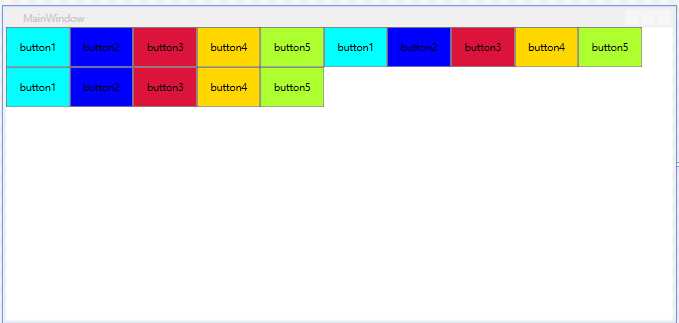
3、WrapPanel:可换行面板与StackPanel相似,通过Orientation属性设置子元素的排列顺序,从左至右按顺序位置定位子元素,当前行无法放下元素时断开至下一行,或者排序按照从上至下或从右至左的顺序进行,通过ItemHeight可以设置当前面板中所有子元素的高度,当然也有ItemWidth设置所有子元素的宽度。
 <WrapPanel Orientation="Horizontal" ItemHeight="50" ItemWidth="80" >
        <Button Content="button1" Background="Aqua"></Button>
        <Button Content="button2" Background="Blue"></Button>
        <Button Content="button3" Background="Crimson"></Button>
        <Button Content="button4" Background="Gold"></Button>
        <Button Content="button5" Background="GreenYellow"></Button>
        <Button Content="button1" Background="Aqua"></Button>
        <Button Content="button2" Background="Blue"></Button>
        <Button Content="button3" Background="Crimson"></Button>
        <Button Content="button4" Background="Gold"></Button>
        <Button Content="button5" Background="GreenYellow"></Button>
        <Button Content="button1" Background="Aqua"></Button>
        <Button Content="button2" Background="Blue"></Button>
        <Button Content="button3" Background="Crimson"></Button>
        <Button Content="button4" Background="Gold"></Button>
        <Button Content="button5" Background="GreenYellow"></Button>

    </WrapPanel>
效果图:
ps:如有写错或描述的不清楚的地方欢迎指正或补充。
标签:wpf com 顺序 png font blog button 补充 拉伸
原文地址:http://www.cnblogs.com/xueDongdong/p/6040983.html