标签:按钮 log 方法 效果 颜色 content 表示 ppc 先来
我们在手机上经常看到一堆选项,但是我们只能选择一个,那么在Android中,这个控件就叫做RadioButton,也就是单选按钮的意思,他们之所以能够达到只能选择一个的效果,是因为有一个RadioGroup这样一个组件。
这次,我们就来详细的解说一下RadioButton和RadioGroup这两个控件的关系和区别,以及如何去使它们默契的搭配在一起~
要实现RadioButton由两部分组成,也就是RadioButton和RadioGroup配合使用,其中RdioGroup是单选组合框,可以容纳多个RadioButton的一个容器。在没有RadioGroup的情况下,RadioButton可以全部被选中;当多个RadioButton被RadioGroup包含的情况下,RadioButton只可以选择一个,从而达到了单选的目的。并用setOnCheckChangeLinstener()来对单选按钮进行监听。
RadioGroup的相关属性:
1.RadioGroup.getCheckedRadioButtonId();
该方法可以获取选中的按钮
2.RadioGroup.clearCheck();
该方法可以清除选中状态
3.setOnCheckedChangeLintener(RadioGroup.OnCheckedChangeListener listener);
当一个单选按钮组中的单选按钮选中状态发生改变的时候调用的回调方法
4.RadioGroup.check(int id);
该方法可以通过传入ID来设置该选项为选中状态
5.addView(View child,int index, ViewGroup.LayoutParams params);
使用指定布局参数添加一个字视图(其中child是要添加的子视图,index是将要添加子视图的位置,params 所要添加的子视图的布局参数)
6.RadioButton.getText();
获取单选框的值
此外,RadioButton的checked属性设置为true,代码里调用RadioButton的check(id)方法,不会触发onCheckedChanged事件
然后,我们来看一下RadioButton和RadioGroup的关系:
1.RadioButton表示单个原型单选框,而RadioGroup是可以容纳多个RadioButton的容器
2.每个RadioGroup中的RadioButton同时只能有一个被选中
3.不同的RadioGroup中的RadioButton互不相干,即如果组A中有一个选中了,那么组B中依然可以有一个被选中。
4.在大部分场合下,一个RadioGroup中至少有两个RadioButton
5.在大部分场合下,一个RadioGroup中的RadioButton默认会有一个被选中,并建议您将它放在RadioGroup的起始位置
我们继续来看一下RadioButton和CheckBox的区别(是与CheckBox哦~):
1.单个RadioButton选中之后,通过点击无法变为未选中
单个CheckBox在选中后,通过点击可以变为未选中
2.一组RadioButton,只能同时选中一个
一组CheckBox,能同时选中多个
3.RadioButton在大部分UI框架中默认都以圆形表示
CheckBox在大部分UI框架中默认都以矩形表示
然后,我们来做一个小案例,来进一步的解释说明RadioButton和RadioGroup
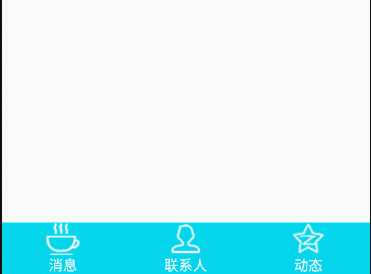
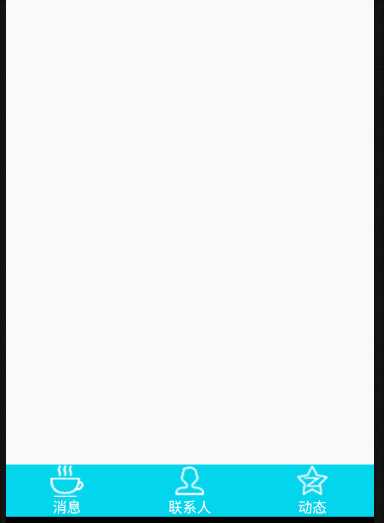
二话不说,我们先上图

今天哈,我们就用RadioButton和RadioGroup来实现我们上面的这个小案例。
首先,我们来分析一下,我们想要实现这个案例都需要准备写什么吧
我们根据上面的图,我们能看出来,我们需要图片~然而需要几张呢?这里事需要6张的哦!我们看起来是三张图片,但是当我们点击的时候,我们会发现图片变色了, 这就是另一张图片了。所以,我们需要准备6张图片。
这是资源。
接下来,我们来分析一下,我们都需要创建什么配置文件
不用想,我们首先必须要有一个主界面的布局文件,并且放上三个RadioButton,用一个RadioGroup把这三个RadioButton包裹起来,并设置相应属性
然后,我们还需要在drawable目录下创建一个改变字体颜色的配置文件,和三个改变图片的配置文件
然后,我们再来分析一下,在Activity中,我们应该如何去做
首先,我们需要获取到这个RadioGroup,然后为其设置点击事件,在点击事件中,我们实现点击按钮弹出一个吐司
好了,我们的分析就暂时到这里,接下来,我们根据我们的分析来做具体的实现
第一步、我们先来创建主界面的布局文件:
<?xml version="1.0" encoding="utf-8"?>
<LinearLayout xmlns:android="http://schemas.android.com/apk/res/android"
    xmlns:tools="http://schemas.android.com/tools"
    android:id="@+id/activity_main"
    android:layout_width="match_parent"
    android:layout_height="match_parent"
    android:orientation="vertical"
    tools:context="application.smile.myapplicationdemo.MainActivity">

    <RadioGroup
        android:id="@+id/rg"
        android:layout_width="match_parent"
        android:layout_height="wrap_content"
        android:background="@color/colorBackground"
        android:orientation="horizontal">

        <RadioButton
            android:id="@+id/radioButton_xiaoxi"
            android:layout_width="0dp"
            android:layout_height="wrap_content"
            android:layout_weight="1"
            android:button="@null"
            android:drawableTop="@drawable/bottom_icon_iamge_selector_xiaoxi"
            android:gravity="center"
            android:text="消息"
            android:textColor="@drawable/bottom_icon_text_selector" />

        <RadioButton
            android:id="@+id/radioButton_lianxiren"
            android:layout_width="0dp"
            android:layout_height="wrap_content"
            android:layout_weight="1"
            android:button="@null"
            android:drawableTop="@drawable/buttom_icon_image_selector_lianxiren"
            android:gravity="center"
            android:text="联系人"
            android:textColor="@drawable/bottom_icon_text_selector" />

        <RadioButton
            android:id="@+id/radioButton_dongtai"
            android:layout_width="0dp"
            android:layout_height="wrap_content"
            android:layout_weight="1"
            android:button="@null"
            android:drawableTop="@drawable/bottom_icon_image_selector_dongtai"
            android:gravity="center"
            android:text="动态"
            android:textColor="@drawable/bottom_icon_text_selector" />
    </RadioGroup>
</LinearLayout>
在这里,我们解释一下其中上面没有介绍到的属性
android:drawableTop 属性是用来将指定的图片显示到RadioButton的顶部,为了方便我们下面放文字
第二步、我们来看改变字体颜色的配置文件:
<?xml version="1.0" encoding="utf-8"?>
<selector xmlns:android="http://schemas.android.com/apk/res/android">
    <item android:state_checked="false" android:color="@color/colorWhite"></item>  这个是白色
    <item android:state_checked="true" android:color="@color/colorRed"></item>    这个是橘黄色
</selector>
第三步、我们来看改变那三张图片的配置文件:
改变“消息”:
<?xml version="1.0" encoding="utf-8"?>
<selector xmlns:android="http://schemas.android.com/apk/res/android">
    <item android:drawable="@mipmap/xiaoxi_unchecked" android:state_checked="false"></item>
    <item android:drawable="@mipmap/xiaoxi_selected" android:state_checked="true"></item>
</selector>
改变“联系人”:
<?xml version="1.0" encoding="utf-8"?>
<selector xmlns:android="http://schemas.android.com/apk/res/android">
    <item android:state_checked="false" android:drawable="@mipmap/lianxiren_unchecked"></item>
    <item android:state_checked="true" android:drawable="@mipmap/lianxiren_selected"></item>
</selector>
改变“动态”:
<?xml version="1.0" encoding="utf-8"?>
<selector xmlns:android="http://schemas.android.com/apk/res/android">
    <item android:state_checked="false" android:drawable="@mipmap/dongtai_unchecked"></item>
    <item android:state_checked="true" android:drawable="@mipmap/dongtai_selected"></item>
</selector>
我们来详细的看一下这些文件中的属性
其中android:state_checked 属性是设置状态的,如果是选中状态,就为true,否则为false。后面对应的 android:drawable 属性就是对应的图片
第四步、我们来看Activity中的具体实现:
public class MainActivity extends AppCompatActivity implements RadioGroup.OnCheckedChangeListener{

    @Override
    protected void onCreate(Bundle savedInstanceState) {
        super.onCreate(savedInstanceState);
        setContentView(R.layout.activity_main);
        initView();
    }

    private void initView() {
            //通过findViewById()来找到我们需要的RadioGroup
        RadioGroup radioGroup = (RadioGroup) findViewById(R.id.rg);
            //设置状态改变的事件
        radioGroup.setOnCheckedChangeListener(this);
    }

    /**
     * 重写的状态改变的事件的方法
     * @param group 单选组合框
     * @param checkedId 其中的每个RadioButton的Id
     */
    @Override
    public void onCheckedChanged(RadioGroup group, int checkedId) {
            //根据不同ID 弹出不同的吐司
        switch (group.getCheckedRadioButtonId()){
            case  R.id.radioButton_xiaoxi:
                Toast.makeText(this, "你点击了“消息”按钮", Toast.LENGTH_SHORT).show();
                break;
            case  R.id.radioButton_lianxiren:
                Toast.makeText(this, "你点击了“联系人”按钮", Toast.LENGTH_SHORT).show();
                break;
            case  R.id.radioButton_dongtai:
                Toast.makeText(this, "你点击了“动态”按钮", Toast.LENGTH_SHORT).show();
                break;
        }
    }
}
根据我们的思路,我们实现了这样的一个小案例,我们来测试一下吧。
 这样,我们就完美的实现了我们的小案例。
让程序写入生命,将代码融入灵魂
-------smile、zj
标签:按钮 log 方法 效果 颜色 content 表示 ppc 先来
原文地址:http://www.cnblogs.com/smilezj/p/6124262.html