1、主服务器信息
solin@mysql-master:~$ lsb_release -a
No LSB modules are available.
Distributor ID: Ubuntu
Description: Ubuntu 14.04.4 LTS
Release: 14.04
Codename: trusty
solin@mysql-master:~$ mysql -V
mysql Ver 14.14 Distrib 5.5.50, for debian-linux-gnu (x86_64) using readline 6.3
solin@mysql-master:~$ ip ro li
default via 192.168.119.1 dev eth0
192.168.119.0/24 dev eth0 proto kernel scope linksrc 192.168.119.95

2、从服务器信息
solin@mysql-slave:~$ lsb_release -a
No LSB modules are available.
Distributor ID: Ubuntu
Description: Ubuntu 14.04.4 LTS
Release: 14.04
Codename: trusty
solin@mysql-slave:~$ mysql -V
mysql Ver 14.14 Distrib 5.5.47, for debian-linux-gnu (x86_64) using readline 6.3
solin@mysql-slave:~$ ip ro ls
default via 192.168.119.1 dev eth0
192.168.119.0/24 dev eth0 proto kernel scope linksrc 192.168.119.137

1、修改my.cnf配置文件
vi /etc/mysql/my.cnf
在[mysqld]中添加:
bind-address = 192.168.119.137
server-id = 1
log_bin = /var/log/mysql/mysql-bin.log
binlog_do_db = include_database_name
binlog_ignore_db = include_database_name
注:
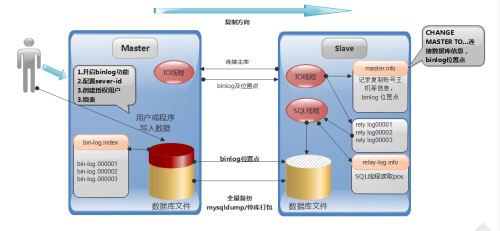
server-id 服务器唯一标识;
log_bin 启动MySQL二进制日志;
binlog_do_db 指定记录二进制日志的数据库;
binlog_ignore_db 指定不记录二进制日志的数据库。

2、查看log_bin是否生效
root@mysql-master:~# mysql -uroot -p -e "show variables like ‘log_bin‘;"
Enter password:
+---------------+-------+
| Variable_name | Value |
+---------------+-------+
| log_bin | ON |
+---------------+-------+

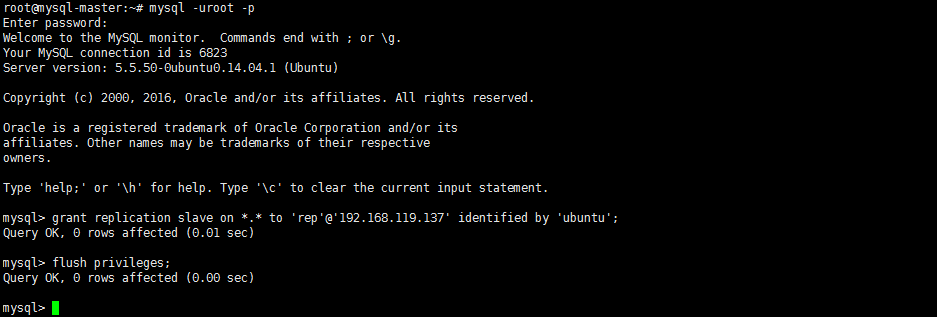
3、登陆主服务器MySQL创建从服务器用到的账户和权限
mysql> grant replication slave on *.* to ‘rep‘@‘192.168.119.137‘ identified by ‘ubuntu‘;
Query OK, 0 rows affected (0.01 sec)
mysql> grant replication slave on *.* to ‘masterbackup‘ @‘ 192.168.119.137‘ identified by ‘masterbackup‘;
mysql> flush privileges;
Query OK, 0 rows affected (0.00 sec)
4、重启mysql
root@mysql-master:~# /etc/init.d/mysql restart
![]()
5、主库上做备份
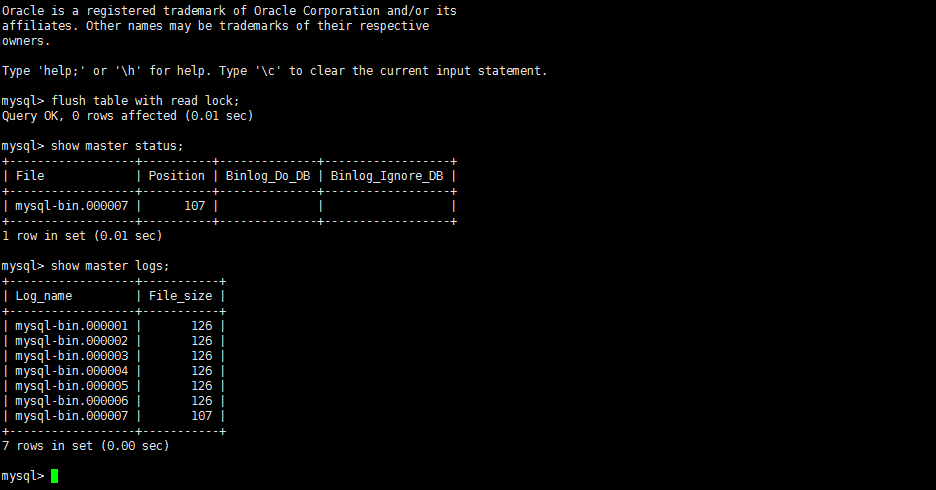
锁定数据库
mysql> flush table with read lock;
Query OK, 0 rows affected (0.01 sec)
mysql> show master status;
+------------------+----------+--------------+------------------+
| File | Position | Binlog_Do_DB | Binlog_Ignore_DB |
+------------------+----------+--------------+------------------+
| mysql-bin.000007 | 107 | | |
+------------------+----------+--------------+------------------+
1 row in set (0.01 sec)
mysql> show master logs;
+------------------+-----------+
| Log_name | File_size |
+------------------+-----------+
| mysql-bin.000001 | 126 |
| mysql-bin.000002 | 126 |
| mysql-bin.000003 | 126 |
| mysql-bin.000004 | 126 |
| mysql-bin.000005 | 126 |
| mysql-bin.000006 | 126 |
| mysql-bin.000007 | 107 |
+------------------+-----------+
7 rows in set (0.00 sec)
mysql>
这个窗口保持不变,重新打开一个终端
solin@mysql-master:~$ sudo su -
[sudo] password for solin:
root@mysql-master:~# mysqldump -uroot -p -A -B --events --master-data=2 >/opt/rep.sql
Enter password:
root@mysql-master:~# ls -l /opt/
总用量 4596
-rw-r--r-- 1 root root 4705979 9月 1 17:25 rep.sql

备份成功,回到刚才终端,解锁数据库
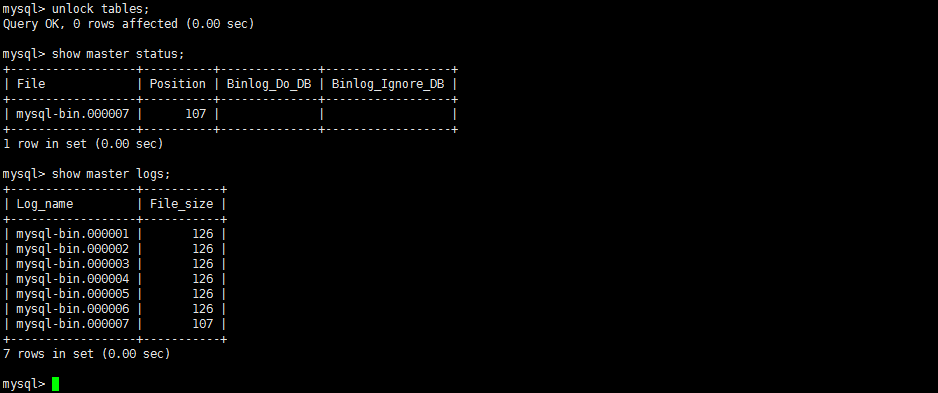
mysql> unlock tables;
Query OK, 0 rows affected (0.00 sec)
mysql> show master status;
+------------------+----------+--------------+------------------+
| File | Position | Binlog_Do_DB | Binlog_Ignore_DB |
+------------------+----------+--------------+------------------+
| mysql-bin.000007 | 107 | | |
+------------------+----------+--------------+------------------+
1 row in set (0.00 sec)
mysql> show master logs;
+------------------+-----------+
| Log_name | File_size |
+------------------+-----------+
| mysql-bin.000001 | 126 |
| mysql-bin.000002 | 126 |
| mysql-bin.000003 | 126 |
| mysql-bin.000004 | 126 |
| mysql-bin.000005 | 126 |
| mysql-bin.000006 | 126 |
| mysql-bin.000007 | 107 |
+------------------+-----------+
7 rows in set (0.00 sec)
授权运程登陆
vi /etc/mysql/my.cnf
bind-address = 192.168.119.0
登陆MySQL数据库
grant all privileges on *.* to root@"192.168.119.0" identified by "ubuntu" with grant option;

6、把主库的备份迁移到从库(从服务器可以远程连接)
root@mysql-master:~# mysql -uroot -h192.168.119.137 -p </opt/rep.sql
![]()
1、修改my.cnf配置文件
vi /etc/mysql/my.cnf
bind-address = 0.0.0.0
server-id = 2

2、授权数据库运程连接
登陆MySQL数据库
mysql> grant all privileges on *.* to root@"%" identified by "ubuntu" with grant option;
Query OK, 0 rows affected (0.01 sec)
mysql> flush privileges;
Query OK, 0 rows affected (0.00 sec)
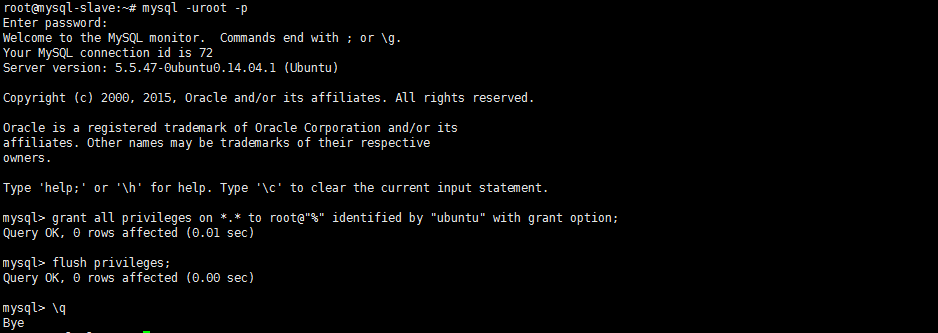
注:把主库的备份迁移到从库可以在此授权之后做
3、从库设置,登录Slave从服务器,连接Master主服务器:
mysql> CHANGE MASTER TO
-> MASTER_HOST=‘192.168.119.95‘,
-> MASTER_PORT=3306,
-> MASTER_USER=‘rep‘,
-> MASTER_PASSWORD=‘ubuntu‘,
-> MASTER_LOG_FILE=‘mysql-bin.000007‘,
-> MASTER_LOG_POS=107;
注:
master_host对应主服务器的IP地址:192.168.119.95;
master_port对应主服务器的端口: 3306;
master_log_file对应show master status显示的File列:mysql-bin.000007;
master_log_pos对应Position列:107

4、启动slave数据同步
mysql> start slave;
Query OK, 0 rows affected (0.00 sec)

查看Slave信息
1、show slave status\G
mysql> show slave status\G
*************************** 1. row ***************************
Slave_IO_State: Waiting for master to send event
Master_Host: 192.168.119.95
Master_User: rep
Master_Port: 3306
Connect_Retry: 60
Master_Log_File: mysql-bin.000008
Read_Master_Log_Pos: 107
Relay_Log_File: mysqld-relay-bin.000003
Relay_Log_Pos: 253
Relay_Master_Log_File: mysql-bin.000008
Slave_IO_Running: Yes
Slave_SQL_Running: Yes
Replicate_Do_DB:
Replicate_Ignore_DB:
Replicate_Do_Table:
Replicate_Ignore_Table:
Replicate_Wild_Do_Table:
Replicate_Wild_Ignore_Table:
Last_Errno: 0
Last_Error:
Skip_Counter: 0
Exec_Master_Log_Pos: 107
Relay_Log_Space: 711
Until_Condition: None
Until_Log_File:
Until_Log_Pos: 0
Master_SSL_Allowed: No
Master_SSL_CA_File:
Master_SSL_CA_Path:
Master_SSL_Cert:
Master_SSL_Cipher:
Master_SSL_Key:
Seconds_Behind_Master: 0
Master_SSL_Verify_Server_Cert: No
Last_IO_Errno: 0
Last_IO_Error:
Last_SQL_Errno: 0
Last_SQL_Error:
Replicate_Ignore_Server_Ids:
Master_Server_Id: 1
1 row in set (0.00 sec)
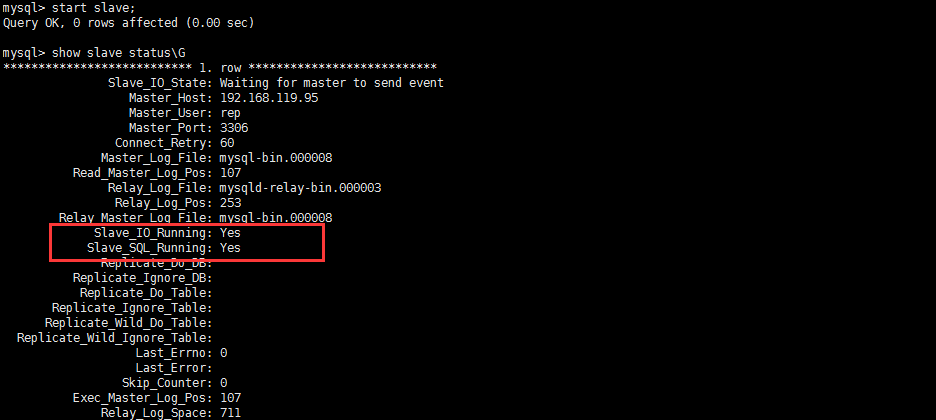
注:Slave_IO_Running和Slave_SQL_Running都为yes才表示同步成功。
2、对比数据库,数据同步成功
Master MySQL

Slave MySQL

本文出自 “运维小当家” 博客,请务必保留此出处http://solin.blog.51cto.com/11319413/1879642
原文地址:http://solin.blog.51cto.com/11319413/1879642