标签:key port net sar 文件名 标题 set pdv put
JavaMail,顾名思义,提供给开发者处理电子邮件相关的编程接口。它是Sun发布的用来处理email的API。它可以方便地执行一些常用的邮件传输。我们可以基于JavaMail开发出类似于Microsoft Outlook的应用程序。
JavaMail包中用于处理电子邮件的核心类是:Session,Message,Address,Authenticator,Store,Transport, Folder等。Session定义了一个基本的邮件会话,它需要从Properties中读取类似于邮件服务器,用户名和密码等信息。不过JDK中并没有包含,使用JavaMail发送邮件需要使用Sun发布的mail.jar和activtion.jar两个包。
邮件协议:
SMTP协议:Simple Mail Transfer Protocol,即简单邮件传输协议,用于发送电子邮件
POP3协议:Post Office Protocol 3,即邮局协议的第三个版本,用于接收邮件
IMAP协议:Internet Message Access Protocol,即互联网消息访问协议,是POP3的替代协议
JavaMail发邮件的流程:
1.搭建James邮件服务器
2.安装OutLook[邮件客户端]
3.配置outLook邮件客户端
4.搭建James邮件服务器
james是apache的一个开源项目,纯java实现。
首先我们需要下载apache-james-2.3.2.zip(批:http://pan.baidu.com/s/1pJoyg7h)
其次运行bin目录下的run.bat即可启动服务器
然后运行cmd命令[Telnet localhost 4555]
最后通过apps\james\SAR-INF\config.xml配置服务器(修改节点)
输入产品秘钥(可选,测试的话,不必输入)
产品秘钥:PQDV9-GPDV4-CRM4D-PHDTH-4M2MT
创建用户账号,根据Telnet localhost 4555,进行连接,
用户名和密码默认为root
进入help,进行添加账户(adduser)
按要求安装,下一步即可,注意下面这个:
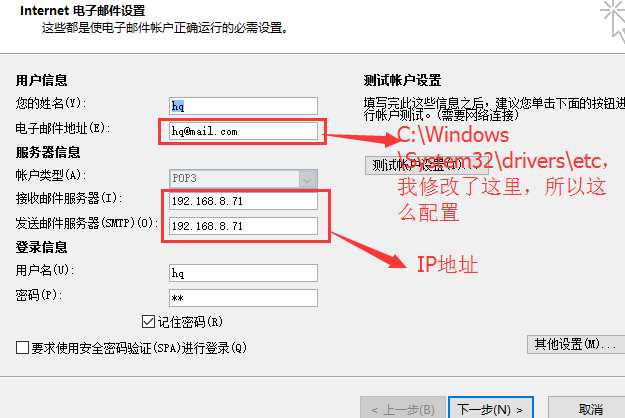
hosts文件:

安装完成,进行测试:
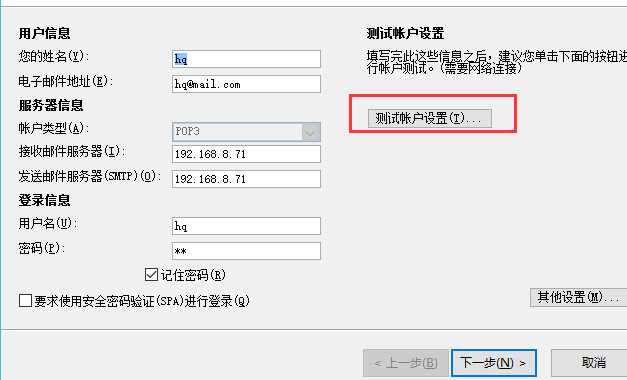

需求:账户收到由javaMail所发送的任务,以及附件信息。
核心代码:
创建一个类EmailAuthenticator并继承自Authenticator,并植入用户名和密码
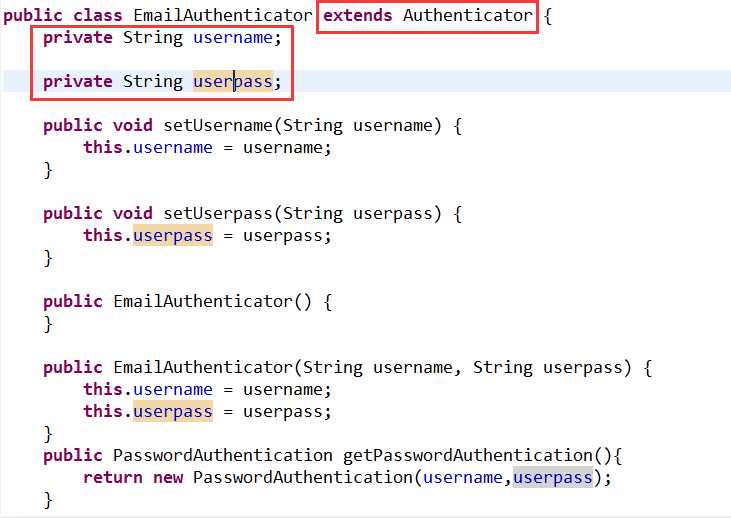
创建Mail类(设置邮件信息):
|
1
2
3
4
5
6
7
8
9
10
11
12
13
14
15
16
17
18
19
20
21
22
23
24
25
26
27
28
29
30
31
32
33
34
35
36
37
38
39
40
41
42
43
44
45
46
47
48
49
50
51
52
53
54
|
public class Mail { private String mailServer,from,to,mailSubject,mailContent; private String username,password; public Mail(){ //设置邮件信息 //进行认证登录的用户名 username="hq@mail.com"; //认证密码 password="hq"; //认证的邮箱对应的邮件服务器 mailServer="192.168.17.176"; //发件人信息 from="wj"; //收件人信息 to="wj@mail.com"; //邮件标题 mailSubject="我们都是好孩子333"; //邮件内容 mailContent="这是一封测试邮件!如有雷同,纯属不可能"; } //设置邮件服务器 @SuppressWarnings("static-access")public void send(){ Properties prop=System.getProperties(); //指定邮件server prop.put("mail.smtp.host", mailServer); //是否开启认证 prop.put("mail.smtp.auth", "true"); //smtp协议的 prop.put("mail.smtp.port", "25"); //产生Session服务 EmailAuthenticator mailauth=new EmailAuthenticator(username, password); Session mailSession=Session.getInstance(prop,(Authenticator)mailauth); try { //封装Message对象 Message message=new MimeMessage(mailSession); message.setFrom(new InternetAddress(from)); //发件人 message.setRecipient(Message.RecipientType.TO, new InternetAddress(to));//收件人 message.setSubject(mailSubject); //设置内容(设置字符集处理乱码问题) message.setContent(mailContent,"text/html;charset=gbk"); message.setSentDate(new Date()); //创建Transport实例,发送邮件 Transport tran=mailSession.getTransport("smtp"); tran.send(message,message.getAllRecipients()); tran.close(); } catch (Exception e) { e.printStackTrace(); } } |
测试类:
|
1
2
3
4
5
6
7
8
|
public class MyTest { public static void main(String[] args) { Mail mail=new Mail(); mail.send(); System.out.println("success!"); } } |


七、发送带附件的Mail
|
1
2
3
4
5
6
7
8
9
10
11
12
13
14
15
16
17
18
19
20
21
22
23
24
25
|
public class MailWithAttachment { private JavaMailSender mailSender; //必须使用 JavaMailSender public void setMailSender(JavaMailSender mailSender) { this.mailSender = mailSender; } public void send() throws MessagingException,IOException{ MimeMessage mimeMessage = mailSender.createMimeMessage(); MimeMessageHelper helper = new MimeMessageHelper(mimeMessage, true, "UTF-8"); helper.setFrom("hq@mail.com"); helper.setTo("wj@mail.com"); helper.setSubject("生活生活"); helper.setText("生活不止眼前的苟且!!!"); //添加附件1 ClassPathResource file1 = new ClassPathResource( "/cn/bdqn/attachfiles/test.doc"); helper.addAttachment(file1.getFilename(), file1.getFile()); //添加附件2:附件的文件名为中文时,需要对文件名进行编码转换,解决乱码问题 ClassPathResource file2 = new ClassPathResource( "/cn/bdqn/attachfiles/附件测试文件.doc"); helper.addAttachment(MimeUtility.encodeWord(file2.getFilename()),file2.getFile()); mailSender.send(mimeMessage); }} |
测试类:
|
1
2
3
4
5
6
7
8
9
10
11
12
13
|
public class MailTest { public static void main(String[] args){ ApplicationContext context = new ClassPathXmlApplicationContext("applicationContext.xml"); /*测试带附件的邮件*/ try{ MailWithAttachment mailWithAttach = (MailWithAttachment)context.getBean("mailWithAttachment"); mailWithAttach.send(); }catch(Exception e){ System.out.print(e.toString()); } }} |
applicationContext.xml:
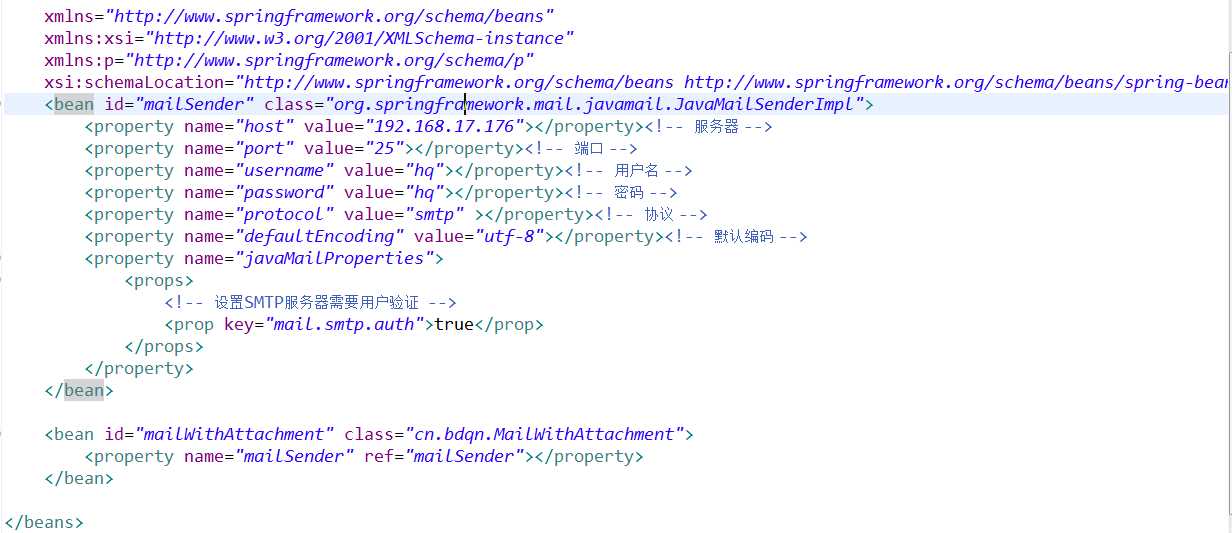
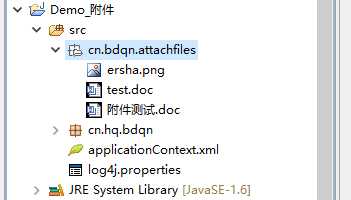
标签:key port net sar 文件名 标题 set pdv put
原文地址:http://www.cnblogs.com/hero96/p/6193713.html