标签:使用 com dem ice conf maven parent hit src
问题产生及解决
对于刚接手spring_boot的人,可能会感觉到很茫然无措,看到书上写的spring_boot是直接打包成jar包,使用java -jar *运行。然而却不知道该怎么打包。而创建spring_boot以后在pom文件中会安装spring_boot打包插件,此时我们会看到如下几个选项:
<?xml version="1.0" encoding="UTF-8"?>
<project xmlns="http://maven.apache.org/POM/4.0.0" xmlns:xsi="http://www.w3.org/2001/XMLSchema-instance"
    xsi:schemaLocation="http://maven.apache.org/POM/4.0.0 http://maven.apache.org/xsd/maven-4.0.0.xsd">
    <modelVersion>4.0.0</modelVersion>

    <groupId>com.penglei</groupId>
    <artifactId>springboot_1</artifactId>
    <version>0.0.1-SNAPSHOT</version>
    <packaging>jar</packaging>

    <name>spring_boot_practice_1</name>
    <description>Demo project for Spring Boot</description>

    <parent>
        <groupId>org.springframework.boot</groupId>
        <artifactId>spring-boot-starter-parent</artifactId>
        <version>1.4.3.RELEASE</version>
        <relativePath/> <!-- lookup parent from repository -->
    </parent>

    <properties>
        <project.build.sourceEncoding>UTF-8</project.build.sourceEncoding>
        <project.reporting.outputEncoding>UTF-8</project.reporting.outputEncoding>
        <java.version>1.8</java.version>
    </properties>

    <dependencies>
        <dependency>
            <groupId>org.springframework.boot</groupId>
            <artifactId>spring-boot-starter-web</artifactId>
        </dependency>

        <dependency>
            <groupId>org.springframework.boot</groupId>
            <artifactId>spring-boot-starter-test</artifactId>
            <scope>test</scope>
        </dependency>
    </dependencies>

    <build>
        <plugins>
            <plugin>
                <groupId>org.springframework.boot</groupId>
                <artifactId>spring-boot-maven-plugin</artifactId>
            </plugin>
        </plugins>
    </build>


    <repositories>
        <repository>
            <id>spring-snapshots</id>
            <url>http://repo.spring.io/snapshot</url>
            <snapshots>
                <enabled>true</enabled>
            </snapshots>
        </repository>
        <repository>
            <id>spring-milestones</id>
            <url>http://repo.spring.io/milestone</url>
        </repository>
    </repositories>
    <pluginRepositories>
        <pluginRepository>
            <id>spring-snapshots</id>
            <url>http://repo.spring.io/snapshot</url>
        </pluginRepository>
        <pluginRepository>
            <id>spring-milestones</id>
            <url>http://repo.spring.io/milestone</url>
        </pluginRepository>
    </pluginRepositories>


</project>
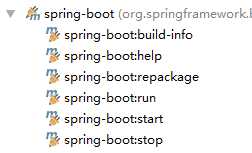
如果此时我们直接点击repackage,则打包时会出现如下错误:
[ERROR] Failed to execute goal org.springframework.boot:spring-boot-maven-plugin:1.4.3.RELEASE:repackage (default-cli) on project springboot_1: Execution default-cli of goal org.springframework.boot:spring-boot-maven-plugin:1.4.3.RELEASE:repackage failed: Source must refer to an existing file -> [Help 1]
[ERROR]
[ERROR] To see the full stack trace of the errors, re-run Maven with the -e switch.
[ERROR] Re-run Maven using the -X switch to enable full debug logging.
[ERROR]
[ERROR] For more information about the errors and possible solutions, please read the following articles:
[ERROR] [Help 1] http://cwiki.apache.org/confluence/display/MAVEN/PluginExecutionException
Process finished with exit code 1
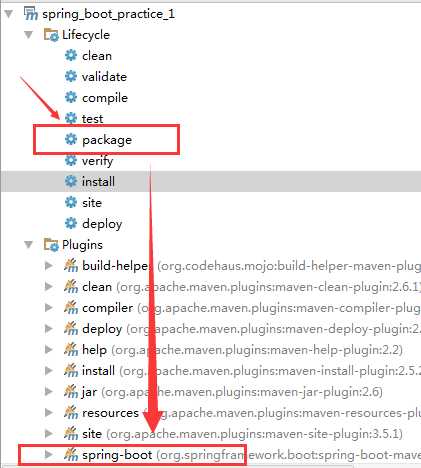
正确的打包方法是:
直接使用maven的package命令,即可完成打包,若有新的内容添加,可以使用spring-boot-maven-plugin的repackage命令.详细步骤如下图:
结语
如果你还需要了解更多技术文章信息,请继续关注白衣秀才的博客
个人网站:http://penglei.top/
Github:https://github.com/whitescholars
微博:http://weibo.com/u/3034107691?refer_flag=1001030102_&is_all=1
标签:使用 com dem ice conf maven parent hit src
原文地址:http://www.cnblogs.com/penglei-it/p/springboot_package.html