标签:alt 处理 用户登陆 fresh 目录 ted 也会 find async
参考页面:
http://www.yuanjiaocheng.net/ASPNET-CORE/core-razor-layout.html
http://www.yuanjiaocheng.net/ASPNET-CORE/core-view-start.html
http://www.yuanjiaocheng.net/ASPNET-CORE/core-import-view.html
http://www.yuanjiaocheng.net/ASPNET-CORE/core-razor-taghelpers.html
http://www.yuanjiaocheng.net/ASPNET-CORE/core-edit-form.html
Asp.net Core 对于授权的改动很友好,非常的灵活,本文以MVC为主,当然如果说webapi或者其他的分布式解决方案授权,也容易就可以实现单点登录都非常的简单,可以使用现成的IdentityServer框架或者自定义实现动非常方便和干净,如果你在运行示例代码的时候未达到预期效果,请把文章拉到结尾寻找答案。
本文示例代码下载,github我这访问不了,暂且直接上传博客园存储了。
 1 public class Startup
 2     {
 3         public void ConfigureServices(IServiceCollection services)
 4         {
 5             services.AddMvc();
 6         }
 7
 8         public void Configure(IApplicationBuilder app)
 9         {
10             app.UseMvc(routes =>
11             {
12                 routes.MapRoute(
13                      name: "default",
14                      template: "{controller=Home}/{action=Index}/{id?}");
15             });
16         }
17     }
添加Controllers文件夹,添加HomeContrller
 public class HomeController : Controller
    {
        public IActionResult Index()
        {
            return View();
        }
    }
创建Views/Home文件夹,并添加Index(Action)对应的Index.cshtml文件
<!--Index.cshtml-->
假如生活欺骗了你
假如生活欺骗了你,
不要悲伤,不要心急!
忧郁的日子里须要镇静:
相信吧,快乐的日子将会来临!
 app.UseCookieAuthentication(new CookieAuthenticationOptions
{
               AuthenticationScheme = "MyCookieMiddlewareInstance",
               LoginPath = new PathString("/Account/Unauthorized/"),
               AccessDeniedPath = new PathString("/Account/Forbidden/"),
               AutomaticAuthenticate = true,
               AutomaticChallenge = true
});
tip:相关配置参数细节请参阅:https://docs.asp.net/en/latest/security/authentication/cookie.html
public class AccountController : Controller
{
     public async Task<IActionResult> Unauthorized(string returnUrl = null)
     {
         List<Claim> claims = new List<Claim>();
         claims.Add(new Claim(ClaimTypes.Name, "halower", ClaimValueTypes.String, "https://www.cnblogs.com/rohelm"));
         var userIdentity = new ClaimsIdentity("管理员");
         userIdentity.AddClaims(claims);
         var userPrincipal = new ClaimsPrincipal(userIdentity);
         await HttpContext.Authentication.SignInAsync("MyCookieMiddlewareInstance", userPrincipal,
             new AuthenticationProperties
             {
                 ExpiresUtc = DateTime.UtcNow.AddMinutes(20),
                 IsPersistent = false,
                 AllowRefresh = false
             });

        if (Url.IsLocalUrl(returnUrl))
         {
             return Redirect(returnUrl);
         }
         else
         {
             return RedirectToAction("Index", "Home");
         }
     }

     public IActionResult Forbidden()
     {
         return View();
     }
}
编辑 Home/Index.schtml
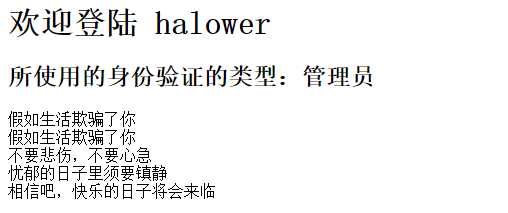
@using System.Security.Claims;

@if (User.Identities.Any(u => u.IsAuthenticated))
{
<h1>
欢迎登陆 @User.Identities.First(u => u.IsAuthenticated).FindFirst(ClaimTypes.Name).Value
</h1>
<h2>所使用的身份验证的类型:@User.Identity.AuthenticationType</h2>
}
<article>
假如生活欺骗了你<br />
假如生活欺骗了你<br />
不要悲伤,不要心急<br />
忧郁的日子里须要镇静<br />
相信吧,快乐的日子将会来临
</article>
可以使用中你会发现Asp.net Core安全验证方面较以往的版本最大的改变就是全部采用中间件的方式进行验证授权,并很好的使用了Policy (策略)这个概念,下那么继续~。
services.AddAuthorization(options =>
{
    options.AddPolicy("EmployeeOnly", policy => policy.RequireClaim("EmployeeNumber"));
});
claims.Add(new Claim("EmployeeNumber", "123456", ClaimValueTypes.String, "http://www.cnblogs.com/rohelm"));
 [Authorize(Roles = "Administrator")]
    public class HomeController:Controller
    {
        [Authorize(Policy = "EmployeeOnly")]
        public IActionResult Index()
        {
            return View();
        }
    }
自定义授权策略的实现,包括实现一个 IAuthorizationRequirement 的Requirement,和实现 AuthorizationHandler<TRequirement> 的处理器,这里使用文档
https://docs.asp.net/en/latest/security/authorization/policies.html中的Code。
public class MinimumAgeRequirement: AuthorizationHandler<MinimumAgeRequirement>, IAuthorizationRequirement
    {
        int _minimumAge;

        public MinimumAgeRequirement(int minimumAge)
        {
            _minimumAge = minimumAge;
        }

        protected override void Handle(AuthorizationContext context, MinimumAgeRequirement requirement)
        {
            if (!context.User.HasClaim(c => c.Type == ClaimTypes.DateOfBirth))
            {
                return;
            }

            var dateOfBirth = Convert.ToDateTime(
                context.User.FindFirst(c => c.Type == ClaimTypes.DateOfBirth).Value);

            int calculatedAge = DateTime.Today.Year - dateOfBirth.Year;
            if (dateOfBirth > DateTime.Today.AddYears(-calculatedAge))
            {
                calculatedAge--;
            }

            if (calculatedAge >= _minimumAge)
            {
                context.Succeed(requirement);
            }
        }
    }
options.AddPolicy("Over21", policy => policy.Requirements.Add(new MinimumAgeRequirement(21)));
修改时间(例如小于21岁的生日,2000-01-01)并运行调试,查看结果
tip:上面的演示,我们使用了一个同时实现AuthorizationHandler<MinimumAgeRequirement>, IAuthorizationRequirement的MinimumAgeRequirement来做演示,但是如果一个Requirement徐要实现多个处理器就需要分开写了,原因很简单,这里无法实现类的多重继承。
下面我们实现一个使用Token登陆的需求
    public class LoginRequirement: IAuthorizationRequirement
    {
    }
 public class HasPasswordHandler : AuthorizationHandler<LoginRequirement>
    {
        protected override void Handle(AuthorizationContext context, LoginRequirement requirement)
        {
            if (!context.User.HasClaim(c => c.Type == "UsernameAndPassword" && c.Issuer == "http://www.cnblogs.com/rohelm"))
                return;
            context.Succeed(requirement);
        }
    }
public class HasAccessTokenHandler : AuthorizationHandler<LoginRequirement>
    {
        protected override void Handle(AuthorizationContext context, LoginRequirement requirement)
        {
            if (!context.User.HasClaim(c => c.Type == "AccessToken" && c.Issuer == "http://www.cnblogs.com/rohelm"))
                return;

            var toeknExpiryIn = Convert.ToDateTime(context.User.FindFirst(c => c.Type == "AccessToken" && c.Issuer == "http://www.cnblogs.com/rohelm").Value);

            if (toeknExpiryIn > DateTime.Now)
            {
                context.Succeed(requirement);
            }
        }
    }
options.AddPolicy("CanLogin", policy => policy.Requirements.Add(new LoginRequirement()));
  services.AddSingleton<IAuthorizationHandler, HasPasswordHandler>();
  services.AddSingleton<IAuthorizationHandler, HasAccessTokenHandler>();
  claims.Add(new Claim("UsernameAndPassword", "123456", ClaimValueTypes.String, "http://www.cnblogs.com/rohelm"));
 // 测试切换登陆声明方式
 // claims.Add(new Claim("AccessToken", DateTime.Now.AddMinutes(1).ToString(), ClaimValueTypes.String, "http://www.cnblogs.com/rohelm"));
在实际开发者中,除了基于用户的授权验证外,通过我们也会遇到针对一些资源的授权限制,例如有的人可以编辑文档,有的人只能查看文档,由此引出该话题
https://docs.asp.net/en/latest/security/authorization/resourcebased.html
public class Document
    {
        public int Id { get; set; }
        public string Author { get; set; }
    }
public interface IDocumentRepository
    {
        IEnumerable<Document> Get();
        Document Get(int id);
    }
public class FakeDocumentRepository : IDocumentRepository
    {
        static List<Document> _documents = new List<Document> {
            new Document { Id = 1, Author = "halower" },
            new Document { Id = 2, Author = "others" }
        };
        public IEnumerable<Document> Get()
        {
            return _documents;
        }

        public Document Get(int id)
        {
            return _documents.FirstOrDefault(d => d.Id == id);
        }
    }
services.AddSingleton<IDocumentRepository, FakeDocumentRepository>();
public class DocumentController : Controller
    {
        IDocumentRepository _documentRepository;

        public DocumentController(IDocumentRepository documentRepository)
        {
            _documentRepository = documentRepository;
        }

        public IActionResult Index()
        {
            return View(_documentRepository.Get());
        }

        public IActionResult Edit(int id)
        {
            var document = _documentRepository.Get(id);

            if (document == null)
                return new NotFoundResult();

            return View(document);
        }
    }
@model IEnumerable<AuthorizationForoNetCore.Modles.Document>

<h1>文档列表</h1>
@foreach (var document in Model)
{
    <p>
        @Html.ActionLink("文档 #" + document.Id, "编辑", new { id = document.Id })
    </p>
}
@model AuthorizationForoNetCore.Modles.Document

<h1>文档 #@Model.Id</h1>
<h2>作者: @Model.Author</h2>
public class EditRequirement : IAuthorizationRequirement
 {
 }
public class DocumentEditHandler : AuthorizationHandler<EditRequirement, Document>
    {
        protected override void Handle(AuthorizationContext context, EditRequirement requirement, Document resource)
        {
            if (resource.Author == context.User.FindFirst(ClaimTypes.Name).Value)
            {
                context.Succeed(requirement);
            }
        }
    }
1 services.AddSingleton<IAuthorizationHandler, DocumentEditHandler>();
public class DocumentController : Controller
    {
        IDocumentRepository _documentRepository;
        IAuthorizationService _authorizationService;

        public DocumentController(IDocumentRepository documentRepository, IAuthorizationService authorizationService)
        {
            _documentRepository = documentRepository;
            _authorizationService = authorizationService;
        }

        public IActionResult Index()
        {
            return View(_documentRepository.Get());
        }

        public async Task<IActionResult> Edit(int id)
        {
            var document = _documentRepository.Get(id);

            if (document == null)
                return new NotFoundResult();

            if (await _authorizationService.AuthorizeAsync(User, document, new EditRequirement()))
            {
                return View(document);
            }
            else
            {
                return new ChallengeResult();
            }
        }
    }
问题来了额,上面示例的视图中怎么做限制了,那就继续了
1.使用 @inject 命令注入 AuthorizationService
2.应用该上述同样策略,做简单修改
@using Microsoft.AspNetCore.Authorization
@model IEnumerable<AuthorizationForoNetCore.Modles.Document>
@inject IAuthorizationService AuthorizationService
@using AuthorizationForoNetCore.Policy
<h1>文档列表</h1>
@{
    var requirement = new EditRequirement();
    foreach (var document in Model)
    {
        if (await AuthorizationService.AuthorizeAsync(User, document, requirement)) {
    <p>
        @Html.ActionLink("文档 #" + document.Id, "编辑", new { id = document.Id })
    </p>
    }
}
}
请在运行时清理Cookie,或者在试验时直接暂时禁用
之前写的一个插件,谁有时间帮升级支持下asp.net Core:https://github.com/halower/JqGridForMvc
教你实践ASP.NET Core Authorization
标签:alt 处理 用户登陆 fresh 目录 ted 也会 find async
原文地址:http://www.cnblogs.com/wangxiaobingya/p/6343799.html