标签:city number sha pil window cloud setup which repeat
使用粒子可以很容易的创建很多细小的物体,例如雨滴雪花等
本章主要内容:
1 使用ParticleBasicMaterial(基础粒子材质)来创建和设计粒子
2 使用ParticleSystem来创建一个粒子集合
3 使用已有的几何体来创建一个粒子系统
4 让粒子和粒子系统动起来
5 用纹理给粒子造型
6 使用ParticleCanvasMaterial在画布上为粒子造型
| 名称 | 描述 |
| Sprite粒子 |
参数是material,生成的sprite可以设置position和scale等属性直接添加到场景中 var sprite = new THREE.Sprite(material);
sprite.position.set(x * 10, y * 10, 0);
scene.add(sprite);
|
| SpriteMaterial粒子的基本材质 |
粒子的基本材质,将在本章第7部分重点讲解其参数 var material = new THREE.SpriteMaterial();
|
| PointCloud粒子系统 |
参数几何体和材质 var cloud = new THREE.PointCloud(geom, material); scene.add(cloud); |
| PointCloudMaterial粒子系统的材质 |
设置所有粒子的大小,颜色,顶点颜色,透明度,是否根据相机距离的远近改变大小等属性 var material = new THREE.PointCloudMaterial({size: 4, vertexColors: true, color: 0xffffff}); |
| SpriteCanvasMaterial | 专门为CanvasRenderer渲染器创建的材质,该材质的program属性输出的是粒子的纹理 |
1 粒子-----THREE.Particle
注意:新的THREE.js已经定义了Sprite对象,即THREE.Sprite,向后兼容THREE.Particle = THREE.Sprite;粒子Particle已经更名为精灵Sprite
THREE.js源码中有这样一行代码

THREE.Sprite跟THREE.Mesh一样,都是THREE.Object3D对象的扩展,Sprite的参数是材质material,
另外CanvasRenderer对象已经不存在了,只有WebGLRenderer(已经找到原因,three.js中只有WebGLRenderer,要引入CanvasRenderer.js才可以)
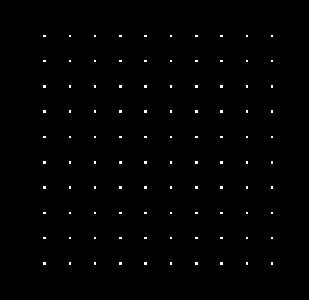
<!DOCTYPE html>

<html>

<head>
    <title>Example 07.01 - Particles - Only works in CanvasRenderer</title>
    <script type="text/javascript" src="../libs/three.js"></script>

    <script type="text/javascript" src="../libs/stats.js"></script>
    <script type="text/javascript" src="../libs/dat.gui.js"></script>
    <style>
        body {
            /* set margin to 0 and overflow to hidden, to go fullscreen */
            margin: 0;
            overflow: hidden;
            background-color: #000000;
        }
    </style>
</head>
<body>

<div id="Stats-output">
</div>
<!-- Div which will hold the Output -->
<div id="WebGL-output">
</div>

<!-- Javascript code that runs our Three.js examples -->
<script type="text/javascript">

    // once everything is loaded, we run our Three.js stuff.
    function init() {

        var stats = initStats();

        // create a scene, that will hold all our elements such as objects, cameras and lights.
        var scene = new THREE.Scene();

        // create a camera, which defines where we‘re looking at.
        var camera = new THREE.PerspectiveCamera(45, window.innerWidth / window.innerHeight, 0.1, 1000);

        // create a render and set the size
        //THREE.CanvasRenderer虽然书中介绍的CanvasRenderer,但是THREE.CanvasRenderer的值是undefined,还没有找到原因
        //var canvasRenderer = new THREE.CanvasRenderer();
        var canvasRenderer = new THREE.WebGLRenderer();
        canvasRenderer.setClearColor(new THREE.Color(0x000000, 1.0));
        canvasRenderer.setSize(window.innerWidth, window.innerHeight);

        // position and point the camera to the center of the scene
        camera.position.x = 0;
        camera.position.y = 0;
        camera.position.z = 150;

        // add the output of the renderer to the html element
        document.getElementById("WebGL-output").appendChild(canvasRenderer.domElement);


        createSprites();
        render();

        function createSprites() {
            var material = new THREE.SpriteMaterial();
            //var material = new THREE.ParticleBasicMaterial();

            for (var x = -5; x < 5; x++) {
                for (var y = -5; y < 5; y++) {
                    //var sprite = new THREE.Particle(material);
                    var sprite = new THREE.Sprite(material);
                    sprite.position.set(x * 10, y * 10, 0);
                    scene.add(sprite);
                }
            }
        }


        function render() {
            stats.update();


            requestAnimationFrame(render);
            canvasRenderer.render(scene, camera);
        }

        function initStats() {

            var stats = new Stats();
            stats.setMode(0); // 0: fps, 1: ms

            // Align top-left
            stats.domElement.style.position = ‘absolute‘;
            stats.domElement.style.left = ‘0px‘;
            stats.domElement.style.top = ‘0px‘;

            document.getElementById("Stats-output").appendChild(stats.domElement);

            return stats;
        }
    }
    window.onload = init;
</script>
</body>
</html>
console.warn( ‘THREE.ParticleBasicMaterial has been renamed to THREE.PointCloudMaterial.‘ );
//ParticleBasicMaterial已经更名为PointCloudMaterial
console.warn( ‘THREE.ParticleSystemMaterial has been renamed to THREE.PointCloudMaterial.‘ );//THREE.ParticleSystemMaterial已经更名为THREE.PointCloudMaterial
console.warn( ‘THREE.ParticleSystem has been renamed to THREE.PointCloud.‘ );
<!DOCTYPE html>

<html>

<head>
    <title>Example 07.02 - Particles - Only works in WebGLRenderer</title>
    <script type="text/javascript" src="../libs/three.js"></script>

    <script type="text/javascript" src="../libs/stats.js"></script>
    <script type="text/javascript" src="../libs/dat.gui.js"></script>
    <style>
        body {
            /* set margin to 0 and overflow to hidden, to go fullscreen */
            margin: 0;
            overflow: hidden;
            background-color: #000000;
        }
    </style>
</head>
<body>

<div id="Stats-output">
</div>
<!-- Div which will hold the Output -->
<div id="WebGL-output">
</div>

<!-- Javascript code that runs our Three.js examples -->
<script type="text/javascript">

    // once everything is loaded, we run our Three.js stuff.
    function init() {

        var stats = initStats();

        // create a scene, that will hold all our elements such as objects, cameras and lights.
        var scene = new THREE.Scene();

        // create a camera, which defines where we‘re looking at.
        var camera = new THREE.PerspectiveCamera(45, window.innerWidth / window.innerHeight, 0.1, 1000);

        // create a render and set the size
        var webGLRenderer = new THREE.WebGLRenderer();
        webGLRenderer.setClearColor(new THREE.Color(0x000000, 1.0));
        webGLRenderer.setSize(window.innerWidth, window.innerHeight);

        // position and point the camera to the center of the scene
        camera.position.x = 0;
        camera.position.y = 0;
        camera.position.z = 150;

        // add the output of the renderer to the html element
        document.getElementById("WebGL-output").appendChild(webGLRenderer.domElement);


        createParticles();
        render();

        function createParticles() {


            var geom = new THREE.Geometry();
            console.warn( ‘THREE.ParticleBasicMaterial has been renamed to THREE.PointCloudMaterial.‘ );
            console.warn( ‘THREE.ParticleSystemMaterial has been renamed to THREE.PointCloudMaterial.‘ );

            //创建一个点云材质
            //PointCloudMaterial==ParticleBasicMaterial
            var material = new THREE.PointCloudMaterial({size: 4, vertexColors: true, color: 0xffffff});

            for (var x = -5; x < 5; x++) {
                for (var y = -5; y < 5; y++) {
                    var particle = new THREE.Vector3(x * 10, y * 10, 0);
                    geom.vertices.push(particle);
                    geom.colors.push(new THREE.Color(Math.random() * 0x00ffff));
                }
            }
            //console.warn( ‘THREE.ParticleSystem has been renamed to THREE.PointCloud.‘ );
            //PointCloud==ParticleSystem
            var cloud = new THREE.PointCloud(geom, material);
            scene.add(cloud);
        }


        function render() {
            stats.update();


            requestAnimationFrame(render);
            webGLRenderer.render(scene, camera);
        }

        function initStats() {

            var stats = new Stats();
            stats.setMode(0); // 0: fps, 1: ms

            // Align top-left
            stats.domElement.style.position = ‘absolute‘;
            stats.domElement.style.left = ‘0px‘;
            stats.domElement.style.top = ‘0px‘;

            document.getElementById("Stats-output").appendChild(stats.domElement);

            return stats;
        }
    }
    window.onload = init;
</script>
</body>
</html>
2 粒子材质PointCloudMaterial和粒子系统PointCloud
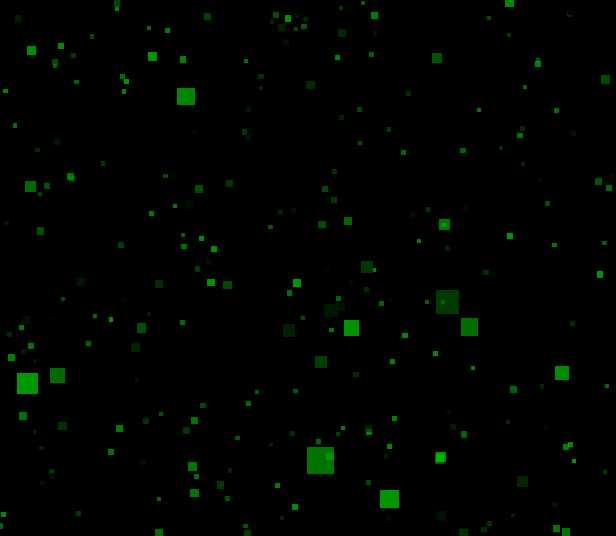
| PointCloudMaterial的属性 | 描述 |
| color |
PointCloud中所有的粒子的颜色都相同, 除非设置了vertexColors且该几何体的colors属性不为空,才会使用colors颜色,否则都使用该属性 |
| map | 在粒子上应用某种材质 |
| size | 粒子的大小 |
| sizeAnnutation |
false:无论相机的位置,所有的粒子大小一致; true:离相机近的粒子更大一些,离相机越远越小 |
| vetexColors | true:且该几何体的colors属性有值,则该粒子会舍弃第一个属性--color,而应用该几何体的colors属性的颜色 |
| opacity | 透明度 |
| transparent | 是否透明 |
| blending | 渲染粒子时的融合模式 |
| fog | 是否受场景的雾化影响 |
<!DOCTYPE html>

<html>

<head>
    <title>Example 07.03 - Particle Basic Material</title>
    <script type="text/javascript" src="../libs/three.js"></script>

    <script type="text/javascript" src="../libs/stats.js"></script>
    <script type="text/javascript" src="../libs/dat.gui.js"></script>
    <style>
        body {
            /* set margin to 0 and overflow to hidden, to go fullscreen */
            margin: 0;
            overflow: hidden;
            background-color: #000000;
        }
    </style>
</head>
<body>

<div id="Stats-output">
</div>
<!-- Div which will hold the Output -->
<div id="WebGL-output">
</div>

<!-- Javascript code that runs our Three.js examples -->
<script type="text/javascript">

    // once everything is loaded, we run our Three.js stuff.
    function init() {

        var stats = initStats();

        // create a scene, that will hold all our elements such as objects, cameras and lights.
        var scene = new THREE.Scene();

        // create a camera, which defines where we‘re looking at.
        var camera = new THREE.PerspectiveCamera(45, window.innerWidth / window.innerHeight, 0.1, 1000);

        // create a render and set the size
        var webGLRenderer = new THREE.WebGLRenderer();
        webGLRenderer.setClearColor(new THREE.Color(0x000000, 1.0));
        webGLRenderer.setSize(window.innerWidth, window.innerHeight);

        // position and point the camera to the center of the scene
        camera.position.x = 20;
        camera.position.y = 0;
        camera.position.z = 150;

        // add the output of the renderer to the html element
        document.getElementById("WebGL-output").appendChild(webGLRenderer.domElement);

        var cloud;

        var controls = new function () {
            this.size = 4;
            this.transparent = true;
            this.opacity = 0.6;
            this.vertexColors = true;
            this.color = 0xffffff;
            this.sizeAttenuation = true;
            this.rotateSystem = true;

            this.redraw = function () {
                if (scene.getObjectByName("particles")) {
                    scene.remove(scene.getObjectByName("particles"));
                }
                createParticles(controls.size, controls.transparent, controls.opacity, controls.vertexColors, controls.sizeAttenuation, controls.color);
            };
        };

        var gui = new dat.GUI();
        gui.add(controls, ‘size‘, 0, 10).onChange(controls.redraw);
        gui.add(controls, ‘transparent‘).onChange(controls.redraw);
        gui.add(controls, ‘opacity‘, 0, 1).onChange(controls.redraw);
        gui.add(controls, ‘vertexColors‘).onChange(controls.redraw);
        gui.addColor(controls, ‘color‘).onChange(controls.redraw);
        gui.add(controls, ‘sizeAttenuation‘).onChange(controls.redraw);
        gui.add(controls, ‘rotateSystem‘);

        controls.redraw();
        render();

        function createParticles(size, transparent, opacity, vertexColors, sizeAttenuation, color) {


            var geom = new THREE.Geometry();
            //设置粒子材质的属性
            var material = new THREE.PointCloudMaterial({
                size: size,//粒子的大小
                transparent: transparent,//是否透明
                opacity: opacity,//透明度是多少
                vertexColors: vertexColors,
                /*通常情况下,所有的粒子应用同一种颜色,但是若该值设置为true,
                且几何体的colors数组也有值,则会使用colors数组的颜色*/
                sizeAttenuation: sizeAttenuation,
                /*false:不管粒子距离相机的远近,它们都拥有相同的尺寸
                    true:粒子的大小取决于它们距离相机的远近
                */

                color: color//粒子系统中所有粒子的颜色
            });


            var range = 500;
            for (var i = 0; i < 15000; i++) {
                var particle = new THREE.Vector3(Math.random() * range - range / 2, Math.random() * range - range / 2, Math.random() * range - range / 2);
                geom.vertices.push(particle);
                var color = new THREE.Color(0x00ff00);
                color.setHSL(color.getHSL().h, color.getHSL().s, Math.random() * color.getHSL().l);
                geom.colors.push(color);

            }
            //粒子系统PointCloud与网格Mesh相同,只接受几何体和材质两个参数
            cloud = new THREE.PointCloud(geom, material);
            cloud.name = "particles";
            scene.add(cloud);
        }


        var step = 0;

        function render() {

            stats.update();

            if (controls.rotateSystem) {
                step += 0.01;

                cloud.rotation.x = step;
                cloud.rotation.z = step;
            }


            requestAnimationFrame(render);
            webGLRenderer.render(scene, camera);
        }

        function initStats() {

            var stats = new Stats();
            stats.setMode(0); // 0: fps, 1: ms

            // Align top-left
            stats.domElement.style.position = ‘absolute‘;
            stats.domElement.style.left = ‘0px‘;
            stats.domElement.style.top = ‘0px‘;

            document.getElementById("Stats-output").appendChild(stats.domElement);

            return stats;
        }
    }
    window.onload = init;
</script>
</body>
</html>
3 使用画布格式化粒子---针对CanvasRenderer渲染器所创建的材质SpriteCanvasMaterial
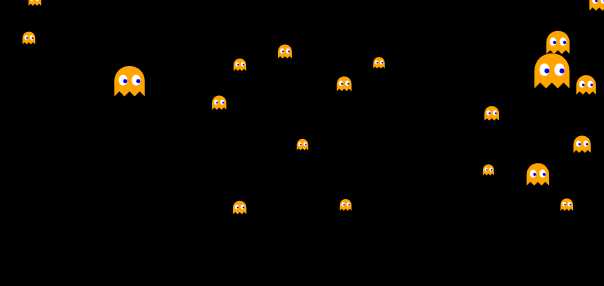
<!DOCTYPE html>

<html>

<head>
    <title>Example 07.04 - Particles - Canvas based texture</title>
    <script type="text/javascript" src="../libs/three.js"></script>

    <script type="text/javascript" src="../libs/stats.js"></script>
    <script type="text/javascript" src="../libs/dat.gui.js"></script>
    <script type="text/javascript" src="../libs/CanvasRenderer.js"></script>
    <script type="text/javascript" src="../libs/Projector.js"></script>
    <style>
        body {
            /* set margin to 0 and overflow to hidden, to go fullscreen */
            margin: 0;
            overflow: hidden;
            background-color: #000000;
        }
    </style>
</head>
<body>

<div id="Stats-output">
</div>
<!-- Div which will hold the Output -->
<div id="WebGL-output">
</div>


<!-- Javascript code that runs our Three.js examples -->
<script type="text/javascript">

    // once everything is loaded, we run our Three.js stuff.
    function init() {

        var stats = initStats();

        // create a scene, that will hold all our elements such as objects, cameras and lights.
        var scene = new THREE.Scene();

        // create a camera, which defines where we‘re looking at.
        var camera = new THREE.PerspectiveCamera(45, window.innerWidth / window.innerHeight, 0.1, 1000);

        // create a render and set the size
        var canvasRenderer = new THREE.CanvasRenderer();
//        var canvasRenderer = new THREE.WebGLRenderer();

        canvasRenderer.setClearColor(new THREE.Color(0x000000, 1.0));
        canvasRenderer.setSize(window.innerWidth, window.innerHeight);

        // position and point the camera to the center of the scene
        camera.position.x = 20;
        camera.position.y = 0;
        camera.position.z = 150;

        // add the output of the renderer to the html element
        document.getElementById("WebGL-output").appendChild(canvasRenderer.domElement);

        var getTexture = function (ctx) {

            // the body,绘制吃豆人中幽灵的身体
            ctx.translate(-81, -84);

            ctx.fillStyle = "orange";
            ctx.beginPath();
            ctx.moveTo(83, 116);
            ctx.lineTo(83, 102);
            ctx.bezierCurveTo(83, 94, 89, 88, 97, 88);
            ctx.bezierCurveTo(105, 88, 111, 94, 111, 102);
            ctx.lineTo(111, 116);
            ctx.lineTo(106.333, 111.333);
            ctx.lineTo(101.666, 116);
            ctx.lineTo(97, 111.333);
            ctx.lineTo(92.333, 116);
            ctx.lineTo(87.666, 111.333);
            ctx.lineTo(83, 116);
            ctx.fill();

            // the eyes
            //绘制其眼睛
            ctx.fillStyle = "white";
            ctx.beginPath();
            ctx.moveTo(91, 96);
            ctx.bezierCurveTo(88, 96, 87, 99, 87, 101);
            ctx.bezierCurveTo(87, 103, 88, 106, 91, 106);
            ctx.bezierCurveTo(94, 106, 95, 103, 95, 101);
            ctx.bezierCurveTo(95, 99, 94, 96, 91, 96);
            ctx.moveTo(103, 96);
            ctx.bezierCurveTo(100, 96, 99, 99, 99, 101);
            ctx.bezierCurveTo(99, 103, 100, 106, 103, 106);
            ctx.bezierCurveTo(106, 106, 107, 103, 107, 101);
            ctx.bezierCurveTo(107, 99, 106, 96, 103, 96);
            ctx.fill();

            // the pupils
            //绘制其眼珠
            ctx.fillStyle = "blue";
            ctx.beginPath();
            ctx.arc(101, 102, 2, 0, Math.PI * 2, true);
            ctx.fill();
            ctx.beginPath();
            ctx.arc(89, 102, 2, 0, Math.PI * 2, true);
            ctx.fill();

        };


        createSprites();
        render();


        function createSprites() {
            var material = new THREE.SpriteCanvasMaterial({
                        program: getTexture,
                        color: 0xffffff
                    }
            );

            material.rotation = Math.PI;

            var range = 500;
            for (var i = 0; i < 1500; i++) {
                //Sprite是Object3D的扩展
                var sprite = new THREE.Sprite(material);
                sprite.position.set(Math.random() * range - range / 2, Math.random() * range - range / 2, Math.random() * range - range / 2);
                sprite.scale.set(0.1, 0.1, 0.1);
                scene.add(sprite);
            }
        }


        var step = 0;

        function render() {

            stats.update();

            requestAnimationFrame(render);
            canvasRenderer.render(scene, camera);
        }

        function initStats() {

            var stats = new Stats();
            stats.setMode(0); // 0: fps, 1: ms

            // Align top-left
            stats.domElement.style.position = ‘absolute‘;
            stats.domElement.style.left = ‘0px‘;
            stats.domElement.style.top = ‘0px‘;

            document.getElementById("Stats-output").appendChild(stats.domElement);

            return stats;
        }


    }
    window.onload = init;
</script>
</body>
</html>
4 基于WebGLRenderer渲染器使用的粒子材质----PointCloudMaterial
PointCloudMaterial材质的map属性使用的是THREE.Texture纹理,该纹理是画布canvas作为参数传递给纹理构造函数得到的
var texture = new THREE.Texture(canvas);
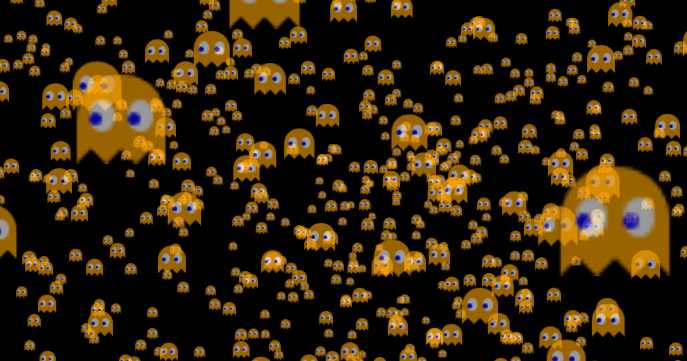
<!DOCTYPE html>

<html>

<head>
    <title>Example 07.05 - Particles - Canvas based texture - WebGL</title>
    <script type="text/javascript" src="../libs/three.js"></script>

    <script type="text/javascript" src="../libs/stats.js"></script>
    <script type="text/javascript" src="../libs/dat.gui.js"></script>
    <style>
        body {
            /* set margin to 0 and overflow to hidden, to go fullscreen */
            margin: 0;
            overflow: hidden;
            background-color: #000000;
        }
    </style>
</head>
<body>

<div id="Stats-output">
</div>
<!-- Div which will hold the Output -->
<div id="WebGL-output">
</div>

<!-- Javascript code that runs our Three.js examples -->
<script type="text/javascript">

    // once everything is loaded, we run our Three.js stuff.
    function init() {

        var stats = initStats();

        // create a scene, that will hold all our elements such as objects, cameras and lights.
        var scene = new THREE.Scene();

        // create a camera, which defines where we‘re looking at.
        var camera = new THREE.PerspectiveCamera(45, window.innerWidth / window.innerHeight, 0.1, 1000);

        // create a render and set the size
        var webGLRenderer = new THREE.WebGLRenderer();
        webGLRenderer.setClearColor(new THREE.Color(0x000000, 1.0));
        webGLRenderer.setSize(window.innerWidth, window.innerHeight);

        // position and point the camera to the center of the scene
        camera.position.x = 20;
        camera.position.y = 0;
        camera.position.z = 150;

        // add the output of the renderer to the html element
        document.getElementById("WebGL-output").appendChild(webGLRenderer.domElement);

        var getTexture = function () {
            var canvas = document.createElement(‘canvas‘);
            canvas.width = 32;
            canvas.height = 32;

            var ctx = canvas.getContext(‘2d‘);
            // the body
            ctx.translate(-81, -84);

            ctx.fillStyle = "orange";
            ctx.beginPath();
            ctx.moveTo(83, 116);
            ctx.lineTo(83, 102);
            ctx.bezierCurveTo(83, 94, 89, 88, 97, 88);
            ctx.bezierCurveTo(105, 88, 111, 94, 111, 102);
            ctx.lineTo(111, 116);
            ctx.lineTo(106.333, 111.333);
            ctx.lineTo(101.666, 116);
            ctx.lineTo(97, 111.333);
            ctx.lineTo(92.333, 116);
            ctx.lineTo(87.666, 111.333);
            ctx.lineTo(83, 116);
            ctx.fill();

            // the eyes
            ctx.fillStyle = "white";
            ctx.beginPath();
            ctx.moveTo(91, 96);
            ctx.bezierCurveTo(88, 96, 87, 99, 87, 101);
            ctx.bezierCurveTo(87, 103, 88, 106, 91, 106);
            ctx.bezierCurveTo(94, 106, 95, 103, 95, 101);
            ctx.bezierCurveTo(95, 99, 94, 96, 91, 96);
            ctx.moveTo(103, 96);
            ctx.bezierCurveTo(100, 96, 99, 99, 99, 101);
            ctx.bezierCurveTo(99, 103, 100, 106, 103, 106);
            ctx.bezierCurveTo(106, 106, 107, 103, 107, 101);
            ctx.bezierCurveTo(107, 99, 106, 96, 103, 96);
            ctx.fill();

            // the pupils
            ctx.fillStyle = "blue";
            ctx.beginPath();
            ctx.arc(101, 102, 2, 0, Math.PI * 2, true);
            ctx.fill();
            ctx.beginPath();
            ctx.arc(89, 102, 2, 0, Math.PI * 2, true);
            ctx.fill();


            var texture = new THREE.Texture(canvas);
            texture.needsUpdate = true;
            return texture;
        };


        var cloud;

        var controls = new function () {
            this.size = 15;
            this.transparent = true;
            this.opacity = 0.6;
            this.color = 0xffffff;
            this.rotateSystem = true;
            this.sizeAttenuation = true;

            this.redraw = function () {
                if (scene.getObjectByName("pointcloud")) {
                    scene.remove(scene.getObjectByName("pointcloud"));
                }
                createPointCloud(controls.size, controls.transparent, controls.opacity, controls.sizeAttenuation, controls.color);
            };
        };

        var gui = new dat.GUI();
        gui.add(controls, ‘size‘, 0, 20).onChange(controls.redraw);
        gui.add(controls, ‘transparent‘).onChange(controls.redraw);
        gui.add(controls, ‘opacity‘, 0, 1).onChange(controls.redraw);
        gui.addColor(controls, ‘color‘).onChange(controls.redraw);
        gui.add(controls, ‘sizeAttenuation‘).onChange(controls.redraw);

        gui.add(controls, ‘rotateSystem‘);

        controls.redraw();

        render();


        function createPointCloud(size, transparent, opacity, sizeAttenuation, color) {

            var geom = new THREE.Geometry();


            var material = new THREE.PointCloudMaterial({
                size: size,
                transparent: transparent,
                opacity: opacity,
                map: getTexture(),
                sizeAttenuation: sizeAttenuation,
                color: color
            });


            var range = 500;
            for (var i = 0; i < 5000; i++) {
                var particle = new THREE.Vector3(Math.random() * range - range / 2, Math.random() * range - range / 2, Math.random() * range - range / 2);
                geom.vertices.push(particle);
            }

            cloud = new THREE.PointCloud(geom, material);
            cloud.name = ‘pointcloud‘;
            cloud.sortParticles = true;
            scene.add(cloud);
        }


        var step = 0;

        function render() {

            stats.update();
            if (controls.rotateSystem) {
                step += 0.01;

                cloud.rotation.x = step;
                cloud.rotation.z = step;
            }


            requestAnimationFrame(render);
            webGLRenderer.render(scene, camera);
        }

        function initStats() {

            var stats = new Stats();
            stats.setMode(0); // 0: fps, 1: ms

            // Align top-left
            stats.domElement.style.position = ‘absolute‘;
            stats.domElement.style.left = ‘0px‘;
            stats.domElement.style.top = ‘0px‘;

            document.getElementById("Stats-output").appendChild(stats.domElement);

            return stats;
        }


    }
    window.onload = init;
</script>
</body>
</html>
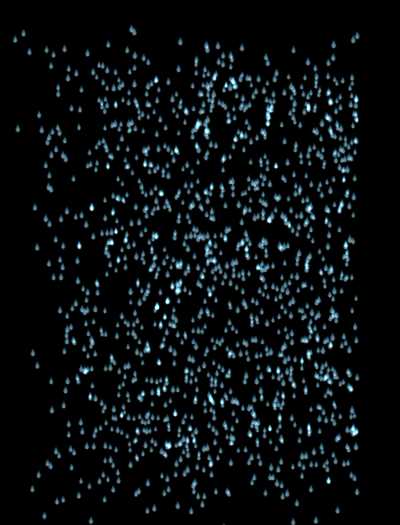
5 引入外部图片形成纹理,然后利用该纹理格式化粒子
引入外部图片形成纹理var texture=new THREE.ImageUtils.loadTexture("../img/rain.jpg");
格式化粒子的材质var material = new THREE.PiontCloudMaterial({map:texture});
利用该材质生成粒子系统 var cloud = new THREE.PointCloud(geom, material);
<!DOCTYPE html>

<html>

<head>
    <title>Example 07.06 - Particles - Rainy scene</title>
    <script type="text/javascript" src="../libs/three.js"></script>

    <script type="text/javascript" src="../libs/stats.js"></script>
    <script type="text/javascript" src="../libs/dat.gui.js"></script>
    <style>
        body {
            /* set margin to 0 and overflow to hidden, to go fullscreen */
            margin: 0;
            overflow: hidden;
            background-color: #000000;
        }
    </style>
</head>
<body>

<div id="Stats-output">
</div>
<!-- Div which will hold the Output -->
<div id="WebGL-output">
</div>

<!-- Javascript code that runs our Three.js examples -->
<script type="text/javascript">

    // once everything is loaded, we run our Three.js stuff.
    function init() {

        var stats = initStats();

        // create a scene, that will hold all our elements such as objects, cameras and lights.
        var scene = new THREE.Scene();

        // create a camera, which defines where we‘re looking at.
        var camera = new THREE.PerspectiveCamera(45, window.innerWidth / window.innerHeight, 0.1, 200);

        // create a render and set the size
        var webGLRenderer = new THREE.WebGLRenderer();
        webGLRenderer.setClearColor(new THREE.Color(0x000000, 1.0));
        webGLRenderer.setSize(window.innerWidth, window.innerHeight);

        // position and point the camera to the center of the scene
        camera.position.x = 20;
        camera.position.y = 40;
        camera.position.z = 110;
        camera.lookAt(new THREE.Vector3(20, 30, 0));

        // add the output of the renderer to the html element
        document.getElementById("WebGL-output").appendChild(webGLRenderer.domElement);

        var system1;
        var cloud;

        var controls = new function () {
            this.size = 3;
            this.transparent = true;
            this.opacity = 0.6;
            this.color = 0xffffff;

            this.sizeAttenuation = true;

            this.redraw = function () {
            //有两个粒子系统
                scene.remove(scene.getObjectByName("particles1"));
                scene.remove(scene.getObjectByName("particles2"));

                createPointCloud(controls.size, controls.transparent, controls.opacity, controls.sizeAttenuation, controls.color);
            };
        };

        var gui = new dat.GUI();
        gui.add(controls, ‘size‘, 0, 20).onChange(controls.redraw);
        gui.add(controls, ‘transparent‘).onChange(controls.redraw);
        gui.add(controls, ‘opacity‘, 0, 1).onChange(controls.redraw);
        gui.addColor(controls, ‘color‘).onChange(controls.redraw);
        gui.add(controls, ‘sizeAttenuation‘).onChange(controls.redraw);

        controls.redraw();

        render();


        function createPointCloud(size, transparent, opacity, sizeAttenuation, color) {
            //引入外部图片生成纹理
            var texture = THREE.ImageUtils.loadTexture("../assets/textures/particles/raindrop-3.png");
            var geom = new THREE.Geometry();

            var material = new THREE.PointCloudMaterial({
                size: size,
                transparent: transparent,
                opacity: opacity,
                map: texture,
                blending: THREE.AdditiveBlending,
                /*这种融合方式:在画新的像素时,背景像素的颜色会被添加到新像素上*/
                sizeAttenuation: sizeAttenuation,
                color: color
            });


            var range = 40;
            for (var i = 0; i < 1500; i++) {
                var particle = new THREE.Vector3(
                        Math.random() * range - range / 2,
                        Math.random() * range * 1.5,
                        Math.random() * range - range / 2);
                particle.velocityY = 0.1 + Math.random() / 5;
                particle.velocityX = (Math.random() - 0.5) / 3;
                geom.vertices.push(particle);
            }

            cloud = new THREE.PointCloud(geom, material);
            cloud.sortParticles = true;

            scene.add(cloud);
        }

        function render() {
            stats.update();
            var vertices = cloud.geometry.vertices;
            vertices.forEach(function (v) {
                v.y = v.y - (v.velocityY);
                v.x = v.x - (v.velocityX);

                if (v.y <= 0) v.y = 60;
                if (v.x <= -20 || v.x >= 20) v.velocityX = v.velocityX * -1;
            });

            requestAnimationFrame(render);
            webGLRenderer.render(scene, camera);
        }

        function initStats() {

            var stats = new Stats();
            stats.setMode(0); // 0: fps, 1: ms

            // Align top-left
            stats.domElement.style.position = ‘absolute‘;
            stats.domElement.style.left = ‘0px‘;
            stats.domElement.style.top = ‘0px‘;

            document.getElementById("Stats-output").appendChild(stats.domElement);

            return stats;
        }


    }
    window.onload = init;
</script>
</body>
</html>
6 通过模拟下雪,学习多个粒子系统并发进行
<!DOCTYPE html>

<html>

<head>
    <title>Example 07.07 - Particles - Snowy scene</title>
    <script type="text/javascript" src="../libs/three.js"></script>

    <script type="text/javascript" src="../libs/stats.js"></script>
    <script type="text/javascript" src="../libs/dat.gui.js"></script>
    <style>
        body {
            /* set margin to 0 and overflow to hidden, to go fullscreen */
            margin: 0;
            overflow: hidden;
            background-color: #000000;
        }
    </style>
</head>
<body>

<div id="Stats-output">
</div>
<!-- Div which will hold the Output -->
<div id="WebGL-output">
</div>

<!-- Javascript code that runs our Three.js examples -->
<script type="text/javascript">

    // once everything is loaded, we run our Three.js stuff.
    function init() {

        var stats = initStats();

        // create a scene, that will hold all our elements such as objects, cameras and lights.
        var scene = new THREE.Scene();

        // create a camera, which defines where we‘re looking at.
        var camera = new THREE.PerspectiveCamera(45, window.innerWidth / window.innerHeight, 0.1, 200);

        // create a render and set the size
        var webGLRenderer = new THREE.WebGLRenderer();
        webGLRenderer.setClearColor(new THREE.Color(0x000000, 1.0));
        webGLRenderer.setSize(window.innerWidth, window.innerHeight);

        // position and point the camera to the center of the scene
        camera.position.x = 20;
        camera.position.y = 40;
        camera.position.z = 110;
        camera.lookAt(new THREE.Vector3(20, 30, 0));

        // add the output of the renderer to the html element
        document.getElementById("WebGL-output").appendChild(webGLRenderer.domElement);

        var system1;
        var system2;

        var controls = new function () {
            this.size = 10;
            this.transparent = true;
            this.opacity = 0.6;
            this.color = 0xffffff;

            this.sizeAttenuation = true;

            this.redraw = function () {
                var toRemove = [];
                scene.children.forEach(function (child) {
                    if (child instanceof THREE.PointCloud) {
                        toRemove.push(child);
                    }
                });
                toRemove.forEach(function (child) {
                    scene.remove(child)
                });
                createPointClouds(controls.size, controls.transparent, controls.opacity, controls.sizeAttenuation, controls.color);
            };
        };

        var gui = new dat.GUI();
        gui.add(controls, ‘size‘, 0, 20).onChange(controls.redraw);
        gui.add(controls, ‘transparent‘).onChange(controls.redraw);
        gui.add(controls, ‘opacity‘, 0, 1).onChange(controls.redraw);
        gui.addColor(controls, ‘color‘).onChange(controls.redraw);
        gui.add(controls, ‘sizeAttenuation‘).onChange(controls.redraw);

        controls.redraw();

        render();

        function createPointCloud(name, texture, size, transparent, opacity, sizeAttenuation, color) {
            var geom = new THREE.Geometry();

            var color = new THREE.Color(color);
            color.setHSL(color.getHSL().h,
                    color.getHSL().s,
                    (Math.random()) * color.getHSL().l);

            var material = new THREE.PointCloudMaterial({
                size: size,
                transparent: transparent,
                opacity: opacity,
                map: texture,
                blending: THREE.AdditiveBlending,
                depthWrite: false,/*该属性决定了这个对象是否影响WebGL的深度缓存,将其设置为false,则各个粒子系统之间互不干涉*/
                sizeAttenuation: sizeAttenuation,
                color: color
            });

            var range = 40;
            for (var i = 0; i < 50; i++) {
                var particle = new THREE.Vector3(
                        Math.random() * range - range / 2,
                        Math.random() * range * 1.5,
                        Math.random() * range - range / 2);
                particle.velocityY = 0.1 + Math.random() / 5;
                particle.velocityX = (Math.random() - 0.5) / 3;
                particle.velocityZ = (Math.random() - 0.5) / 3;
                geom.vertices.push(particle);
            }

            var system = new THREE.PointCloud(geom, material);
            system.name = name;
            system.sortParticles = true;
            return system;
        }

        function createPointClouds(size, transparent, opacity, sizeAttenuation, color) {

            var texture1 = THREE.ImageUtils.loadTexture("../assets/textures/particles/snowflake1.png");
            var texture2 = THREE.ImageUtils.loadTexture("../assets/textures/particles/snowflake2.png");
            var texture3 = THREE.ImageUtils.loadTexture("../assets/textures/particles/snowflake3.png");
            var texture4 = THREE.ImageUtils.loadTexture("../assets/textures/particles/snowflake5.png");

            scene.add(createPointCloud("system1", texture1, size, transparent, opacity, sizeAttenuation, color));
            scene.add(createPointCloud("system2", texture2, size, transparent, opacity, sizeAttenuation, color));
            scene.add(createPointCloud("system3", texture3, size, transparent, opacity, sizeAttenuation, color));
            scene.add(createPointCloud("system4", texture4, size, transparent, opacity, sizeAttenuation, color));
        }


        function render() {

            stats.update();

            scene.children.forEach(function (child) {
                if (child instanceof THREE.PointCloud) {
                    var vertices = child.geometry.vertices;
                    vertices.forEach(function (v) {
                        v.y = v.y - (v.velocityY);
                        v.x = v.x - (v.velocityX);
                        v.z = v.z - (v.velocityZ);

                        if (v.y <= 0) v.y = 60;
                        if (v.x <= -20 || v.x >= 20) v.velocityX = v.velocityX * -1;
                        if (v.z <= -20 || v.z >= 20) v.velocityZ = v.velocityZ * -1;
                    });
                }
            });

            requestAnimationFrame(render);
            webGLRenderer.render(scene, camera);
        }

        function initStats() {

            var stats = new Stats();
            stats.setMode(0); // 0: fps, 1: ms

            // Align top-left
            stats.domElement.style.position = ‘absolute‘;
            stats.domElement.style.left = ‘0px‘;
            stats.domElement.style.top = ‘0px‘;

            document.getElementById("Stats-output").appendChild(stats.domElement);

            return stats;
        }


    }
    window.onload = init;
</script>
</body>
</html>
7 Sprite粒子和SpriteMaterial粒子的基本材质
| SpriteMaterial属性 | 描述 |
| color | 粒子的颜色 |
| map | 粒子的纹理 |
| sizeAnnutation | 相机的远近是否影响粒子的大小 |
| opacity | 透明度 |
| transparent | 是否透明 |
| blending | 融合方式 |
| fog | 是否受场景雾化的影响 |
| useScreenCoordinates | true:粒子的位置是绝对位置,原点是屏幕的左上角 |
| scaleByViewport |
true:粒子的大小取决于视窗的尺寸,粒子的宽=图片的宽/窗口的高 false:粒子的宽=图片的宽/1.0 |
| alignment |
当粒子被缩放的时候,指定从哪里开始缩放, THREE.SpriteAlignment.topLeft左上角保持不动,进行缩放 |
| uvOffset | 当载入的图片是一个精灵图片,即很多小图组成一张大图,取大图上具体某个小图时,使用该属性,进行偏移得到具体的小图 |
| uvScale | 对根据uvOffset获取到的小图进行缩放 |
<!DOCTYPE html>

<html>

<head>
    <title>Example 07.09 - Sprites in 3D</title>
    <script type="text/javascript" src="../libs/three.js"></script>

    <script type="text/javascript" src="../libs/stats.js"></script>
    <script type="text/javascript" src="../libs/dat.gui.js"></script>
    <style>
        body {
            /* set margin to 0 and overflow to hidden, to go fullscreen */
            margin: 0;
            overflow: hidden;
            background-color: #000000;
        }
    </style>
</head>
<body>

<div id="Stats-output">
</div>
<!-- Div which will hold the Output -->
<div id="WebGL-output">
</div>


<!-- Javascript code that runs our Three.js examples -->
<script type="text/javascript">

    // once everything is loaded, we run our Three.js stuff.
    function init() {

        var stats = initStats();

        // create a scene, that will hold all our elements such as objects, cameras and lights.
        var scene = new THREE.Scene();

        // create a camera, which defines where we‘re looking at.
        var camera = new THREE.PerspectiveCamera(45, window.innerWidth / window.innerHeight, 0.1, 1000);

        // create a render and set the size
        var webGLRenderer = new THREE.WebGLRenderer();
        webGLRenderer.setClearColor(new THREE.Color(0x000000, 1.0));
        webGLRenderer.setSize(window.innerWidth, window.innerHeight);

        // position and point the camera to the center of the scene
        camera.position.x = 20;
        camera.position.y = 0;
        camera.position.z = 150;

        // add the output of the renderer to the html element
        document.getElementById("WebGL-output").appendChild(webGLRenderer.domElement);


        createSprites();
        render();

        var group;

        function createSprites() {

            group = new THREE.Object3D();
            var range = 200;
            for (var i = 0; i < 400; i++) {
                group.add(createSprite(10, false, 0.6, 0xffffff, i % 5, range));
            }
            scene.add(group);
        }


        function getTexture() {
        //只需要载入一张大图,该大图由5个小图组成
            var texture = new THREE.ImageUtils.loadTexture("../assets/textures/particles/sprite-sheet.png");
            return texture;
        }


        function createSprite(size, transparent, opacity, color, spriteNumber, range) {


            var spriteMaterial = new THREE.SpriteMaterial({
                        opacity: opacity,
                        color: color,
                        transparent: transparent,
                        map: getTexture()
                    }
            );

            // we have 1 row, with five sprites
            spriteMaterial.map.offset = new THREE.Vector2(0.2 * spriteNumber, 0);
            spriteMaterial.map.repeat = new THREE.Vector2(1 / 5, 1);
            spriteMaterial.depthTest = false;

            spriteMaterial.blending = THREE.AdditiveBlending;

            var sprite = new THREE.Sprite(spriteMaterial);
            sprite.scale.set(size, size, size);
            sprite.position.set(Math.random() * range - range / 2, Math.random() * range - range / 2, Math.random() * range - range / 2);
            sprite.velocityX = 5;


            return sprite;
        }


        var step = 0;

        function render() {

            stats.update();
            step += 0.01;
            group.rotation.x = step;

            requestAnimationFrame(render);
            webGLRenderer.render(scene, camera);
        }

        function initStats() {

            var stats = new Stats();
            stats.setMode(0); // 0: fps, 1: ms

            // Align top-left
            stats.domElement.style.position = ‘absolute‘;
            stats.domElement.style.left = ‘0px‘;
            stats.domElement.style.top = ‘0px‘;

            document.getElementById("Stats-output").appendChild(stats.domElement);

            return stats;
        }


    }
    window.onload = init;
</script>
</body>
</html>
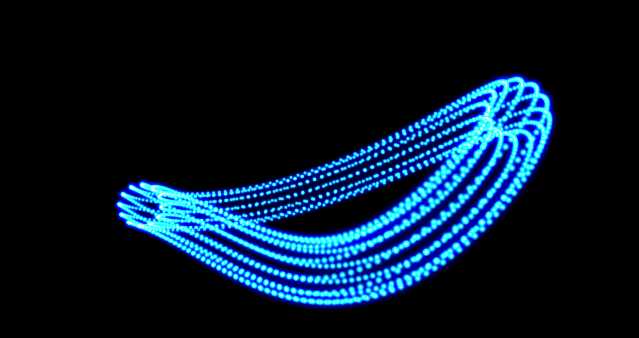
8 将canvas作为纹理,其中canvas上绘制了一条放射颜色渐变,扭结环几何体的各个顶点和canvas纹理作为参数传递粒子系统的构造函数,生成一个粒子系统
var gradient = context.createRadialGradient()//canvas上绘制一条放射颜色渐变
var texture = new THREE.Texture(canvas);//canvas作为参数传递给纹理构造函数,生成一个纹理
var material = new THREE.PointCloudMaterial({map: generateSprite()});// 利用粒子基本材质的map属性应用该纹理,生成材质
var geom = new THREE.TorusKnotGeometry()//扭结环构造函数,生成一个几何体
var cloud = new THREE.PointCloud(geom, material);//利用上面得到的几何体和材质得到一个粒子系统
<!DOCTYPE html>

<html>

<head>
    <title>Example 07.10 - 3D Torusknot</title>
    <script type="text/javascript" src="../libs/three.js"></script>

    <script type="text/javascript" src="../libs/stats.js"></script>
    <script type="text/javascript" src="../libs/dat.gui.js"></script>
    <style>
        body {
            /* set margin to 0 and overflow to hidden, to go fullscreen */
            margin: 0;
            overflow: hidden;
        }
    </style>
</head>
<body>

<div id="Stats-output">
</div>
<!-- Div which will hold the Output -->
<div id="WebGL-output">
</div>

<!-- Javascript code that runs our Three.js examples -->
<script type="text/javascript">

    // once everything is loaded, we run our Three.js stuff.
    function init() {

        var stats = initStats();

        // create a scene, that will hold all our elements such as objects, cameras and lights.
        var scene = new THREE.Scene();

        // create a camera, which defines where we‘re looking at.
        var camera = new THREE.PerspectiveCamera(45, window.innerWidth / window.innerHeight, 0.1, 1000);

        // create a render and set the size
        var webGLRenderer = new THREE.WebGLRenderer();
        webGLRenderer.setClearColor(new THREE.Color(0x000000, 1.0));
        webGLRenderer.setSize(window.innerWidth, window.innerHeight);
        webGLRenderer.shadowMapEnabled = true;


        // position and point the camera to the center of the scene
        camera.position.x = -30;
        camera.position.y = 40;
        camera.position.z = 50;
        camera.lookAt(new THREE.Vector3(10, 0, 0));

        // add the output of the renderer to the html element
        document.getElementById("WebGL-output").appendChild(webGLRenderer.domElement);

        // call the render function
        var step = 0;

        var knot;

        // setup the control gui
        var controls = new function () {
            // we need the first child, since it‘s a multimaterial
            this.radius = 13;
            this.tube = 1.7;
            this.radialSegments = 156;
            this.tubularSegments = 12;
            this.p = 5;
            this.q = 4;
            this.heightScale = 3.5;
            this.asParticles = false;
            this.rotate = false;

            this.redraw = function () {
                // remove the old plane
                if (knot) scene.remove(knot);
                // create a new one
                var geom = new THREE.TorusKnotGeometry(controls.radius, controls.tube, Math.round(controls.radialSegments), Math.round(controls.tubularSegments), Math.round(controls.p), Math.round(controls.q), controls.heightScale);

                if (controls.asParticles) {
                    knot = createPointCloud(geom);
                } else {
                    knot = createMesh(geom);
                }

                // add it to the scene.
                scene.add(knot);
            };

        };

        var gui = new dat.GUI();
        gui.add(controls, ‘radius‘, 0, 40).onChange(controls.redraw);
        gui.add(controls, ‘tube‘, 0, 40).onChange(controls.redraw);
        gui.add(controls, ‘radialSegments‘, 0, 400).step(1).onChange(controls.redraw);
        gui.add(controls, ‘tubularSegments‘, 1, 20).step(1).onChange(controls.redraw);
        gui.add(controls, ‘p‘, 1, 10).step(1).onChange(controls.redraw);
        gui.add(controls, ‘q‘, 1, 15).step(1).onChange(controls.redraw);
        gui.add(controls, ‘heightScale‘, 0, 5).onChange(controls.redraw);
        gui.add(controls, ‘asParticles‘).onChange(controls.redraw);
        gui.add(controls, ‘rotate‘).onChange(controls.redraw);

        controls.redraw();

        render();

        // from THREE.js examples
        function generateSprite() {

            var canvas = document.createElement(‘canvas‘);
            canvas.width = 16;
            canvas.height = 16;

            var context = canvas.getContext(‘2d‘);
            var gradient = context.createRadialGradient(canvas.width / 2, canvas.height / 2, 0, canvas.width / 2, canvas.height / 2, canvas.width / 2);
            gradient.addColorStop(0, ‘rgba(255,255,255,1)‘);
            gradient.addColorStop(0.2, ‘rgba(0,255,255,1)‘);
            gradient.addColorStop(0.4, ‘rgba(0,0,64,1)‘);
            gradient.addColorStop(1, ‘rgba(0,0,0,1)‘);

            context.fillStyle = gradient;
            context.fillRect(0, 0, canvas.width, canvas.height);

            var texture = new THREE.Texture(canvas);
            texture.needsUpdate = true;
            return texture;

        }

        function createPointCloud(geom) {
            var material = new THREE.PointCloudMaterial({
                color: 0xffffff,
                size: 3,
                transparent: true,
                blending: THREE.AdditiveBlending,
                map: generateSprite()
            });

            var cloud = new THREE.PointCloud(geom, material);
            cloud.sortParticles = true;
            return cloud;
        }

        function createMesh(geom) {

            // assign two materials
            var meshMaterial = new THREE.MeshNormalMaterial({});
            meshMaterial.side = THREE.DoubleSide;

            // create a multimaterial
            var mesh = THREE.SceneUtils.createMultiMaterialObject(geom, [meshMaterial]);

            return mesh;
        }

        function render() {
            stats.update();

            if (controls.rotate) {
                knot.rotation.y = step += 0.01;
            }

            // render using requestAnimationFrame
            requestAnimationFrame(render);
            webGLRenderer.render(scene, camera);
        }

        function initStats() {

            var stats = new Stats();
            stats.setMode(0); // 0: fps, 1: ms

            // Align top-left
            stats.domElement.style.position = ‘absolute‘;
            stats.domElement.style.left = ‘0px‘;
            stats.domElement.style.top = ‘0px‘;

            document.getElementById("Stats-output").appendChild(stats.domElement);

            return stats;
        }
    }
    window.onload = init;
</script>
</body>
</html>
标签:city number sha pil window cloud setup which repeat
原文地址:http://www.cnblogs.com/amy2011/p/6358330.html