标签:2.4 fork security jin script 方式 测试 ref modules
操作系统:centos7.2 x64
tengine:Tengine/2.2.0
主机IP: 10.0.0.12
一、安装tengine
1.1 下载源码安装包
1.1.1 源码包pcre-8.40
用于支持正则表达式
            [root@tengine ~]# cd /usr/local/src/
            [root@tengine src]# wget ftp://ftp.csx.cam.ac.uk/pub/software/programming/pcre/pcre-8.40.tar.gz
1.1.2 源码包zlib-1.2.11
用于支持数据压缩
[root@tengine src]# wget http://zlib.net/zlib-1.2.11.tar.gz
1.1.3 源码包openssl-1.0.2
用于数据加密及支持SSL协议
[root@tengine src]# wget https://www.openssl.org/source/openssl-1.0.2k.tar.gz
1.1.4 源码包jemalloc-4.4.0
用于优化内存管理
[root@tengine src]# wget https://github.com/jemalloc/jemalloc/archive/4.4.0.tar.gz
1.1.5 源码包tengine-2.2.0
            [root@tengine src]# wget http://tengine.taobao.org/download/tengine-2.2.0.tar.gz
            [root@tengine src]# ls
            jemalloc-4.4.0.tar.gz  openssl-1.0.2k.tar.gz  pcre-8.40.tar.gz  tengine-2.2.0.tar.gz  zlib-1.2.11.tar.gz
1.2 编译安装依赖包
1.2.1 更新工具包
[root@tengine src]# yum install openssl-devel zlib-devel -y
1.2.2 编译pcre
            [root@tengine src]# tar xf pcre-8.40.tar.gz
            [root@tengine src]# cd pcre-8.40
            [root@tengine pcre-8.40]# ./configure --prefix=/usr/local/pcre
            [root@tengine pcre-8.40]# make && make install
1.2.3 编译openssl
            [root@tengine src]# tar xf openssl-1.0.2k.tar.gz
            [root@tengine src]# cd openssl-1.0.2k
            [root@tengine openssl-1.0.2k]# ./config --prefix=/usr/local/openssl
            [root@tengine openssl-1.0.2k]# make && make install
1.2.4 编译zlib
            [root@tengine src]# tar xf zlib-1.2.11.tar.gz
            [root@tengine src]# cd zlib-1.2.11
            [root@tengine zlib-1.2.11]# ./configure --prefix=/usr/local/zlib
            [root@tengine zlib-1.2.11]# make && make install
1.2.5 编译jemalloc
            [root@tengine src]# tar xf jemalloc-4.4.0.tar.gz
            [root@tengine src]# cd jemalloc-4.4.0
            [root@tengine jemalloc-4.4.0]# ./autogen.sh
            autoconf
            ./autogen.sh: line 5: autoconf: command not found
            Error 0 in autoconf

            # 安装autoconf包
            [root@tengine jemalloc-4.4.0]# yum install autoconf -y
            [root@tengine jemalloc-4.4.0]# ./autogen.sh
            [root@tengine jemalloc-4.4.0]# make
            [root@tengine jemalloc-4.4.0]# make install
            /usr/bin/install: cannot stat ‘doc/jemalloc.html’: No such file or directory
            make: *** [install_doc_html] Error 1
            # 这里只是说明文档和html页面没有,可以忽悠这个错误,可以直接touch
            [root@tengine jemalloc-4.4.0]# touch doc/jemalloc.html
            [root@tengine jemalloc-4.4.0]# make install
            [root@tengine jemalloc-4.4.0]# touch doc/jemalloc.3
            [root@tengine jemalloc-4.4.0]# make install
1.2.8 加载库文件
            [root@tengine tengine-2.2.0]# echo ‘/usr/local/pcre/lib/‘ > /etc/ld.so.conf.d/pcre.conf
            [root@tengine tengine-2.2.0]# echo ‘/usr/local/zlib/lib/‘ > /etc/ld.so.conf.d/zlib.conf
            [root@tengine tengine-2.2.0]# echo ‘/usr/local/openssl/lib/‘ > /etc/ld.so.conf.d/openssl.conf
            [root@tengine tengine-2.2.0]# echo ‘/usr/local/lib/‘ > /etc/ld.so.conf.d/local.conf
            [root@tengine tengine-2.2.0]# ldconfig -v | less
            /usr/local/lib:
                    libjemalloc.so.2 -> libjemalloc.so.2
            /usr/local/openssl/lib:
            /usr/local/pcre/lib:
                    libpcrecpp.so.0 -> libpcrecpp.so.0.0.1
                    libpcreposix.so.0 -> libpcreposix.so.0.0.4
                    libpcre.so.1 -> libpcre.so.1.2.8
            /usr/local/zlib/lib:
                    libz.so.1 -> libz.so.1.2.11
                    ......
                    ......
1.2.7 编译tengine
            [root@tengine src]# tar xf tengine-2.2.0.tar.gz
            [root@tengine src]# cd tengine-2.2.0
            # 创建tengine运行用户
            [root@tengine tengine-2.2.0]# groupadd -g 80 www
            [root@tengine tengine-2.2.0]# useradd -u 80 -g 80 -s /sbin/nologin -M www
            # 注意,在编译tengine时候,pcre, openssl, zlib必须指向源码目录,而jemalloc不能指向源码目录。切记!
            [root@tengine tengine-2.2.0]# ./configure --prefix=/usr/local/tengine --user=www --group=www             --with-http_stub_status_module             --with-http_ssl_module             --with-http_gzip_static_module             --with-openssl=/usr/local/src/openssl-1.0.2k             --with-pcre=/usr/local/src/pcre-8.40             --with-zlib=/usr/local/src/zlib-1.2.11             --with-jemalloc

            [root@tengine tengine-2.2.0]# make
            [root@tengine tengine-2.2.0]# make install

            [root@tengine tengine-2.2.0]# cd /usr/local/tengine/
            [root@tengine tengine]# ls
            conf  html  include  logs  modules  sbin
            [root@tengine tengine]# echo ‘PATH=$PATH:/usr/local/tengine/sbin/‘ > /etc/profile.d/tengine.sh
            [root@tengine tengine]# cat !$
            cat /etc/profile.d/tengine.sh
            PATH=$PATH:/usr/local/tengine/sbin/
            [root@tengine tengine]# source /etc/profile.d/tengine.sh
            [root@tengine tengine]# nginx
            [root@tengine tengine]# netstat -ntplu | grep nginx
            tcp        0      0 0.0.0.0:80              0.0.0.0:*               LISTEN      53295/nginx: master

            # tengine编译成功!

            # 验证jemalloc是否生效
            [root@tengine tengine]# yum install lsof -y
            [root@tengine tengine]# lsof -n | grep jemalloc
            nginx     23371         root  mem       REG              253,0   2584161   34723136 /usr/local/lib/libjemalloc.so.2
            nginx     23372          www  mem       REG              253,0   2584161   34723136 /usr/local/lib/libjemalloc.so.2
            # jemalloc 已生效!
1.3 编写服务,实现开机启动
        [root@tengine tengine-2.2.0]# vim /usr/lib/systemd/system/tengine.service

        [Unit]
        Description=The nginx HTTP and reverse proxy server
        After=syslog.target network.target remote-fs.target nss-lookup.target

        [Service]
        Type=forking
        PIDFile=/usr/local/tengine/logs/nginx.pid
        ExecStartPre=/usr/local/tengine/sbin/nginx -t
        ExecStart=/usr/local/tengine/sbin/nginx
        ExecReload=/bin/kill -s HUP $MAINPID
        ExecStop=/bin/kill -s QUIT $MAINPID
        PrivateTmp=true

        [Install]
        WantedBy=multi-user.target

        [root@tengine tengine-2.2.0]# nginx -s stop
        [root@tengine tengine-2.2.0]# systemctl status tengine
        ● tengine.service - The nginx HTTP and reverse proxy server
           Loaded: loaded (/usr/lib/systemd/system/tengine.service; disabled; vendor preset: disabled)
           Active: inactive (dead)

        # 启动服务
        [root@tengine tengine-2.2.0]# systemctl start tengine
        [root@tengine tengine-2.2.0]# netstat -ntplu | grep nginx
        tcp        0      0 0.0.0.0:80              0.0.0.0:*               LISTEN      23429/nginx: master

        # 设置开机启动
        [root@tengine tengine-2.2.0]# systemctl enable tengine
        Created symlink from /etc/systemd/system/multi-user.target.wants/tengine.service to /usr/lib/systemd/system/tengine.service.
二、tengine配置SSL并强制使用HTTPS访问
2.1 使用openssl 生成 SSL key 和 CSR
        [root@tengine ~]# mkdir /etc/ssl/private
        [root@tengine ~]# cd /etc/ssl/private/
        [root@tengine private]# openssl req -new -newkey rsa:2048 -sha256 -nodes -out super_com.csr -keyout super_com.key -subj "/C=CN/ST=Beijing/L=Beijing/O=Super Inc./OU=Web Security/CN=super.com"

        # 这里为了实验,我们自行签发不受浏览器信任的SSL证书

        [root@tengine private]# openssl x509 -req -days 365 -in super_com.csr -signkey super_com.key -out super_com.crt
        Signature ok
        subject=/C=CN/ST=Beijing/L=Beijing/O=Super Inc./OU=Web Security/CN=super.com
        Getting Private key
2.2 为tengine配置SSL协议认证
这里配置建议使用以下两种方式:
(1)通过tengine write配置正则跳转的方式,该方式会占用服务器资源;
(2)通过html meta 跳转的方式,百度采用这种方式;
2.2.1 tengine write方式实现:
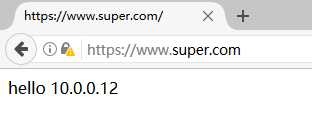
            [root@tengine ~]# cd /usr/local/tengine/conf/
            [root@tengine conf]# vim nginx.conf
            ...
            ...
            http {
                server {
                    listen       80;
                    server_name  www.super.com;
                    rewrite ^(.*)$ https://$host$1 permanent;                    # 访问的所有url都跳转为https协议
                    ...
                    ...
                    }
                include vhost/.conf;
            }
            ...
            ...
            [root@tengine conf]# mkdir /usr/local/tengine/conf/vhost
            [root@tengine conf]# cd /usr/local/tengine/conf/vhost
            [root@tengine vhost]# vim ssl.conf

            server {
              listen       443 ssl;
              ssl on;
              ssl_certificate /etc/ssl/private/example_com.crt;
              ssl_certificate_key /etc/ssl/private/example_com.key;
              location / {
                root /usr/local/tengine/html/ssl;
                index index.html;
              }
            }
            # 创建网站根目录和测试页面
            [root@tengine vhost]# mkdir /usr/local/tengine/html/ssl
            [root@tengine vhost]# cd !$
            cd /usr/local/tengine/html/ssl
            [root@tengine ssl]# echo ‘hello 10.0.0.12‘ > index.html


            [root@tengine conf]# echo ‘10.0.0.12    www.super.com‘ >> /etc/hosts
            [root@tengine conf]# ping www.super.com
            PING www.super.com (10.0.0.12) 56(84) bytes of data.
            64 bytes from www.super.com (10.0.0.12): icmp_seq=1 ttl=64 time=0.057 ms
            # 重新加载tengine
            [root@tengine conf]# nginx -t
            nginx: the configuration file /usr/local/tengine/conf/nginx.conf syntax is ok
            nginx: configuration file /usr/local/tengine/conf/nginx.conf test is successful
            [root@tengine conf]# nginx -s stop     # 这里reload不生效可以尝试关闭,在开启
            [root@tengine conf]# nginx
            [root@tengine conf]# netstat -ntplu | grep nginx
            tcp        0      0 0.0.0.0:80              0.0.0.0:*               LISTEN      23513/nginx: master
            tcp        0      0 0.0.0.0:443             0.0.0.0:*               LISTEN      23513/nginx: master
            [root@tengine conf]# setenforce 0; systemctl stop firewalld     # 关闭selinux和防火墙
# 编辑本地主机hosts文件。C:\Windows\System32\drivers\etc\hosts
10.0.0.12 www.super.com
浏览器访问:http://www.super.com/
2.2.2 通过html meta 跳转的方式实现:
            [root@tengine conf]# vim nginx.conf
            # 将rewrite注释
            #rewrite ^(.*)$  https://$host$1 permanent;
            [root@tengine conf]# cd /usr/local/tengine/html/
            [root@tengine html]# vim index.html

            <html>
            <meta http-equiv="refresh" content="0;url=https://www.super.com/">
            </html>

标签:2.4 fork security jin script 方式 测试 ref modules
原文地址:http://www.cnblogs.com/hukey/p/6368543.html