标签:targe 资源 应用 逆时针 cto uart 颜色 model end
前几天在 Lexus 官网看到有这样的一个效果:http://www.lexus.com.cn/models/es/360
于是顺手打开控制台看了下他们是怎么做的,发现使用的技术还是比较简单的,通过背景图的切换来完成全景的效果。
心血来潮自己做了一个优化一点的版本,先上 DEMO 和 源码。(由于图片资源较大,加载时间较长,请耐心等待)
接下来分享下我的制作流程。首先观察下他们的图片链接:
http://img.lexus.do2014.cn/images/es/car/spoke10a/Sonic_Quartz/36.jpg!t1024x450.jpg
标红的位置为图片的序号,在拖拽时通过改变 url 来完成全景的效果。每款车的每个颜色都有60张图,序号为1-59。
现在想把这60张图下载下来,一张张扣自然太low,小小的运用下 node.js 帮我们实现这个需求:依次请求图片,并通过 fileSystem 将图片写到本地。
download.js
var http = require("http"),
    fs = require("fs");

var imgPath = ‘http://img.lexus.do2014.cn/images/es/car/spoke10a/Red_Mica_Crystal_Shine/‘;

fs.mkdir(‘./downloadImg‘, (err) => {
    if (err && err.code != ‘EEXIST‘) return;
    downloadImg();
});

function downloadImg() {
    for (var i = 0; i < 60; i ++) {
        var url = imgPath + i + ".jpg!t1024x450.jpg";
        // console.log(url);
        ((i) => {
             http.get(url, (res) => {
                var out = fs.createWriteStream(‘./downloadImg/‘+i+‘.jpg‘, {
                    encoding: ‘binary‘
                });

                res.on(‘data‘, (chunk) => {
                    out.write(chunk);
                });

                res.on(‘end‘, () => {
                    console.log(‘Image_‘+i+‘ download complete.‘);
                    out.end(‘‘);
                });
            });
        })(i);
    }
}
$ node download.js
这样60张图片就已经下载下来了,接下来想通过 CSS 精灵来实现这个图片切换的效果,所以需要将这些图片拼成一整张,我这里使用 sketch 来完成。
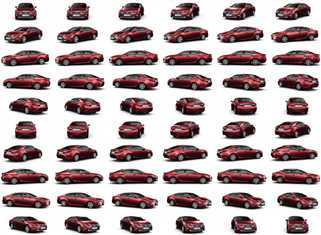
在同等的服务器条件下,一张肯定要比多张效率高。不过即使是压缩之后的图,也有着上M的大小。如果有 CDN 进行加速的话,那是再好不过的了。
准备工作已经完成了,接下来进行代码的编写。
首先创建一个方法用来生成矩阵,矩阵中用来保存每辆车在雪碧图中的坐标。
{
  // ...
  I: 0,
  J: 0,
  rowNum: 10,
  colNum: 6,
  max: 60,
  conWidth: 1024,
  conHeight: 450,
   //...
  createMatrix() {
        this.matrix = [];

        var arr = [];

        for (var i = 0; i < this.max; i ++) {
            var position = ‘-‘ + this.I * this.conWidth + ‘ -‘ + this.J * this.conHeight;
            arr.push(position);

            this.I ++;

            if ((i+1) % this.colNum == 0) {
                this.matrix.push(arr);
                arr = [];
                this.I = 0;
                this.J ++;
            }
        }
        // console.log(this.matrix);
        this.I = 0;
        this.J = 0;
    }
}
生成的坐标矩阵如下
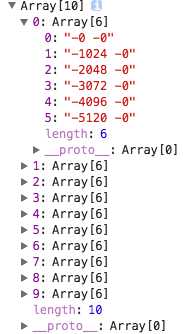
由于这些坐标最后是应用于 backgroundPostion 属性上的,所以直接在前面添加了 “-” 号。
接下来创建一个改变图片行列序号的方法,同时将坐标设置到 backgroundPosition 上。
{
       //...
    this.$container: document.querySelector(‘#container‘),
    this.I: 0,
    this.J: 0,
    this.rowNum: 10,
    this.colNum: 6,
       //...
    rotate(type) { //clockwise: 顺时针, anti: 逆时针
        if (type == ‘clockwise‘) {
            this.I ++;

            if (this.I >= this.colNum) {
                this.I = 0;
                this.J ++;
                if (this.J >= this.rowNum) this.J = 0;
            }

        } else if (type == ‘anti‘) {
            this.I --;

            if (this.I < 0) {
                this.I = this.colNum - 1;
                this.J --;
                if (this.J < 0) this.J = this.rowNum - 1;
            }
        }
        // console.log(this.I, this.J);
        this.changePosition();
    },

    changePosition() {
        // console.log(this.matrix[this.J][this.I]);
        this.$container.style.backgroundPosition = this.matrix[this.J][this.I];
    },
}
最后使用 hammer.js 来完成手势的操作
var hammer = new Hammer(this.$container);

hammer.on(‘pan‘, function(e) {
  if ([向右拖动]) {
    this.rotate(‘anti‘);
  } else {
    this.rotate(‘clockwise‘);
  }
});
这样,一个全景观车的效果就完成了。
感谢你的浏览,希望有所帮助。
标签:targe 资源 应用 逆时针 cto uart 颜色 model end
原文地址:http://www.cnblogs.com/ghost-xyx/p/6407169.html