标签:style blog http color os io 文件 for
新增專案實現留言板功能,瞭解MVC的運行機制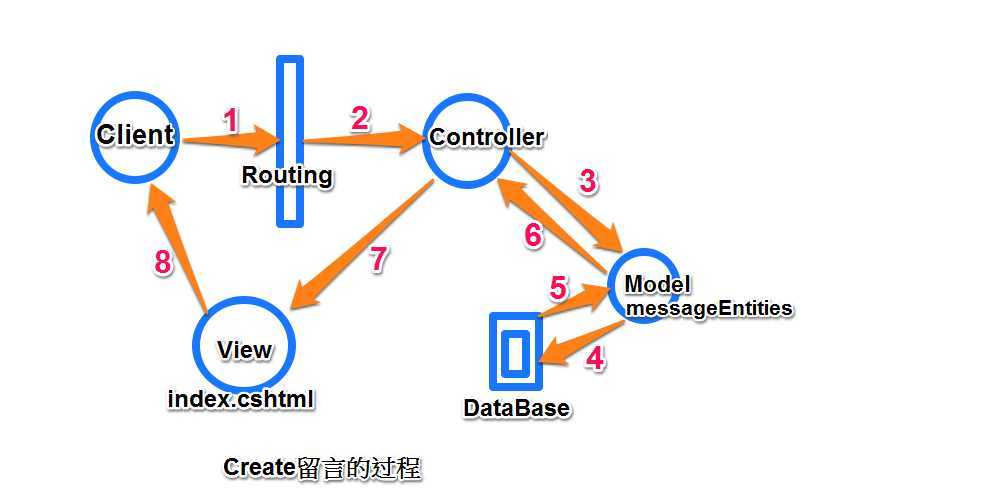
1,新增專案
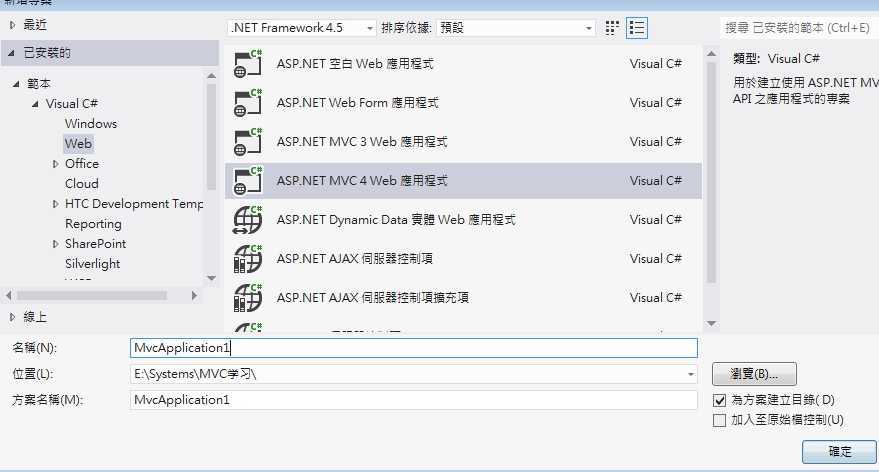
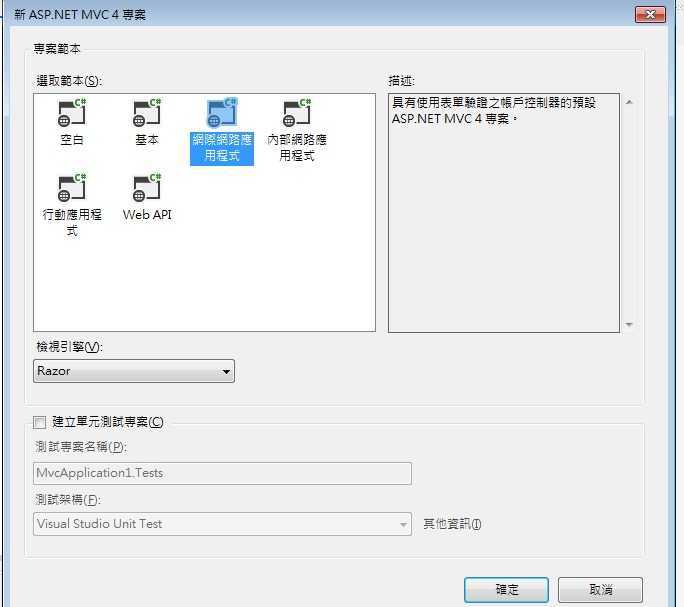
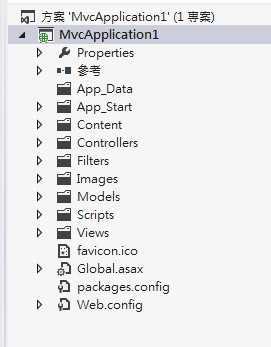
2,添加數據庫文件message.mdf
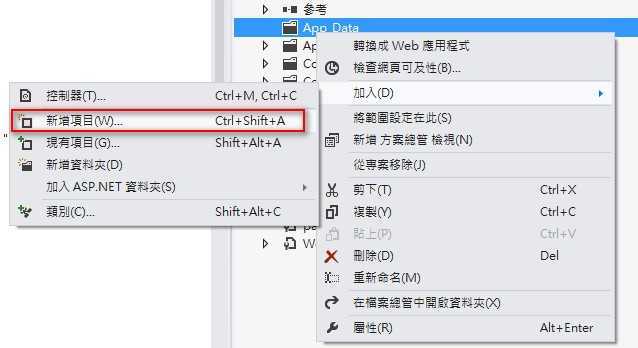
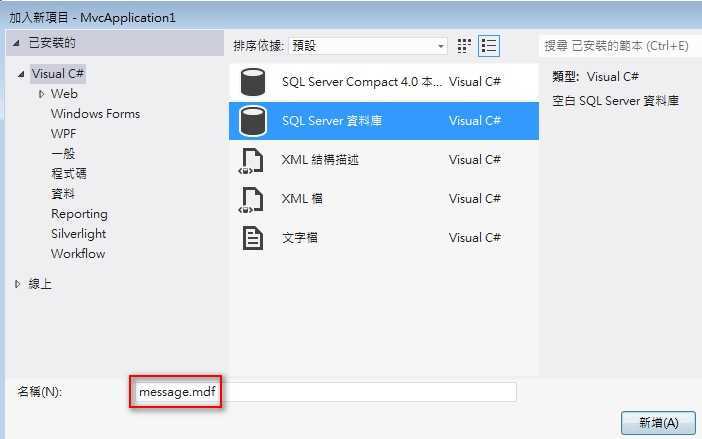
Ctrl+W,L 打開資料庫連接,添加存放留言的Atricle表
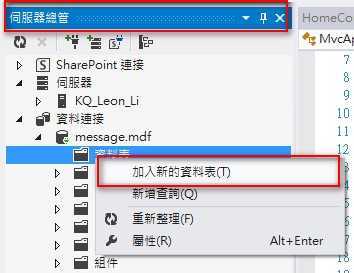
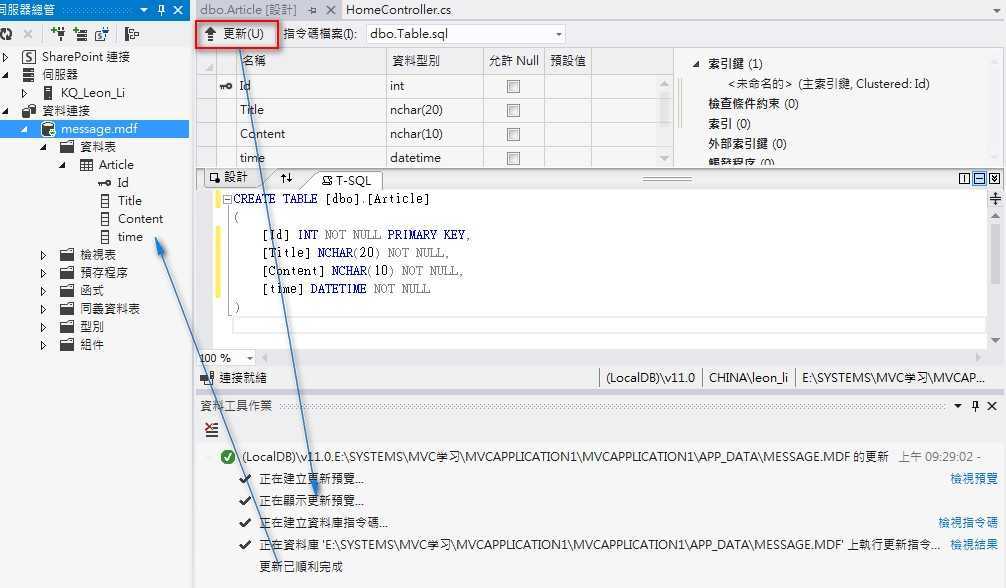
添加字段,後點擊"更新"後看到新增的Atricle表(Content 應該設置為text)
3,添加ADO.NET實體數據模型 (MVC通過實體數據模型對數據庫中的數據進行增删改查)
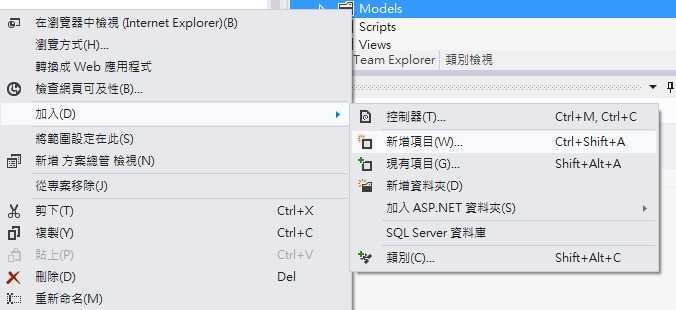
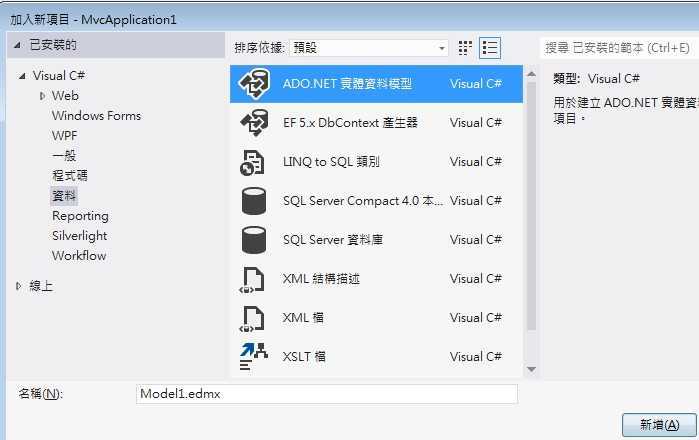
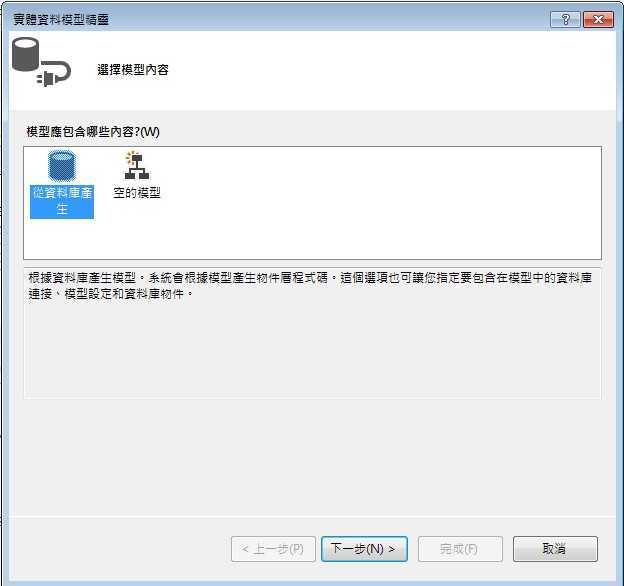
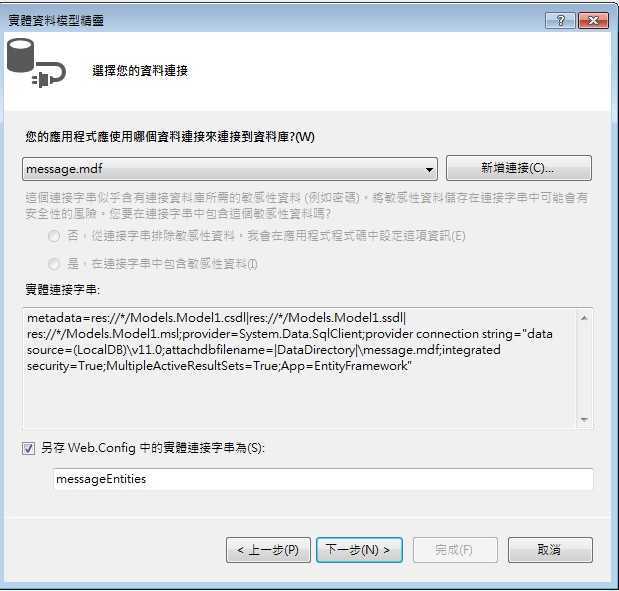
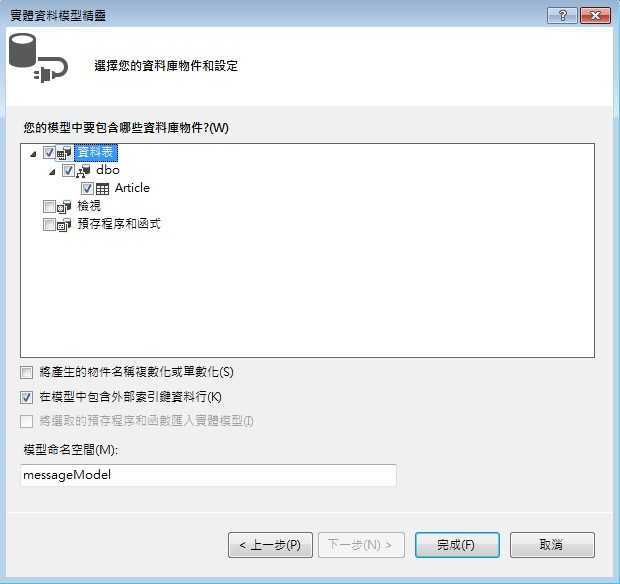 ADO.NET實體數據模型添加完成。
4,建立Service
我們把對Model中message.mdf數據處理的類單獨放在Service文件夾中,這樣更加方便之後的維護同樣也符合MVC耦合度低的特點,這一步是為Controller中的Action方法做準備。新建Service文件夾,添加messageDBService.cs類(Entity實體和Controller的橋樑):
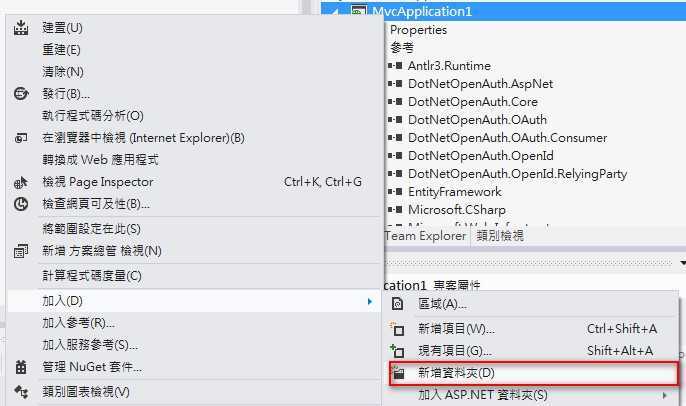
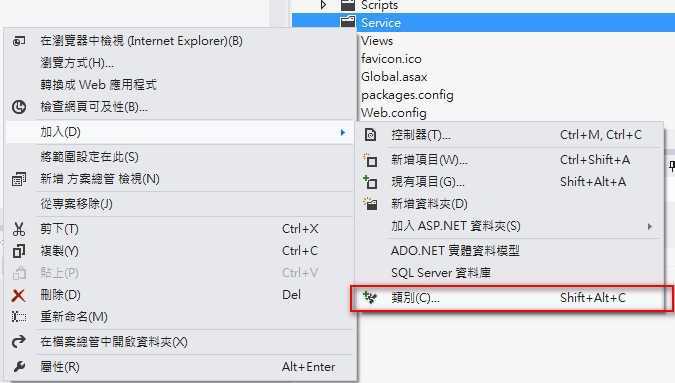
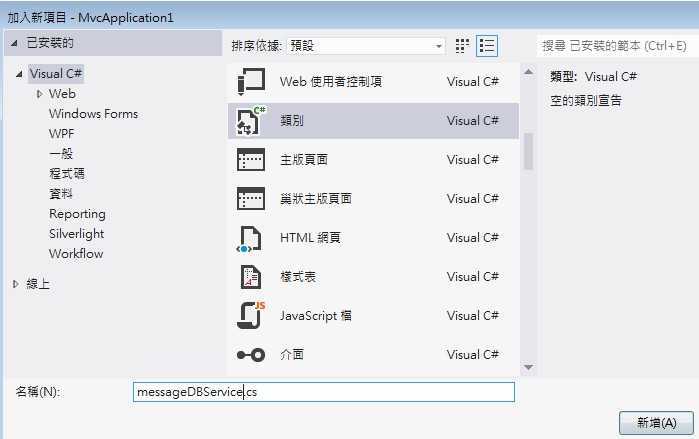
Service類中添加兩個方法,分別實現對數據的讀和寫

using System;
using System.Collections.Generic;
using System.Linq;
using System.Web;
using MvcApplication1.Models;  //引用Model命名空間

namespace MvcApplication1.Service
{
    public class messageDBService
    {
        //實例化實體數據
        public Models.messageEntities db=new Models.messageEntities();

        //讀取並返回messageEntity中的數據
        public List<Article> GetData()
        {
            return (db.Article.ToList());
        }
        //把從User接受的數據寫入messageEnitity
        public void DBCreate(string strTitle,string strContent)
        {
            //實例化Artile對象
            Article newData=new Article();

            //給Artile對象的屬性賦值
            newData.Title=strTitle;
            newData.Content=strContent;
            newData.time=DateTime.Now;

            //實體添加到Entity中
            db.Article.Add(newData);
            //保存到數據庫
            db.SaveChanges();

        }
    }
}
4,添加控制器Controller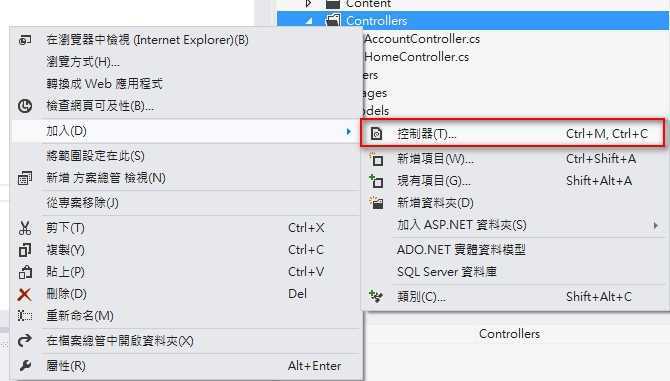
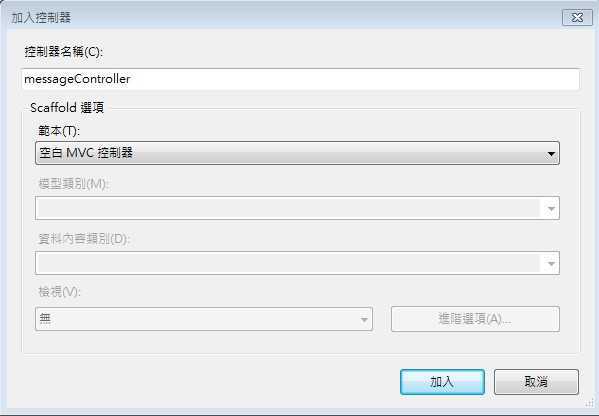
控制器中的Action實現留言板的添加留言查看留言的功能:

using System;
using System.Collections.Generic;
using System.Linq;
using System.Web;
using System.Web.Mvc;
using MvcApplication1.Models;
using MvcApplication1.Service;

namespace MvcApplication1.Controllers
{
    public class messageController : Controller
    {
        //實例化Service
        messageDBService data = new messageDBService();


        // GET: /message/
        public ActionResult Index()
        {
            //Article列表
            return View(data.GetData());
        }

        public ActionResult Create()
        {
            return View();
        }

        [HttpPost]
        public ActionResult Create(string strAtricle, string strContent)
        {
            //調用Service中的Create方法,把數據寫到數據庫中
            data.DBCreate(strAtricle, strContent);
            //重導向到 Action
            return RedirectToAction("Index");
        }
    }
}
5,添加Action對應的View頁面:
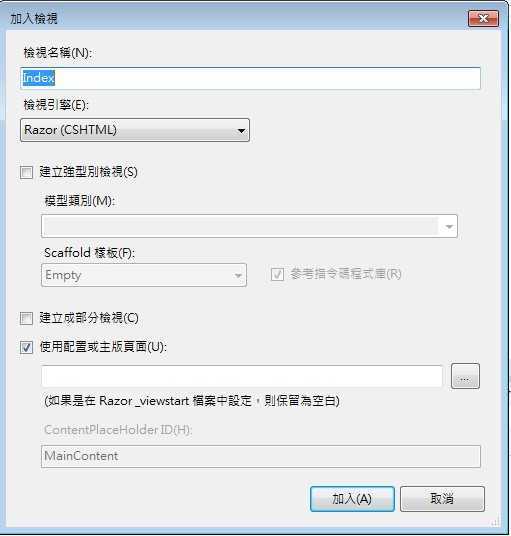
View頁面接收Controller傳遞過來的資料,在User提交按鈕的時候把數據傳給Controller
View Index顯示Article內容,更新View如下:

@model IEnumerable<MvcApplication1.Models.Article>

@{
    ViewBag.Title = "留言板";
}
<div>

    <h2>首頁-留言列表</h2>

    @if (Model != null)
    {
        <table>
            <tbody>
                @foreach (var item in Model)
                {
                    <tr>
                        <td>標題:</td>
                        <td>@item.Title</td>
                    </tr>
                    <tr>
                        <td>留言內容:</td>
                        <td>@item.Content</td>
                    </tr>
                    <tr>
                        <td>時間:</td>
                        <td>@item.time</td>
                    </tr>
                }
            </tbody>
        </table>
    }

</div>
   <br />
<div>
    @Html.ActionLink("點擊新增留言", "Create");
</div>
同樣為 Controller中的 Create Action 添加對應的View:

@model IEnumerable<MvcApplication1.Models.Article>
@{
    ViewBag.Title = "Create";
}

<h2>新增留言</h2>
@using (Html.BeginForm("Create", "Message"))
{
    <div>
        @Html.Label("標題")
        @Html.TextBox("strAtricle")
        <br />

        @Html.Label("內容")
        @Html.TextBox("strContent")
        <br />
        <input type="submit" value="送出留言" />
    </div>

}
在~/Views/Shared/_Layout.cshtml(相當於asp.net中的母版頁Master),中添加留言首頁的連接:

  <ul id="menu">
                        <li>@Html.ActionLink("首頁", "Index", "Home")</li>
                        <li>@Html.ActionLink("關於", "About", "Home")</li>
                        <li>@Html.ActionLink("連絡", "Contact", "Home")</li>
                        <li>@Html.ActionLink("留言", "index", "Message")</li>
                    </ul>
以上完成了一個簡單的留言板。
首頁:
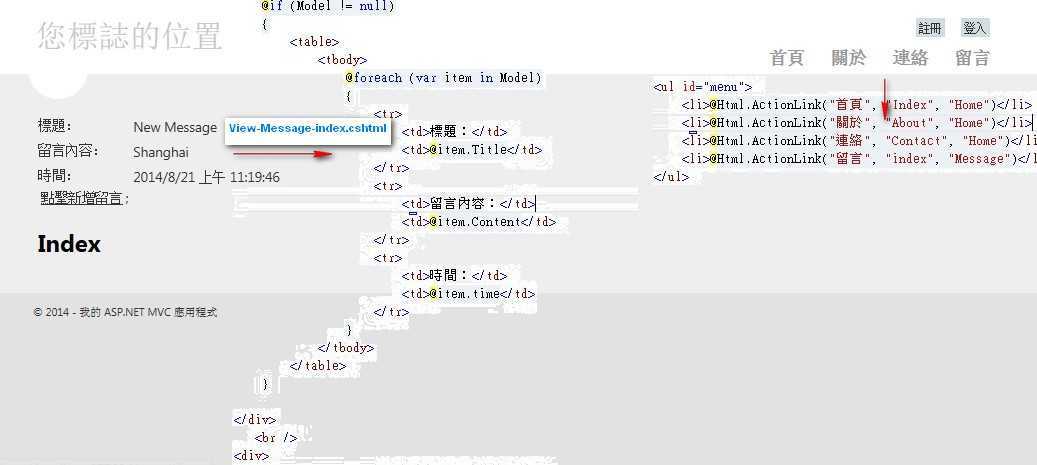
點擊"新增留言", @Html.ActionLink("點擊新增留言", "Create"); 程式根據Routing規則找到對應Controller中的Action
 →
→ 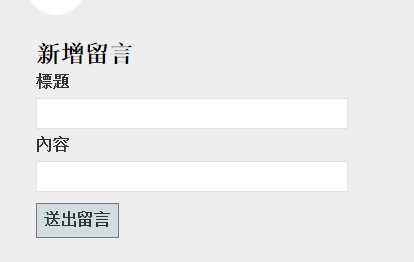 →
→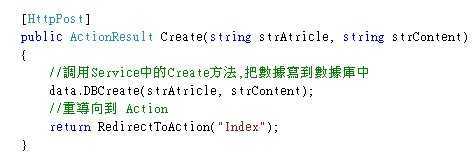 →保存到DB
通過留言板我們看到了MVC項目的運行流程如下:
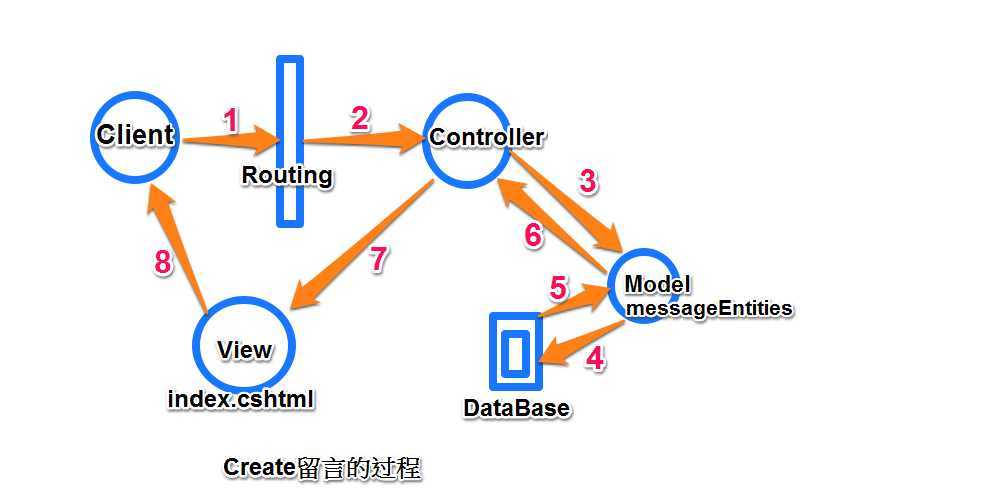
ASP.NET MVC 4.0 学习2-留言板實現,布布扣,bubuko.com
标签:style blog http color os io 文件 for
原文地址:http://www.cnblogs.com/hishanghai/p/3926847.html