标签:ace test hot ase model arc clip pack mave
1、创建一个Java项目
1)File--->New--->Other--->Maven--->Maven Projet
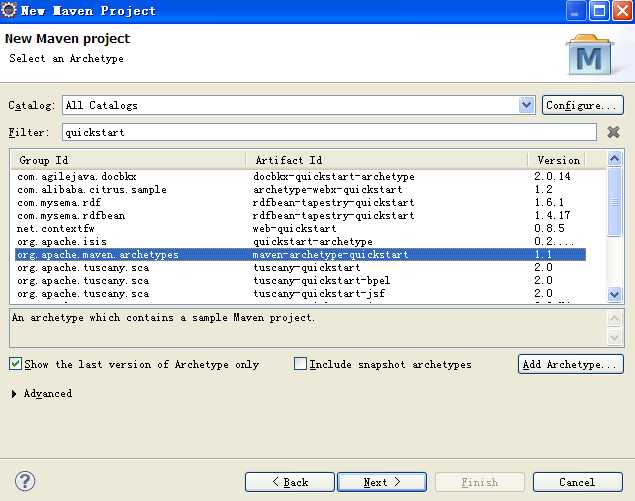
2)选择maven-archetype-quickstart
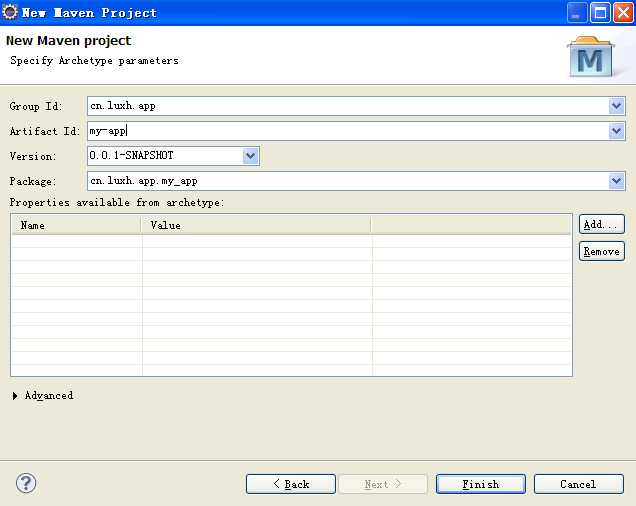
3)输入项目的信息
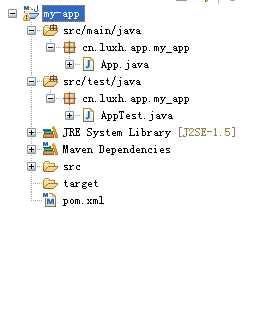
4)生成的Java项目包结构如下
5)修改pom.xml,指定编译时的JDK版本
 1 <project xmlns="http://maven.apache.org/POM/4.0.0" xmlns:xsi="http://www.w3.org/2001/XMLSchema-instance"
 2   xsi:schemaLocation="http://maven.apache.org/POM/4.0.0 http://maven.apache.org/xsd/maven-4.0.0.xsd">
 3   <modelVersion>4.0.0</modelVersion>
 4
 5   <groupId>cn.luxh.app</groupId>
 6   <artifactId>my-app</artifactId>
 7   <version>0.0.1-SNAPSHOT</version>
 8   <packaging>jar</packaging>
 9
10   <name>my-app</name>
11   <url>http://maven.apache.org</url>
12
13   <!-- 指定属性 -->
14   <properties>
15       <junit.version>4.10</junit.version>
16     <project.build.sourceEncoding>UTF-8</project.build.sourceEncoding>
17       <jdk.version>1.6</jdk.version>
18   </properties>
19
20   <build>
21       <plugins>
22           <!-- 指定JDK的编译版本 -->
23           <plugin>
24               <groupId>org.apache.maven.plugins</groupId>
25               <artifactId>maven-compiler-plugin</artifactId>
26               <version>2.5.1</version>
27               <configuration>
28                   <source>${jdk.version}</source>
29                   <target>${jdk.version}</target>
30                   <showWarnings>true</showWarnings>
31               </configuration>
32           </plugin>
33       </plugins>
34   </build>
35   <dependencies>
36     <dependency>
37       <groupId>junit</groupId>
38       <artifactId>junit</artifactId>
39       <version>${junit.version}</version>
40       <scope>test</scope>
41     </dependency>
42   </dependencies>
43 </project>
2、创建一个Web项目
1)File--->New--->Other--->Maven--->Maven Projet
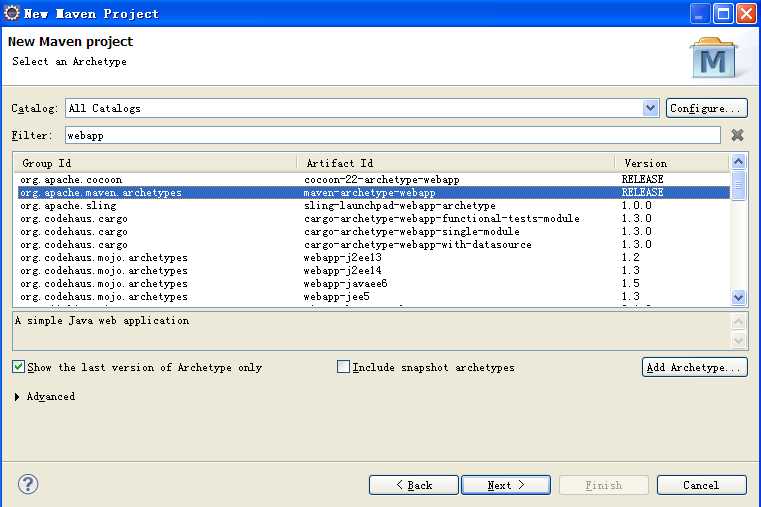
2)选择maven-archetype-webapp
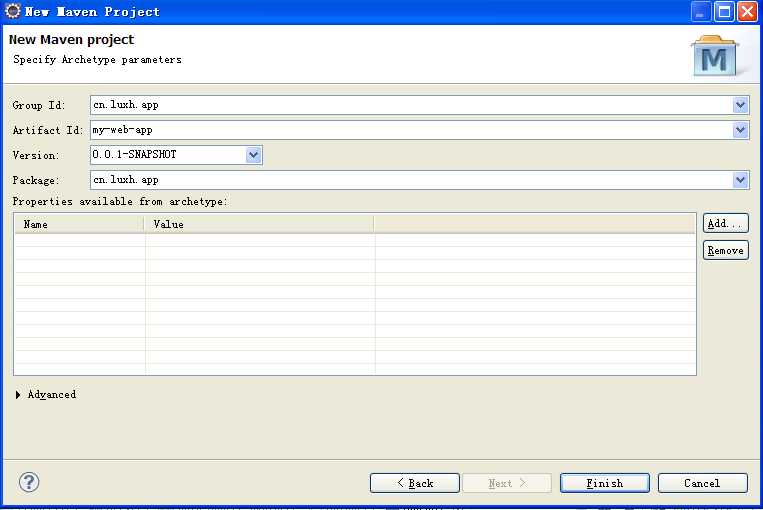
3)填写项目信息
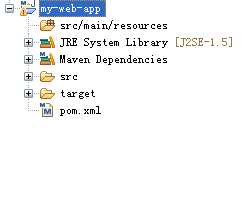
4)生产的Web项目包结构
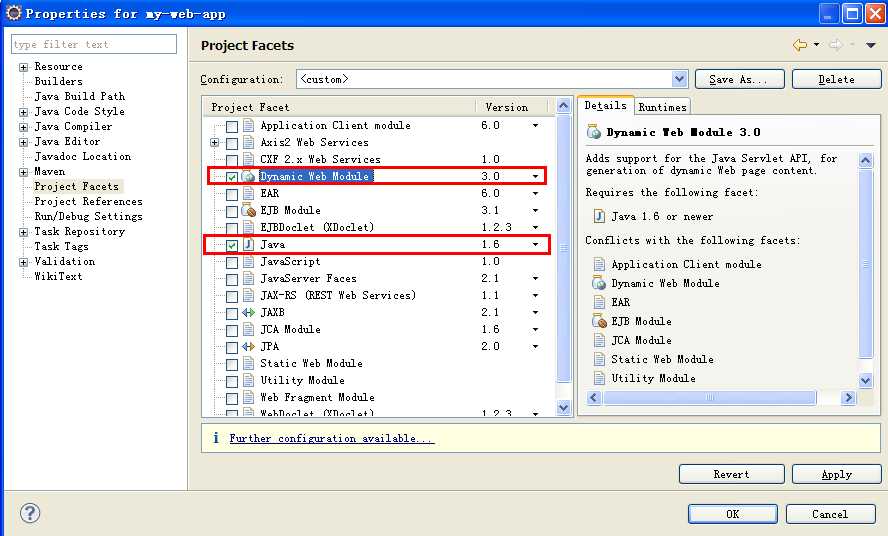
4.1)把项目转为 Dynamic Web Module,在项目上点击右键,选择属性,然后选择Project facets,然后点击Convert to faceted form...
勾选Dynamic Web Module,选择3.0,表示支持servlet3.0
勾选Java,选择1.6或更高的jdk版本
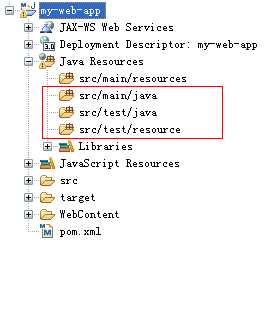
4.2)工具只生成了一个叫 src/main/resource的source folder,我们需要手工添加 src/main/java、src/test/java和src/test/resource 三个source folder,在项目上右键 New ---->Source Folder,输入folder name即可。
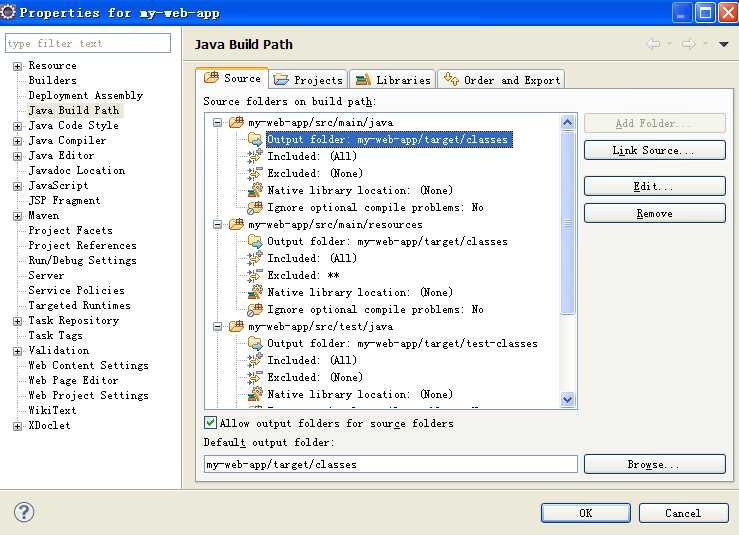
4.3)修改Source Folder的编译路径,进入Java Build Bath窗口,双击每个文件夹下的Output folder,指定路径。
src/main/java和src/main/resource指定target/calsses,src/test/java和src/test/resource指定target/test-classes
都选上选上Allow output folders for source folders.
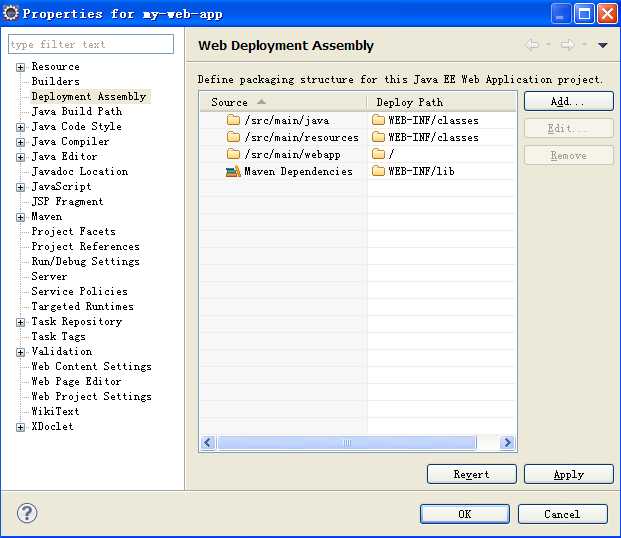
4.4)配置部署的程序Deployment Assembly,删掉test的那两项,test的程序发布的时候不需要,添加maven的依赖库,发布的时候可以发布到lib目录中,添加/src/main/webapp为部署的根目录
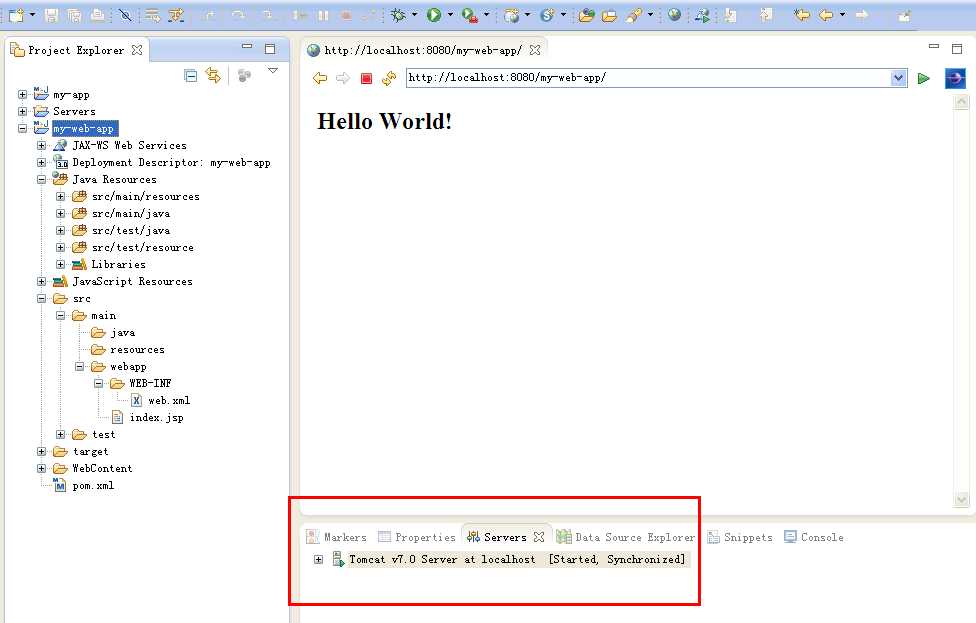
5)配置tomcat7,发布运行项目
转载:http://blog.csdn.net/edward0830ly/article/details/8748951#comments
如有涉及版权问题,请及时联系我,以便删除该引用!谢谢原作者【edward0830ly】!
标签:ace test hot ase model arc clip pack mave
原文地址:http://www.cnblogs.com/may-cn/p/6517882.html