标签:权重 type bsp keep off error 核心 com stc
nginx是俄罗斯人开发的一款跨平台的高性能HTTP和反向代理服务器,可以利用它实现web应用服务器的负载均衡。
反向代理是指将用户请求通过代理服务器转发给后端内部网络的应用服务器,典型的应用比如配置nginx、lighttpd等反向代理软件实现负载均衡。与反向代理相对应的叫正向代理,典型的应用比如vpn。用户直接访问google网站访问不了,而代理服务器可以访问google网站。这样用户就通过访问代理服务器,从而间接的达到访问google网站的目的。
负载均衡是指将用户发起的大量web请求通过一定的算法分摊到多个应用服务器,从来达到降低服务器负载压力的目的。
nginx官方网站:http://nginx.org/,可以在网站上面进行下载。本篇博客结合windows/iis+asp.net+nginx实现负载均衡,所以我们下载对应的windows版的nginx。下载之后,我们解压看到nginx如下目录:
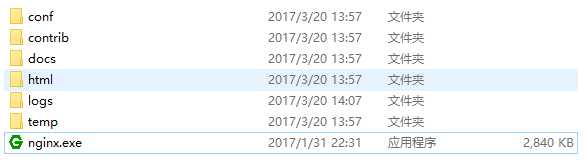
我们打开conf目录下的nginx.conf文件,修改为如下的配置:
#user  nobody;
worker_processes  4;

#error_log  logs/error.log;
#error_log  logs/error.log  notice;
#error_log  logs/error.log  info;

#pid        logs/nginx.pid;

events {
    worker_connections  1024;
}

http {
    include       mime.types;
    default_type  application/octet-stream;

    #log_format  main  ‘$remote_addr - $remote_user [$time_local] "$request" ‘
    #                  ‘$status $body_bytes_sent "$http_referer" ‘
    #                  ‘"$http_user_agent" "$http_x_forwarded_for"‘;

    #access_log  logs/access.log  main;

    sendfile        on;
    #tcp_nopush     on;

    #keepalive_timeout  0;
    keepalive_timeout  65;

    #gzip  on;

    upstream cluster_server {
        server  10.77.137.120:9000 weight=1;
        server  10.77.137.11:8081 weight=2;
    }

    server {
        listen       8083;
        server_name  guwei4037-pc;

        #charset utf-8;

        #access_log  logs/host.access.log  main;

        location / {
            root   html;
            index  index.aspx index.html index.htm;

            #指向集群名称为cluster_server
            proxy_pass    http://cluster_server;

            #设置主机头和客户端真实地址,以便服务器获取客户端真实IP
            proxy_set_header   Host              $host;
            proxy_set_header   X-Real-IP         $remote_addr;
            proxy_set_header   X-Forwarded-For   $proxy_add_x_forwarded_for;

            #禁用缓存
            proxy_buffering off;
        }

        location ~ \.(jpg|png|jpeg|bmp|gif|swf|css)$
        {
            expires 30d;
            root /nginx-1.9.3/html;#root: #静态文件存在地址,这里设置在/nginx-1.9.3/html下
            break;
        }

        #error_page  404              /404.html;

        # redirect server error pages to the static page /50x.html
        #
        error_page   500 502 503 504  /50x.html;
        location = /50x.html {
            root   html;
        }

        # proxy the PHP scripts to Apache listening on 127.0.0.1:80
        #
        #location ~ \.php$ {
        #    proxy_pass   http://127.0.0.1;
        #}

        # pass the PHP scripts to FastCGI server listening on 127.0.0.1:9000
        #
        #location ~ \.php$ {
        #    root           html;
        #    fastcgi_pass   127.0.0.1:9000;
        #    fastcgi_index  index.php;
        #    fastcgi_param  SCRIPT_FILENAME  /scripts$fastcgi_script_name;
        #    include        fastcgi_params;
        #}

        # deny access to .htaccess files, if Apache‘s document root
        # concurs with nginx‘s one
        #
        #location ~ /\.ht {
        #    deny  all;
        #}
    }


    # another virtual host using mix of IP-, name-, and port-based configuration
    #
    #server {
    #    listen       8000;
    #    listen       somename:8080;
    #    server_name  somename  alias  another.alias;

    #    location / {
    #        root   html;
    #        index  index.html index.htm;
    #    }
    #}


    # HTTPS server
    #
    #server {
    #    listen       443 ssl;
    #    server_name  localhost;

    #    ssl_certificate      cert.pem;
    #    ssl_certificate_key  cert.key;

    #    ssl_session_cache    shared:SSL:1m;
    #    ssl_session_timeout  5m;

    #    ssl_ciphers  HIGH:!aNULL:!MD5;
    #    ssl_prefer_server_ciphers  on;

    #    location / {
    #        root   html;
    #        index  index.html index.htm;
    #    }
    #}

}
如上配置文件有几点需要说明:
1、worker_processes 指定为4,表示有4个工作进程,这个数值一般与服务器的CPU核心数一致。通过start nginx启动nginx服务后,可以通过任务管理器观察进程可以看到nginx的进程数。
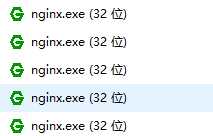
其中有1个是守护进程,4个是工作进程。如果指定worker_processes为1,则会有两个nginx.exe进程(1个守护进程,1个工作进程)。
2、worker_connections指定的1024为默认的最大的连接数。可以指定更大的连接数,但要根据nginx服务器的配置来定。
3、keepalive_timeout指定的65s为保持连接的超时时间。
4、通过server-location-proxy_pass,与设置的cluster_server集群绑定。
5、通过upstream节点配置了cluster_server。里面的两个server分别指向两个不同的服务器,通过weight(权重)设置访问两台服务器的概率。
6、在server-location下的index,添加index.aspx,用于支持asp.net页面的访问。
然后我们开发一个aspx页面,用于演示。
protected void Page_Load(object sender, EventArgs e)
{
    this.Label0.Text = "请求开始时间:" + DateTime.Now.ToString("yyyy-MM-dd HH:mm:ss");
    this.Label1.Text = "服务器名称:" + base.Server.MachineName;
    this.Label2.Text = "服务器IP地址:" + base.Request.ServerVariables["LOCAL_ADDR"];
    this.Label3.Text = "HTTP访问端口:" + base.Request.ServerVariables["SERVER_PORT"];
    this.Label4.Text = string.Concat(new object[] { ".NET解释引擎版本:.NET CLR", Environment.Version.Major, ".", Environment.Version.Minor, ".", Environment.Version.Build, ".", Environment.Version.Revision });
    this.Label5.Text = "服务器操作系统版本:" + Environment.OSVersion.ToString();
    this.Label6.Text = "服务器IIS版本:" + base.Request.ServerVariables["SERVER_SOFTWARE"];
    this.Label7.Text = "服务器域名:" + base.Request.ServerVariables["SERVER_NAME"];
    this.Label8.Text = "虚拟目录的绝对路径:" + base.Request.ServerVariables["APPL_RHYSICAL_PATH"];
    this.Label9.Text = "执行文件的绝对路径:" + base.Request.ServerVariables["PATH_TRANSLATED"];
    this.Label10.Text = "虚拟目录Session总数:" + this.Session.Contents.Count.ToString();
    this.Label11.Text = "虚拟目录Application总数:" + base.Application.Contents.Count.ToString();
    this.Label12.Text = "域名主机:" + base.Request.ServerVariables["HTTP_HOST"];
    this.Label13.Text = "服务器区域语言:" + base.Request.ServerVariables["HTTP_ACCEPT_LANGUAGE"];
    this.Label14.Text = "用户信息:" + base.Request.ServerVariables["HTTP_USER_AGENT"];
    this.Label14.Text = "CPU个数:" + Environment.GetEnvironmentVariable("NUMBER_OF_PROCESSORS");
    this.Label15.Text = "CPU类型:" + Environment.GetEnvironmentVariable("PROCESSOR_IDENTIFIER");
    this.Label16.Text = "请求来源地址:" + base.Request.Headers["X-Real-IP"];
}
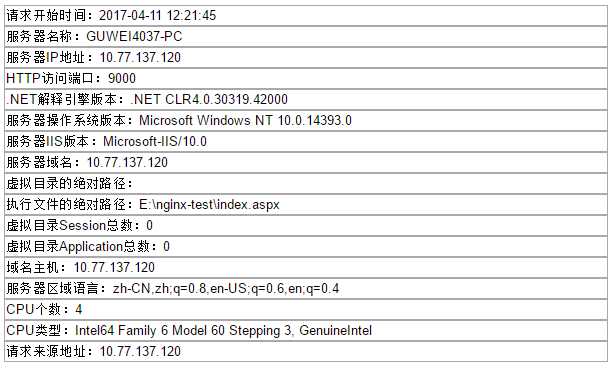
然后将它发布到多个服务器的iis中,比如如上配置的10.77.137.120:9000和10.77.137.11:8081两个地址。我们访问我们监听的8083端口,地址为:http://10.77.137.120:8083/,可以看到如下的页面。
多刷新几次,可以看到新的地址信息:
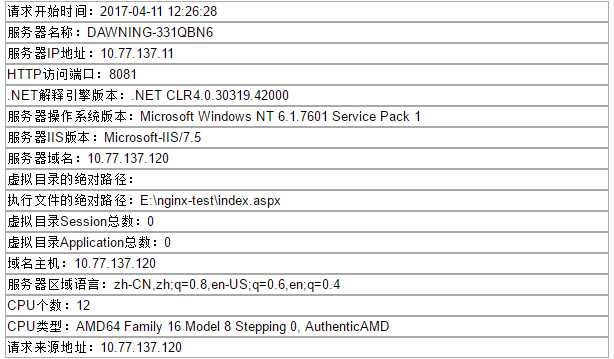
如上便实现了负载均衡。
标签:权重 type bsp keep off error 核心 com stc
原文地址:http://www.cnblogs.com/guwei4037/p/6692984.html