标签:移动端实现下拉刷新
1.touchstart:只要将手指放在了屏幕上(而不管是几只),都会触发touchstart事件。
2.touchmove: 当我们用手指在屏幕上滑动时,这个事件会被连续触发。 如果我们不希望页面随之滑动,我们可以使用event的preventDefault来阻止这个默认行为。
3.touchend: 当手指滑动后离开屏幕,这时就触发了touchend事件。
4.touchcancel: 系统停止跟踪触摸时候会触发。例如在触摸过程中突然页面alert()一个提示框,此时会触发该事件,这个事件比较少用。
1. touches,这是一个类数组对象,包含了所有的手指信息,如果只有一个手指,那么我们用touches[0]来表示。
2. targetTouches 。 手指在目标区域的手指信息。
3. changedTouches:最近一次触发该事件的手指信息。
4. touchend时,touches与targetTouches信息会被删除,changedTouches保存的最后一次的信息,最好用于计算手指信息。
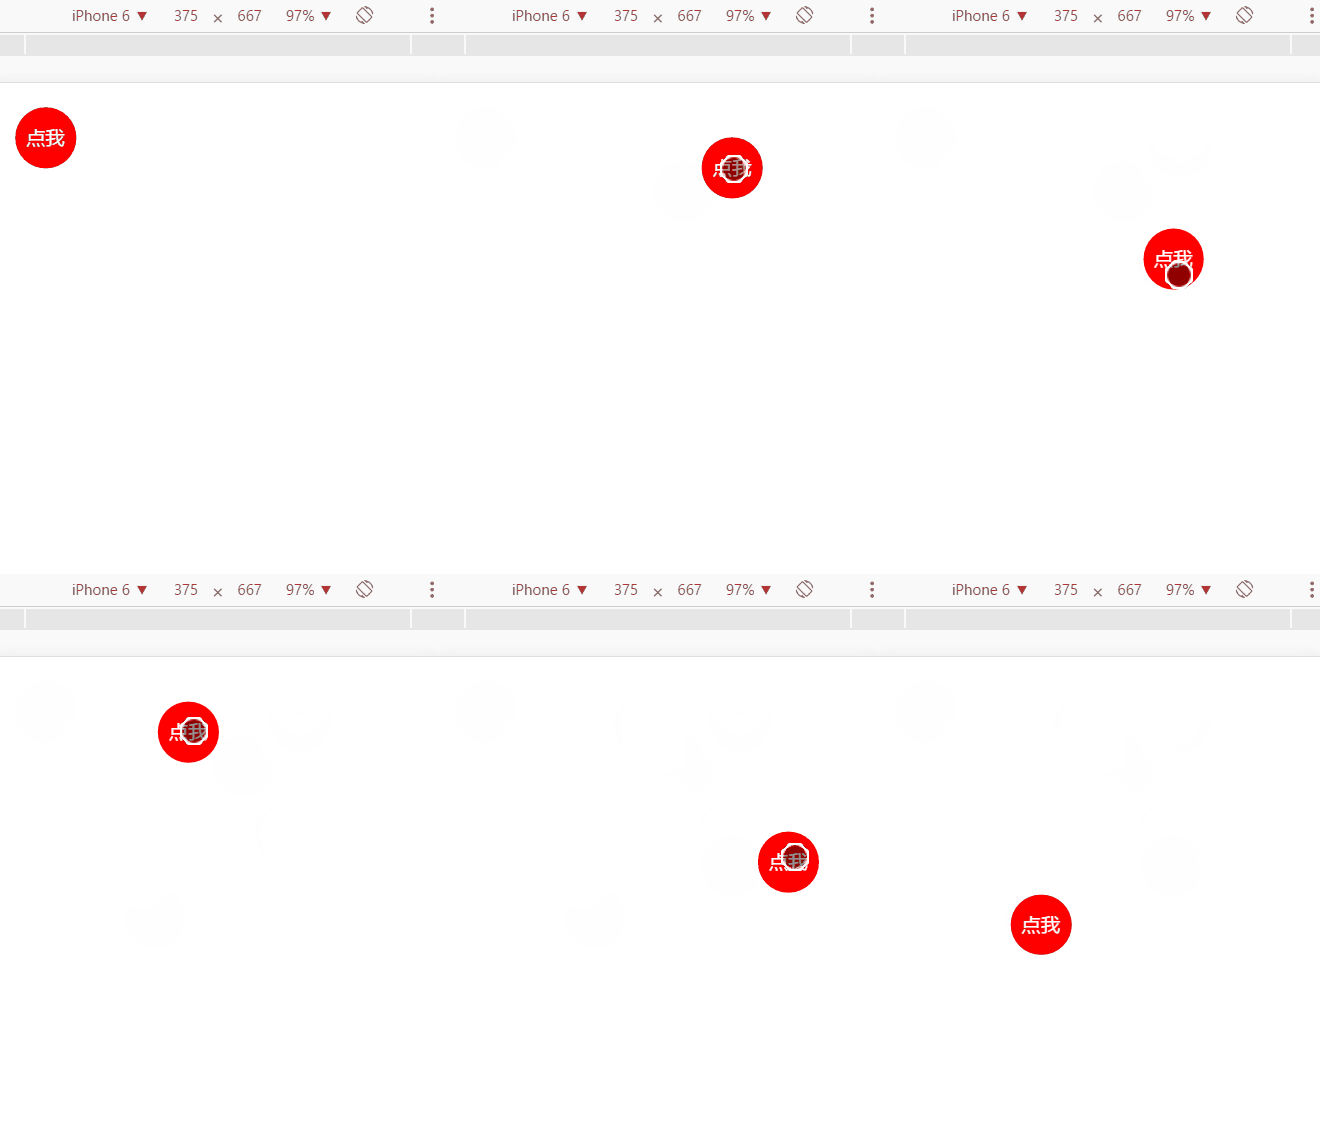
先看效果图:

它的实现原理非常简单,就是将红色圆形的postion属性设为absolute,然后,当我们滑动它时,就触发了touchmove事件,将其Left和top设置为event的pageX和pageY即可,为保证触发中心与圆心在同一位置,只需将pageX加上width的一半,pageY加上height的一半。
源码如下:
<!DOCTYPE html>
<html>
<head>
    <title>touchExample</title>
    <meta name="viewport" content="width=device-width,user-scalable=no,initial-scale=1.0,minimum-scale=1.0,maximum-scale=1.0">
    <script type="text/javascript" src="http://code.jquery.com/jquery-latest.js"></script>
    <style>
        #touchDiv{
            position: absolute;
            width: 50px;
            height: 50px;
            top: 20px;
            left: 20px;
            text-align: center;
            line-height: 50px;
            color:white;
            border-radius: 50%;
            background-color: red;
        }    </style>
</head>
<body>
    <div id="touchDiv">点我</div>
    <script>        var touchDiv = document.getElementById("touchDiv");        var x,y;
        touchDiv.addEventListener("touchstart",canDrag);
        touchDiv.addEventListener("touchmove",drag);
        touchDiv.addEventListener("touchend",nodrag);
        function canDrag (e) {
            console.log("god开始");
        }
        function drag (e) {
            $("#touchDiv").css("left",e.touches[0].pageX-25);
            $("#touchDiv").css("top",e.touches[0].pageY-25);
        }
        function nodrag () {
            console.log("god结束");
        }    </script>
</body>
</html>
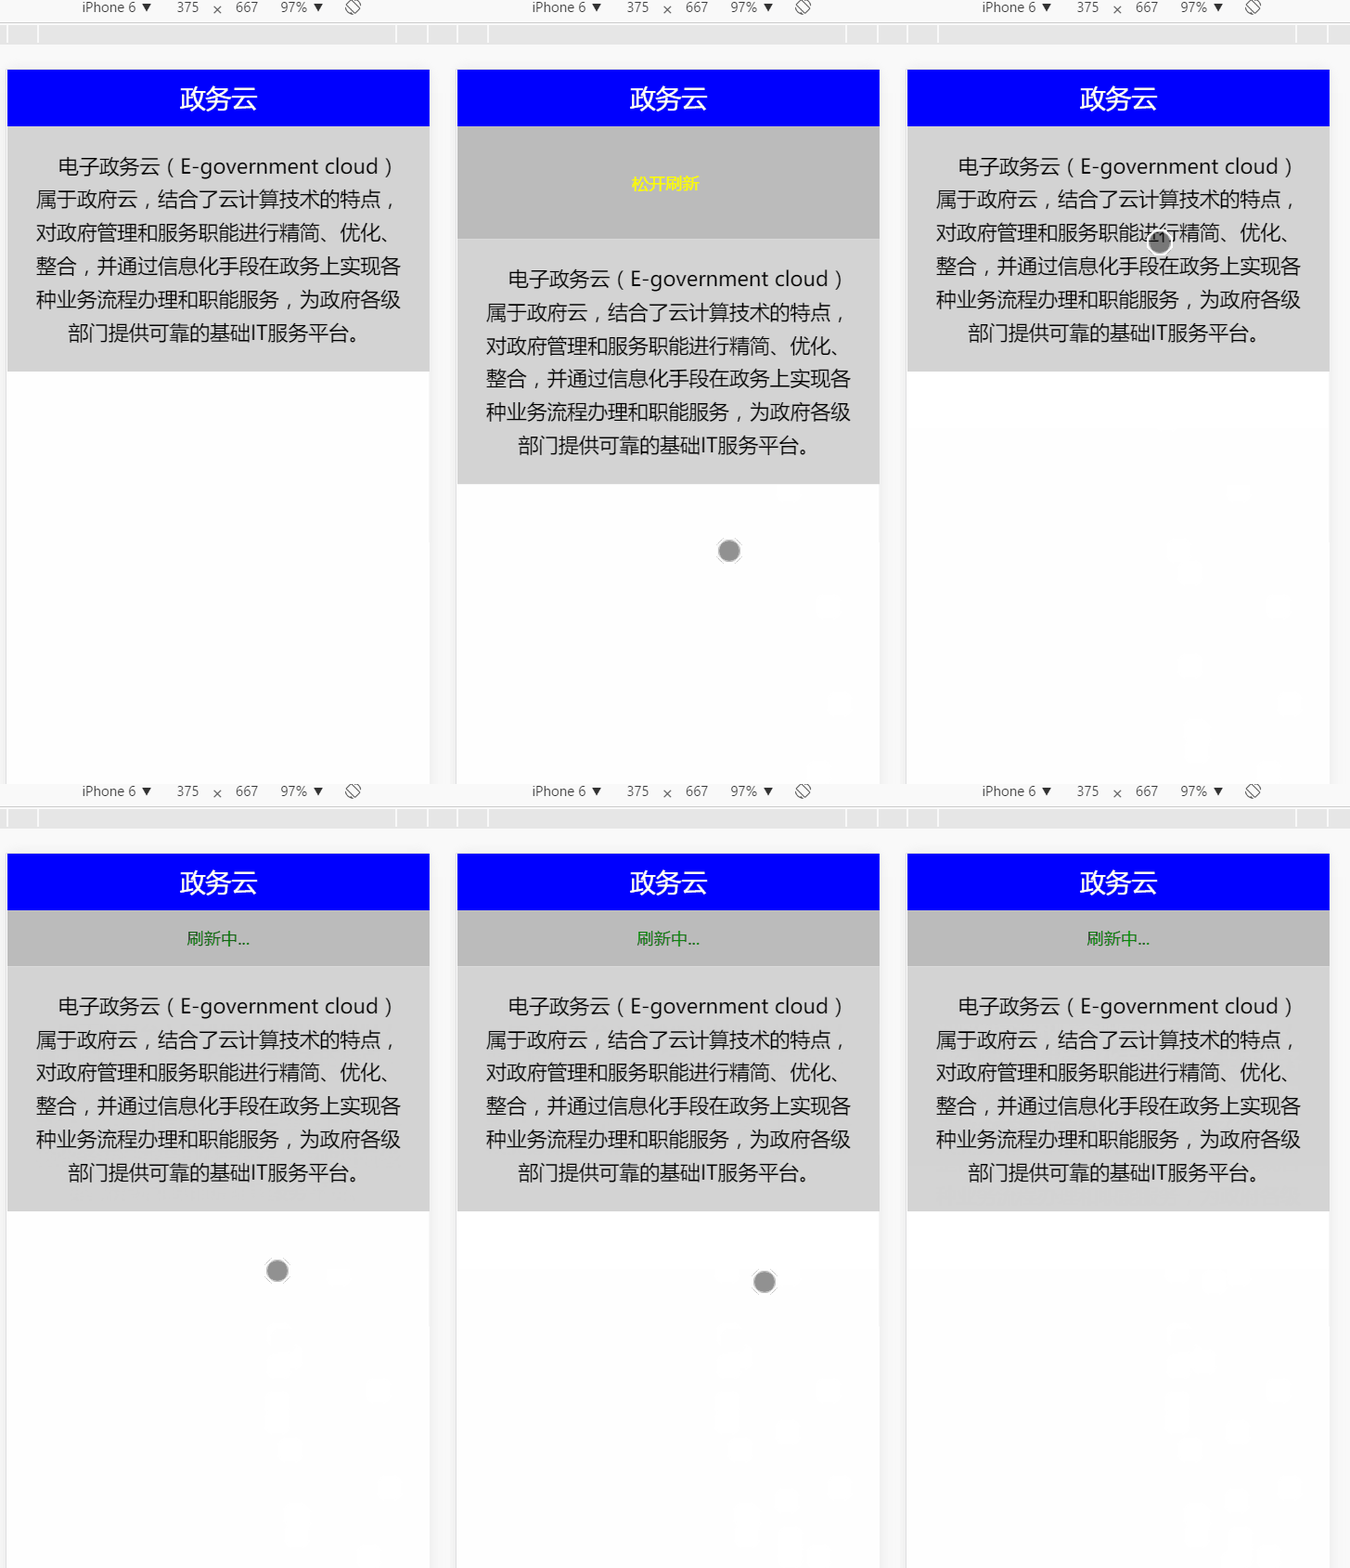
这个实例就是下拉刷新功能的实现,效果如下:

源码如下:
<!DOCTYPE html>
<html>
<head>
    <title>下拉刷新</title>
    <meta name="viewport" content="width=device-width,user-scalable=no,initial-scale=1.0,minimum-scale=1.0,maximum-scale=1.0">
    <style>
        *{
            margin:0;
            padding: 0;
            font-size:15px;
        }
        .header{
            height: 50px;
            line-height: 50px;
            text-align: center;
            background-color: blue;
            color:white;
            font-size: 23px;
        }
        .drag_to_refresh{
            align-items: center;
            padding-left: 155px;
            background-color: #bbb;
            color:yellow;
            display: none;
        }
        .refresh{
            height: 50px;
            line-height: 50px;
            text-align: center;
            background-color: #bbb;
            color: green;
            display: none;
        }
        .drag{
            text-align: center;
            background-color: lightgray;
            position: relative;
            padding:20px;
            text-indent: 1em;
            line-height: 30px;
            font-size:18px;
        }    </style>
</head>
<body>
    <div class="header">政务云</div>
    <div class="drag_to_refresh"></div>
    <div class="refresh">刷新中...</div>
    <div class="drag">电子政务云(E-government cloud)属于政府云,结合了云计算技术的特点,对政府管理和服务职能进行精简、优化、整合,并通过信息化手段在政务上实现各种业务流程办理和职能服务,为政府各级部门提供可靠的基础IT服务平台。</div>
<script>window.onload = function () {    var initX;    var drag_content = document.querySelector(".drag");    var drag_to_refresh = document.querySelector(".drag_to_refresh");    var refresh = document.querySelector(".refresh");

    drag_content.addEventListener("touchmove",drag);
    drag_content.addEventListener("touchstart",dragStart);
    drag_content.addEventListener("touchend",dragEnd);

    function dragStart(e){
        initY = e.touches[0].pageY;
        console.log(initX);
    }

    function drag (e){
        drag_to_refresh.style.display = "block";
        drag_to_refresh.style.height = (e.touches[0].pageY - initY) + "px";
        console.log(drag_to_refresh.style.height);        if(parseInt(drag_to_refresh.style.height)>=100){            // 注意:因为height得到的值是px为单位,所以用parseInt解析
            drag_to_refresh.style.height = "100px";            if(parseInt(drag_to_refresh.style.height)>80){
                drag_to_refresh.style.lineHeight = drag_to_refresh.style.height;
                drag_to_refresh.innerHTML  = "松开刷新";
            }
        }
    }

    function dragEnd (e){        if(parseInt(drag_to_refresh.style.height)>80){
            refresh.style.display = "block";
            setTimeout(reload,1000);
        }
        drag_to_refresh.style.display = "none";
    }

    function reload () {
        location.reload();
    }
}</script>
</body>
</html>
标签:移动端实现下拉刷新
原文地址:http://kiujyhgt.blog.51cto.com/12806908/1916701