标签:保存 导致 tsx 面向接口 save 建立 standard 连接池 模式
(从整合开始,使用回归使用eclipse)
一、三大框架版本:
struts2
hibernate5
spring4
二、SSH三大框架回顾:
Hibernate:
ORM思想
核心配置文件:
单独使用时名称和位置是固定,整合时不是固定的
会有一个HibernateTemplate的封装
Struts2:
核心组成:
action
处理提交表单数据,操作域对象
值栈
存取数据的方法
拦截器
AOP和责任链模式
Spring:
IoC和AOP是spring的灵魂
引入的是schema约束
三、SSH整合的思想
web:===struts2
service:===spring
dao:hibernaate
web调service,service调dao
整合思想就是两个两个整合:1.struts2和spring整合,2.spring和hibernate整合
1.把struts2里面的action对象的创建交给spring管理
需要记得配置除了 id 和 class ,还要有scope为prototype为多实例
2.把数据库配置信息交给spring
第一次访问时需要创建sessionFactory比较慢,把这个对象的创建交给spring管理
让对象在服务器在启动时创建
整合准备工作:
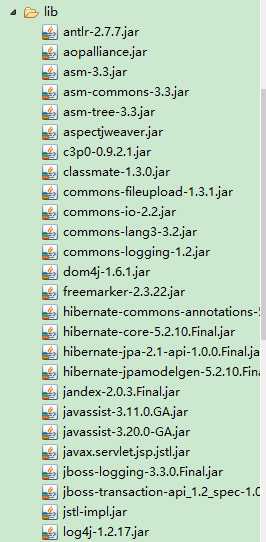
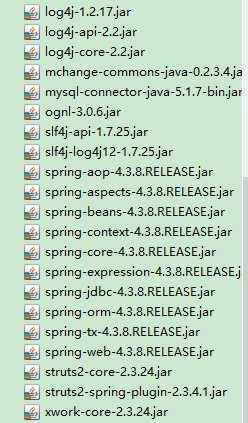
先列出所有jar图,后面导包不再单独贴图(从log4j处接上)
1.struts2和spring整合
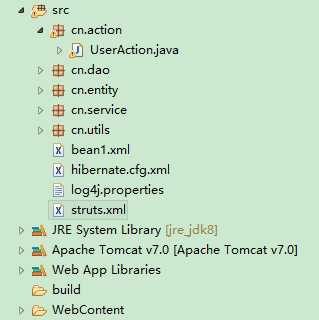
新建项目:SSHDemo
目录结构如下:
导入spring的14个jar包(day03里除去mysql驱动包)
再导入整合的jar包 :struts-spring-plugin的jar包(如图所示,注意版本2.3.4)
再加整合web项目的jar包:spring-web.jar
接下来导入strus2的jar包(day03的jar加上jstl的两个包共15个包
建一个action:UserAction
package cn.action;

import com.opensymphony.xwork2.ActionSupport;

import cn.service.UserService;

public class UserAction extends ActionSupport {

    //注入service
    private UserService userService;

    public void setUserService(UserService userService) {
        this.userService = userService;
    }

    @Override
    public String execute() throws Exception {
        System.out.println("Hello SSH!");
        userService.add();
        return NONE;
    }
}
(eclipse并没有自带jstl的包:jstl.jar standard.jar,找jstl在me里自带有))
配置struts.xml
<?xml version="1.0" encoding="UTF-8"?>
<!DOCTYPE struts PUBLIC
    "-//Apache Software Foundation//DTD Struts Configuration 2.3//EN"
    "http://struts.apache.org/dtds/struts-2.3.dtd">
<struts>
    <package name="sshdemo1" extends="struts-default" namespace="/">
        <!-- 没有返回值,不需要result -->
        <action name="userAction" class="userAction"></action>
    </package>
</struts>
不要忘了配置过滤器(在下面web.xml中一并列出)
创建spring的配置文件
把action由struts.xml交给spring管理
<!-- 配置action对象,注意是多实例 -->
    <bean id="userAction" class="cn.action.UserAction" scope="prototype">
        <!-- 注入service -->
        <property name="userService" ref="userService"></property>
    </bean>
配置监听器:让服务器启动时加载一些需要的资源
配置context-param
(src下又叫类路径)
web.xml:
<?xml version="1.0" encoding="UTF-8"?>
<web-app xmlns:xsi="http://www.w3.org/2001/XMLSchema-instance" xmlns="http://java.sun.com/xml/ns/javaee" xsi:schemaLocation="http://java.sun.com/xml/ns/javaee http://java.sun.com/xml/ns/javaee/web-app_2_5.xsd" id="WebApp_ID" version="2.5">
  <display-name>SSHDemo</display-name>
  <!-- 指定spring配置文件的位置 -->
  <context-param>
      <param-name>contextConfigLocation</param-name>
      <param-value>classpath:bean1.xml</param-value>
  </context-param>
  <!-- 配置过滤器 -->
  <filter>
    <filter-name>struts2</filter-name>
    <filter-class>org.apache.struts2.dispatcher.ng.filter.StrutsPrepareAndExecuteFilter</filter-class>
  </filter>
  <filter-mapping>
    <filter-name>struts2</filter-name>
    <url-pattern>/*</url-pattern>
  </filter-mapping>
   <!-- 配置监听器 -->
  <listener>
      <listener-class>org.springframework.web.context.ContextLoaderListener</listener-class>
  </listener>

  <welcome-file-list>
    <welcome-file>index.html</welcome-file>
    <welcome-file>index.htm</welcome-file>
    <welcome-file>index.jsp</welcome-file>
    <welcome-file>default.html</welcome-file>
    <welcome-file>default.htm</welcome-file>
    <welcome-file>default.jsp</welcome-file>
  </welcome-file-list>
</web-app>
现在有两个配置文件都有配置action,会导致两边创建两次action
解决方案是stuts.xml中action的class不写全路径,写spring的id值(前提是要引入struts-spring-plugin的整合jar包)
<action name="userAction" class="userAction"></action>
2.spring和hibernate整合
搭建Hibernate环境,导入Hibernate的jar包
导入整合orm框架的jar包:spring-orm
创建实体类:
User //必须有一个唯一属性值
package cn.entity;

public class User {

        //实体类必须有一个唯一属性值
        private String uid;
        private String username;
        private String password;
        private String address;

        public String getUid() {
            return uid;
        }
        public void setUid(String uid) {
            this.uid = uid;
        }
        public String getUsername() {
            return username;
        }
        public void setUsername(String username) {
            this.username = username;
        }
        public String getPassword() {
            return password;
        }
        public void setPassword(String password) {
            this.password = password;
        }
        public String getAddress() {
            return address;
        }
        public void setAddress(String address) {
            this.address = address;
        }

        @Override
        public String toString() {
            return "User [uid=" + uid + ", username=" + username + ", password=" + password + ", address=" + address + "]";
        }
    }
创建映射文件User.hbm.xml
<?xml version="1.0" encoding="UTF-8"?>
<!DOCTYPE hibernate-mapping PUBLIC
    "-//Hibernate/Hibernate Mapping DTD 3.0//EN"
    "http://www.hibernate.org/dtd/hibernate-mapping-3.0.dtd">
<hibernate-mapping>
    <!-- 映射的类 name是类的全路径  table是表名 -->
    <class name="cn.entity.User" table="t_ssh_user">
        <id name="uid" column="uid">
            <!-- 设置id增长策略 -->
            <generator class="uuid"></generator>
        </id>
        <!-- 配置其它属性 -->
        <property name="username" column="username"></property>
        <property name="password" column="password"></property>
        <property name="address" column="address"></property>
    </class>
</hibernate-mapping>
创建核心配置文件(引入工具类:创建的工具类不在同级目录下,按一下F5就好了...)
<?xml version="1.0" encoding="UTF-8"?>
<!DOCTYPE hibernate-configuration PUBLIC
    "-//Hibernate/Hibernate Configuration DTD 3.0//EN"
    "http://www.hibernate.org/dtd/hibernate-configuration-3.0.dtd">
<hibernate-configuration>
    <session-factory>
        <!-- 一、配置数据库的信息,交给spring连接池替代 -->
     <!--    <property name="hibernate.connection.driver_class">com.mysql.jdbc.Driver</property>
        <property name="hibernate.connection.url">jdbc:mysql://localhost:3306/hibernate</property>
        <property name="hibernate.connection.username">root</property>
        <property name="hibernate.connection.password">root</property> -->
        <!-- 二、配置hibernate信息 可选项 -->
        <!-- 输出底层SQL语句 -->
        <property name="hibernate.show_sql">true</property>
        <!-- 格式化SQL语句 -->
        <property name="hibernate.format_sql">true</property>
        <!-- 如果没有表,创建  已有表 更新 -->
        <property name="hibernate.hbm2ddl.auto">update</property>
        <!-- 配置MySQL方言 -->
        <property name="hibernate.dialect">org.hibernate.dialect.MySQL5Dialect</property>
        <!-- 三、引入映射文件 -->
        <mapping resource="cn/entity/User.hbm.xml"/>
    </session-factory>
</hibernate-configuration>
配置后执行一下工具类,看配置是否正确
package cn.utils;

import org.hibernate.Session;
import org.hibernate.SessionFactory;
import org.hibernate.cfg.Configuration;

public class HibernateUtils {

    private static Configuration cfg = null;
    private static SessionFactory sessionFactory = null;
    //静态代码块实现
    static {
        cfg = new Configuration();
        cfg.configure();
        sessionFactory = cfg.buildSessionFactory();
    }
    //提供静态方法返回sessionFactory
    public static SessionFactory getSessionFactory(){
        return sessionFactory;
    }
    //返回本地线程绑定的session
    public static Session getSessionObject(){
        return sessionFactory.getCurrentSession();
    }
    public static void main(String[] args) {

    }
}
把sessionFactory的创建交给spring管理:
LocalSessionFactoryBean是spring封装的类,帮我们加载配置文件,创建sessionFactory
也就是代替我们原来工具类的代码
<!-- 配置SessionFactory,交给spring管理 -->
    <bean id="sessionFactory" class="org.springframework.orm.hibernate5.LocalSessionFactoryBean">
        <!-- 注入数据源 -->
        <property name="dataSource" ref="dataSource"></property>
        <!-- 指定hibernate核心配置文件位置 -->
        <property name="configLocation" value="classpath:hibernate.cfg.xml"></property>
    </bean>
dao使用HibernateTemplate:
先创建service和dao(Dao使用面向接口编程)
UserDao
package cn.dao;

public interface UserDao {

    void add();
}
UserDaoImpl
package cn.dao;

import org.springframework.orm.hibernate5.HibernateTemplate;

import cn.entity.User;

public class UserDaoImpl implements UserDao {

    //注意导的包是5的版本
    private HibernateTemplate hibernateTemplate;

    public void setHibernateTemplate(HibernateTemplate hibernateTemplate) {
        this.hibernateTemplate = hibernateTemplate;
    }

    @Override
    public void add() {
        //使用配置文件实现
        //创建模板,传入sessionFactory
/*        HibernateTemplate hibernateTemplate =
                new HibernateTemplate(sesseionFactory);*/
        System.out.println("dao.add");
        User user = new User();
        user.setUsername("jack");
        user.setPassword("123");
        user.setAddress("北京");
        hibernateTemplate.save(user);

    }


}
UserService
package cn.service;

import javax.transaction.Transactional;

import cn.dao.UserDao;

@Transactional
public class UserService {

    //注入dao,注意写接口(多态特性) UserDao dao = new UserDaoImpl()
    private UserDao userDao;

    public void setUserDao(UserDao userDao) {
        this.userDao = userDao;
    }


    public void add() {
        System.out.println("service.add");
        userDao.add();

    }
}
完成注入关系:
action注入service service注入dao
在dao使用HibernateTemplate
在模板中注入sessionFactory
在dao中注入hibernateTemplate
配置事务管理器:
注入dataSource(day03)
现在建议注入sessionFactory (它包含dataSource)
    <!-- 配置事务管理器 -->
    <bean id="transactionManager" class="org.springframework.orm.hibernate5.HibernateTransactionManager">
        <!-- 注入sessionFactory -->
        <property name="sessionFactory" ref="sessionFactory"></property
</bean>
<!-- 开启事务注解 -->
<tx:annotation-driven transaction-manager="transactionManager"/>
在service类上加transactional注解(类的完整信息见上文)
@Transactional
public class UserService {
下面是 HibernateTemplate的常用方法。
delete(Object entity): 删除指定持久化实例。
deleteAll(Collection entities): 删除集合内全部持久化类实例。
find(String queryString): 根据 HQL 查询字符串来返回实例集合。
findByNamedQuery(String queryName): 根据命名查询返回实例集合。
get(Classentity Class,Serializable id): 根据主键加载特定持久化类的实例。
save(Object entity): 保存新的实例。
saveOrUpdate(Object entity): 根据实例状态,选择保存或者更新。
update(Object entity): 更新实例的状态,要求entity 是持久状态。
setMaxResults(intmax Results): 设置分页的大小。
这里只演示添加的save ,其它类同,对比Hibernate
find()方法可以查询所有记录,传入HQL,后面可以接可变参数
但是find()不能使用分页,需要使用离线的critria(待补充)
方法所在类为上文UserDaoImpl
    @Override
    public void add() {
        //使用配置文件实现
        //创建模板,传入sessionFactory
        /*HibernateTemplate hibernateTemplate =
                new HibernateTemplate(sesseionFactory);*/
        System.out.println("dao.add");
        User user = new User();
        user.setUsername("jack");
        user.setPassword("123");
        user.setAddress("北京");
        hibernateTemplate.save(user);

    }
特别注意主键生成策略与主键的对应!uuid为对应String的id值!
DaImpl可以继承这个类HibernateDaoSupport,这个父类有模板属性和set()方法
并且里面有createHibernateTemplate,直接帮我们实现了注入。
直接注入sessionFactory即可,无需在配置文件中创建hibernateTemplate对象,也不用注入
在hibernate配置文件中配置了与本地线程绑定的session的配置
hibernateTemplate里面已经实现了,不需要在spring里再写了,那句配置可以去掉了<>thread</>
继承后得到HibernateTemplate:this.getHibernateTemplate()
package cn.dao;

import org.springframework.orm.hibernate5.HibernateTemplate;
import org.springframework.orm.hibernate5.support.HibernateDaoSupport;

public class UserDaoImpl2 extends HibernateDaoSupport implements UserDao {

    @Override
    public void add() {
        HibernateTemplate hibernateTemplate =
                this.getHibernateTemplate();

    }

}
大致过程小结:
框架整合大致过程:
                导包:(如果公司,大多统一提供)
                创建struts2环境
                    1)创建action,创建struts.xml,配置action
                    2)配置struts2过滤器
                搭建hibernate环境
                    1)创建实体类
                    2)创建映射文件,建立表语实体类映射关系
                    3)创建核心配置文件,引入映射文件
                搭建spring环境
                    1)创建spring核心配置文件
                    2)让spring在服务器启动时加载配置文件
                    配置监听器,指定spring配置文件路径

                struts2和spring整合
                    1)action在spring配置(多实例)
                    在strutsxml的action的class写spring配置文件action的id值
                spring和hibernate整合
                    1)把hibernate核心配置文件的数据库的配置在spring里配置(使用连接池)
                    2)把sessionFactory在spring配置(spring有一个封装的类)
                        记得对sessionFactory进行属性注入

                完成action注入service;service注入dao;dao注入HibernateTemplate
                dao里使用hibernate模板(先要创建模板对象才能注入)
                配置事务
                配置完成后需要加注解
完整的整合的三大配置文件信息如下:
bean1.xml
<?xml version="1.0" encoding="UTF-8"?>
<beans xmlns="http://www.springframework.org/schema/beans"
        xmlns:xsi="http://www.w3.org/2001/XMLSchema-instance"
        xmlns:aop="http://www.springframework.org/schema/aop"
        xmlns:context="http://www.springframework.org/schema/context"
        xmlns:tx="http://www.springframework.org/schema/tx" xsi:schemaLocation="
        http://www.springframework.org/schema/beans http://www.springframework.org/schema/beans/spring-beans-4.3.xsd
        http://www.springframework.org/schema/tx http://www.springframework.org/schema/tx/spring-tx.xsd
        http://www.springframework.org/schema/context http://www.springframework.org/schema/context/spring-context.xsd
        http://www.springframework.org/schema/aop http://www.springframework.org/schema/aop/spring-aop.xsd">

    <!-- 配置c3p0连接池 -->
    <bean id="dataSource" class="com.mchange.v2.c3p0.ComboPooledDataSource">
        <!-- 进行属性注入 -->
        <property name="driverClass" value="com.mysql.jdbc.Driver"></property>
        <property name="jdbcUrl" value="jdbc:mysql://localhost:3306/hibernate"></property>
        <property name="user" value="root"></property>
        <property name="password" value="root"></property>
    </bean>

    <!-- 配置SessionFactory,交给spring管理 -->
    <bean id="sessionFactory" class="org.springframework.orm.hibernate5.LocalSessionFactoryBean">
        <!-- 注入数据源 -->
        <property name="dataSource" ref="dataSource"></property>
        <!-- 指定hibernate核心配置文件位置 -->
        <property name="configLocation" value="classpath:hibernate.cfg.xml"></property>
    </bean>

    <!-- 配置事务管理器 -->
    <bean id="transactionManager" class="org.springframework.orm.hibernate5.HibernateTransactionManager">
        <!-- 注入sessionFactory -->
        <property name="sessionFactory" ref="sessionFactory"></property>
    </bean>

    <!-- 开启事务注解 -->
    <tx:annotation-driven transaction-manager="transactionManager"/>

    <!-- 配置action对象,注意是多实例 -->
    <bean id="userAction" class="cn.action.UserAction" scope="prototype">
        <!-- 注入service -->
        <property name="userService" ref="userService"></property>
    </bean>

    <!-- 配置service对象 -->
    <bean id="userService" class="cn.service.UserService">
        <!-- 注入dao -->
        <property name="userDao" ref="userDaoImpl"></property>
    </bean>

    <!-- 创建dao实现类对象 -->
    <bean id="userDaoImpl" class="cn.dao.UserDaoImpl">
        <property name="hibernateTemplate" ref="hibernateTemplate"></property>
    </bean>

    <!-- 创建hibernateTemplate模板对象 -->
    <bean id="hibernateTemplate" class="org.springframework.orm.hibernate5.HibernateTemplate">
        <!-- 注入sessionFactory,上面已经创建,可以打开源码看属性 -->
        <property name="sessionFactory" ref="sessionFactory"></property>
    </bean>
</beans>
hibernate.cfg.xml
<?xml version="1.0" encoding="UTF-8"?>
<!DOCTYPE hibernate-configuration PUBLIC
    "-//Hibernate/Hibernate Configuration DTD 3.0//EN"
    "http://www.hibernate.org/dtd/hibernate-configuration-3.0.dtd">
<hibernate-configuration>
    <session-factory>
        <!-- 一、配置数据库的信息,交给spring连接池替代 -->
     <!--    <property name="hibernate.connection.driver_class">com.mysql.jdbc.Driver</property>
        <property name="hibernate.connection.url">jdbc:mysql://localhost:3306/hibernate</property>
        <property name="hibernate.connection.username">root</property>
        <property name="hibernate.connection.password">root</property> -->
        <!-- 二、配置hibernate信息 可选项 -->
        <!-- 输出底层SQL语句 -->
        <property name="hibernate.show_sql">true</property>
        <!-- 格式化SQL语句 -->
        <property name="hibernate.format_sql">true</property>
        <!-- 如果没有表,创建  已有表 更新 -->
        <property name="hibernate.hbm2ddl.auto">update</property>
        <!-- 配置MySQL方言 -->
        <property name="hibernate.dialect">org.hibernate.dialect.MySQL5Dialect</property>
        <!-- 三、引入映射文件 -->
        <mapping resource="cn/entity/User.hbm.xml"/>
    </session-factory>
</hibernate-configuration>
struts.xml
<?xml version="1.0" encoding="UTF-8"?>
<!DOCTYPE struts PUBLIC
    "-//Apache Software Foundation//DTD Struts Configuration 2.3//EN"
    "http://struts.apache.org/dtds/struts-2.3.dtd">
<struts>
    <package name="sshdemo1" extends="struts-default" namespace="/">
        <!-- 没有返回值,不需要result -->
        <action name="userAction" class="userAction"></action>
    </package>
</struts>
其它整合操作:(感觉第一种结构更简明)
1)整合hibernate框架的时候,把hibernate基本信息和引入映射都写入spring配置文件
这样,hibernate核心配置文件就可以去除了
打开类LocalSessionFactoryBean可以看到一些属性
先改配置文件 bean1.xml
配置hibernate基本信息
Properties hibernateProperties; 注入properties见前面属性注入
配置引入映射:
String[] mappingResources;注入集合的方式,可以注入多个
测试启动服务器多了一个表,即配置正常
<?xml version="1.0" encoding="UTF-8"?>
<beans xmlns="http://www.springframework.org/schema/beans"
        xmlns:xsi="http://www.w3.org/2001/XMLSchema-instance"
        xmlns:aop="http://www.springframework.org/schema/aop"
        xmlns:context="http://www.springframework.org/schema/context"
        xmlns:tx="http://www.springframework.org/schema/tx" xsi:schemaLocation="
        http://www.springframework.org/schema/beans http://www.springframework.org/schema/beans/spring-beans-4.3.xsd
        http://www.springframework.org/schema/tx http://www.springframework.org/schema/tx/spring-tx.xsd
        http://www.springframework.org/schema/context http://www.springframework.org/schema/context/spring-context.xsd
        http://www.springframework.org/schema/aop http://www.springframework.org/schema/aop/spring-aop.xsd">

    <!-- 配置c3p0连接池 -->
    <bean id="dataSource" class="com.mchange.v2.c3p0.ComboPooledDataSource">
        <!-- 进行属性注入 -->
        <property name="driverClass" value="com.mysql.jdbc.Driver"></property>
        <property name="jdbcUrl" value="jdbc:mysql://localhost:3306/hibernate"></property>
        <property name="user" value="root"></property>
        <property name="password" value="root"></property>
    </bean>

    <!-- 配置SessionFactory,交给spring管理 -->
    <bean id="sessionFactory" class="org.springframework.orm.hibernate5.LocalSessionFactoryBean">
        <!-- 注入数据源 -->
        <property name="dataSource" ref="dataSource"></property>
        <!-- 指定hibernate核心配置文件位置 -->
        <!-- <property name="configLocation" value="classpath:hibernate.cfg.xml"></property>  -->
        <!-- 配置hibernate基本信息 -->
        <property name="hibernateProperties">
            <props>
                <prop key="hibernate.show_sql">true</prop>
                <prop key="hibernate.format_sql">true</prop>
                <prop key="hibernate.hbm2ddl.auto">update</prop>
                <prop key="hibernate.dialect">org.hibernate.dialect.MySQL5Dialect</prop>
            </props>
        </property>
        <!-- 配置映射文件引入 -->
        <property name="mappingResources">
            <list>
                <value>cn/entity/User.hbm.xml</value>
            </list>
        </property>
    </bean>

    <!-- 配置事务管理器 -->
    <bean id="transactionManager" class="org.springframework.orm.hibernate5.HibernateTransactionManager">
        <!-- 注入sessionFactory -->
        <property name="sessionFactory" ref="sessionFactory"></property>
    </bean>

    <!-- 开启事务注解 -->
    <tx:annotation-driven transaction-manager="transactionManager"/>

    <import resource="classpath:user.xml"/>
</beans>
spring分模块开发:
(之前的include引入可以解决,回顾struts2的分模块开发)
解决的是多人协作的维护问题
把核心配置文件的一部分:例如action部分拿出来
再用include单独引用
复制一份,删掉部分,进行引入(这里引入user.xml)
使用import
user.xml
<?xml version="1.0" encoding="UTF-8"?>
<beans xmlns="http://www.springframework.org/schema/beans"
        xmlns:xsi="http://www.w3.org/2001/XMLSchema-instance"
        xmlns:aop="http://www.springframework.org/schema/aop"
        xmlns:context="http://www.springframework.org/schema/context"
        xmlns:tx="http://www.springframework.org/schema/tx" xsi:schemaLocation="
        http://www.springframework.org/schema/beans http://www.springframework.org/schema/beans/spring-beans-4.3.xsd
        http://www.springframework.org/schema/tx http://www.springframework.org/schema/tx/spring-tx.xsd
        http://www.springframework.org/schema/context http://www.springframework.org/schema/context/spring-context.xsd
        http://www.springframework.org/schema/aop http://www.springframework.org/schema/aop/spring-aop.xsd">

    <!-- 配置action对象,注意是多实例 -->
    <bean id="userAction" class="cn.action.UserAction" scope="prototype">
        <!-- 注入service -->
        <property name="userService" ref="userService"></property>
    </bean>

    <!-- 配置service对象 -->
    <bean id="userService" class="cn.service.UserService">
        <!-- 注入dao -->
        <property name="userDao" ref="userDaoImpl"></property>
    </bean>

    <!-- 创建dao实现类对象 -->
    <bean id="userDaoImpl" class="cn.dao.UserDaoImpl">
        <property name="hibernateTemplate" ref="hibernateTemplate"></property>
    </bean>

    <!-- 创建hibernateTemplate模板对象 -->
    <bean id="hibernateTemplate" class="org.springframework.orm.hibernate5.HibernateTemplate">
        <!-- 注入sessionFactory,上面已经创建,可以打开源码看属性 -->
        <property name="sessionFactory" ref="sessionFactory"></property>
    </bean>
</beans>
引入:(完整的bean1.xml见上文)
<import resource="classpath:user.xml"/>
标签:保存 导致 tsx 面向接口 save 建立 standard 连接池 模式
原文地址:http://www.cnblogs.com/jiangbei/p/6791853.html