标签:ati end nts remove log ade 配置 使用 default
介绍:
我使用的Bundle:
"vich/uploader-bundle": "^1.4";
"liip/imagine-bundle": "^1.7"

配置:
1)首先需使用composer加载这两个Bundle,
2)注册:
new Vich\UploaderBundle\VichUploaderBundle(),
new Liip\ImagineBundle\LiipImagineBundle()
3)配置路由
_liip_imagine:
    resource: "@LiipImagineBundle/Resources/config/routing.xml"

4)配置config
配置VichUploaderBundle
vich_uploader:
    db_driver: orm # or mongodb or propel or phpcr
    mappings:
#实体中要配置的(mapping="dream_post");dream_post是个名称而已需要对应;
        dream_post:
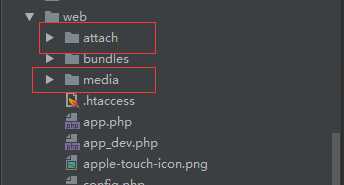
#这里是配置文件存储目录会存储在web/attach/artice下
            uri_prefix:         /attach/article
            upload_destination: "%kernel.root_dir%/../web/attach/article"
#vich_uploader里的服务名称
            namer:              vich_uploader.namer_uniqid
# 你自己写的服务名称app.vich.directory.namer是我写的一个服务
            directory_namer:   app.vich.directory.namer
            inject_on_load:     false
            delete_on_update:   true
            delete_on_remove:   true
        dream_attach:
            uri_prefix:         /attach/attach
            upload_destination: "%kernel.root_dir%/../data/attach/attach"
            namer:              vich_uploader.namer_uniqid
            directory_namer:   app.vich.directory.namer
            inject_on_load:     false
            delete_on_update:   true
            delete_on_remove:   true
配置LiipImagineBundle
liip_imagine :
    # configure resolvers
    resolvers :
        # setup the default resolver
        default :
            # use the default web path
            web_path : ~
    # your filter sets are defined here
    filter_sets :
        # use the default cache configuration
        cache : ~
        thumbnail_preview :
            quality : 75
            filters :
                thumbnail  : { size : [80, 50], mode : outbound }
5)写上传服务:
<?php

namespace AppBundle\Service;

use Vich\UploaderBundle\Naming\DirectoryNamerInterface;
use Vich\UploaderBundle\Mapping\PropertyMapping;

class VichDirectoryNamer implements DirectoryNamerInterface
{
    /**
     * Creates a directory name for the file being uploaded.
     *
     * @param object          $object  The object the upload is attached to.
     * @param PropertyMapping $mapping The mapping to use to manipulate the given object.
     *
     * @return string The directory name.
     */
    public function directoryName($object, PropertyMapping $mapping){
        $name = $mapping->getFileName($object);
        $directoryName = "";
        for($i=0;$i<5;$i++){
            $directoryName = $directoryName.substr($name,0,$i+1).‘/‘;
        }
        return $directoryName;
    }
}
配置服务
在本AppBundle里配置
services:
    app.vich.directory.namer:
        class: AppBundle\Service\VichDirectoryNamer
其中app.vich.directory.namer:就是刚才config中的自己写的服务名称

如果这里看不明白可以加我微信或者加SymfonyQQ群询问
微信号:WhenDreams 回复消息"Symfony上传图片" ;QQ群:182983780

6)写实体属性
/**
 * @var string
 *
 * @ORM\Column(name="filename", type="string", length=255)
 */
private $filename;

/**
 * @var string
 *
 * @Vich\UploadableField(mapping="dream_post", fileNameProperty="filename")
 */
private $attach;

public function setAttach($attach){
    $this->attach = $attach;

    if ($attach) {
        $this->created = new \DateTime(‘now‘);
    }

    return $this;
}

public function getAttach(){
    return $this->attach;
}

7)表单配置
->add(‘attach‘, FileType::class, [
    ‘label‘ => ‘上传‘,
    ‘required‘ => $options[‘data‘]->getId() == null
]);


8)页面显示:
<th>Image</th>
<td>
    <a href="{{ vich_uploader_asset(post,‘attach‘)}}" target="_blank">
        <img src="{{ vich_uploader_asset(post,‘attach‘)|imagine_filter(‘thumbnail_preview‘)}}" >
    </a>
</td>
=================================
如果需要全部代码关注我微信号whenDreams回复"Symfony上传图片",
或者加QQ群:182983780


这是我的微信号
标签:ati end nts remove log ade 配置 使用 default
原文地址:http://www.cnblogs.com/Amos-Turing/p/6873523.html