标签:lib obb 段错误 html 4.01 price person border code 领域
从Spring2.0起就提供了一组全面的自动数据绑定标签来处理表单元素。生成的标签兼容HTML 4.01与XHTML 1.0。表单标签库中包含了可以用在JSP页面中渲染HTML元素的标签。表单标记库包含在spring-webmvc.jar中,库的描述符称为spring-form.tld,为了使用这些标签必须在jsp页面开头处声明这个tablib指令。
<%@ taglib prefix="form" uri="http://www.springframework.org/tags/form" %>
以下表格展示了标签库中的常用标签:
|
标签 |
描述 |
|
form |
渲染表单元素form |
|
input |
渲染<input type=”text”/>元素 |
|
password |
渲染<input type=”password”/>元素 |
|
hidden |
渲染<input type=”hidden”/>元素 |
|
textarea |
渲染textarea元素 |
|
checkbox |
渲染一个<input type=”checkbox”/>复选元素 |
|
checkboxs |
渲染多个<input type=”checkbox”/>元素 |
|
radiobutton |
渲染一个<input type=”radio”/>单选元素 |
|
radiobuttons |
渲染多个<input type=”radio”/>元素 |
|
select |
渲染一个选择元素 |
|
option |
渲染一个可选元素 |
|
options |
渲染多个可选元素列表 |
|
errors |
在span元素中渲染字段错误 |
path:要绑定的属性路径,最重要的属性,多个元素必填,相当于 modelAttribute.getXXX() 。
cssClass:定义要应用到被渲染元素的CSS类,类样式。
cssStyle:定义要应用到被渲染元素的CSS样式,行内样式。
htmlEscape:接受true或者false,表示是否应该对被渲染的值进行HTML转义。
cssErrorClass:定义要应用到被渲染input元素的CSS类,如果bound属性中包含错误,则覆盖cssClass属性值。
这个标签会生成HTML form标签,同时为form内部所包含的标签提供一个绑定路径(binding path)。 它把命令对象(command object)存在PageContext中,这样form内部的标签就可以使用这个对象了。标签库中的其他标签都声明在form标签的内部。
让我们假设有一个叫User的领域对象,它是一个JavaBean,有着诸如 firstName和lastName这样的属性。我们将把它当作 一个表单支持对象(form backing object),它对应的表单控制器用 form.jsp页面来显示表单。
commandName:暴露表单对象的模型属性名称,默认为command,它定义了模型属性的名称,其中包含了一个backing object,其属性将用于填充生成的表单。如果该属性存在,则必须在返回包含该表单的视图的请求处理方法中添加相应的模型属性。
modelAttribute:暴露form backing object的模型属性名称,默认为command
commandName与modelAttribute功能基本一样,使用modelAttribute就可以了,因为commandName已被抛弃。
如果在页面中使用form不设置任意属性<form:form/>,解析后的结果如下:
<form id="command" action="/SpringMVC04/bar/action11" method="post"></form>
新建一个控制器,在控制器中添加一个action

 1 package com.zhangguo.springmvc04.controllers;
 2 import org.springframework.stereotype.Controller;
 3 import org.springframework.ui.Model;
 4 import org.springframework.web.bind.annotation.RequestMapping;
 5 import com.zhangguo.springmvc04.entities.Product;
 6
 7 @Controller
 8 @RequestMapping("/bar")
 9 public class BarController {
10     @RequestMapping("/action11")
11     public String action11(Model model){
12         //向模型中添加一个名为product的对象,用于渲染视图
13         model.addAttribute("product", new Product("Meizu note1", 999));
14         return "bar/action11";
15     }
16 }
在views/bar目录下添加action11.jsp页面
 1 <%@ page language="java" contentType="text/html; charset=UTF-8" pageEncoding="UTF-8"%>
 2 <%@ taglib prefix="c" uri="http://java.sun.com/jsp/jstl/core"%>
 3 <%@ taglib prefix="form" uri="http://www.springframework.org/tags/form"%>
 4 <!DOCTYPE html>
 5 <html>
 6 <head>
 7 <meta http-equiv="Content-Type" content="text/html; charset=UTF-8">
 8 <title>bar/action11</title>
 9 </head>
10 <body>
11     <form:form modelAttribute="product">
12         <p>
13             <label for="name">名称:</label>
14             <form:input path="name" />
15         </p>
16         <p>
17             <label for="price">价格:</label>
18             <form:input path="price" />
19         </p>
20     </form:form>
21 </body>
22 </html>
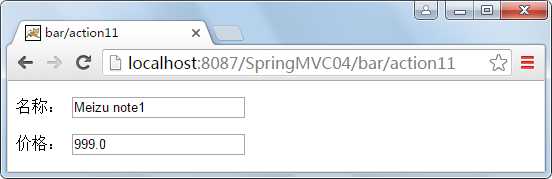
form表单与模型中名称为product的对象进行绑定,form中的表单元素的path指的就是访问该对象的路径,如果没有该对象或找不到属性名将异常。系统将自动把指定模型中的值与页面进行绑定,渲染后的结果如下
 1 <!DOCTYPE html>
 2 <html>
 3 <head>
 4 <meta http-equiv="Content-Type" content="text/html; charset=UTF-8">
 5 <title>bar/action11</title>
 6 </head>
 7 <body>
 8     <form id="product" action="/SpringMVC04/bar/action11" method="post">
 9         <p>
10             <label for="name">名称:</label>
11             <input id="name" name="name" type="text" value="Meizu note1"/>
12         </p>
13         <p>
14             <label for="price">价格:</label>
15             <input id="price" name="price" type="text" value="999.0"/>
16         </p>
17     </form>
18 </body>
19 </html>
运行结果:
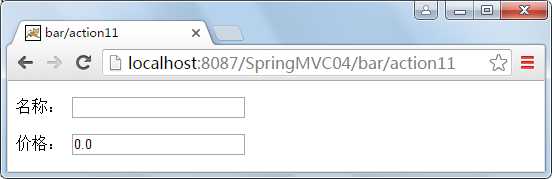
模型可以为空,不是为null,中间可以没有数据,但非字符类型会取默认值,如价格会变成0.0。model.addAttribute("product", new Product()),结果如下:
input元素可以设置其它的属性,如前面提到的通用属性,修改后的表单如下:
1 <p>
2             <label for="name">名称:</label>
3             <form:input path="name" cssClass="textCss" cssStyle="color:blue" a="b" htmlEscape="false"/>
4         </p>
修改action11方法的内容如下:
        //向模型中添加一个名为product的对象,用于渲染视图
        model.addAttribute("product", new Product("Meizu note1<hr/>", 999));
渲染结果:
1 <p>
2             <label for="name">名称:</label>
3             <input id="name" name="name" class="textCss" style="color:blue" a="b" type="text" value="Meizu note1<hr/>"/>
4         </p>
默认从服务器发送到客户端的数据中是会编码的,如示例中<hr/>,会解析成<hr>,但我们设置属性htmlEscape="false"结果原样输出;我们在标签中设置a="b"原样解析出来,这里给开发者留了很大的空间,如想使用原input标签的属性都可以直接写。
form:checkbox元素将渲染成一个复选框,通过该元素可以获得3种不同类型的值,分别是boolean,数组,基本数据类型,添加一个新的实体类Person,如下所示:
 1 package com.zhangguo.springmvc04.entities;
 2
 3 public class Person {
 4     /*
 5      * 婚否
 6      */
 7     private boolean isMarried;
 8     /*
 9      * 爱好
10      */
11     private String[] hobbies;
12     /**
13      * 学历
14      */
15     private String education;
16
17
18     public boolean getIsMarried() {
19         return isMarried;
20     }
21     public void setIsMarried(boolean isMarried) {
22         this.isMarried = isMarried;
23     }
24     public String[] getHobbies() {
25         return hobbies;
26     }
27     public void setHobbies(String[] hobbies) {
28         this.hobbies = hobbies;
29     }
30     public String getEducation() {
31         return education;
32     }
33     public void setEducation(String education) {
34         this.education = education;
35     }
36 }
特别注意的是boolean类型的值生成的get/set属性名称前是不带get与set的,这样会引起异常,建议手动修改。
在控制器中新增2个action,代码如下:
 1 //checkbox
 2     @RequestMapping("/action21")
 3     public String action21(Model model){
 4         model.addAttribute("person", new Person());
 5         return "bar/action21";
 6     }
 7
 8     @RequestMapping("/action22")
 9     @ResponseBody
10     public Person action22(HttpServletResponse response,Person person){
11         return person;
12     }
在views/bar目录下添加action21视图,视图脚本如下:
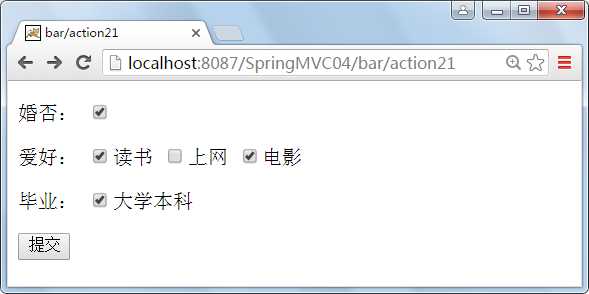
 1 <%@ page language="java" contentType="text/html; charset=UTF-8" pageEncoding="UTF-8"%>
 2 <%@ taglib prefix="c" uri="http://java.sun.com/jsp/jstl/core"%>
 3 <%@ taglib prefix="form" uri="http://www.springframework.org/tags/form"%>
 4 <!DOCTYPE html>
 5 <html>
 6 <head>
 7 <meta http-equiv="Content-Type" content="text/html; charset=UTF-8">
 8 <title>bar/action21</title>
 9 </head>
10 <body>
11     <form:form modelAttribute="person" action="action22">
12         <p>
13             <label for="name">婚否:</label>
14             <form:checkbox path="isMarried" />
15         </p>
16         <p>
17             <label for="name">爱好:</label>
18             <form:checkbox path="hobbies" value="读书"/>读书
19             <form:checkbox path="hobbies" value="上网"/>上网
20             <form:checkbox path="hobbies" value="电影"/>电影
21         </p>
22         <p>
23             <label for="name">毕业:</label>
24             <form:checkbox path="education" value="本科"/>大学本科
25         </p>
26         <p>
27         <button>提交</button>
28         </p>
29     </form:form>
30 </body>
31 </html>
渲染后的视图如下:
 1 <!DOCTYPE html>
 2 <html>
 3 <head>
 4 <meta http-equiv="Content-Type" content="text/html; charset=UTF-8">
 5 <title>bar/action21</title>
 6 </head>
 7 <body>
 8     <form id="person" action="action22" method="post">
 9         <p>
10             <label for="name">婚否:</label>
11             <input id="isMarried1" name="isMarried" type="checkbox" value="true"/><input type="hidden" name="_isMarried" value="on"/>
12         </p>
13         <p>
14             <label for="name">爱好:</label>
15             <input id="hobbies1" name="hobbies" type="checkbox" value="读书"/><input type="hidden" name="_hobbies" value="on"/>读书
16             <input id="hobbies2" name="hobbies" type="checkbox" value="上网"/><input type="hidden" name="_hobbies" value="on"/>上网
17             <input id="hobbies3" name="hobbies" type="checkbox" value="电影"/><input type="hidden" name="_hobbies" value="on"/>电影
18         </p>
19         <p>
20             <label for="name">毕业:</label>
21             <input id="education1" name="education" type="checkbox" value="本科"/><input type="hidden" name="_education" value="on"/>大学本科
22         </p>
23         <p>
24         <button>提交</button>
25         </p>
26     </form>
27 </body>
28 </html>
运行结果:
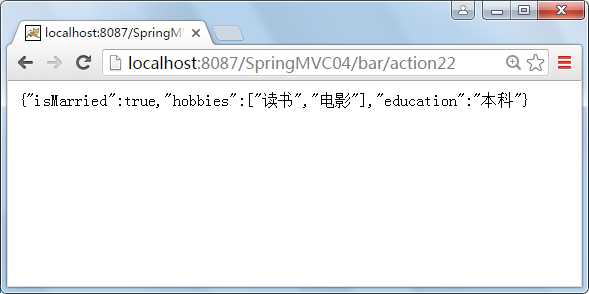
form:checkbox在渲染成input标签里会变成2个表单元素,这样可以确保用户没有选择内容时也会将值带会服务器,默认是没有这样的。
小结:checkbox有三种使用方法
第一种用法:若绑定值是java.lang.Boolean类型,则值为true时,input(checkbox)标为checked(选中)。其value(值)属性对应于setValue(Object)值属性的解析值。
第二种用法:若绑定值是Array(数组)类型或java.util.Collection,则配置的setValue(Object)值出现在绑定的Collection中时,input(checkbox)标为checked(选中)。
第三种用法:若绑定值为其他类型,则当配置的setValue(Object)等于其绑定值时,input(checkbox)标为checked(选中)。
这个标签生成类型为radio的HTML input 标签,也就是常见的单选框。这个标签的典型用法是一次声明多个标签实例,所有的标签都有相同的path属性,但是他们的value属性不同。
定义2个action,代码如下:
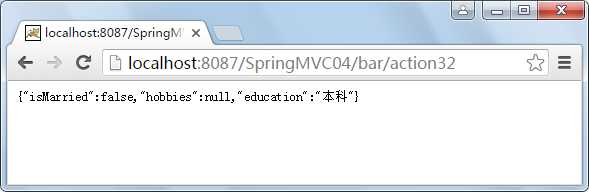
 1 @RequestMapping("/action31")
 2     public String action31(Model model){
 3         model.addAttribute("person", new Person());
 4         return "bar/action31";
 5     }
 6
 7     @RequestMapping("/action32")
 8     @ResponseBody
 9     public Person action32(HttpServletResponse response,Person person){
10         return person;
11     }
在views/bar下定义视图action31.jsp,脚本如下:
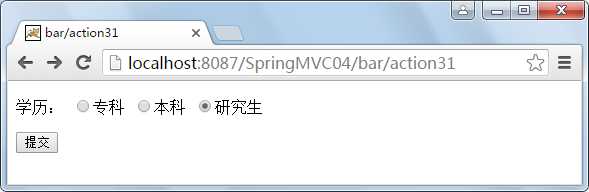
 1 <%@ page language="java" contentType="text/html; charset=UTF-8" pageEncoding="UTF-8"%>
 2 <%@ taglib prefix="c" uri="http://java.sun.com/jsp/jstl/core"%>
 3 <%@ taglib prefix="form" uri="http://www.springframework.org/tags/form"%>
 4 <!DOCTYPE html>
 5 <html>
 6 <head>
 7 <meta http-equiv="Content-Type" content="text/html; charset=UTF-8">
 8 <title>bar/action31</title>
 9 </head>
10 <body>
11     <form:form modelAttribute="person" action="action32">
12         <p>
13             <label for="name">学历:</label>
14             <form:radiobutton path="education" value="专科"/>专科
15             <form:radiobutton path="education" value="本科"/>本科
16             <form:radiobutton path="education" value="研究生"/>研究生
17         </p>
18         <p>
19         <button>提交</button>
20         </p>
21     </form:form>
22 </body>
23 </html>
运行后页面渲染结果:
 1 <!DOCTYPE html>
 2 <html>
 3 <head>
 4 <meta http-equiv="Content-Type" content="text/html; charset=UTF-8">
 5 <title>bar/action31</title>
 6 </head>
 7 <body>
 8     <form id="person" action="action32" method="post">
 9         <p>
10             <label for="name">学历:</label>
11             <input id="education1" name="education" type="radio" value="专科"/>专科
12             <input id="education2" name="education" type="radio" value="本科"/>本科
13             <input id="education3" name="education" type="radio" value="研究生"/>研究生
14         </p>
15         <p>
16         <button>提交</button>
17         </p>
18     </form>
19 </body>
20 </html>
运行结果:
这个标签生成类型为password的HTML input标签,渲染后生成一个密码框。input标签的值和表单支持对象相应属性的值保持一致。该标签与input类似,但有一个特殊的属性showPassword, 是否将对象中的值绑定到密码框中,默认为false,也意味着密码框中不会出现默认的掩码。
修改action31,修改后如下所示:
1 @RequestMapping("/action31")
2     public String action31(Model model){
3         Person person=new Person();
4         person.setEducation("edu");
5         model.addAttribute("person", person);
6         return "bar/action31";
7     }
当页面脚本如下时:
        <p>
           <label>密码:</label>
           <form:password path="education" showPassword="true"/>
        </p>
渲染结果:
        <p>
           <label>密码:</label>
           <input id="education" name="education" type="password" value="edu"/>
        </p>

当页面脚本如下时:
        <p>
           <label>密码:</label>
           <form:password path="education" showPassword="false"/>
        </p>
渲染结果:
        <p>
           <label>密码:</label>
           <input id="education" name="education" type="password" value=""/>
        </p>

这个标签生成HTML select标签,就是下拉框,多选框。在生成的HTML代码中,被选中的选项和表单支持对象相应属性的值保持一致。这个标签也支持嵌套的option和options标签。
定义两个action,代码如下:
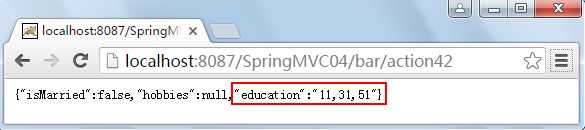
 1 //select 下拉列表
 2     @RequestMapping("/action41")
 3     public String action41(Model model){
 4         List<ProductType>  productTypes = new ArrayList<ProductType>();
 5         productTypes.add(new ProductType(11, "数码电子"));
 6         productTypes.add(new ProductType(21, "鞋帽服饰"));
 7         productTypes.add(new ProductType(31, "图书音像"));
 8         productTypes.add(new ProductType(41, "五金家电"));
 9         productTypes.add(new ProductType(51, "生鲜水果"));
10         model.addAttribute("productTypes", productTypes);
11         model.addAttribute("person", new Person());
12         return "bar/action41";
13     }
14
15     @RequestMapping("/action42")
16     @ResponseBody
17     public Person action42(HttpServletResponse response,Person person){
18         return person;
19     }
在action41中为模型添加了一个属性productTypes,该对象用于绑定到页面的下拉列表框。
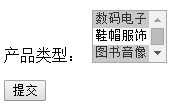
在views/bar下添加视图action41.jsp,脚本如下:
 1 <%@ page language="java" contentType="text/html; charset=UTF-8" pageEncoding="UTF-8"%>
 2 <%@ taglib prefix="c" uri="http://java.sun.com/jsp/jstl/core"%>
 3 <%@ taglib prefix="form" uri="http://www.springframework.org/tags/form"%>
 4 <!DOCTYPE html>
 5 <html>
 6 <head>
 7 <meta http-equiv="Content-Type" content="text/html; charset=UTF-8">
 8 <title>bar/action41</title>
 9 </head>
10 <body>
11     <form:form modelAttribute="person" action="action42">
12         <p>
13             <label for="name">产品类型:</label>
14             <form:select size="3" multiple="multiple" path="education" items="${productTypes}"  itemLabel="name"  itemValue="id"></form:select>
15         </p>
16         <p>
17         <button>提交</button>
18         </p>
19     </form:form>
20 </body>
21 </html>
size="3" 表示可见项为3项,默认可见项为1项
multiple="multiple" 允许多选,默认为单选
path="education" 与表单中指定的modelAttribute对象进行双向绑定
items="${productTypes}" 绑定到下拉列表的集合对象
itemLabel="name" 集合中的对象用于作为下拉列表option的text属性
itemValue="id" 集合中的对象用于作为下拉列表option的value属性
渲染后的页面:
 1 <!DOCTYPE html>
 2 <html>
 3 <head>
 4 <meta http-equiv="Content-Type" content="text/html; charset=UTF-8">
 5 <title>bar/action41</title>
 6 </head>
 7 <body>
 8     <form id="person" action="action42" method="post">
 9         <p>
10             <label for="name">产品类型:</label>
11             <select id="education" name="education" multiple="multiple" size="3">
12                 <option value="11">数码电子</option>
13                 <option value="21">鞋帽服饰</option>
14                 <option value="31">图书音像</option>
15                 <option value="41">五金家电</option>
16                 <option value="51">生鲜水果</option></select>
17                 <input type="hidden" name="_education" value="1" />
18         </p>
19         <p>
20             <button>提交</button>
21         </p>
22     </form>
23 </body>
24 </html>
请注意渲染后一个form:selelct标签变成了2个标签,多出一个hidden,保证没有选择时也有值带回服务器。
运行结果:
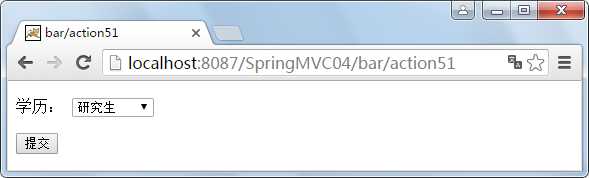
这个标签生成HTML option标签,可以用于生成select表单元素中的单项,没有path属性,有label与value属性。新增2个action,代码如下:
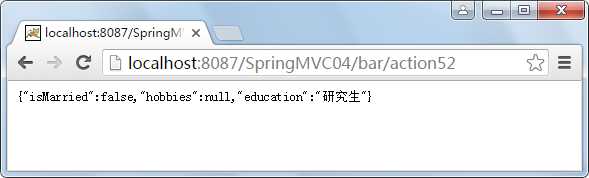
 1 //option
 2     @RequestMapping("/action51")
 3     public String action51(Model model){
 4         model.addAttribute("person", new Person());
 5         return "bar/action51";
 6     }
 7
 8     @RequestMapping("/action52")
 9     @ResponseBody
10     public Person action52(HttpServletResponse response,Person person){
11         return person;
12     }
在views/bar下新增页面action51.jsp,内容如下:
 1 <%@ page language="java" contentType="text/html; charset=UTF-8" pageEncoding="UTF-8"%>
 2 <%@ taglib prefix="c" uri="http://java.sun.com/jsp/jstl/core"%>
 3 <%@ taglib prefix="form" uri="http://www.springframework.org/tags/form"%>
 4 <!DOCTYPE html>
 5 <html>
 6 <head>
 7 <meta http-equiv="Content-Type" content="text/html; charset=UTF-8">
 8 <title>bar/action51</title>
 9 </head>
10 <body>
11     <form:form modelAttribute="person" action="action52">
12         <p>
13             <label for="name">学历:</label>
14             <form:select path="education">
15                 <form:option value="" >--请选择--</form:option>
16                 <form:option value="大专">大专</form:option>
17                 <form:option value="本科">本科</form:option>
18                 <form:option value="研究生">研究生</form:option>
19             </form:select>
20         </p>
21         <p>
22             <button>提交</button>
23         </p>
24     </form:form>
25 </body>
26 </html>
渲染后的页面:
 1 <!DOCTYPE html>
 2 <html>
 3 <head>
 4 <meta http-equiv="Content-Type" content="text/html; charset=UTF-8">
 5 <title>bar/action51</title>
 6 </head>
 7 <body>
 8     <form id="person" action="action52" method="post">
 9         <p>
10             <label for="name">学历:</label>
11             <select id="education" name="education">
12                 <option value="">--请选择--</option>
13                 <option value="大专">大专</option>
14                 <option value="本科">本科</option>
15                 <option value="研究生">研究生</option>
16             </select>
17         </p>
18         <p>
19             <button>提交</button>
20         </p>
21     </form>
22 </body>
23 </html>
运行结果:
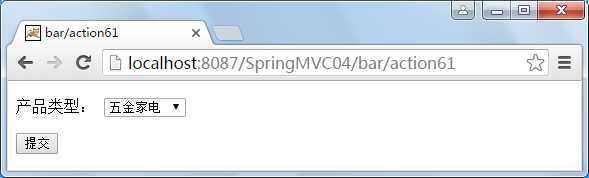
这个标签生成一系列的HTML option标签,可以用它生成select标签中的子标签,在控制器中新增两个action,代码如下:
 1 //options
 2     @RequestMapping("/action61")
 3     public String action61(Model model){
 4         List<ProductType>  productTypes = new ArrayList<ProductType>();
 5         productTypes.add(new ProductType(11, "数码电子"));
 6         productTypes.add(new ProductType(21, "鞋帽服饰"));
 7         productTypes.add(new ProductType(31, "图书音像"));
 8         productTypes.add(new ProductType(41, "五金家电"));
 9         productTypes.add(new ProductType(51, "生鲜水果"));
10         model.addAttribute("productTypes", productTypes);
11         model.addAttribute("person", new Person());
12         return "bar/action61";
13     }
14
15     @RequestMapping("/action62")
16     @ResponseBody
17     public Person action62(HttpServletResponse response,Person person){
18         return person;
19     }
在views/bar下增加一个名为action61.jsp的页面,页面脚本如下:
 1 <%@ page language="java" contentType="text/html; charset=UTF-8" pageEncoding="UTF-8"%>
 2 <%@ taglib prefix="c" uri="http://java.sun.com/jsp/jstl/core"%>
 3 <%@ taglib prefix="form" uri="http://www.springframework.org/tags/form"%>
 4 <!DOCTYPE html>
 5 <html>
 6 <head>
 7 <meta http-equiv="Content-Type" content="text/html; charset=UTF-8">
 8 <title>bar/action61</title>
 9 </head>
10 <body>
11     <form:form modelAttribute="person" action="action62">
12         <p>
13             <label for="name">产品类型:</label>
14             <form:select path="education">
15                <form:option value="">--请选择--</form:option>
16                <form:options items="${productTypes}" itemLabel="name" itemValue="id"/>
17             </form:select>
18         </p>
19         <p>
20             <button>提交</button>
21         </p>
22     </form:form>
23 </body>
24 </html>
绑定集合的方法与select类似,渲染后的页面生成结果如下:
 1 <!DOCTYPE html>
 2 <html>
 3 <head>
 4 <meta http-equiv="Content-Type" content="text/html; charset=UTF-8">
 5 <title>bar/action61</title>
 6 </head>
 7 <body>
 8     <form id="person" action="action62" method="post">
 9         <p>
10             <label for="name">产品类型:</label>
11             <select id="education" name="education">
12                <option value="">--请选择--</option>
13                <option value="11">数码电子</option>
14                <option value="21">鞋帽服饰</option>
15                <option value="31">图书音像</option>
16                <option value="41">五金家电</option>
17                <option value="51">生鲜水果</option>
18             </select>
19         </p>
20         <p>
21             <button>提交</button>
22         </p>
23     </form>
24 </body>
25 </html>
通过这个方式实现了一个请选择标签,运行结果如下:
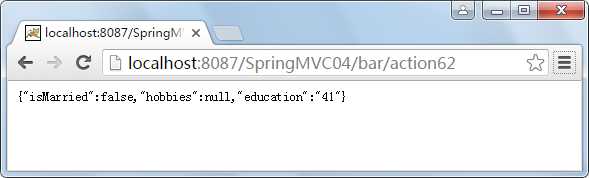
上面的这个例子同时使用了option标签和options标签。这两个标签生成的HTML代码是相同的,但是第一个option标签允许你在JSP中明确声明这个标签的值只供显示使用,并不绑定到表单支持对象的属性上。
这个标签生成HTML textarea标签,就是一个多行文本标签,用法与input非常类似。errors标签用于显示错误信息,如下脚本:

<tr>
    <td>学历:</td>
    <td><form:textarea path="education" rows="3" cols="20" /></td>
    <td><form:errors path="education" /></td>
</tr>
将被渲染成:
            <tr>
                <td>学历:</td>
                <td><textarea id="education" name="education" rows="3" cols="20"></textarea></td>
                <td></td>
            </tr>
因为当前并没有对应的错误信息,所以errors标签并未生成任何HTML脚本。errors标签生成类型为‘span‘的HTML标签,用来显示表单验证时出现的错误信息。通过这个标签,你可以访问控制器(controller)和与控制器关联的验证器(validator)产生的错误信息。
这个标签生成类型为hidden的HTML input标签。在生成的HTML代码中,input标签的值和表单支持对象相应属性的值保持一致。如果你需要声明一个类型为hidden的input标签,但是表单支持对象中没有对应的属性,你只能使用HTML的标签。在控制器下新增两个action,代码如下:
 1 //hidden
 2         @RequestMapping("/action71")
 3         public String action71(Model model){
 4             Person person=new Person();
 5             person.setEducation("99");
 6             model.addAttribute("person", person);
 7             return "bar/action71";
 8         }
 9
10         @RequestMapping("/action72")
11         @ResponseBody
12         public Person action72(HttpServletResponse response,Person person){
13             return person;
14         }
在views/bar目录下新增视图action71.jsp,脚本如下:
 1 <%@ page language="java" contentType="text/html; charset=UTF-8" pageEncoding="UTF-8"%>
 2 <%@ taglib prefix="c" uri="http://java.sun.com/jsp/jstl/core"%>
 3 <%@ taglib prefix="form" uri="http://www.springframework.org/tags/form"%>
 4 <!DOCTYPE html>
 5 <html>
 6 <head>
 7 <meta http-equiv="Content-Type" content="text/html; charset=UTF-8">
 8 <title>bar/action71</title>
 9 </head>
10 <body>
11     <form:form modelAttribute="person" action="action72">
12         <p>
13             <form:hidden path="education" />
14             <input type="hidden" value="1" name="id">
15         </p>
16         <p>
17             <button>提交</button>
18         </p>
19     </form:form>
20 </body>
21 </html>
渲染后的页面:
 1 <!DOCTYPE html>
 2 <html>
 3 <head>
 4 <meta http-equiv="Content-Type" content="text/html; charset=UTF-8">
 5 <title>bar/action61</title>
 6 </head>
 7 <body>
 8     <form id="person" action="action62" method="post">
 9         <p>
10             <input id="education" name="education" type="hidden" value="99"/>
11             <input type="hidden" value="1" name="id">
12         </p>
13         <p>
14             <button>提交</button>
15         </p>
16     </form>
17 </body>
18 </html>
运行结果:
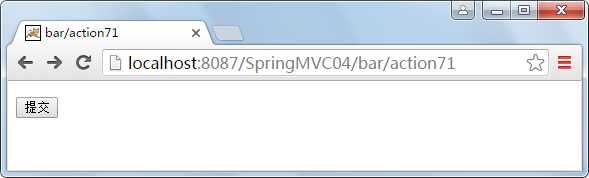
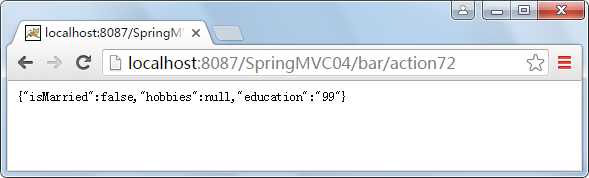
隐藏域用于保持页面状态。
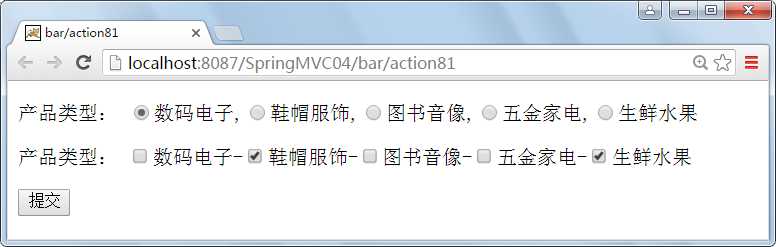
radiobuttons将生成一组单选框,只允许多个中选择1个;checkboxs生成一组复选列表,允许多选。添加两个action,代码如下:
 1 //radiobuttons,checkboxs
 2     @RequestMapping("/action81")
 3     public String action81(Model model) {
 4         List<ProductType> productTypes = new ArrayList<ProductType>();
 5         productTypes.add(new ProductType(11, "数码电子"));
 6         productTypes.add(new ProductType(21, "鞋帽服饰"));
 7         productTypes.add(new ProductType(31, "图书音像"));
 8         productTypes.add(new ProductType(41, "五金家电"));
 9         productTypes.add(new ProductType(51, "生鲜水果"));
10         model.addAttribute("productTypes", productTypes);
11         model.addAttribute("person", new Person());
12         return "bar/action81";
13     }
14
15     @RequestMapping("/action82")
16     @ResponseBody
17     public Person action82(HttpServletResponse response, Person person) {
18         return person;
19     }
在views/bar目录下添加一个名为action81.jsp的视图,脚本如下:
 1 <%@ page language="java" contentType="text/html; charset=UTF-8" pageEncoding="UTF-8"%>
 2 <%@ taglib prefix="c" uri="http://java.sun.com/jsp/jstl/core"%>
 3 <%@ taglib prefix="form" uri="http://www.springframework.org/tags/form"%>
 4 <!DOCTYPE html>
 5 <html>
 6 <head>
 7 <meta http-equiv="Content-Type" content="text/html; charset=UTF-8">
 8 <title>bar/action81</title>
 9 </head>
10 <body>
11     <form:form modelAttribute="person" action="action82">
12         <p>
13             <label for="name">产品类型:</label>
14             <form:radiobuttons path="education" items="${productTypes}"  itemLabel="name"  itemValue="id" delimiter=","  element="a"/>
15         </p>
16         <p>
17             <label for="name">产品类型:</label>
18             <form:checkboxes path="education" items="${productTypes}"  itemLabel="name"  itemValue="id" delimiter="-"/>
19         </p>
20         <p>
21         <button>提交</button>
22         </p>
23     </form:form>
24 </body>
25 </html>
属性delimiter=",",表示生成的单项间使用“,”号分隔,默认为空。
属性element="a",表示生成的单项容器,默认为span。
渲染后结果如下:
 1 <!DOCTYPE html>
 2 <html>
 3 <head>
 4 <meta http-equiv="Content-Type" content="text/html; charset=UTF-8">
 5 <title>bar/action81</title>
 6 </head>
 7 <body>
 8     <form id="person" action="action82" method="post">
 9         <p>
10             <label for="name">产品类型:</label>
11             <a><input id="education1" name="education" type="radio" value="11"/><label for="education1">数码电子</label></a><a>,<input id="education2" name="education" type="radio" value="21"/><label for="education2">鞋帽服饰</label></a><a>,<input id="education3" name="education" type="radio" value="31"/><label for="education3">图书音像</label></a><a>,<input id="education4" name="education" type="radio" value="41"/><label for="education4">五金家电</label></a><a>,<input id="education5" name="education" type="radio" value="51"/><label for="education5">生鲜水果</label></a>
12         </p>
13         <p>
14             <label for="name">产品类型:</label>
15             <span><input id="education6" name="education" type="checkbox" value="11"/><label for="education6">数码电子</label></span><span>-<input id="education7" name="education" type="checkbox" value="21"/><label for="education7">鞋帽服饰</label></span><span>-<input id="education8" name="education" type="checkbox" value="31"/><label for="education8">图书音像</label></span><span>-<input id="education9" name="education" type="checkbox" value="41"/><label for="education9">五金家电</label></span><span>-<input id="education10" name="education" type="checkbox" value="51"/><label for="education10">生鲜水果</label></span><input type="hidden" name="_education" value="on"/>
16         </p>
17         <p>
18         <button>提交</button>
19         </p>
20     </form>
21 </body>
22 </html>
运行结果如下:


从Spring2.0起就提供了一组全面的自动数据绑定标签来处理表单元素。生成的标签兼容HTML 4.01与XHTML 1.0。表单标签库中包含了可以用在JSP页面中渲染HTML元素的标签。表单标记库包含在spring-webmvc.jar中,库的描述符称为spring-form.tld,为了使用这些标签必须在jsp页面开头处声明这个tablib指令。
<%@ taglib prefix="form" uri="http://www.springframework.org/tags/form" %>
以下表格展示了标签库中的常用标签:
|
标签 |
描述 |
|
form |
渲染表单元素form |
|
input |
渲染<input type=”text”/>元素 |
|
password |
渲染<input type=”password”/>元素 |
|
hidden |
渲染<input type=”hidden”/>元素 |
|
textarea |
渲染textarea元素 |
|
checkbox |
渲染一个<input type=”checkbox”/>复选元素 |
|
checkboxs |
渲染多个<input type=”checkbox”/>元素 |
|
radiobutton |
渲染一个<input type=”radio”/>单选元素 |
|
radiobuttons |
渲染多个<input type=”radio”/>元素 |
|
select |
渲染一个选择元素 |
|
option |
渲染一个可选元素 |
|
options |
渲染多个可选元素列表 |
|
errors |
在span元素中渲染字段错误 |
path:要绑定的属性路径,最重要的属性,多个元素必填,相当于 modelAttribute.getXXX() 。
cssClass:定义要应用到被渲染元素的CSS类,类样式。
cssStyle:定义要应用到被渲染元素的CSS样式,行内样式。
htmlEscape:接受true或者false,表示是否应该对被渲染的值进行HTML转义。
cssErrorClass:定义要应用到被渲染input元素的CSS类,如果bound属性中包含错误,则覆盖cssClass属性值。
这个标签会生成HTML form标签,同时为form内部所包含的标签提供一个绑定路径(binding path)。 它把命令对象(command object)存在PageContext中,这样form内部的标签就可以使用这个对象了。标签库中的其他标签都声明在form标签的内部。
让我们假设有一个叫User的领域对象,它是一个JavaBean,有着诸如 firstName和lastName这样的属性。我们将把它当作 一个表单支持对象(form backing object),它对应的表单控制器用 form.jsp页面来显示表单。
commandName:暴露表单对象的模型属性名称,默认为command,它定义了模型属性的名称,其中包含了一个backing object,其属性将用于填充生成的表单。如果该属性存在,则必须在返回包含该表单的视图的请求处理方法中添加相应的模型属性。
modelAttribute:暴露form backing object的模型属性名称,默认为command
commandName与modelAttribute功能基本一样,使用modelAttribute就可以了,因为commandName已被抛弃。
如果在页面中使用form不设置任意属性<form:form/>,解析后的结果如下:
<form id="command" action="/SpringMVC04/bar/action11" method="post"></form>
标签:lib obb 段错误 html 4.01 price person border code 领域
原文地址:http://www.cnblogs.com/yang82/p/6880447.html
