标签:src word ram isp 适配器 keyword strong pretty string
读者阅读过SpringMVC学习(一)——SpringMVC介绍与入门这篇文章后,想必都会写写SpringMVC的入门小程序,在这个小程序中,SpringMVC的核心配置文件——springmvc.xml为:
<?xml version="1.0" encoding="UTF-8"?>
<beans xmlns="http://www.springframework.org/schema/beans"
    xmlns:xsi="http://www.w3.org/2001/XMLSchema-instance"
    xmlns:p="http://www.springframework.org/schema/p"
    xmlns:context="http://www.springframework.org/schema/context"
    xmlns:mvc="http://www.springframework.org/schema/mvc"
    xsi:schemaLocation="
        http://www.springframework.org/schema/beans
        http://www.springframework.org/schema/beans/spring-beans-4.0.xsd
        http://www.springframework.org/schema/mvc
        http://www.springframework.org/schema/mvc/spring-mvc-4.0.xsd
        http://www.springframework.org/schema/context
        http://www.springframework.org/schema/context/spring-context-4.0.xsd">

    <context:component-scan base-package="com.itheima.springmvc.controller"/>

</beans>
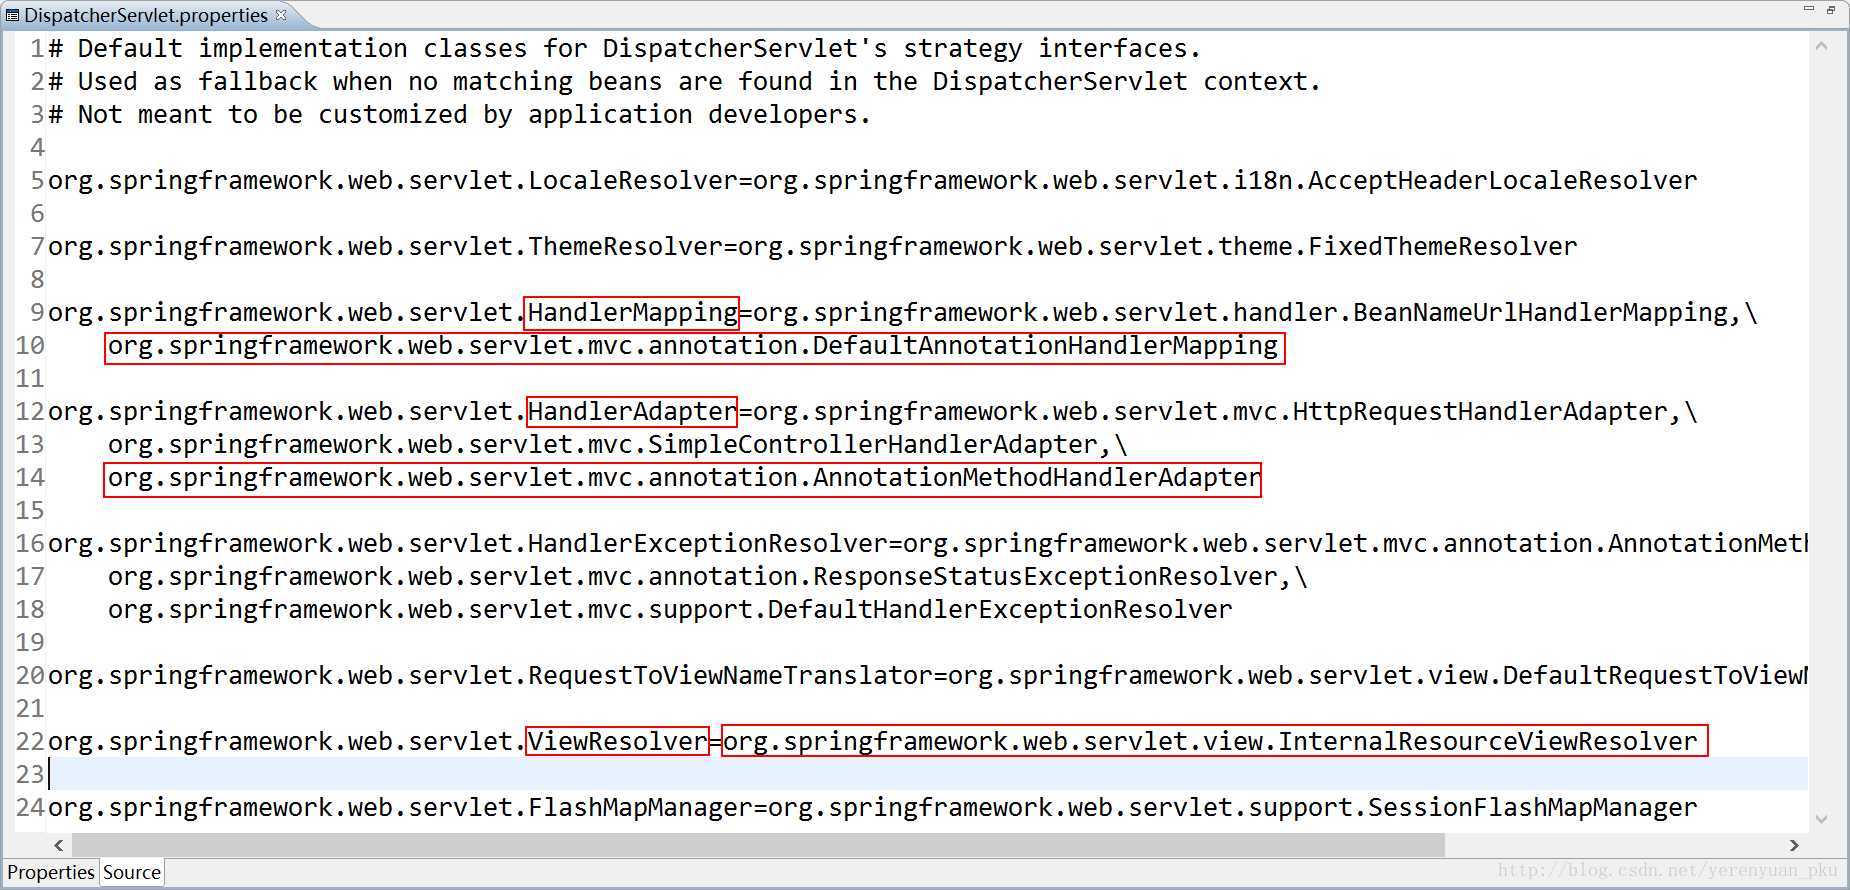
读者可能怀疑这写的不对啊!怎么可能只配这点东西呢?SpringMVC的三大组件哪去了,它们不是要配置吗?且听我慢慢讲解。我们发现这几个组件并没配置,但却是好使的,就是因为它有一个默认配置,DispatcherServlet.properties这个默认配置文件里面默认加载了,看图: 
可以看出我们使用了注解方式的处理器映射器和处理器适配器。
默认加载的注解方式的处理器映射器
org.springframework.web.servlet.mvc.annotation.DefaultAnnotationHandlerMapping默认加载的注解方式的处理器适配器
org.springframework.web.servlet.mvc.annotation.AnnotationMethodHandlerAdapter默认加载的视图适配器(默认解析JSP视图的视图解析器)
org.springframework.web.servlet.view.InternalResourceViewResolver我们如果使用默认加载的注解方式的映射器和适配器,那么对它们的可控制性是比较小的,所以一般来说,我们都是自己配置的,因为有的时候我们需要扩展一些其他的组件。
使用组件扫描器可省去在Spring容器中配置每个Controller类的繁琐。使用<context:component-scan>自动扫描标记@controller注解的控制器类,配置如下:
<context:component-scan base-package="com.itheima.springmvc.controller"/>注意:如果要扫描多个包,多个包中间使用半角逗号分隔。很明显在入门小程序中我已经配置了。
注解式处理器映射器,对类中标记@ResquestMapping注解的方法进行映射,根据@ResquestMapping注解定义的url匹配@ResquestMapping注解标记的方法,匹配成功返回HandlerMethod对象给前端控制器,HandlerMethod对象中封装了url对应的方法Method。
从Spring3.1版本开始,废除了DefaultAnnotationHandlerMapping的使用,推荐使用RequestMappingHandlerMapping完成注解式处理器映射。配置如下:
<!-- 配置注解式处理器映射器 -->
<bean class="org.springframework.web.servlet.mvc.method.annotation.RequestMappingHandlerMapping"></bean>
推荐使用最新版本的注解式处理器映射器,如果你想对其扩展,可以在这个bean里面配置其他的属性。 @RequestMapping注解的描述:定义请求url到处理器功能方法的映射。
注解式处理器适配器,对标记@ResquestMapping注解的方法进行适配。
从Spring3.1版本开始,废除了AnnotationMethodHandlerAdapter的使用,推荐使用RequestMappingHandlerAdapter完成注解式处理器适配。配置如下:
<!-- 配置注解式处理器适配器 -->
<bean class="org.springframework.web.servlet.mvc.method.annotation.RequestMappingHandlerAdapter"></bean>
推荐使用最新版本的注解式处理器适配器,如果你想对其扩展,可以在这个bean里面配置其他的属性。
当我们配置完注解式处理器映射器和注解式处理器适配器之后,SpringMVC的核心配置文件——springmvc.xml就应该为:
<?xml version="1.0" encoding="UTF-8"?>
<beans xmlns="http://www.springframework.org/schema/beans"
    xmlns:xsi="http://www.w3.org/2001/XMLSchema-instance"
    xmlns:p="http://www.springframework.org/schema/p"
    xmlns:context="http://www.springframework.org/schema/context"
    xmlns:mvc="http://www.springframework.org/schema/mvc"
    xsi:schemaLocation="
        http://www.springframework.org/schema/beans
        http://www.springframework.org/schema/beans/spring-beans-4.0.xsd
        http://www.springframework.org/schema/mvc
        http://www.springframework.org/schema/mvc/spring-mvc-4.0.xsd
        http://www.springframework.org/schema/context
        http://www.springframework.org/schema/context/spring-context-4.0.xsd">

    <context:component-scan base-package="com.itheima.springmvc.controller"/>

    <!-- 配置注解式处理器映射器 -->
    <bean class="org.springframework.web.servlet.mvc.method.annotation.RequestMappingHandlerMapping"></bean>

    <!-- 配置注解式处理器适配器 -->
    <bean class="org.springframework.web.servlet.mvc.method.annotation.RequestMappingHandlerAdapter"></bean>

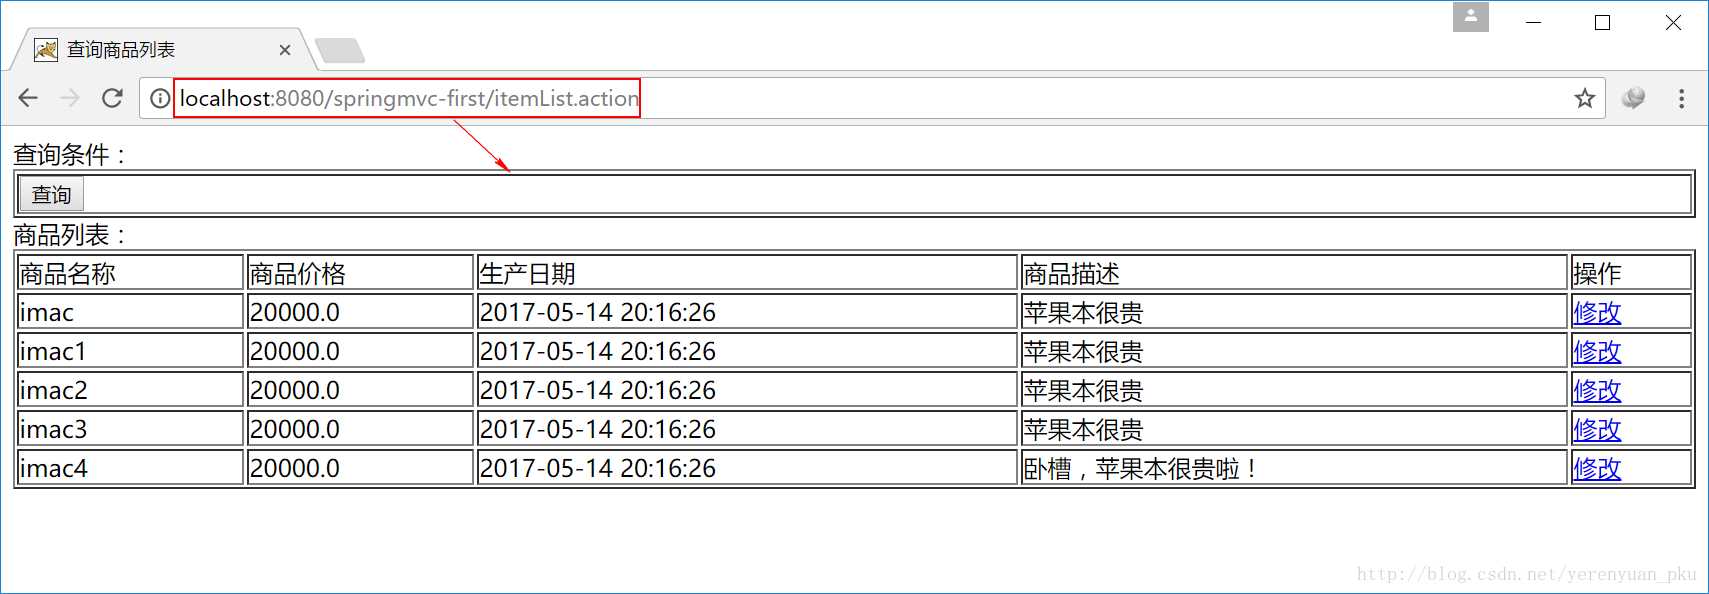
</beans>然后在浏览器地址栏中输入url地址——http://localhost:8080/springmvc-first/itemList.action,回车,也能同样看到如下效果: 
<mvc:annotation-driven>使用注解要注意一个问题,就是注解适配器和映射器必须配对使用,也就是说,不能一个用注解,一个用非注解。要用一起用,要么都不用。其实在SpringMVC中还有更加简便的注解,SpringMVC使用<mvc:annotation-driven>自动加载RequestMappingHandlerMapping和RequestMappingHandlerAdapter,可在springmvc.xml配置文件中使用<mvc:annotation-driven>替代注解处理器和适配器的配置,如下图所示: 
注意:如果配置一个注解驱动之后,那么就可以不用配置处理器映射器和处理器适配器了。
此时在浏览器地址栏中输入url地址——http://localhost:8080/springmvc-first/itemList.action,回车,同样也能看到如上效果。
我们也可在springmvc.xml配置文件中自己手动配置视图解析器,如下:
<!-- 配置视图解析器(对jsp默认解析的视图解析器) -->
<bean class="org.springframework.web.servlet.view.InternalResourceViewResolver">
    <!-- prefix:前缀 -->
    <property name="prefix" value="/WEB-INF/jsp/"></property>
    <!-- suffix:后缀 -->
    <property name="suffix" value=".jsp"></property>
</bean>这样一来,ItemController类的代码就要修改为:
@Controller
public class ItemController {
    // .action可以省略  (请求的url地址)
    @RequestMapping("/itemList.action")
    public ModelAndView itemList() {
        // 查询商品列表,使用静态数据生成一个商品列表
        List<Items> itemList = new ArrayList<Items>();
        itemList.add(new Items(1, "imac", 20000, new Date(), "苹果本很贵"));
        itemList.add(new Items(2, "imac1", 20000, new Date(), "苹果本很贵"));
        itemList.add(new Items(3, "imac2", 20000, new Date(), "苹果本很贵"));
        itemList.add(new Items(4, "imac3", 20000, new Date(), "苹果本很贵"));
        itemList.add(new Items(5, "imac4", 20000, new Date(), "卧槽,苹果本很贵啦!"));
        // 把商品列表传递给jsp
        ModelAndView modelAndView = new ModelAndView();
        modelAndView.addObject("itemList", itemList);

        // 配置完视图解析器之后只需要返回返回jsp的名称即可
        modelAndView.setViewName("itemList");

        // 返回结果
        return modelAndView;
    }
}
如果这时返回全路径,即/WEB-INF/jsp/itemList.jsp,那就不好使了。
到这就基本总结完了SpringMVC中使用注解方式的适配器和映射器了,很明显,开发中我们就使用注解配置,那样非常方便。
SpringMVC学习(三)——SpringMVC的配置文件
标签:src word ram isp 适配器 keyword strong pretty string
原文地址:http://www.cnblogs.com/love540376/p/6911998.html