标签:图片 视图 stat maya lin index viewport man exp
因为工作需要,要看threejs editor的源码,顺便记录过程。
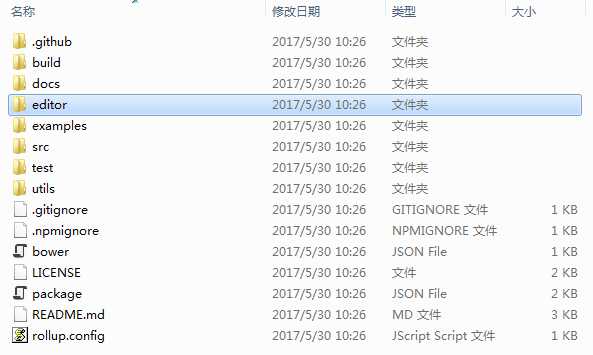
github下载的源码目录是这样的

但是editor和其他文件夹内的内容的关联的,我需要将其独立出来并且编辑editor。
进入editor,three.js-master\editor,打开index.html,从源码可以看出来,里面引用了上级目录的一些.js文件。

所以,要独立出来,就把../examples/js文件夹下的所有内容拷贝到three.js-master\editor\js目录下。然后把index.html中的“../examples/js”全部替换为“js”,步骤是:"ctrl+F"-->"Find All" ,这样就全部选中了,然后全部替换为“js”

这样,这个editor文件夹就从threejs master中独立出来了。
下面来看看index.html,有人会好奇,这里面没有写人任何样式和布局。其实<link href="css/main.css" rel="stylesheet" /><link id="theme" href="css/light.css" rel="stylesheet" />
<link rel="stylesheet" href="js/libs/codemirror/codemirror.css">
<link rel="stylesheet" href="js/libs/codemirror/theme/monokai.css">

<link rel="stylesheet" href="js/libs/codemirror/addon/dialog.css">
<link rel="stylesheet" href="js/libs/codemirror/addon/show-hint.css">
<link rel="stylesheet" href="js/libs/codemirror/addon/tern.css">

<script src="js/libs/ui.js"></script>
<script src="js/libs/ui.three.js"></script>
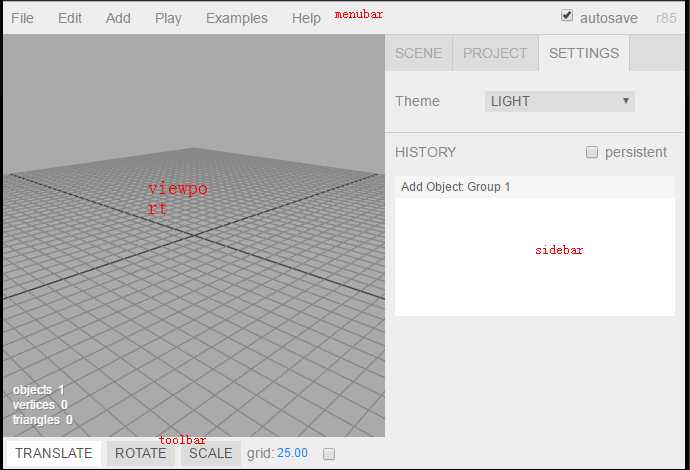
<!--菜单栏的设计-->
<script src="js/Editor.js"></script>

<script src="js/Config.js"></script>
<script src="js/History.js"></script>
<script src="js/Loader.js"></script>
<script src="js/Menubar.js"></script>
<script src="js/Menubar.File.js"></script>
<script src="js/Menubar.Edit.js"></script>
<script src="js/Menubar.Add.js"></script>
<script src="js/Menubar.Play.js"></script>
<!-- <script src="js/Menubar.View.js"></script> -->
<script src="js/Menubar.Examples.js"></script>
<script src="js/Menubar.Help.js"></script>
<script src="js/Menubar.Status.js"></script>

<!--右边工具栏的设计-->
<script src="js/Sidebar.js"></script>
<script src="js/Sidebar.Scene.js"></script>
<script src="js/Sidebar.Project.js"></script>
<script src="js/Sidebar.Settings.js"></script>
<script src="js/Sidebar.Properties.js"></script>
<script src="js/Sidebar.Object.js"></script>
<script src="js/Sidebar.Geometry.js"></script>
<script src="js/Sidebar.Geometry.Geometry.js"></script>
<script src="js/Sidebar.Geometry.BufferGeometry.js"></script>
<script src="js/Sidebar.Geometry.Modifiers.js"></script>
<script src="js/Sidebar.Geometry.BoxGeometry.js"></script>
<script src="js/Sidebar.Geometry.CircleGeometry.js"></script>
<script src="js/Sidebar.Geometry.CylinderGeometry.js"></script>
<script src="js/Sidebar.Geometry.IcosahedronGeometry.js"></script>
<script src="js/Sidebar.Geometry.PlaneGeometry.js"></script>
<script src="js/Sidebar.Geometry.SphereGeometry.js"></script>
<script src="js/Sidebar.Geometry.TorusGeometry.js"></script>
<script src="js/Sidebar.Geometry.TorusKnotGeometry.js"></script>
<script src="js/geometries/TeapotBufferGeometry.js"></script>
<script src="js/Sidebar.Geometry.TeapotBufferGeometry.js"></script>
<script src="js/Sidebar.Geometry.LatheGeometry.js"></script>
<script src="js/Sidebar.Material.js"></script>
<script src="js/Sidebar.Animation.js"></script>
<script src="js/Sidebar.Script.js"></script>
<script src="js/Sidebar.History.js"></script>
<!--底部工具栏设计-->
 <script src="js/Toolbar.js"></script>


<!--中心那一片视图的设计-->
<script src="js/Viewport.js"></script>
<script src="js/Viewport.Info.js"></script>

<script src="js/Command.js"></script>
<script src="js/commands/AddObjectCommand.js"></script>
<script src="js/commands/RemoveObjectCommand.js"></script>
<script src="js/commands/MoveObjectCommand.js"></script>
<script src="js/commands/SetPositionCommand.js"></script>
<script src="js/commands/SetRotationCommand.js"></script>
<script src="js/commands/SetScaleCommand.js"></script>
<script src="js/commands/SetValueCommand.js"></script>
<script src="js/commands/SetUuidCommand.js"></script>
<script src="js/commands/SetColorCommand.js"></script>
<script src="js/commands/SetGeometryCommand.js"></script>
<script src="js/commands/SetGeometryValueCommand.js"></script>
<script src="js/commands/MultiCmdsCommand.js"></script>
<script src="js/commands/AddScriptCommand.js"></script>
<script src="js/commands/RemoveScriptCommand.js"></script>
<script src="js/commands/SetScriptValueCommand.js"></script>
<script src="js/commands/SetMaterialCommand.js"></script>
<script src="js/commands/SetMaterialValueCommand.js"></script>
<script src="js/commands/SetMaterialColorCommand.js"></script>
<script src="js/commands/SetMaterialMapCommand.js"></script>
<script src="js/commands/SetSceneCommand.js"></script>
在这些css和js文件里面加入了index的页面组件、样式和相关交互的变化规则。

threejs master在github还在不断更新,功能也越来越完善,希望有更多的人加入学习和应用threejs的阵营。
其实对于threejs editor的应用,我个人对图形学没多少研究,更倾向于从3Dmax或者maya或者blender等开始入手了解学习。threejs线上的3D编辑器还不如某些客户端的编辑器那么强大,比如:editor现在支持import多种文件类型,但是不包括3Dmax的.max文件;只支持export为stl、obj和json数据。
而且editor不支持3D烘焙技术,可能有些人不了解烘焙技术。
烘培是指,把光照信息渲染成贴图,而后把这个烘培后的贴图再贴回到场景中去的技术。烘培技术把光照计算的结果提前写入到了贴图中,因此在实时渲染中不需要进行耗时的光照计算,大大提高了实时渲染的效率。
烘培和渲染区别:
渲染是指生成一张图片。
烘焙是指按模型UV的展开而渲染成一张物体的材质。
webGL之three.js入门4--ThreeJS Editor入门篇
标签:图片 视图 stat maya lin index viewport man exp
原文地址:http://www.cnblogs.com/catherinezyr/p/7009911.html