标签:nec pac conf -- blog grant 注意 提示 spring配置
=============编码规范,所有文健,所有页面,所有数据库的数据表都采用UTF-8编码格式,避免乱码;===========开发环境:jdk1.7+tomcat8.0+mysql5.7+eclipse Mars.2 Release (4.5.2)
1:创建一个动态web项目,名称如Oa;
2:创建一个Oa的数据库,并且创建一个新用户只可以操作Oa这个数据库;
1 ----创建数据库
2 create database Oa default character set utf8;
3
4 -----创建用户
5 create user biexiansheng identified by ‘123456‘;
6
7 -----为用户授权
8 grant all on Oa.* to biexiansheng;
温馨提示:创建好之后使用的是Navicat连接的数据库,注意连接名和用户名是自己起的比如我的别先生,密码也是自己的比如我的123456。
3:导入各个框架的jar包:
3.1:第一步,先导入struts2的jar包,如下所示:
asm-3.3.jar
asm-commons-3.3.jar
asm-tree-3.3.jar
commons-fileupload-1.3.1.jar
commons-io-2.2.jar
commons-lang-2.4.jar
freemarker-2.3.19.jar
javassist-3.11.0.GA.jar
ognl-3.0.6.jar
struts2-core-2.3.16.3.jar
struts2-spring-plugin-2.3.16.3.jar
xwork-core-2.3.16.3.jar
然后配置一下web.xml的前端控制器:
 1 <?xml version="1.0" encoding="UTF-8"?>
 2 <web-app xmlns:xsi="http://www.w3.org/2001/XMLSchema-instance" xmlns="http://xmlns.jcp.org/xml/ns/javaee" xsi:schemaLocation="http://xmlns.jcp.org/xml/ns/javaee http://xmlns.jcp.org/xml/ns/javaee/web-app_3_1.xsd" id="WebApp_ID" version="3.1">
 3   <display-name>Oa</display-name>
 4   <welcome-file-list>
 5     <welcome-file>index.html</welcome-file>
 6     <welcome-file>index.htm</welcome-file>
 7     <welcome-file>index.jsp</welcome-file>
 8     <welcome-file>default.html</welcome-file>
 9     <welcome-file>default.htm</welcome-file>
10     <welcome-file>default.jsp</welcome-file>
11   </welcome-file-list>
12
13
14   <!-- 配置struts2的前端控制器 -->
15   <filter>
16       <filter-name>struts2</filter-name>
17       <!-- struts2-core-2.3.16.3.jar这个jar包里面查找 -->
18       <filter-class>org.apache.struts2.dispatcher.ng.filter.StrutsPrepareAndExecuteFilter</filter-class>
19   </filter>
20   <filter-mapping>
21       <filter-name>struts2</filter-name>
22       <url-pattern>/*</url-pattern>
23   </filter-mapping>
24
25
26
27
28 </web-app>
然后再复制一下struts.xml的配置文件放到src/config下面,模板如下所示:
<?xml version="1.0" encoding="UTF-8" ?>
<!DOCTYPE struts PUBLIC
    "-//Apache Software Foundation//DTD Struts Configuration 2.0//EN"
    "http://struts.apache.org/dtds/struts-2.0.dtd">


<!-- struts2的配置信息 -->
<struts>

    <!-- 将对象工厂指定为spring -->
    <constant name="struts.objectFactory" value="spring"></constant>

    <!-- struts的Action的访问后缀,必须以.do结尾 -->
    <constant name="struts.action.extension" value="do"></constant>


       <package name="default" namespace="/" extends="struts-default">
           <action name="">
               <result></result>
           </action>
       </package>

</struts>
3.2:导入spring的jar包:如下所示:
com.springsource.com.mchange.v2.c3p0-0.9.1.2.jar
com.springsource.org.aopalliance-1.0.0.jar
com.springsource.org.apache.commons.logging-1.1.1.jar
com.springsource.org.apache.log4j-1.2.15.jar
com.springsource.org.aspectj.weaver-1.6.8.RELEASE.jar
spring-aop-3.2.5.RELEASE.jar
spring-aspects-3.2.5.RELEASE.jar
spring-beans-3.2.5.RELEASE.jar
spring-context-3.2.5.RELEASE.jar
spring-core-3.2.5.RELEASE.jar
spring-expression-3.2.5.RELEASE.jar
spring-jdbc-3.2.5.RELEASE.jar
spring-orm-3.2.5.RELEASE.jar
spring-tx-3.2.5.RELEASE.jar
spring-web-3.2.5.RELEASE.jar
然后在web.xml里面配置一下spring的上下文载入器和监听器,配置如下所示:
 1 <?xml version="1.0" encoding="UTF-8"?>
 2 <web-app xmlns:xsi="http://www.w3.org/2001/XMLSchema-instance" xmlns="http://xmlns.jcp.org/xml/ns/javaee" xsi:schemaLocation="http://xmlns.jcp.org/xml/ns/javaee http://xmlns.jcp.org/xml/ns/javaee/web-app_3_1.xsd" id="WebApp_ID" version="3.1">
 3   <display-name>Oa</display-name>
 4   <welcome-file-list>
 5     <welcome-file>index.html</welcome-file>
 6     <welcome-file>index.htm</welcome-file>
 7     <welcome-file>index.jsp</welcome-file>
 8     <welcome-file>default.html</welcome-file>
 9     <welcome-file>default.htm</welcome-file>
10     <welcome-file>default.jsp</welcome-file>
11   </welcome-file-list>
12
13   <!-- 通过上下文参数指定spring配置文件的位置 -->
14   <context-param>
15       <param-name>contextConfigLocation</param-name>
16       <param-value>classpath:beans.xml</param-value>
17   </context-param>
18
19   <!-- 配置spring的上下文载入器监听器,项目启动时加载spring -->
20   <listener>
21       <!--
22           方法:ctrl+shift+t 搜索ContextLoaderListener
23           spring-web-3.2.5.RELEASE.jar
24       -->
25       <listener-class>org.springframework.web.context.ContextLoaderListener</listener-class>
26   </listener>
27
28
29   <!-- 配置struts2的前端控制器 -->
30   <filter>
31       <filter-name>struts2</filter-name>
32       <!-- struts2-core-2.3.16.3.jar这个jar包里面查找 -->
33       <filter-class>org.apache.struts2.dispatcher.ng.filter.StrutsPrepareAndExecuteFilter</filter-class>
34   </filter>
35   <filter-mapping>
36       <filter-name>struts2</filter-name>
37       <url-pattern>/*</url-pattern>
38   </filter-mapping>
39
40
41
42
43 </web-app>
然后在src/config下面配置一下spring的配置文件:(由于使用的是注解扫描的,所以会使用开启注解和组件扫描)
 1 <?xml version="1.0" encoding="UTF-8"?>
 2 <beans xmlns="http://www.springframework.org/schema/beans"
 3     xmlns:xsi="http://www.w3.org/2001/XMLSchema-instance"
 4     xmlns:p="http://www.springframework.org/schema/p"
 5     xmlns:context="http://www.springframework.org/schema/context"
 6     xmlns:aop="http://www.springframework.org/schema/aop"
 7     xmlns:tx="http://www.springframework.org/schema/tx"
 8     xsi:schemaLocation="http://www.springframework.org/schema/beans
 9          http://www.springframework.org/schema/beans/spring-beans.xsd
10           http://www.springframework.org/schema/context
11          http://www.springframework.org/schema/context/spring-context.xsd
12          http://www.springframework.org/schema/aop
13          http://www.springframework.org/schema/aop/spring-aop.xsd
14          http://www.springframework.org/schema/tx
15           http://www.springframework.org/schema/tx/spring-tx.xsd">
16
17
18      <!-- IoC容器的配置,也叫控制反转,要创建的所有的对象都配置在这里 -->
19
20      <!-- 读取属性文件 -->
21      <context:property-placeholder location="classpath:jdbc.properties"/>
22
23      <!-- 数据源 -->
24      <!--
25          ctrl+shift+t搜索ComboPooledDataSource
26       -->
27      <bean id="dataSource" class="com.mchange.v2.c3p0.ComboPooledDataSource">
28          <property name="driverClass" value="${driverClass}"></property>
29          <property name="jdbcUrl" value="${jdbcUrl}"></property>
30          <property name="user" value="${user}"></property>
31          <property name="password" value="${password}"></property>
32          <property name="initialPoolSize" value="${initialPoolSize}"></property>
33          <property name="minPoolSize" value="${minPoolSize}"></property>
34          <property name="maxPoolSize" value="${maxPoolSize}"></property>
35      </bean>
36
37      <!-- 本地回话工厂bean -->
38      <bean id="sessionFactory" class="org.springframework.orm.hibernate3.LocalSessionFactoryBean">
39          <!-- 注入数据源 -->
40          <property name="dataSource" ref="dataSource"></property>
41
42          <!-- 注入hibernate属性 -->
43          <property name="hibernateProperties">
44              <props>
45                  <!-- mysql的方言,由于使用工作流框架所以使用这个方言 -->
46                  <prop key="hibernate.dialect">org.hibernate.dialect.MySQL5InnoDBDialect</prop>
47
48                  <prop key="hibernate.hbm2ddl.auto">true</prop>
49
50                  <prop key="hibernate.show_sql">true</prop>
51
52                  <prop key="hibernate.format_sql">true</prop>
53              </props>
54
55          </property>
56
57
58          <!-- hibernate的映射文件 -->
59          <property name="mappingDirectoryLocations">
60              <list>
61                  <value>classpath:com/oa/po</value>
62              </list>
63          </property>
64
65      </bean>
66
67      <!-- hibernate的事务管理器 -->
68      <bean id="txManager" class="org.springframework.orm.hibernate3.HibernateTransactionManager">
69          <property name="sessionFactory" ref="sessionFactory"></property>
70      </bean>
71
72      <!-- 对注解的支持 -->
73      <context:annotation-config></context:annotation-config>
74      <!-- 组件扫描 -->
75      <context:component-scan base-package="com.oa"></context:component-scan>
76
77      <!-- 注解驱动 -->
78      <tx:annotation-driven transaction-manager="txManager"/>
79
80
81 </beans>
创建一个jdbc.properties配置文件,配置如下所示:
1 driverClass=com.mysql.jdbc.Driver
2 jdbcUrl=jdbc:mysql://localhost:3306/oa
3 user=biexiansheng
4 password=123456
5 initialPoolSize=20
6 minPoolSize=20
7 maxPoolSize=40
创建一个log4j.properties配置文件,用于记录日志的相关信息:(记得修改自己的日志保存的文件路径,在第9行)
 1 ### direct log messages to stdout ###
 2 log4j.appender.stdout=org.apache.log4j.ConsoleAppender
 3 log4j.appender.stdout.Target=System.err
 4 log4j.appender.stdout.layout=org.apache.log4j.PatternLayout
 5 log4j.appender.stdout.layout.ConversionPattern=%d{ABSOLUTE} %5p %c{1}:%L - %m%n
 6
 7 ### direct messages to file mylog.log ###
 8 log4j.appender.file=org.apache.log4j.FileAppender
 9 log4j.appender.file.File=E:\Android_java_resouce\JAVA_EE\eclipse\workspace\mylog.log
10 log4j.appender.file.layout=org.apache.log4j.PatternLayout
11 log4j.appender.file.layout.ConversionPattern=%d{ABSOLUTE} %5p %c{1}:%L - %m%n
12
13 ### set log levels - for more verbose logging change ‘info‘ to ‘debug‘ ###
14
15 log4j.rootLogger=info, stdout
3.3:导入hibernate的相关jar包,如下所示:
 1 antlr-2.7.6.jar
 2 commons-collections-3.1.jar
 3 dom4j-1.6.1.jar
 4 hibernate-jpa-2.0-api-1.0.0.Final.jar
 5 hibernate3.jar
 6 javassist-3.12.0.GA.jar
 7 jta-1.1.jar
 8 mysql-connector-java-5.1.40-bin.jar
 9 slf4j-api-1.6.1.jar
10 slf4j-log4j12-1.7.2.jar
4:创建项目包结构,搭建的项目结构如下所示:
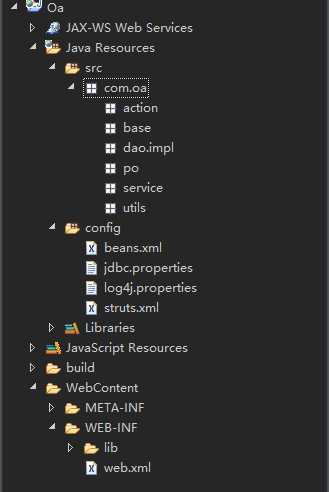
5:项目搭建好之后将项目放到本地tomat下面跑一下,看看搭建的项目是否出现错误:
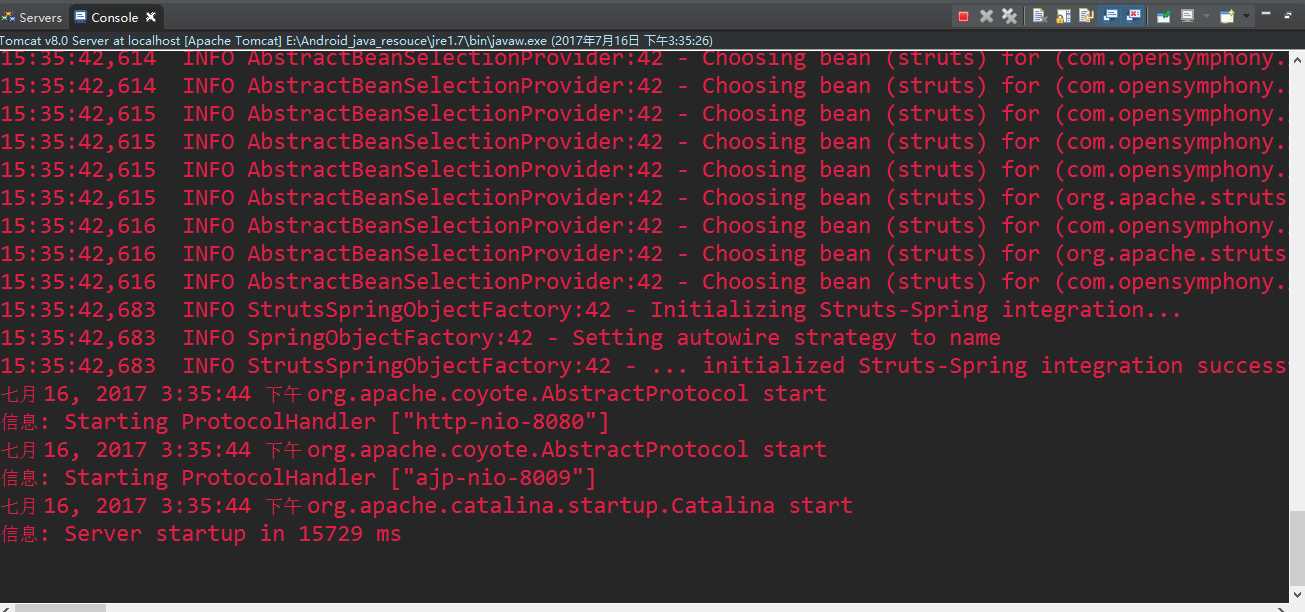
温馨提示:假如最后跑项目出现错误,请不要着急,仔细分析,应该可以很快解决问题;
所谓万事开头难,开好头,加油!生命不息,运动不止;
Struts2+Spring+Hibernate+Jbpm技术实现Oa(Office Automation)办公系统第一天框架搭建
标签:nec pac conf -- blog grant 注意 提示 spring配置
原文地址:http://www.cnblogs.com/biehongli/p/7190686.html