标签:相对 read apk 弹性布局 roi version ora ott mem
Android 布局介绍
LinearLayout 线性布局
RelativeLayout 相对布局
TableLayout 表格布局
FrameLayout 帧布局
ConstraintLayout 弹性布局(新) 介绍:http://www.jianshu.com/p/32a0a6e0a98a
<?xml version="1.0" encoding="utf-8"?>
<android.support.constraint.ConstraintLayout xmlns:android="http://schemas.android.com/apk/res/android"
    xmlns:app="http://schemas.android.com/apk/res-auto"
    xmlns:tools="http://schemas.android.com/tools"
    android:layout_width="match_parent"
    android:layout_height="match_parent"
    tools:context="com.oazzz.test5.MainActivity">

    <TextView
        android:layout_width="wrap_content"
        android:layout_height="wrap_content"
        android:text="Hello World!"
        app:layout_constraintBottom_toBottomOf="parent"
        app:layout_constraintLeft_toLeftOf="parent"
        app:layout_constraintRight_toRightOf="parent"
        app:layout_constraintTop_toTopOf="parent" />
</android.support.constraint.ConstraintLayout>
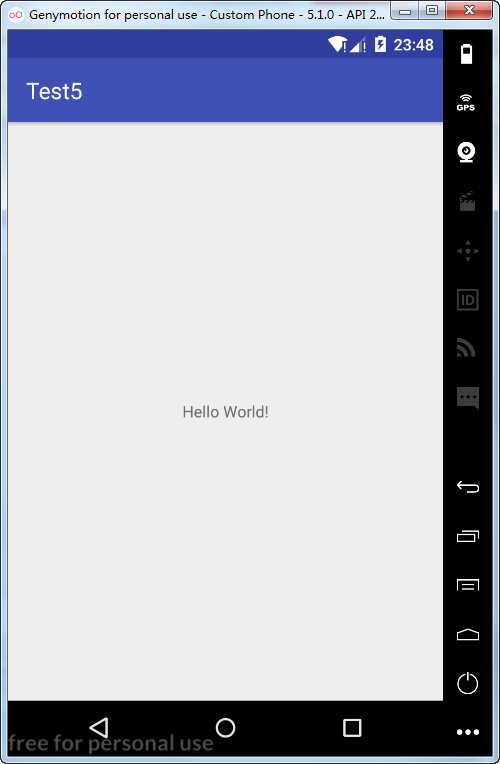
此时的界面效果和其它布局看不出什么不同:
按 http://www.jianshu.com/p/32a0a6e0a98a 来个相对定位布局效果:
<?xml version="1.0" encoding="utf-8"?>
<android.support.constraint.ConstraintLayout
    android:id="@+id/constraintLayout"
    xmlns:android="http://schemas.android.com/apk/res/android"
    xmlns:app="http://schemas.android.com/apk/res-auto"
    android:layout_width="match_parent"
    android:layout_height="match_parent">

    <Button
        android:id="@+id/cancel_button"
        android:layout_width="wrap_content"
        android:layout_height="wrap_content"
        android:layout_marginBottom="16dp"
        android:layout_marginStart="16dp"
        android:text="取消"
        app:layout_constraintBottom_toBottomOf="@id/constraintLayout"
        app:layout_constraintStart_toStartOf="@id/constraintLayout"/>

    <Button
        android:id="@+id/next_button"
        android:layout_width="wrap_content"
        android:layout_height="wrap_content"
        android:layout_marginBottom="16dp"
        android:layout_marginStart="16dp"
        android:text="下一步"
        app:layout_constraintBottom_toBottomOf="@id/constraintLayout"
        app:layout_constraintStart_toEndOf="@id/cancel_button"/>

</android.support.constraint.ConstraintLayout>
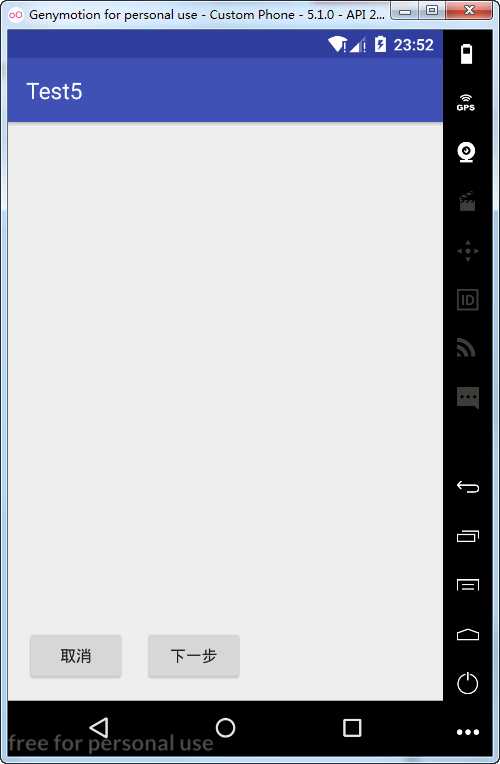
界面效果如图: 取消 按钮 左 16dp 下 16 dp ,下一步 按钮 左 16dp 下 16 dp 。
父容器可以直接指定ID(@id/constraintLayout),也可以使用 parent 代指。
再来个比例布局效果:
<?xml version="1.0" encoding="utf-8"?>
<android.support.constraint.ConstraintLayout
    xmlns:tools="http://schemas.android.com/tools"
    android:id="@+id/constraintLayout"
    xmlns:android="http://schemas.android.com/apk/res/android"
    xmlns:app="http://schemas.android.com/apk/res-auto"
    android:layout_width="match_parent"
    android:layout_height="match_parent">

    <Button
        android:layout_width="wrap_content"
        android:layout_height="wrap_content"
        android:text="Center"
        app:layout_constraintEnd_toEndOf="@id/constraintLayout"
        app:layout_constraintStart_toStartOf="@id/constraintLayout"
        app:layout_constraintTop_toTopOf="@+id/constraintLayout"
        app:layout_constraintBottom_toBottomOf="@+id/constraintLayout"/>

    <Button
        android:layout_width="wrap_content"
        android:layout_height="wrap_content"
        android:text="Bias"
        app:layout_constraintEnd_toEndOf="@id/constraintLayout"
        app:layout_constraintStart_toStartOf="@id/constraintLayout"
        app:layout_constraintTop_toTopOf="@+id/constraintLayout"
        app:layout_constraintBottom_toBottomOf="@+id/constraintLayout"
        app:layout_constraintHorizontal_bias="0.5"
        app:layout_constraintVertical_bias="0.25"/>

</android.support.constraint.ConstraintLayout>
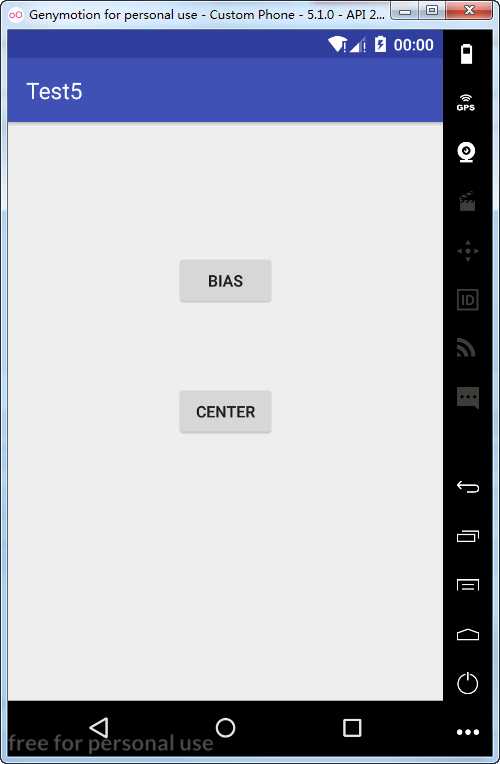
界面效果如图: 其中 Center 按钮的全部边界与 父容器边界对齐,则显示为居中效果。
Bias 按钮对齐父容器后,再按比例布局,水平居中(靠左 1 / 2),垂直靠上 1 / 4
还有对齐线:
<?xml version="1.0" encoding="utf-8"?>
<android.support.constraint.ConstraintLayout
    xmlns:tools="http://schemas.android.com/tools"
    android:id="@+id/constraintLayout"
    xmlns:android="http://schemas.android.com/apk/res/android"
    xmlns:app="http://schemas.android.com/apk/res-auto"
    android:layout_width="match_parent"
    android:layout_height="match_parent">

    <android.support.constraint.Guideline
        android:id="@+id/guideLine"
        android:layout_width="wrap_content"
        android:layout_height="wrap_content"
        android:orientation="vertical"
        app:layout_constraintGuide_begin="50dp"/>

    <Button
        android:layout_width="wrap_content"
        android:layout_height="wrap_content"
        android:text="Guide Up"
        app:layout_constraintStart_toStartOf="@id/guideLine"
        app:layout_constraintTop_toTopOf="@+id/constraintLayout"
        app:layout_constraintBottom_toBottomOf="@+id/constraintLayout"
        app:layout_constraintVertical_bias="0.25"/>

    <Button
        android:layout_width="wrap_content"
        android:layout_height="wrap_content"
        android:text="Guide Down"
        app:layout_constraintStart_toStartOf="@id/guideLine"
        app:layout_constraintTop_toTopOf="@+id/constraintLayout"
        app:layout_constraintBottom_toBottomOf="@+id/constraintLayout"
        app:layout_constraintVertical_bias="0.5"/>

</android.support.constraint.ConstraintLayout>
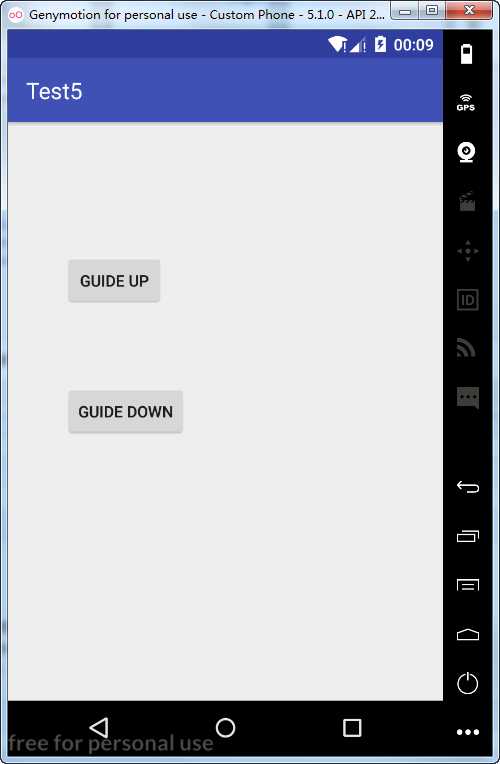
界面效果如下图: 两个按钮左边距都按对齐线对齐,然后再按比例排列
自动填充:
<?xml version="1.0" encoding="utf-8"?>
<android.support.constraint.ConstraintLayout
    android:id="@+id/constraintLayout"
    xmlns:android="http://schemas.android.com/apk/res/android"
    xmlns:app="http://schemas.android.com/apk/res-auto"
    android:layout_width="match_parent"
    android:layout_height="match_parent">

    <Button
        android:id="@+id/small"
        android:layout_width="wrap_content"
        android:layout_height="wrap_content"
        android:text="Small"
        app:layout_constraintStart_toStartOf="@id/constraintLayout"
        app:layout_constraintTop_toTopOf="@id/constraintLayout"/>

    <Button
        android:layout_width="0dp"
        android:layout_height="wrap_content"
        android:text="Large"
        app:layout_constraintBottom_toBottomOf="@id/constraintLayout"
        app:layout_constraintEnd_toEndOf="@id/constraintLayout"
        app:layout_constraintStart_toEndOf="@id/small"
        app:layout_constraintTop_toTopOf="@id/constraintLayout"/>

</android.support.constraint.ConstraintLayout>
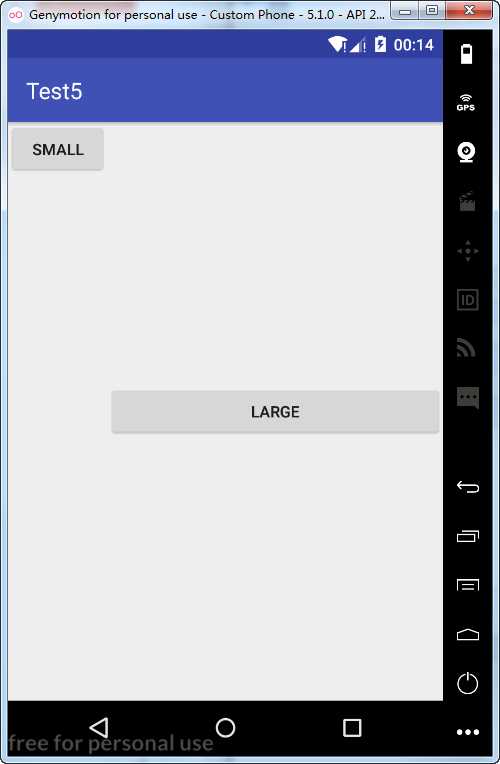
界面效果如下图: Small 按钮位于父容器左上角,Large 按钮自动宽度,上下都与父容器对齐,显示为居中效果,左侧从 Small 结束位置开始,右侧对齐父容器。
比例缩放:
<?xml version="1.0" encoding="utf-8"?>
<android.support.constraint.ConstraintLayout
    android:id="@+id/constraintLayout"
    xmlns:android="http://schemas.android.com/apk/res/android"
    xmlns:app="http://schemas.android.com/apk/res-auto"
    android:layout_width="match_parent"
    android:layout_height="match_parent">

    <ImageView
        android:id="@+id/imageView1"
        android:layout_width="0dp"
        android:layout_height="150dp"
        android:background="@color/colorAccent"
        android:src="@drawable/_06"
        app:layout_constraintLeft_toLeftOf="@+id/constraintLayout"
        app:layout_constraintRight_toRightOf="@+id/constraintLayout"
        app:layout_constraintTop_toTopOf="@+id/constraintLayout"
        app:layout_constraintDimensionRatio="16:9"/>

    <ImageView
        android:layout_width="150dp"
        android:layout_height="0dp"
        android:background="@color/colorPrimary"
        android:src="@drawable/_06"
        app:layout_constraintTop_toBottomOf="@id/imageView1"
        app:layout_constraintLeft_toLeftOf="@+id/constraintLayout"
        app:layout_constraintRight_toRightOf="@+id/constraintLayout"
        app:layout_constraintDimensionRatio="4:3"/>
</android.support.constraint.ConstraintLayout>
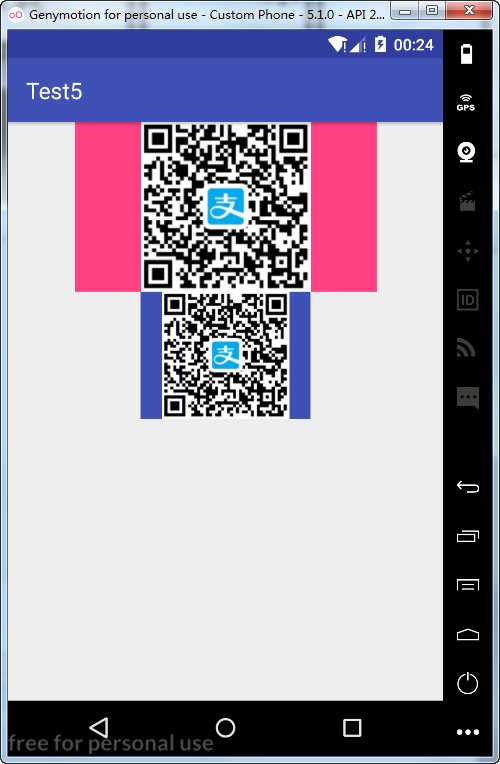
界面效果如下图: 图片1 按 16:9 缩放,图片2 按 4:3 缩放
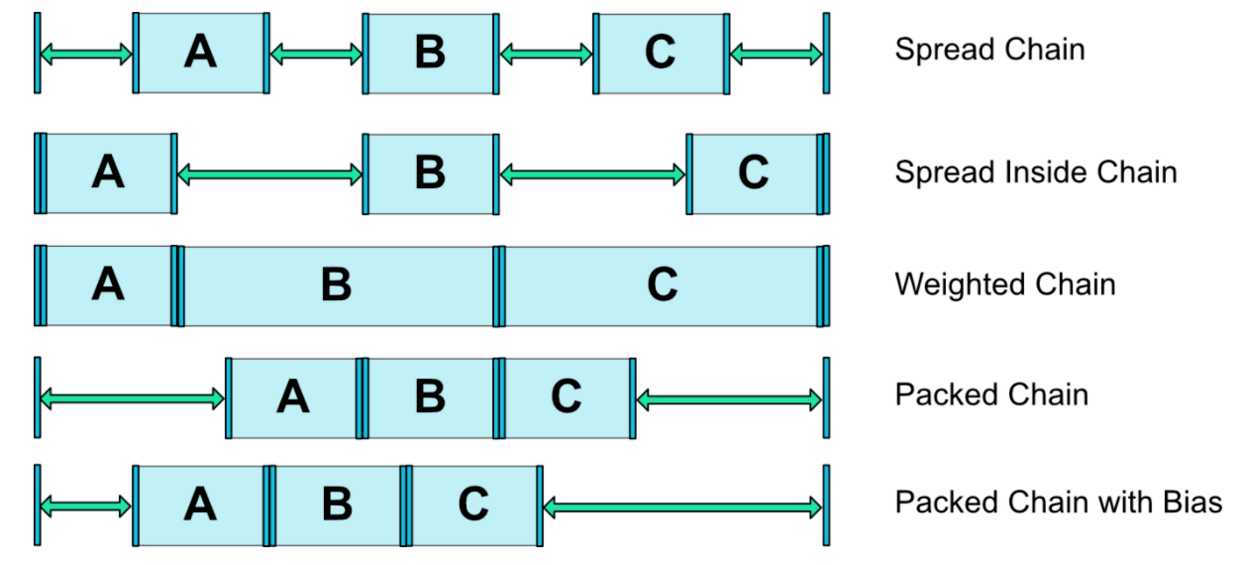
还有 链样式,直接复制过来了
使用方式:
<TextView
    android:id="@+id/property_tv_cst_aries"
    style="@style/MemberWidget.Constellation"
    android:layout_marginLeft="@dimen/spacing_big"
    android:layout_marginTop="@dimen/spacing_medium"
    android:onClick="@{listener::onConstellationSelected}"
    android:text="白"
    app:layout_constraintHorizontal_chainStyle="spread_inside"
    app:layout_constraintLeft_toLeftOf="parent"
    app:layout_constraintRight_toLeftOf="@+id/property_tv_cst_taurus"
    app:layout_constraintTop_toBottomOf="@id/property_tv_constellation" />
标签:相对 read apk 弹性布局 roi version ora ott mem
原文地址:http://www.cnblogs.com/z5337/p/7198349.html