标签:android style blog http color 使用 strong ar 文件
TextView 是Android文本控件,用于显示文字。
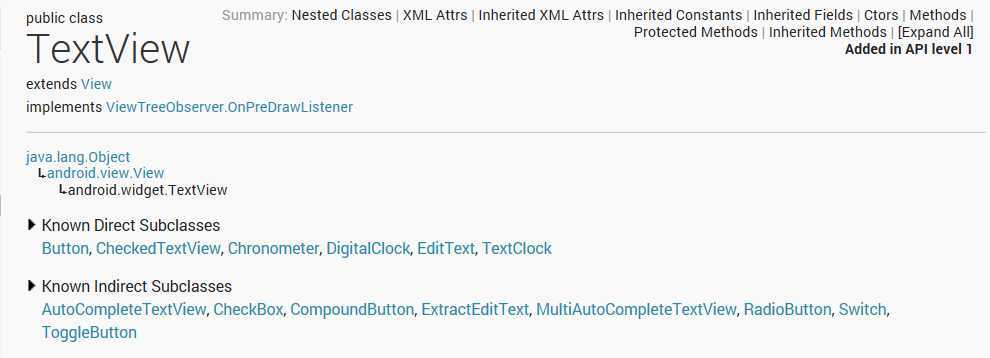
我们先看一看TextView的结构(developer.android.com)

从这里我们可以得知,TextView是View的子类,他有直接子类Button,EditText等
接下来我们了解下 TextView的xml属性
|
android:ems |
设置TextView的宽度为N个字符的宽度 |
|
android:maxems |
设置TextView的宽度为最长为N个字符的宽度。与ems同时使用时覆盖ems选项 |
|
android:maxLength |
限制输入字符数 |
|
android:lines |
设置文本的行数 |
|
android:maxLines |
设置文本的最大显示行数,超出行数将不显示 |
|
android:lineSpacingExtra |
设置行间距 |
|
android:lineSpacingMultiplier |
设置行间距的倍数 |
|
android:password |
以密码形式显示文本 |
|
android:numeric |
如果被设置,会弹出有一个数字输入法(Edittext的属性) |
|
android:phoneNumber |
设置为电话号码的输入方式 |
|
android:singleLine |
设置单行显示 |
|
android:textAppearance |
设置文字外观。 |
|
android:textColor |
设置文本颜色 |
|
android:textColorHighlight |
被选中文字的底色 |
|
android:textColorHint |
设置提示信息文字的颜色,默认为灰色。与hint一起使用 |
|
android:textColorLink |
文字链接的颜色 |
|
android:textScaleX |
设置文字之间间隔 |
|
android:textSize |
设置文字大小,推荐度量单位”sp” |
|
android:textStyle |
设置字形 |
|
android:typeface |
设置文本字体 |
|
android:drawableTop |
设置文字上方的图片 |
|
android:drawablePadding |
设置文字和图片的间距 |
属性给大家介绍了,属性该怎么用呢?控件的属性是在 xml文件里使用的,接下来 我们打开 layout 里的 activity_main.xml文件。
切换到 代码模式, 真正的android开发 是不需要拖拽控件的!!!
根节点是一个viewgroup的控件,既然是viewgroup 表示 这个控件里面 可以包含很多的控件,比如我们的布局控件,布局控件里就可以包含很多的控件
1 <LinearLayout xmlns:android="http://schemas.android.com/apk/res/android"
2     xmlns:tools="http://schemas.android.com/tools"
3     android:layout_width="match_parent"
4     android:layout_height="match_parent">
5 <!-- 在这中间区域输入 TextView -->
6
7 </LinearLayout>
大家在 中间区域输入
<TextView android:layout_width="match_parent"
    android:layout_height="wrap_content"
    android:text="@string/app_name"
    android:textColor="#8A2BE2"
    android:textSize="30sp"
    />
注意:布局文件里,所有的控件 都必须加上android:layout_width 和 android:layout_height 这2个属性! 他表示控件在屏幕的宽度和高度,一般有3个值
1.match_parent:组件会显示得和其父组件一样大
2.wrap_content:组件内容有多大,就显示多大,
3.fill_parent:和match_parent 一个意思,2.2 以后 就使用match_parent了
这个TextView 写好后,出现的效果是 显示 紫色的 文字,并且字体大小为 30sp。 TextView的其他属性 就交给大家去尝试了。
标签:android style blog http color 使用 strong ar 文件
原文地址:http://www.cnblogs.com/blog-IT/p/3951505.html