标签:style blog http io 使用 java strong ar 文件
以前没有接触过extjs,现在需要写一个项目,计划使用extjs来写。毕竟页面看起来比较清爽。自己看了2个星期的文档和例子,还是云里雾里。光java配置就弄了4-5天,最后不得已放弃。改为VS2013开发。
第一个成功运行的代码,当然不是Hello Word
本人是菜鸟,因此只考虑功能是否正常显示。虽然是用extjs5,但是某些功能可能是用低版本的语法来实现的。因为英文太难了,API基本看不懂。吐槽的请绕行。
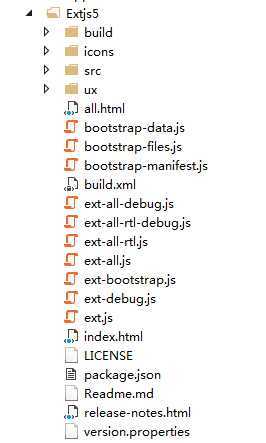
Extjs5包里面引用的文件目录:其中icons是从朋友的项目里面复制过来的,ux是从build的子文件夹里面复制出来的。

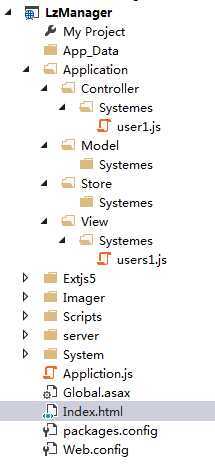
项目目录:

html 页面代码引用:
<link href="Extjs5/build/packages/ext-theme-classic/build/resources/ext-theme-classic-all.css" rel="stylesheet" />
<script src="Extjs5/build/bootstrap.js"></script>
<script src="Appliction.js"></script>
Appliction.js 代码:
(function () {
Ext.onReady(function () {
//开启悬浮提示功能
Ext.QuickTips.init();
//开启动态加载
Ext.Loader.setConfig({
enabled: true
});
//创建应用程序的实例
Ext.application({
//设定命名空间
name: ‘Lz‘,
//指定配置选项,设置相应的路径
appFolder: ‘Application‘,
//加载控制器
controllers: [‘Systemes.user1‘],
//自动加载和实例化Viewport文件
autoCreateViewport: ‘Lz.view.Systemes.users1‘
});
});
})();
controller层user1.js代码:
Ext.define(‘Lz.controller.Systemes.user1‘, {
extend: ‘Ext.app.Controller‘,
//将Viewport.js添加到控制器
views: [‘Systemes.users1‘]
});
view层users1.js代码
Ext.Loader.setConfig({
enabled: true
});
Ext.Loader.setPath(‘Ext.ux‘, ‘/Extjs5/ux‘);
Ext.require([
‘Ext.ux.statusbar.StatusBar‘
]);
Ext.define(‘Lz.view.Systemes.users1‘,{
extend: ‘Ext.panel.Panel‘,
xtype: ‘LayoutDefault‘,
layout: ‘border‘,
items:
[ {
region: ‘north‘,
xtype: ‘panel‘,
height: 80,
style: ‘text-align:center;margin:-1px;‘,
html: ‘<div style="font-weight:bold;font-size:24px">上海利众综合管理系统</div>‘
}, {
region: ‘west‘,
width: 300,
title:‘导航栏‘,
split: true,
collapsible: true
}, {
region: ‘center‘,
xtype: ‘tabpanel‘,
id: ‘centerTabPanel‘,
activeTab: 0,
items: {
title: ‘我的工作‘,
icon:‘../../../Extjs5/icons/house.png‘,
layout: ‘fit‘ //自动填充页面
}
},
{
region: ‘south‘,
style: ‘margin:-2px‘,
items: [{
xtype: ‘statusbar‘,
defaultIconCls: ‘default-icon‘,
text: ‘Ready‘,
iconCls: ‘Readyicon‘,
items: [{}, ‘-‘, ‘综合管理系统‘]
}]
}]
});
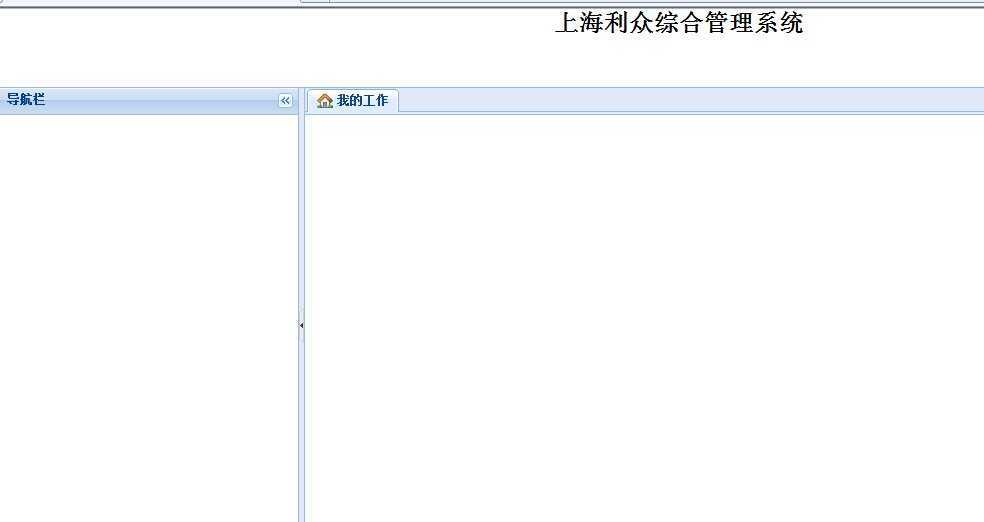
最后效果图:

如果有大神指教的,请加QQ:叁陆玖贰玖伍叁叁肆
标签:style blog http io 使用 java strong ar 文件
原文地址:http://www.cnblogs.com/liughq/p/3951837.html