标签:sign efi color soft pre auto blog 并且 class
第一步:引入Fluent Ribbon的库
第一种方法:直接到github上下载,
下载地址:https://github.com/fluentribbon/Fluent.Ribbon
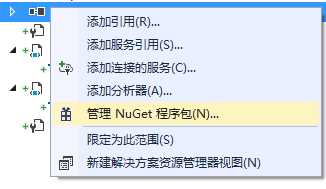
第二种方法:在VS项目引用处,点击右键,弹出Nuget管理程序包,输入Fluent.Ribbon查询,安装对应的包文件
第二步:设置默认皮肤
打开App.xaml文件,写入如下配置,当前最新版本只定义了这个默认皮肤
<Application.Resources>
<ResourceDictionary Source="pack://application:,,,/Fluent;Component/Themes/Generic.xaml" />
</Application.Resources>
第三步 设置窗体为RibbonWindow
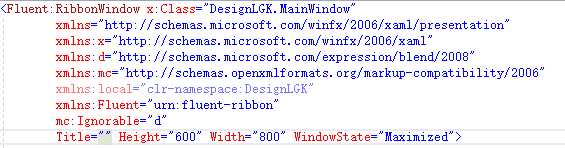
如下图,窗体为RibbonWindow类型,并且引入Fluent的命名空间:xmlns:Fluent="urn:fluent-ribbon"
第四步,创建Ribbon控件
代码如下所示:
<Fluent:RibbonWindow x:Class="DesignLGK.MainWindow"
xmlns="http://schemas.microsoft.com/winfx/2006/xaml/presentation"
xmlns:x="http://schemas.microsoft.com/winfx/2006/xaml"
xmlns:d="http://schemas.microsoft.com/expression/blend/2008"
xmlns:mc="http://schemas.openxmlformats.org/markup-compatibility/2006"
xmlns:local="clr-namespace:DesignLGK"
xmlns:Fluent="urn:fluent-ribbon"
mc:Ignorable="d"
Title="" Height="600" Width="800" WindowState="Maximized">
<Grid>
<Grid.RowDefinitions>
<RowDefinition Height="Auto"></RowDefinition>
<RowDefinition></RowDefinition>
<RowDefinition></RowDefinition>
</Grid.RowDefinitions>
<Fluent:Ribbon Grid.Row="0">
<Fluent:RibbonTabItem Header="项目" IsSelected="True"></Fluent:RibbonTabItem>
</Fluent:Ribbon>
</Grid>
</Fluent:RibbonWindow>
完成以后,其界面如下:

标签:sign efi color soft pre auto blog 并且 class
原文地址:http://www.cnblogs.com/minhost/p/7229819.html