标签:des style blog http color os io strong ar
Silverlight一般用来开发一些企业的应用系统,如果用户一直面对同一种风格的页面,时间长了难免厌烦,所以一般都会提供好几种风格及Theme供用户选中,下面就来说一下如何在不重新登录系统的情况下,实现风格的动态切换。我们写一个Demo来说明一下。
新建一个Silverlight的项目,并添加一个默认的站点,先来写一下页面吧,简单起见,只放两个控件,MainPage的代码如下:
<UserControl x:Class="SilverlightChangeTheme.MainPage"
    xmlns="http://schemas.microsoft.com/winfx/2006/xaml/presentation"
    xmlns:x="http://schemas.microsoft.com/winfx/2006/xaml"
    xmlns:d="http://schemas.microsoft.com/expression/blend/2008"
    xmlns:mc="http://schemas.openxmlformats.org/markup-compatibility/2006"
    mc:Ignorable="d"
    d:DesignHeight="300" d:DesignWidth="400">

    <Grid x:Name="LayoutRoot" Background="White">
      <Button Content="ChangeTheme" Height="23" HorizontalAlignment="Left"
              Margin="40,66,0,0" Name="button1" VerticalAlignment="Top"
              Width="108" Click="button1_Click" Style="{StaticResource BtnStyle}" />
      <TextBlock Height="23" HorizontalAlignment="Left"
                 Margin="58,37,0,0" Name="textBlock1"
                 Text="文字样式" VerticalAlignment="Top"
                 FontSize="14" Width="101" Style="{StaticResource txtStyle}" />
   </Grid>
</UserControl>
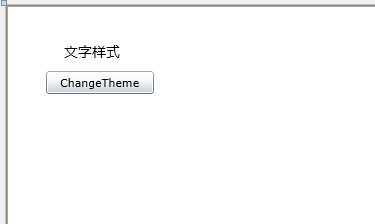
效果图如下:

就是一个简单的按钮和一个TextBlock,下面要实现的效果是点击按钮实现文字和按钮字体颜色改变(样式要从资源文件加载);
那么既然要实现切换风格,首先要有资源文件,我们先建两个Silverlight Resource Dictionary,红色风格和蓝色风格,命名为Blue.xaml和Red.xaml,代码如下:
Red.xaml:
<ResourceDictionary
    xmlns="http://schemas.microsoft.com/winfx/2006/xaml/presentation"
    xmlns:x="http://schemas.microsoft.com/winfx/2006/xaml">

   <Style TargetType="Button" x:Key="BtnStyle">
      <Setter Property="Foreground" Value="Red" />
   </Style>
   <Style TargetType="TextBlock" x:Key="txtStyle">
      <Setter Property="Foreground" Value="Red" />
   </Style>
</ResourceDictionary>
Blue.xaml:
<ResourceDictionary
    xmlns="http://schemas.microsoft.com/winfx/2006/xaml/presentation"
    xmlns:x="http://schemas.microsoft.com/winfx/2006/xaml">

   <Style TargetType="Button" x:Key="BtnStyle">
      <Setter Property="Foreground" Value="Blue" />
   </Style>
   <Style TargetType="TextBlock" x:Key="txtStyle">
      <Setter Property="Foreground" Value="Blue" />
   </Style>
</ResourceDictionary>
由于MainPage中已经绑定了资源文件中的样式,所以系统启动时就必须加载某一个样式文件,就是所谓的默认样式,所以要加一个静态类,来实现系统启动时加载默认样式和切换样式,代码如下:
ThemeHelper.cs
using System;
using System.Net;
using System.Windows;
using System.Windows.Controls;
using System.Windows.Documents;
using System.Windows.Ink;
using System.Windows.Input;
using System.Windows.Media;
using System.Windows.Media.Animation;
using System.Windows.Shapes;

namespace SilverlightChangeTheme
{
   public static class ThemeHelper
   {
      /// <summary>
      /// 加载样式文件到Application.Current.Resources
      /// </summary>
      /// <param name="theme"></param>
      public static void LoadTheme(string theme)
      {
         ResourceDictionary rd = new ResourceDictionary();
         if (theme.Length == 3)
         {
            Application.LoadComponent(rd, new Uri("/SilverlightChangeTheme;component/Red.xaml", UriKind.Relative));
         }
         else
         {
            Application.LoadComponent(rd, new Uri("/SilverlightChangeTheme;component/Blue.xaml", UriKind.Relative));
         }
         //清空Application.Current.Resources,存放新的样式
         if (Application.Current.Resources.Count > 0)
         {
            Application.Current.Resources.Clear();
         }
         Application.Current.Resources.MergedDictionaries.Add(rd);
      }

      /// <summary>
      /// 从Application.Current.Resources中获取指定名称的样式
      /// </summary>
      /// <param name="name"></param>
      /// <returns></returns>
      public static object FindResource(string name)
      {
         if (App.Current.Resources.Contains(name))
         {
            return App.Current.Resources[name];
         }
         else
         {
            return null; //这里返回NULL,如果没有控件会变成系统默认样式。
         }
      }
   }
}
然后在App.xaml.cs中,在Application_Startup方法中添加如下代码:
private void Application_Startup(object sender, StartupEventArgs e)
      {
         //加载默认样式
         ThemeHelper.LoadTheme("Blue");
         this.RootVisual = new MainPage();
      }
这样启动时就会自动加载蓝色的风格了,效果图下:

然后,给MainPage的Button添加事件,实现样式的切换,代码如下:
using System;
using System.Collections.Generic;
using System.Linq;
using System.Net;
using System.Windows;
using System.Windows.Controls;
using System.Windows.Documents;
using System.Windows.Input;
using System.Windows.Media;
using System.Windows.Media.Animation;
using System.Windows.Shapes;

namespace SilverlightChangeTheme
{
   public partial class MainPage : UserControl
   {
      bool IsRed = false;
      public MainPage()
      {
         InitializeComponent();
      }

      private void button1_Click(object sender, RoutedEventArgs e)
      {
         if (IsRed)
         {
            //加载样式到Application.Current.Resources
            ThemeHelper.LoadTheme("Blue");
            IsRed = false;
         }
         else
         {
            //加载样式到Application.Current.Resources
            ThemeHelper.LoadTheme("Red");
            IsRed = true;
         }
         //运行时,更新样式必须重新设置每个控件的Style,然后调用this.UpdateLayout()方法更新页面。
         button1.Style = ThemeHelper.FindResource("BtnStyle") as Style;
         textBlock1.Style = ThemeHelper.FindResource("txtStyle") as Style;
         this.UpdateLayout();
      }
   }
}
这样就实现了样式的切换,需要注意的是系统启动后切换样式,要在代码中重新设置每个控件的Style,然后调用this.UpdateLayout()方法更新页面。
当然,如果有多窗体的话,没有打开的话是不需要设置的,只需要设置已经显示的控件。
补充知识:
关于Uri路径的写法。
XAML文件的相对Uri访问, 如<Image Source="silverlight.png" />或是<Image Source="./silverlight.png" />,
在子文件夹里的可以用<Image Source=”./images/sl.jpg” />访问到
最保险的方式是采用特有的程序集资源URI访问,格式为
<Image Source="/{assemblyShortName};component/Foo.jpg"/>, 这种方式还可以引用到xap中的其他程序集中的图片
修改我们的两个图片的引用方式为
<Image Source="/SilverlightApplication1;component/silverlight.png"/>
<Image Source="/SilverlightApplication1;component/images/sl.jpg" Height="100"/>
标签:des style blog http color os io strong ar
原文地址:http://www.cnblogs.com/yunfeifei/p/3953373.html