标签:工作 format strftime second 随机数 保留 completed war 进程
本节大纲
模块,就是实现某种或者某类功能代码的合集。
类似于函数式编程和面向过程编程,函数式编程完成一个功能,其他代码可以调用,提供了代码的重用性跟代码间的耦合。对于一个复杂的功能,可能需要多个函数才能完成,多个.py文件的代码集合就叫做模块。
如:os是系统相关的模块;file是文件操作相关模块。
模块分为三种:
自定义模块 和开源模块的使用参考 http://www.cnblogs.com/wupeiqi/articles/4963027.html
time & datetime 模块
>>> import time
>>> time.clock()#返回处理器时间,3.3开始已废弃 , 改成了time.process_time()测量处理器运算时间,不包括sleep时间,不稳定,mac上测不出来
8.210571603573898e-07
>>> time.altzone#返回与utc时间的时间差,以秒计算
-32400
>>> time.asctime()#注意格式
‘Sat Aug  5 13:12:58 2017‘
>>> time.localtime()#返回本地时间 的struct time对象格式
time.struct_time(tm_year=2017, tm_mon=8, tm_mday=5, tm_hour=13, tm_min=13, tm_sec=21, tm_wday=5, tm_yday=217, tm_isdst=0)

>>> time.gmtime(time.time()-800000)#返回utc时间的struc时间对象格式
time.struct_time(tm_year=2017, tm_mon=7, tm_mday=26, tm_hour=23, tm_min=0, tm_sec=41, tm_wday=2, tm_yday=207, tm_isdst=0)

>>> time.asctime(time.localtime())
‘Sat Aug  5 13:14:59 2017‘
>>> time.ctime()
‘Sat Aug  5 13:15:22 2017‘
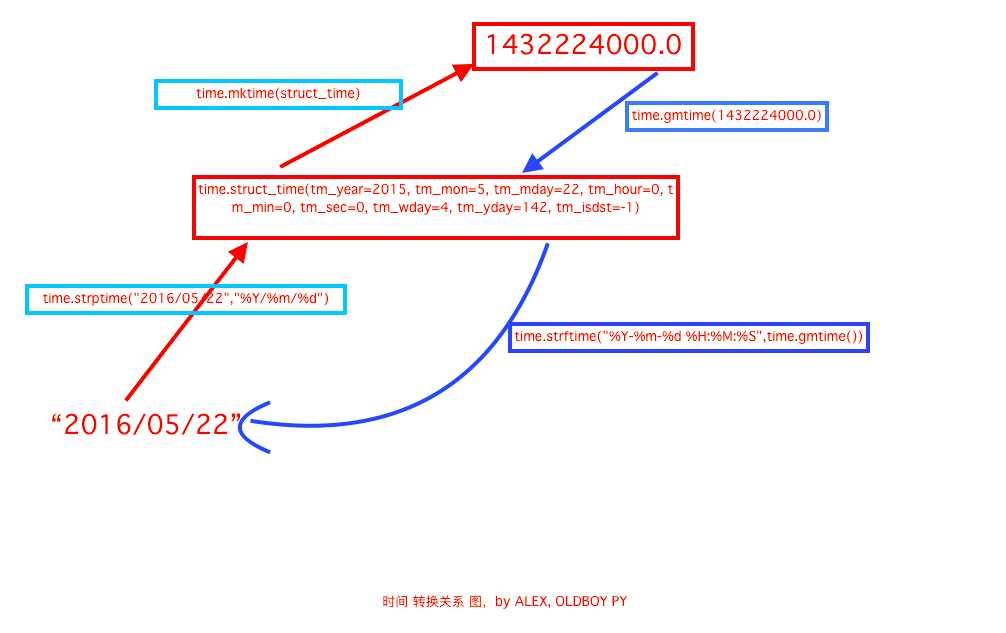
格式转换
import time

string_2_struct = time.strptime("2017/06/06", "%Y/%m/%d")#将日期字符串 转换成struct时间对象格式
print(string_2_struct)

string_new = time.mktime(string_2_struct)#将struct时间对象转成时间戳
print(string_new)


result:
time.struct_time(tm_year=2017, tm_mon=6, tm_mday=6, tm_hour=0, tm_min=0, tm_sec=0, tm_wday=1, tm_yday=157, tm_isdst=-1)
1496678400.0
print(time.gmtime(time.time()-86640))#将utc时间戳转换成struct_time格式
print(time.strftime("%Y-%m-%d %H:%M:%S",time.gmtime()))#将utc struct_time格式转成指定的字符串格式
time.struct_time(tm_year=2017, tm_mon=8, tm_mday=4, tm_hour=5, tm_min=40, tm_sec=9, tm_wday=4, tm_yday=216, tm_isdst=0)
2017-08-05 05:44:09
时间加减换算
print(datetime.datetime.now())
print(datetime.datetime.now() + datetime.timedelta(3))
print(datetime.datetime.now() + datetime.timedelta(-3))
print(datetime.datetime.now() + datetime.timedelta(hours=5))
print(datetime.datetime.now() + datetime.timedelta(minutes=30))

c_time = datetime.datetime.now()
print(c_time)
print(c_time.replace(minute=10,hour=2))
2017-08-05 14:07:57.010701
2017-08-08 14:07:57.010701
2017-08-02 14:07:57.010701
2017-08-05 19:07:57.010701
2017-08-05 14:37:57.010701
2017-08-05 14:07:57.010701
2017-08-05 02:10:57.010701
| Directive | Meaning | Notes |
|---|---|---|
%a |
Locale’s abbreviated weekday name. | |
%A |
Locale’s full weekday name. | |
%b |
Locale’s abbreviated month name. | |
%B |
Locale’s full month name. | |
%c |
Locale’s appropriate date and time representation. | |
%d |
Day of the month as a decimal number [01,31]. | |
%H |
Hour (24-hour clock) as a decimal number [00,23]. | |
%I |
Hour (12-hour clock) as a decimal number [01,12]. | |
%j |
Day of the year as a decimal number [001,366]. | |
%m |
Month as a decimal number [01,12]. | |
%M |
Minute as a decimal number [00,59]. | |
%p |
Locale’s equivalent of either AM or PM. | (1) |
%S |
Second as a decimal number [00,61]. | (2) |
%U |
Week number of the year (Sunday as the first day of the week) as a decimal number [00,53]. All days in a new year preceding the first Sunday are considered to be in week 0. | (3) |
%w |
Weekday as a decimal number [0(Sunday),6]. | |
%W |
Week number of the year (Monday as the first day of the week) as a decimal number [00,53]. All days in a new year preceding the first Monday are considered to be in week 0. | (3) |
%x |
Locale’s appropriate date representation. | |
%X |
Locale’s appropriate time representation. | |
%y |
Year without century as a decimal number [00,99]. | |
%Y |
Year with century as a decimal number. | |
%z |
Time zone offset indicating a positive or negative time difference from UTC/GMT of the form +HHMM or -HHMM, where H represents decimal hour digits and M represents decimal minute digits [-23:59, +23:59]. | |
%Z |
Time zone name (no characters if no time zone exists). | |
%% |
A literal ‘%‘ character. |
random模块
随机数的产生 & 生成随机验证码
import random

print(random.random())
print(random.randint(1,2))
print(random.randrange(1,10))

checkcode = ‘‘
for i in range(4):
    current = random.randrange(0,4)
    if current!= i:
        temp = chr(random.randrange(65,90))
    else:
        temp = random.randrange(0,9)
    checkcode +=str(temp)
print(checkcode)
OS模块
提供对操作系统进行调用的接口
print(os.getcwd())  #获取当前工作目录,即当前脚本工作目录路径

>>> os.chdir(r"c:\Users")  #切换路径
>>> os.getcwd()
‘c:\\Users‘

>>> os.curdir  #返回当前目录
‘.‘
>>> os.pardir  #返回当前目录的父级目录字符串
‘..‘

os.makedirs(‘dirname1/dirname2‘)   # 可生成多层递归目录
os.removedirs(‘dirname1‘)   # 若目录为空,则删除,并递归到上一级目录,如若也为空,则删除,依此类推

os.mkdir(‘dirname‘)   # 生成单级目录;相当于shell中mkdir dirname
os.rmdir(‘dirname‘)   # 删除单级空目录,若目录不为空则无法删除,报错;相当于shell中rmdir dirname
os.listdir(‘dirname‘)   # 列出指定目录下的所有文件和子目录,包括隐藏文件,并以列表方式打印
os.remove() # 删除一个文件
os.rename("oldname","newname") # 重命名文件/目录
os.stat(‘path/filename‘) # 获取文件/目录信息
os.sep    输出操作系统特定的路径分隔符,win下为"\\",Linux下为"/"
os.linesep    输出当前平台使用的行终止符,win下为"\r\n",Linux下为"\n"

os.pathsep    输出用于分割文件路径的字符串

os.name    输出字符串指示当前使用平台。win->‘nt‘; Linux->‘posix‘

os.system("bash command")  运行shell命令,直接显示

os.environ  获取系统环境变量

os.path.abspath(path)  返回path规范化的绝对路径

os.path.split(path)  将path分割成目录和文件名二元组返回

os.path.dirname(path)  返回path的目录。其实就是os.path.split(path)的第一个元素

os.path.basename(path)  返回path最后的文件名。如何path以/或\结尾,那么就会返回空值。即os.path.split(path)的第二个元素

os.path.exists(path)  如果path存在,返回True;如果path不存在,返回False

os.path.isabs(path)  如果path是绝对路径,返回True

os.path.isfile(path)  如果path是一个存在的文件,返回True。否则返回False

os.path.isdir(path)  如果path是一个存在的目录,则返回True。否则返回False

os.path.join(path1[, path2[, ...]])  将多个路径组合后返回,第一个绝对路径之前的参数将被忽略

os.path.getatime(path)  返回path所指向的文件或者目录的最后存取时间

os.path.getmtime(path)  返回path所指向的文件或者目录的最后修改时间
sys模块
1 sys.argv           命令行参数List,第一个元素是程序本身路径
2 sys.exit(n)        退出程序,正常退出时exit(0)
3 sys.version        获取Python解释程序的版本信息
4 sys.maxint         最大的Int值
5 sys.path           返回模块的搜索路径,初始化时使用PYTHONPATH环境变量的值
6 sys.platform       返回操作系统平台名称
7 sys.stdout.write(‘please:‘)
8 val = sys.stdin.readline()[:-1]
shutil模块
高级的文件,文件夹,压缩包处理模块
shutil.copyfileobj(fsrc, fdst[, length])
将文件内容拷贝到另一个文件中,可以部分内容
shutil.copyfile(src, dst)
拷贝文件
shutil.copymode(src, dst)
仅拷贝权限。内容,组,用户均不变
shutil.copystat(src, dst)
拷贝状态的信息,包括:mode bits, atime, mtime, flags
shutil.copy(src, dst)
拷贝文件和权限
shutil.copy2(src, dst)
拷贝文件和状态信息
shutil.ignore_patterns(*patterns)
shutil.copytree(src, dst, symlinks=False, ignore=None)
递归的去拷贝文件
例如:copytree(source, destination, ignore=ignore_patterns(‘*.pyc‘, ‘tmp*‘))
shutil.rmtree(path[, ignore_errors[, onerror]])
递归的去删除文件
shutil.move(src, dst)
递归的去移动文件
shutil.make_archive(base_name, format,...)
创建压缩包并返回文件路径,例如:zip、tar
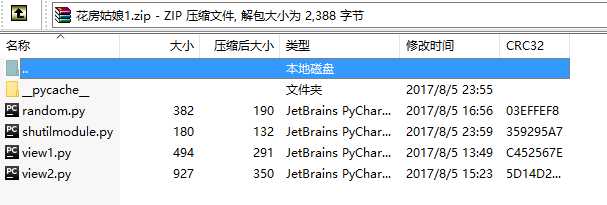
import shutil

shutil.make_archive("D:\花房姑娘","zip","E:\\随便\\taylor")

shutil.make_archive("D:\花房姑娘1","zip")

#第一个填位置参数填文件名的话会保存在当前目录,同理后面的目录不填的话也会默认当前目录

shutil对压缩包的处理是调用ZipFile和TarFile两个模块来进行的
import zipfile
z = zipfile.ZipFile(‘我就要回到老地方.zip‘, ‘w‘,)
z.write(‘view1.py‘)#要压缩的文件
z.write(‘view2.py‘)
z.close()

y = zipfile.ZipFile(‘我就要回到老地方.zip‘, ‘r‘)
y.extractall(‘D:\\‘)
y.close()

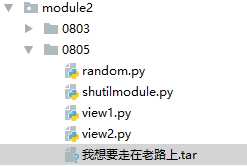
import tarfile
tar = tarfile.open(‘我想要走在老路上.tar‘,‘w‘)
tar.add(‘E:\\随便\\taylor‘)
tar.close()
#解压同理
tar = tarfile.open(‘your.tar‘,‘r‘)
tar.extractall()  # 可设置解压地址
tar.close()
shelve模块
shelve模块是一个简单的k,v将内存数据通过文件持久化的模块,可以持久化任何pickle可支持的python数据格式
#写入
import shelve
import time
d = shelve.open(‘我独自走过你身旁‘)

info = {‘age‘: 22,‘salary‘: 30000}
time = time.time()
name = [‘dandy‘,‘crystal‘,‘taylor‘]
d[‘name‘]=name
d[‘info‘]=info
d[‘time‘]=time
d.close()
会生成3个文件
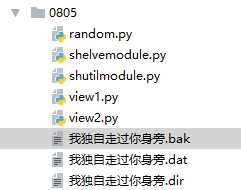
#读取
import shelve
d = shelve.open(‘我独自走过你身旁‘)
print(d.get(‘name‘))
print(d.get(‘info‘))
print(d.get(‘time‘))
xml处理模块
xml是实现不同语言或程序之间进行数据交换的协议,跟json差不多,但json使用起来更简单。在还没有json的时候,大家只能选择xml作为主流的数据交换方式,至今很多传统公司如金融公司的很多系统借口还主要是xml
xml的格式如下,就是通过<>节点来区别数据结构的:

 1 <?xml version="1.0"?>
 2
 3 <data>
 4
 5     <country name="Liechtenstein">
 6
 7         <rank updated="yes">2</rank>
 8
 9         <year>2008</year>
10
11         <gdppc>141100</gdppc>
12
13         <neighbor name="Austria" direction="E"/>
14
15         <neighbor name="Switzerland" direction="W"/>
16
17     </country>
18
19     <country name="Singapore">
20
21         <rank updated="yes">5</rank>
22
23         <year>2011</year>
24
25         <gdppc>59900</gdppc>
26
27         <neighbor name="Malaysia" direction="N"/>
28
29     </country>
30
31     <country name="Panama">
32
33         <rank updated="yes">69</rank>
34
35         <year>2011</year>
36
37         <gdppc>13600</gdppc>
38
39         <neighbor name="Costa Rica" direction="W"/>
40
41         <neighbor name="Colombia" direction="E"/>
42
43     </country>
44
45 </data>
xml协议在各种语言里都是支持的,在python中可以用一下模块操作xml
#读取xml,注意一下attrib跟text的输出内容跟格式
import xml.etree.cElementTree as ET

tree = ET.parse(‘xmlTest.xml‘)
root = tree.getroot()
print(root)  #返回内存地址
print(root.tag)  #返回最外层的data

#遍历xml文档
for child in root:
    print(child.tag, child.attrib)
    for i in child:
        print(i.tag,i.attrib, i.text)

#只遍历year节点
for year in root.iter(‘year‘):
    print(year.tag,year.text)
修改和删除xml文档内容
import xml.etree.cElementTree as ET

tree = ET.parse(‘xmlTest.xml‘)
root = tree.getroot()

#修改
for year in root.iter(‘year‘):
    new_year = int(year.text) + 1
    year.text = str(new_year)  # 复制
    year.set("upated","yes")  # 设置attribute
tree.write("xmlTest.xml")

#按条件删除
for country in root.findall(‘country‘):
    rank = int(country.find(‘rank‘).text)
    if rank >50:
        root.remove(country)
tree.write(‘你问我要去向何方.xml‘)
创建自己的xml文档
import xml.etree.cElementTree as ET

new_xml = ET.Element("namelist")#外层
List1 = ET.SubElement(new_xml,"info",attrib={"enrolled": "yes"})#list1
name = ET.SubElement(List1,"name")
name.text = "dandy"
age = ET.SubElement(List1, "age", attrib={"checked": "no"})
sex = ET.SubElement(List1, "sex")
sex.text ="33"

List2 = ET.SubElement(new_xml,"info",attrib={"enrolled": "no"})#list2
name = ET.SubElement(List2,"name")
name.text = "Crystal"
age = ET.SubElement(List2, "age", attrib={"checked": "no"})
age.text = ‘19‘
salary = ET.SubElement(List2,"salary",attrib={"company":"Flex"})
salary.text = "30000"

et= ET.ElementTree(new_xml)#生成文档对象
et.write("你带我走进你的花房.xml", encoding="utf-8",xml_declaration=True)

ET.dump(new_xml)#打印生成的格式
生成文件
<?xml version=‘1.0‘ encoding=‘utf-8‘?>
<namelist>
    <info enrolled="yes">
        <name>dandy</name>
        <age checked="no" />
        <sex>33</sex>
    </info>
    <info enrolled="no">
        <name>Crystal</name>
        <age checked="no">19</age>
        <salary company="Flex">30000</salary>
    </info>
</namelist>
PyYaml模块
Python也可以很容易的处理ymal文档格式,只不过需要安装一个模块,参考文档:http://pyyaml.org/wiki/PyYAMLDocumentation
configparser模块
用于生成修改常见配置文档
 1 [DEFAULT]
 2 ServerAliveInterval = 45
 3 Compression = yes
 4 CompressionLevel = 9
 5 ForwardX11 = yes
 6
 7 [bitbucket.org]
 8 User = hg
 9
10 [topsecret.server.com]
11 Port = 50022
12 ForwardX11 = no
写
import configparser

config = configparser.ConfigParser()

config["Default"] = {‘ServerAliveInterval‘: 45,
                     ‘Compression‘:‘yes‘,
                     ‘CompressionLevel‘:‘9‘}

config[‘bitbucket.arg‘] = {}
config[‘bitbucket.arg‘][‘User‘] = ‘hg‘

config[‘topsecret.server.com‘] = {}
topsecret = config[‘topsecret.server.com‘]
topsecret[‘Host Port‘] = ‘50022‘
topsecret[‘ForwardX11‘] = ‘no‘

config[‘Default‘][‘ForwardX11‘] = ‘yes‘

with open(‘噢姑娘.ini‘, ‘w‘)as configfile:
    config.write(configfile)
读
import configparser

config = configparser.ConfigParser()
config.read(‘噢姑娘.ini‘)
print(config.sections())

print(‘bitbucket.arg‘ in config)
print(config[‘bitbucket.arg‘][‘User‘])

topscret = config[‘topsecret.server.com‘]
print(topscret[‘forwardx11‘])

for key in config[‘Default‘]:
    print(key)
configparser的增删改查语法
import configparser

config = configparser.ConfigParser()
config.read(‘噢姑娘.ini‘)

option = config.options(‘Default‘)
print(option)  #[‘serveraliveinterval‘, ‘compression‘, ‘compressionlevel‘, ‘forwardx11‘]

option1 = config.items(‘Default‘)
print(option1)  #[(‘serveraliveinterval‘, ‘45‘), (‘compression‘, ‘yes‘), (‘compressionlevel‘, ‘9‘), (‘forwardx11‘, ‘yes‘)]

#删除并写入文件
config.remove_section(‘bitbucket.arg‘)
config.write(open(‘噢姑娘2.ini‘, ‘w‘))
hashlib模块
用于加密相关的操作,3.x里代替了md5模块和sha模块,主要提供 SHA1, SHA224, SHA256, SHA384, SHA512 ,MD5 算法
import hashlib
m = hashlib.md5()
m.update(b"hello")  # 16进制形式加密
m.update(b"It‘s me")
print(m.hexdigest())  # 会将2次update拼接
>>>>>>>:
64f69d95135bc13d4827f871b37f780f
其他的加密方法类似,只需要将md5改为对应的
python 还有一个 hmac 模块,它内部对我们创建 key 和 内容 再进行处理然后再加密.
散列消息鉴别码,简称HMAC,是一种基于消息鉴别码MAC(Message Authentication Code)的鉴别机制。使用HMAC时,消息通讯的双方,通过验证消息中加入的鉴别密钥K来鉴别消息的真伪;
一般用于网络通信中消息加密,前提是双方先要约定好key,就像接头暗号一样,然后消息发送把用key把消息加密,接收方用key + 消息明文再加密,拿加密后的值 跟 发送者的相对比是否相等,这样就能验证消息的真实性,及发送者的合法性了。
import hmac
h = hmac.new(b‘天王盖地虎‘, b‘宝塔镇河妖‘.encode(encoding="utf-8"))
print(h.hexdigest())
更多关于md5,sha1,sha256等介绍的文章看这里https://www.tbs-certificates.co.uk/FAQ/en/sha256.html
Subprocess模块
The subprocess module allows you to spawn new processes, connect to their input/output/error pipes, and obtain their return codes. This module intends to replace several older modules and functions:
os.system
os.spawn*
The recommended approach to invoking subprocesses is to use the run() function for all use cases it can handle. For more advanced use cases, the underlying Popen interface can be used directly.
The run() function was added in Python 3.5; if you need to retain compatibility with older versions, see the Older high-level API section.
subprocess.run(args, *, stdin=None, input=None, stdout=None, stderr=None, shell=False, timeout=None, check=False)Run the command described by args. Wait for command to complete, then return a CompletedProcess instance.
The arguments shown above are merely the most common ones, described below in Frequently Used Arguments (hence the use of keyword-only notation in the abbreviated signature). The full function signature is largely the same as that of the Popen constructor - apart from timeout, input and check, all the arguments to this function are passed through to that interface.
This does not capture stdout or stderr by default. To do so, pass PIPE for the stdout and/or stderr arguments.
The timeout argument is passed to Popen.communicate(). If the timeout expires, the child process will be killed and waited for. The TimeoutExpired exception will be re-raised after the child process has terminated.
The input argument is passed to Popen.communicate() and thus to the subprocess’s stdin. If used it must be a byte sequence, or a string if universal_newlines=True. When used, the internal Popen object is automatically created withstdin=PIPE, and the stdin argument may not be used as well.
If check is True, and the process exits with a non-zero exit code, a CalledProcessError exception will be raised. Attributes of that exception hold the arguments, the exit code, and stdout and stderr if they were captured.
#执行命令,返回命令执行状态 , 0 or 非0 >>> retcode = subprocess.call(["ls", "-l"])
#执行命令,如果命令结果为0,就正常返回,否则抛异常 >>> subprocess.check_call(["ls", "-l"]) 0
#接收字符串格式命令,返回元组形式,第1个元素是执行状态,第2个是命令结果 >>> subprocess.getstatusoutput(‘ls /bin/ls‘) (0, ‘/bin/ls‘)
#接收字符串格式命令,并返回结果 >>> subprocess.getoutput(‘ls /bin/ls‘) ‘/bin/ls‘
#执行命令,并返回结果,注意是返回结果,不是打印,下例结果返回给res >>> res=subprocess.check_output([‘ls‘,‘-l‘]) >>> res b‘total 0\ndrwxr-xr-x 12 alex staff 408 Nov 2 11:05 OldBoyCRM\n‘
#上面那些方法,底层都是封装的subprocess.Popen poll() Check if child process has terminated. Returns returncode
wait() Wait for child process to terminate. Returns returncode attribute.
terminate() 杀掉所启动进程 communicate() 等待任务结束
stdin 标准输入
stdout 标准输出
stderr 标准错误
pid The process ID of the child process.
#例子 >>> p = subprocess.Popen("df -h|grep disk",stdin=subprocess.PIPE,stdout=subprocess.PIPE,shell=True) >>> p.stdout.read() b‘/dev/disk1 465Gi 64Gi 400Gi 14% 16901472 104938142 14% /\n‘
|
1
2
3
4
5
6
7
8
9
10
11
|
>>> subprocess.run(["ls", "-l"]) # doesn‘t capture outputCompletedProcess(args=[‘ls‘, ‘-l‘], returncode=0)>>> subprocess.run("exit 1", shell=True, check=True)Traceback (most recent call last): ...subprocess.CalledProcessError: Command ‘exit 1‘ returned non-zero exit status 1>>> subprocess.run(["ls", "-l", "/dev/null"], stdout=subprocess.PIPE)CompletedProcess(args=[‘ls‘, ‘-l‘, ‘/dev/null‘], returncode=0,stdout=b‘crw-rw-rw- 1 root root 1, 3 Jan 23 16:23 /dev/null\n‘) |
调用subprocess.run(...)是推荐的常用方法,在大多数情况下能满足需求,但如果你可能需要进行一些复杂的与系统的交互的话,你还可以用subprocess.Popen(),语法如下:
|
1
2
|
p = subprocess.Popen("find / -size +1000000 -exec ls -shl {} \;",shell=True,stdout=subprocess.PIPE)print(p.stdout.read()) |
可用参数:
终端输入的命令分为两种:
需要交互的命令示例
|
1
2
3
4
5
6
7
8
9
10
|
import subprocessobj = subprocess.Popen(["python"], stdin=subprocess.PIPE, stdout=subprocess.PIPE, stderr=subprocess.PIPE)obj.stdin.write(‘print 1 \n ‘)obj.stdin.write(‘print 2 \n ‘)obj.stdin.write(‘print 3 \n ‘)obj.stdin.write(‘print 4 \n ‘)out_error_list = obj.communicate(timeout=10)print out_error_list |
|
1
2
3
4
5
6
7
8
9
10
11
12
13
14
15
16
17
18
|
import subprocessdef mypass(): mypass = ‘123‘ #or get the password from anywhere return mypassecho = subprocess.Popen([‘echo‘,mypass()], stdout=subprocess.PIPE, )sudo = subprocess.Popen([‘sudo‘,‘-S‘,‘iptables‘,‘-L‘], stdin=echo.stdout, stdout=subprocess.PIPE, )end_of_pipe = sudo.stdoutprint "Password ok \n Iptables Chains %s" % end_of_pipe.read() |
参考:http://www.cnblogs.com/alex3714/articles/5161349.html
logging模块
很多程序都有记录日志的需求,并且日志中包含的信息多种多样,比如:正常程序的访问日志,错误,警告信息输出,python的日志模块提供了标准的日志接口,可以通过它存储各种形式的日志logging的日志分为5个级别:debug(), info(), warning(), error(), critical().
import logging

logging.warning("this is a logging warnning test")
logging.critical("this is a logging critical test")
输出:
WARNING:root:this is a logging warnning test
CRITICAL:root:this is a logging critical test
看一下这几个日志级别分别代表什么意思
| Level | When it’s used |
|---|---|
DEBUG |
Detailed information, typically of interest only when diagnosing problems. |
INFO |
Confirmation that things are working as expected. |
WARNING |
An indication that something unexpected happened, or indicative of some problem in the near future (e.g. ‘disk space low’). The software is still working as expected. |
ERROR |
Due to a more serious problem, the software has not been able to perform some function. |
CRITICAL |
A serious error, indicating that the program itself may be unable to continue running. |
写日志到文件中去
import logging

logging.basicConfig(filename="example.log",level=logging.INFO)
logging.debug("This message should go to file log")
logging.info(‘this file need, too‘)
logging.warning(‘And this, too‘)
其中下面这句中的level=loggin.INFO意思是,把日志纪录级别设置为INFO,也就是说,只有比日志是INFO或比INFO级别更高的日志才会被纪录到文件里,在这个例子, 第一条日志是不会被纪录的,如果希望纪录debug的日志,那把日志级别改成DEBUG就行了。
logging.basicConfig(filename=‘example.log‘,level=logging.INFO)
可以在中间自定义格式:
import logging

logging.basicConfig(filename="example.log",format="%(asctime)s %(message)s",datefmt="%m/%d%Y %I:%M:%S %p",level=logging.INFO)
logging.debug("This message should go to file log")
logging.info(‘this file need, too‘)
logging.warning(‘And this, too‘)
输出:
08/062017 02:55:29 PM this file need, too
08/062017 02:55:29 PM And this, too
日志格式
|
%(name)s |
Logger的名字 |
|
%(levelno)s |
数字形式的日志级别 |
|
%(levelname)s |
文本形式的日志级别 |
|
%(pathname)s |
调用日志输出函数的模块的完整路径名,可能没有 |
|
%(filename)s |
调用日志输出函数的模块的文件名 |
|
%(module)s |
调用日志输出函数的模块名 |
|
%(funcName)s |
调用日志输出函数的函数名 |
|
%(lineno)d |
调用日志输出函数的语句所在的代码行 |
|
%(created)f |
当前时间,用UNIX标准的表示时间的浮 点数表示 |
|
%(relativeCreated)d |
输出日志信息时的,自Logger创建以 来的毫秒数 |
|
%(asctime)s |
字符串形式的当前时间。默认格式是 “2003-07-08 16:49:45,896”。逗号后面的是毫秒 |
|
%(thread)d |
线程ID。可能没有 |
|
%(threadName)s |
线程名。可能没有 |
|
%(process)d |
进程ID。可能没有 |
|
%(message)s |
用户输出的消息 |
如果想同时把log打印在屏幕和文件日志里,就需要了解一点复杂的知识 了
Python 使用logging模块记录日志涉及四个主要类,使用官方文档中的概括最为合适:
logger提供了应用程序可以直接使用的接口;
handler将(logger创建的)日志记录发送到合适的目的输出;
filter提供了细度设备来决定输出哪条日志记录;
formatter决定日志记录的最终输出格式。
logger 每个程序在输出信息之前都要获得一个Logger。Logger通常对应了程序的模块名,比如聊天工具的图形界面模块可以这样获得它的Logger: LOG=logging.getLogger(”chat.gui”) 而核心模块可以这样: LOG=logging.getLogger(”chat.kernel”)
Logger.setLevel(lel):指定最低的日志级别,低于lel的级别将被忽略。debug是最低的内置级别,critical为最高 Logger.addFilter(filt)、Logger.removeFilter(filt):添加或删除指定的filter Logger.addHandler(hdlr)、Logger.removeHandler(hdlr):增加或删除指定的handler Logger.debug()、Logger.info()、Logger.warning()、Logger.error()、Logger.critical():可以设置的日志级别
handler
handler对象负责发送相关的信息到指定目的地。Python的日志系统有多种Handler可以使用。有些Handler可以把信息输出到控制台,有些Logger可以把信息输出到文件,还有些 Handler可以把信息发送到网络上。如果觉得不够用,还可以编写自己的Handler。可以通过addHandler()方法添加多个多handler Handler.setLevel(lel):指定被处理的信息级别,低于lel级别的信息将被忽略 Handler.setFormatter():给这个handler选择一个格式 Handler.addFilter(filt)、Handler.removeFilter(filt):新增或删除一个filter对象
每个Logger可以附加多个Handler。接下来我们就来介绍一些常用的Handler: 1) logging.StreamHandler 使用这个Handler可以向类似与sys.stdout或者sys.stderr的任何文件对象(file object)输出信息。它的构造函数是: StreamHandler([strm]) 其中strm参数是一个文件对象。默认是sys.stderr
2) logging.FileHandler 和StreamHandler类似,用于向一个文件输出日志信息。不过FileHandler会帮你打开这个文件。它的构造函数是: FileHandler(filename[,mode]) filename是文件名,必须指定一个文件名。 mode是文件的打开方式。参见Python内置函数open()的用法。默认是’a‘,即添加到文件末尾。
3) logging.handlers.RotatingFileHandler 这个Handler类似于上面的FileHandler,但是它可以管理文件大小。当文件达到一定大小之后,它会自动将当前日志文件改名,然后创建 一个新的同名日志文件继续输出。比如日志文件是chat.log。当chat.log达到指定的大小之后,RotatingFileHandler自动把 文件改名为chat.log.1。不过,如果chat.log.1已经存在,会先把chat.log.1重命名为chat.log.2。。。最后重新创建 chat.log,继续输出日志信息。它的构造函数是: RotatingFileHandler( filename[, mode[, maxBytes[, backupCount]]]) 其中filename和mode两个参数和FileHandler一样。 maxBytes用于指定日志文件的最大文件大小。如果maxBytes为0,意味着日志文件可以无限大,这时上面描述的重命名过程就不会发生。 backupCount用于指定保留的备份文件的个数。比如,如果指定为2,当上面描述的重命名过程发生时,原有的chat.log.2并不会被更名,而是被删除。
4) logging.handlers.TimedRotatingFileHandler 这个Handler和RotatingFileHandler类似,不过,它没有通过判断文件大小来决定何时重新创建日志文件,而是间隔一定时间就 自动创建新的日志文件。重命名的过程与RotatingFileHandler类似,不过新的文件不是附加数字,而是当前时间。它的构造函数是: TimedRotatingFileHandler( filename [,when [,interval [,backupCount]]]) 其中filename参数和backupCount参数和RotatingFileHandler具有相同的意义。 interval是时间间隔。 when参数是一个字符串。表示时间间隔的单位,不区分大小写。它有以下取值: S 秒 M 分 H 小时 D 天 W 每星期(interval==0时代表星期一) midnight 每天凌晨
#!/user/bin/env python
# -*-coding: utf-8-*-

import logging

# create logger
logger = logging.getLogger("test_log")
logger.setLevel(logging.DEBUG)

# create console handler and set level to debug
ch = logging.StreamHandler()
ch.setLevel(logging.DEBUG)

# create file handler and set level to warning
fh = logging.FileHandler("噢姑娘.log")
fh.setLevel(logging.WARNING)

# create format
ch_format = logging.Formatter("%(asctime)s - %(name)s - %(levelname)s - %(message)s")
fh_format = logging.Formatter("%(asctime)s - %(name)s - %(levelname)s - %(message)s")

# add formatter to ch and fh
ch.setFormatter(ch_format)
fh.setFormatter(fh_format)

# add ch and fh to logger
logger.addHandler(ch)
logger.addHandler(fh)

# code
logger.debug("Debug Message")
logger.info("Info Message")
logger.warning("Warning Message")
logger.error("Error Message")
logger.critical("Critical Message")
输出:
>>>>>(Screen:)
2017-08-06 15:58:56,936 - test_log - DEBUG - Debug Message
2017-08-06 15:58:56,936 - test_log - INFO - Info Message
2017-08-06 15:58:56,936 - test_log - WARNING - Warning Message
2017-08-06 15:58:56,936 - test_log - ERROR - Error Message
2017-08-06 15:58:56,936 - test_log - CRITICAL - Critical Message

>>>>>(File)
2017-08-06 15:58:56,936 - test_log - WARNING - Warning Message
2017-08-06 15:58:56,936 - test_log - ERROR - Error Message
2017-08-06 15:58:56,936 - test_log - CRITICAL - Critical Message
自动截断文件:
#根据文件大小
#!/user/bin/env python
# -*-coding: utf-8-*-

import logging
from logging import handlers

logger = logging.getLogger("TEST_LOG")

log_gile = "timelog.log"
fh = handlers.RotatingFileHandler(filename=log_gile,maxBytes=15,backupCount=3)
formatter = logging.Formatter("%(asctime)s  |  %(module)s  |  %(lineno)d  --%(message)s")
fh.setFormatter(formatter)
logger.addHandler(fh)


logger.warning("Test warning !")
logger.warning("Test warning !")
logger.warning("Test warning !")
logger.warning("Test warning !")
logger.warning("Test warning !")
#根据时间设置截断
#!/user/bin/env python
# -*-coding: utf-8-*-

import logging
import time
from logging import handlers

logger = logging.getLogger("TEST_LOG")

log_gile = "timelog.log"
fh = handlers.TimedRotatingFileHandler(filename=log_gile,when="S",interval=5,backupCount=3)
formatter = logging.Formatter("%(asctime)s  |  %(module)s  |  %(lineno)d  --%(message)s")
fh.setFormatter(formatter)
logger.addHandler(fh)


logger.warning("Test warning !")
time.sleep(4)
logger.warning("Test warning !")
logger.warning("Test warning !")
time.sleep(5)
logger.warning("Test warning !")
logger.warning("Test warning !")
re正则表达式模块
‘.‘     默认匹配除\n之外的任意一个字符,若指定flag DOTALL,则匹配任意字符,包括换行

‘^‘     匹配字符开头,若指定flags MULTILINE,这种也可以匹配上(r"^a","\nabc\neee",flags=re.MULTILINE)

‘$‘     匹配字符结尾,或e.search("foo$","bfoo\nsdfsf",flags=re.MULTILINE).group()也可以

‘*‘     匹配*号前的字符0次或多次,re.findall("ab*","cabb3abcbbac")  结果为[‘abb‘, ‘ab‘, ‘a‘]

‘+‘     匹配前一个字符1次或多次,re.findall("ab+","ab+cd+abb+bba") 结果[‘ab‘, ‘abb‘]

‘?‘     匹配前一个字符1次或0次

‘{m}‘   匹配前一个字符m次

‘{n,m}‘ 匹配前一个字符n到m次,re.findall("ab{1,3}","abb abc abbcbbb") 结果‘abb‘, ‘ab‘, ‘abb‘]

‘|‘     匹配|左或|右的字符,re.search("abc|ABC","ABCBabcCD").group() 结果‘ABC‘

‘(...)‘ 分组匹配,re.search("(abc){2}a(123|456)c", "abcabca456c").group() 结果 abcabca456c


‘\A‘    只从字符开头匹配,re.search("\Aabc","alexabc") 是匹配不到的

‘\Z‘    匹配字符结尾,同$

‘\d‘    匹配数字0-9

‘\D‘    匹配非数字

‘\w‘    匹配[A-Za-z0-9]

‘\W‘    匹配非[A-Za-z0-9]

‘s‘     匹配空白字符、\t、\n、\r , re.search("\s+","ab\tc1\n3").group() 结果 ‘\t‘
最常用的匹配语法
|
1
2
3
4
5
|
re.match 从头开始匹配re.search 匹配包含re.findall 把所有匹配到的字符放到以列表中的元素返回re.splitall 以匹配到的字符当做列表分隔符re.sub 匹配字符并替换 |
反斜杠的困扰 与大多数编程语言相同,正则表达式里使用"\"作为转义字符,这就可能造成反斜杠困扰。假如你需要匹配文本中的字符"\",那么使用编程语言表示的正则表达式里将需要4个反斜杠"\\\\":前两个和后两个分别用于在编程语言里转义成反斜杠,转换成两个反斜杠后再在正则表达式里转义成一个反斜杠。Python里的原生字符串很好地解决了这个问题,这个例子中的正则表达式可以使用r"\\"表示。同样,匹配一个数字的"\\d"可以写成r"\d"。有了原生字符串,你再也不用担心是不是漏写了反斜杠,写出来的表达式也更直观。
仅需轻轻知道的几个匹配模式
|
1
2
3
|
re.I(re.IGNORECASE): 忽略大小写(括号内是完整写法,下同)M(MULTILINE): 多行模式,改变‘^‘和‘$‘的行为(参见上图)S(DOTALL): 点任意匹配模式,改变‘.‘的行为 |
标签:工作 format strftime second 随机数 保留 completed war 进程
原文地址:http://www.cnblogs.com/wuzdandz/p/7292090.html
