标签:开发人员 3.2 推荐 dcl netbeans 播放 from www 特性
对于初次接触Linux系统的人来说,ns-3 的安装似乎并不友好。但其实仅仅要按部就班地来做,其安装过程也没有看上去的那么复杂。本文将官方 Wiki 中的安装过程稍作梳理,希望能为刚開始学习的人带来一些方便。
同一时候由于官方 Wiki 中的描写叙述已经足够具体。因此本文中将会出现大段引用而且不打算进行翻译。望请见谅。
本节參考官方 Wiki 中 Installation 页面的 Prerequisites - Ubuntu/Debian 小节,具体说明请跳转至 Wiki 页面进行查询。
执行下面指令,安装正确编译和使用 ns-3 所必须的工具:
minimal requirements for C++ (release): This is the minimal set of packages needed to run ns-3 from a released tarball.
apt-get install gcc g++ pythonminimal requirements for Python (release): This is the minimal set of packages needed to work with Python bindings from a released tarball.
apt-get install gcc g++ python python-devqt4 development tools (Note: qt4, not qt5) needed for NetAnim animator
apt-get install qt4-dev-tools libqt4-dev
以上是安装 ns-3 所必须安装的工具(实际上第三个qt开发包对 ns-3 本身来说并非必须的,可是它是动画演示工具 NetAnim 所必须的,而该工具是 ns-3 很经常使用的工具,所以我觉得属于必装工具)。在官方 Wiki 中 Installation 页面的 Prerequisites - Ubuntu/Debian 小节中还有许多其它的可选工具,能够在以后的实际使用中选择自己所须要的进行安装。
由于作者对于 Linux 下的编程也是新手,因此一个优秀的 IDE 对我来说显得不可缺少,我选择了Eclipse这款工具作为我调试 ns-3 的工具,由于它是一个功能强大且稳定的 IDE 工具,而且 ns-3 的官方 Wiki 中有关于怎样利用 Eclipse 进行调试的说明(相关说明本文后半部分将会具体解说),所以我选择它来进行调试。相同拥有官方说明的 IDE 工具还有 NetBeans 和 QtCreator。
假设打算使用 Eclipse 进行 ns-3 的开发工作,此时能够先安装 Eclipse 以及 cdt 插件(使 Eclipse 支持 C++ 开发),而且打开 Eclipse 并新建一个工作空间(workspace)。
之后下载的 ns-3 project应当直接放到该工作空间文件夹中以便 Eclipse 识别。
该工具是 ns-3 新版本号中提供的一个集安装、编译与查询缺少工具于一身的工具,但我所使用的一直是手动安装方式(将在下一小节中介绍),从来没有尝试过这样的安装方式。所以。在此直接照搬官方 Wiki 中的相关介绍,详情请參考官方 Wiki 中 Installation 页面的 Installation - Installation with Bake 小节。
Bake is a new tool for installing, building and finding out the missing requirements for ns-3 in your own environment.
To use Bake you need to have at least Python (preferably 2.6 and above) and mercurial in your machine (see the section Prerequisites above to see how to install these).
First you need to download Bake using Mercurial, go to where you want Bake to be installed and call
hg clone http://code.nsnam.org/bakeIt is advisable to add bake to your path.
export BAKE_HOME=`pwd`/bake
export PATH=$PATH:$BAKE_HOME
export PYTHONPATH=$PYTHONPATH:$BAKE_HOME
After that you can use Bake to find the missing packages, download build and install ns-3 and its modules.
To find out what is missing in your system and may be needed for installing ns-3 you can call bake check:
bake.py checkYou should have seen something like:
> Python - OK
> GNU C++ compiler - OK
> Mercurial - OK
> CVS - OK
> GIT - OK
> Bazaar - OK
> Tar tool - OK
> Unzip tool - OK
> Unrar tool - OK
> 7z data compression utility - OK
> XZ data compression utility - OK
> Make - OK
> cMake - OK
> patch tool - OK
> autoreconf tool - OK
> Path searched for tools: /usr/lib64/qt-3.3/bin
/usr/lib64/ccache /usr/local/bin /usr/bin/bin/usr/local/sbin /usr/sbin
/sbin /user/dcamara/home/scripts/user/dcamara/home/INRIA/Programs/bin
/user/dcamara/home/INRIA/repos/llvm/build/Debug+Asserts/binBefore downloading and building ns-3 you need to configure bake to inform it which are the modules you want added to ns-3, the standard distribution for example.
bake.py configure -e ns-3.17Then to see the modules it has added, and the specific system requirements for this configuration, you can call bake show:
bake.py showTo download the modules, build and install you can call bake deploy
bake.py deployThis will download the selected modules, all their dependencies and build ns-3 with all these independent modules. You can also perform this installation step by step, i.e. by calling download and build in different steps.
bake.py download
bake.py build
在官方 Wiki Installation 页面中介绍了三种手动安装的选项——使用 Mercurial(一种版本号管理工具)进行安装、使用源代码安装开发人员版本号(拥有最新特性但不够稳定)、使用源代码安装公布版(即Release版,最新的稳定版本号)。官方推荐使用第一种方式。可是作者并没有使用Mercurial,而且手动安装方式相对来说更加简单,所以作者选择了第三种方式进行安装。因此。本节将介绍第三种安装方式。其它两种安装方式请移步官方 Wiki Installation 页面的 Installation-Manual installation 小节查看详情。
cd
mkdir tarballs
cd tarballs
wget http://www.nsnam.org/release/ns-allinone-3.13.tar.bz2
tar xjf ns-allinone-3.13.tar.bz2
在终端中进入 ns-3 project文件夹(build.py所在的那一级文件夹,一般其文件夹名形如“ns-allinone-3.25”)并执行编译脚本:
./build.py
耐心等待一段时间(依电脑配置不同编译时长不同,我的编译时间约有40分钟),编译成功后将会看到例如以下提示:
Build finished successfully (00:02:37)
Leaving directory `./ns-3.25’
./waf configure --enable-examples --enable-tests待配置成功后下一次编译时就会将样例程序和測试程序也进行编译并能够执行了。此时使用Waf进行编译(作者也不太清楚 build.py 编译和 Waf 编译的关系):
./waf待编译完毕后就可以使用 ns-3 进行仿真或开发了
至此,ns-3 已经在你的电脑里成功安装了。
如今进入 ns-3 project文件夹(Waf所在文件夹),执行一下指令能够执行你的第一个 ns-3 程序了(该程序路径为 /ns-allinone-3.25/ns-3.25/scratch/scratch-simulator.cc):
./waf --run scratch-simulator输出为:
Scratch Simulator
同一时候也在此验证了你的 ns-3 成功安装。
本章主要依据官方 Wiki 中的《HOWTO configure Eclipse with ns-3》一文。来介绍怎样配置 Eclipse 的各项參数,使得能够方便地通过 Eclipse 来完毕 ns-3 项目的开发工作。与之前一样,具体介绍请移步官方 Wiki 中 HOWTO configure Eclipse with ns-3 一文。
${workspace_loc:/ns-allinone-3.25/ns-3.25}/waf
当中斜体部分应该换成相应的你的 ns-3 project的文件夹名称。
${workspace_loc:/ns-allinone-3.25/ns-3.25}
当中斜体部分应该换成相应的你的 ns-3 project的文件夹名称。
而且你能够选择通过点击工作文件夹(Workspace…)button来浏览并选择编译文件夹。

- 选择行为(Behaviour)选项卡
- 将编译(Build (incremental build))后的“all”指令改为“build”
- 点击应用(Apply)或确认(OK)button保存设置并退出
该文件即为点击调试(Debug)button时所要调试的文件,因此每次须要调试不同文件的时候须要在此修改
点击project(Project)下的浏览(Browse…)button,选择你的 ns-3 project
选择环境(Environment)选项卡
${workspace_loc:ns-allinone-3.25/ns-3.25}/build
当中斜体部分应该换成相应的你的 ns-3 project的文件夹名称。

此时在文本框中应显演示样例如以下:
${workspace_loc:/ns-allinone-3.25/ns-3.25/waf}
当中斜体部分应该换成相应的你的 ns-3 project的文件夹名称。
此时在文本框中应显演示样例如以下:
${workspace_loc:/ns-allinone-3.25/ns-3.25}
当中斜体部分应该换成相应的你的 ns-3 project的文件夹名称。
- 在參数(Arguments)下的文本框中输入执行參数
–run “${string_prompt}”
这样在通过外部执行工具执行 ns-3 脚本时,能够通过在弹出的文本框中输入须要执行的 ns-3 脚本文件名来执行该脚本(名称不包含后缀)。
至此。Eclipse 中的配置工作所有完毕。能够尝试一下编译、调试和执行功能能否够正确执行。另外还能够至官方 Wiki 中 HOWTO configure Eclipse with ns-3 一文中查看许多其它配置信息。
到此为止。ns-3 的安装与配置部分全然结束,你已经能够使用 ns-3 来进行仿真或者开发了。对于 ns-3 的开发,官方站点和官方文档是很重要的參考资料。尤其是官方在线 API 文档、官方 Wiki 页面以及三本重要官方參考资料——Tutorial、Manual、Models,这三本资料均可通过官网下载。
很感谢您的阅读,希望我写的这些文字能够给予你你想要的帮助。
更新于2016/04/28
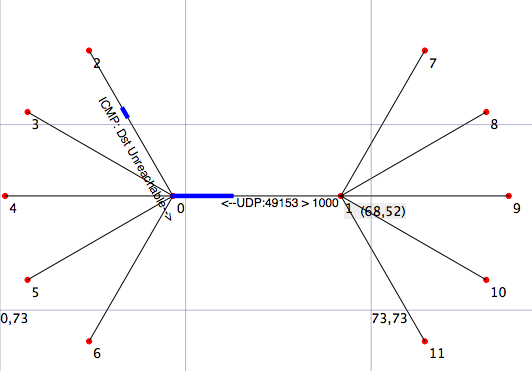
本章主要依据官方 Wiki 中的《NetAnim 3.107》一文。来介绍怎样下载、编译与简单使用NetAnim这款动画演示工具。NetAnim能够通过读取 ns-3 仿真过程中记录并生成的记录文件里的内容。来把仿真过程用动画的形式展示出来。下面是一张 NetAnim 的使用截图(来自 ns-3 官方 Wiki):

其它更具体的安装与用法请參考 ns-3 官方 Wiki 的《NetAnim 3.107》。
执行下面指令能够安装执行 NetAnim 所必须的工具(其实这两个工具我们之前应该已经安装过了):
apt-get install mercurial
apt-get install qt4-dev-tools
若安装了 Mercurial 工具。能够通过下面指令直接下载到所在文件夹。若没有安装,则可点击下面指令中的链接,通过浏览器下载(若之前是从官网下载了 ns-allinone-3.xx 源代码包的话,里面已经自带了 NetAnim 源代码,路径为 ns-allinone-3.xx/netanim-3.xxx):
hg clone http://code.nsnam.org/netanim
进入 NetAnim 源代码文件夹,执行下面指令来编译之:
make clean
qmake NetAnim.pro  (For MAC Users: qmake -spec macx-g++ NetAnim.pro)
make
编译完毕后在 NetAnim 文件夹中会生成名为“NetAnim”的可执行文件,双击它就可以执行。
NetAnim 的使用很之简单。总共分3步:
include "ns3/netanim-module.h"AnimationInterface anim ("AnimFileName.xml");最后点击“播放”button就可以看到动画演示效果了
标签:开发人员 3.2 推荐 dcl netbeans 播放 from www 特性
原文地址:http://www.cnblogs.com/lxjshuju/p/7352334.html