标签:rate 服务 window samba 允许 关闭 lin 协议 新建
1、在WINDOWS服务器中创建NFS SERVER
首先,打开服务管理器,选择添加角色;

选中文件服务,下一步;

出现一个提示,不管它,继续下一步;

在接下来的页面中选中“网络文件系统服务”(NFS),下一步;

点击安装;

系统开始安装,大约需要几分钟;

安装完成,点击关闭;

这样,在Windows Server 2008
R2建立了NFS服务,然后选择一个分区,新建一个文件夹,比如NFS;

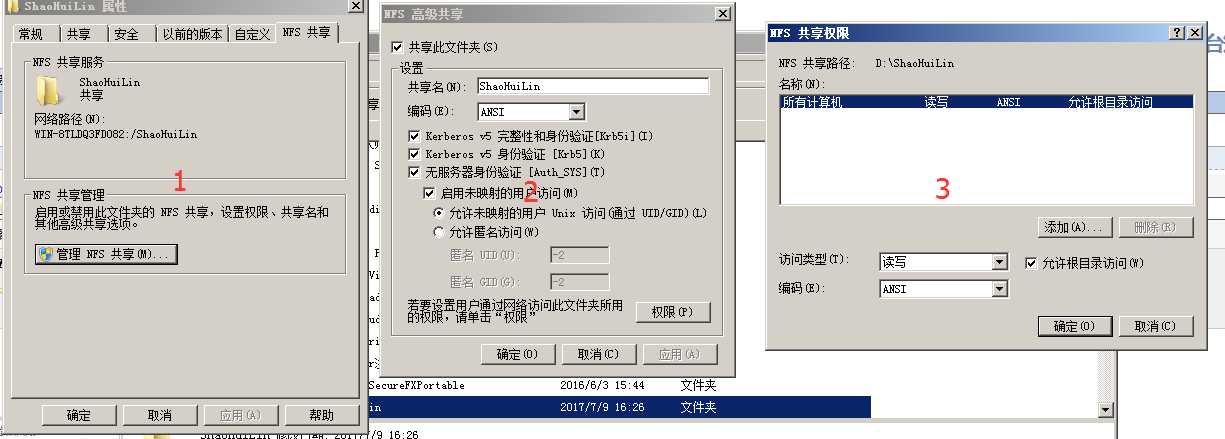
在文件夹上右键,属性,可以看到属性列表多了一个NFS共享;

点击管理NFS共享,选择共享此文件夹,下面的验证默认就好;

点击“权限”,这里默认显示所有计算机都有只读权限,不允许根目录访问,不必管它,选择“添加”;
二、以下为Centos x64 的内容
#创建一个测试目录
mkdir /mnt/nfs -p
#安装软件包
yum -y install nfs-utils rpcbind
#查看一个Windows Server NFS的正确性
showmount -e 192.168.1.210
Export list for 192.168.1.210:
/ShaoHuiLin (everyone)
#手动挂载
mount -t nfs -o nolock 192.168.1.210:/ShaoHuiLin /mnt/nfs
#重启后自动挂载
echo "192.168.1.210:/ShaoHuiLin /mnt/nfs nfs defaults 0 0">> /etc/fstab
写在最后:
1、WINDOWS NFS服务创建启动后,发现修自动在防火墙中添加了端口开放,无需关闭防火墙,即可实现Linux服务器中NFS的挂载。
因为不是什么 Samba协议的445端口,所以不用怕什么病毒了。
3、这个玩意是可以面向所有服务器开放的,其实也没什么安全问题,不像Samba还要使用用户名与密码去连接。
哈哈,比SSH协议的那个SFTP的靠谱!!!
在WINDOWS2008 Server 中创建NFS服务器,使用LINUX的MOUNT命令去加载网络盘
标签:rate 服务 window samba 允许 关闭 lin 协议 新建
原文地址:http://www.cnblogs.com/littlehb/p/7392086.html