标签:tap demo 浏览器 pen 代码 group uil conf exce
1,父项目,在pom中加入
<dependencyManagement>
<dependencies>
<dependency>
<groupId>org.springframework.boot</groupId>
<artifactId>spring-boot-dependencies</artifactId>
<version>1.5.6.RELEASE</version>
<type>pom</type>
<scope>import</scope>
</dependency>
</dependencies>
</dependencyManagement>
<build>
<plugins>
<plugin>
<groupId>org.apache.maven.plugins</groupId>
<artifactId>maven-compiler-plugin</artifactId>
</plugin>
</plugins>
</build>
2,创建子maven项目,
<dependencies>
<dependency>
<groupId>org.springframework.boot</groupId>
<artifactId>spring-boot-starter-web</artifactId>
</dependency>
</dependencies>
<!-- Package as an executable jar -->
<build>
<plugins>
<plugin>
<groupId>org.apache.maven.plugins</groupId>
<artifactId>maven-compiler-plugin</artifactId>
</plugin>
<plugin>
<groupId>org.springframework.boot</groupId>
<artifactId>spring-boot-maven-plugin</artifactId>
<version>1.3.5.RELEASE</version>
</plugin>
</plugins>
</build>
3,如果报错 Failed to execute goal org.springframework.boot:spring-boot-maven-plugin:1.3.5.RELEASE:run (default-cli) on project springboot-base: An exception occurred while running. null: InvocationTargetException: Connector configured to listen on port 8080 failed to start -> [Help 1]
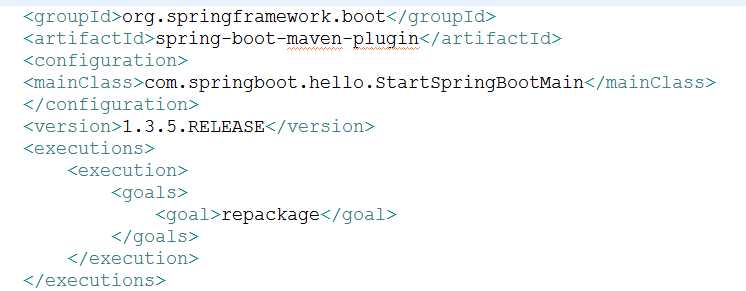
请在子maven项目的pom里加上红色标记的plugin
4,启动后再浏览器输入http://localhost:8080/
5,使用springboot做单元测试

6,springboot 使用的注解:@SpringBootApplication等价于@EnableAutoConfiguration+@ComponentScan+其他配置
EnableAutoConfiguration:springboot启动自动配置处理,ComponentScan扫描子包或其他包,
在springboot中,可以把controller单独抽离到子包中,springboot自动谁扫描到,并执行.
注:刚开始时测试都没问题,后台加了几个测试方法后,页面就一直报错找不到路径了,待研究.找到原因后更新
7,路径映射:@RestController:该注解做自由映射路径标签,可以有不同的风格,可以重写URL,使用该注解时,可以不使用@ResponseBody
8,程序员都会喜欢的俩个依赖:
<dependency>
<groupId>org.springframework</groupId>
<artifactId>springloaded</artifactId>
</dependency>
<dependency>
<groupId>org.springframework.boot</groupId>
<artifactId>spring-boot-devtools</artifactId>
</dependency>
这俩个依赖成对使用,主要是在改动某些代码时,可以不用再重新手动去重新启动.
注:只是方法和返回的改动时,springboot自动加载,方法参数和注解改动无效.
9,测试几个方法都没问题后,可以打包发布了
发布插件:

打包后可以在cmd中使用Java -jar xxxx.jar,自动执行,无需启动容器,访问URL,页面显示成功,Linux下也是一样,不需要容器,只需要一个jar包.
标签:tap demo 浏览器 pen 代码 group uil conf exce
原文地址:http://www.cnblogs.com/blogjava-blogs/p/7468569.html