标签:get 京东 multiple buffer multi tin blog ini文件 有一个
Django的部署可以有很多方式,采用nginx+uwsgi的方式是其中比较常见的一种方式。
在这种方式中,我们的通常做法是,将nginx作为服务器最前端,它将接收WEB的所有请求,统一管理请求。nginx把所有静态请求自己来处理(这是NGINX的强项)。然后,NGINX将所有非静态请求通过uwsgi传递给Django,由Django来进行处理,从而完成一次WEB请求。
可见,uwsgi的作用就类似一个桥接器。起到桥梁的作用。
Linux的强项是用来做服务器,所以,下面的整个部署过程我们选择在Ubuntu下完成。
Nginx (engine x) 是一个高性能的HTTP和反向代理服务器,也是一个IMAP/POP3/SMTP服务器。
Nginx是一款轻量级的Web 服务器/反向代理服务器及电子邮件(IMAP/POP3)代理服务器,并在一个BSD-like 协议下发行。其特点是占有内存少,并发能力强,事实上nginx的并发能力确实在同类型的网页服务器中表现较好,中国大陆使用nginx网站用户有:百度、京东、新浪、网易、腾讯、淘宝等。
打开ubuntu控制台(ctrl+alt+t)利用Ubuntu的仓库安装。
linux@ubuntu:~$ sudo apt-get install nginx #安
启动Nginx:
linux@ubuntu:~$ /etc/init.d/nginx start  #启动
linux@ubuntu:~$ /etc/init.d/nginx stop  #关闭
linux@ubuntu:~$ /etc/init.d/nginx restart  #重启
修改Nginx默认端口号,打开/etc/nginx/nginx.conf 文件,修改端口号。
server {
    listen         8000;
    server_name    127.0.0.1
    access_log      /var/log/nginx/myblog_access.log;
    error_log       /var/log/nginx/myblog_error.log;
    charset     utf-8;

    client_max_body_size 75M;
    root /home/linux/Desktop/MyBlog;
    location / {
        include uwsgi_params;
        uwsgi_pass 127.0.0.1:9001;
        uwsgi_read_timeout 2;
    }
    location /static/ {
        expires 30d;
        autoindex on;
        add_header Cache-Control private;
        alias /home/linux/Desktop/MyBlog/static/;
     }
 }
通过上面命令重启nginx。
linux@ubuntu:~$ sudo pip install uwsgi
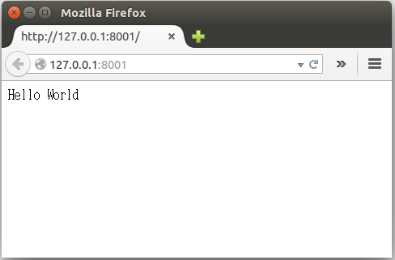
测试uwsgi 写一个test.py文件
def application(env, start_response):
    start_response(‘200 OK‘, [(‘Content-Type‘,‘text/html‘)])
    return “HelloWorld”
linux@ubuntu:~$ uwsgi --http :8001 --wsgi-file test.py
运行上面命令,

在我们通过Django创建myweb项目时,在子目录myweb下已经帮我们生成的 wsgi.py文件。所以,我们只需要再创建myblog_uwsgi.ini配置文件即可,当然,uwsgi支持多种类型的配置文件,如xml,ini等。此处,使用ini类型的配置。
[uwsgi]
# Django-related settings
#socket  指定项目执行的端口号。
socket = 127.0.0.1:9001
# 项目绝对路径
chdir           = /home/linux/Desktop/MyBlog
# Django的wsgi文件相对路径
wsgi-file       = MyBlog/wsgi.py
# process-related settings
# master
master          = True
# 最大进程数
processes       = 4
# 线程数
threads         = 2
#设置此参数,有一个主进程
master=True
#守护进程的方式运行,log日志存在此log文件里
deamonize=/var/log/uwsgi/djangoProject.log
#主进程id写入文件里
pidfile= /var/log/nginx/uwsgi.pid
# ... with appropriate permissions - may be needed
# chmod-socket    = 664
#退出时,清理环境
vacuum          = True
reload-mercy    = 10
max-requests    = 5000
limit-as        = 512
buffer-size     = 30000
接下来,切换到myweb项目目录下,通过uwsgi命令读取myblog_uwsgi.ini文件启动项目。
..........................
Python main interpreter initialized at 0x8b52dc0
your server socket listen backlog is limited to 100 connections
your mercy for graceful operations on workers is 60 seconds
mapped 319920 bytes (312 KB) for 4 cores
*** Operational MODE: preforking ***
WSGI app 0 (mountpoint=‘‘) ready in 1 seconds on interpreter 0x8b52dc0 pid: 7158 (default app)
*** uWSGI is running in multiple interpreter mode ***
spawned uWSGI master process (pid: 7158)
spawned uWSGI worker 1 (pid: 7160, cores: 1)
spawned uWSGI worker 2 (pid: 7161, cores: 1)
spawned uWSGI worker 3 (pid: 7162, cores: 1)
spawned uWSGI worker 4 (pid: 7163, cores: 1)
注意查看uwsgi的启动信息,如果有错,就要检查配置文件的参数是否设置有误。
listen 指定的是nginx代理uwsgi对外的端口号。
include uwsgi_params;
uwsgi_pass 127.0.0.1:9001;
include 必须指定为uwsgi_params;而uwsgi_pass指的本机IP的端口与myweb_uwsgi.ini配置文件中的必须一致。
然后访问主机ip 加上设置的端口8000 127.0.0.1:8000 就可以了
标签:get 京东 multiple buffer multi tin blog ini文件 有一个
原文地址:http://www.cnblogs.com/zyj-python/p/7545669.html