标签:服务 版本 creat ## create 服务器 move system logs
最近刚接触linux操作系统,买了个阿里云服务器,centos7系统,装mysql数据库网上查看了别人的博客,方法都不太一样,自己也试了几个,结果都没有成功。
后来搜索发现阿里云安装mysql跟有专门的方法,我把云服务器磁盘初始化之后,重新安装,然后试了真的安装成功了,希望这篇博文能帮助以后在阿里云上安装mysql的朋友,不用再走我走过的弯路。以下是我测试安装成功的步骤,命令也可以直接复制粘贴。我看到链接地址:https://jingyan.baidu.com/article/454316ab67bd02f7a7c03af4.html
1、
#######安装rpm包
[root@typecodes ~]# rpm -Uvh http://dev.mysql.com/get/mysql-community-release-el7-5.noarch.rpm
2、
这时查看当前可用的mysql安装资源:
[root@typecodes ~]# yum repolist enabled | grep "mysql.*-community.*"
从上面的列表可以看出,mysql56-community/x86_64和MySQL 5.6 Community Server可以使用。
因此,我们就可以直接用yum方式安装了MySQL5.6版本了。
[root@typecodes ~]# yum -y install mysql-community-server
3、
#######安装成功后,将其加入开机启动
[root@typecodes ~]# systemctl enable mysqld
4、
#######启动mysql服务进程
[root@typecodes ~]# systemctl start mysqld
5、
#######配置mysql(设置密码等)
[root@typecodes ~]# mysql_secure_installation
6、
[设置root用户密码]
Remove anonymous users? [Y/n] y [删除匿名用户]
Disallow root login remotely? [Y/n] y [禁止root远程登录]
Remove test database and access to it? [Y/n] y [删除test数据库]
Reload privilege tables now? [Y/n] y [刷新权限]
7、
#################设置mysql
登陆:
[root@typecodes ~]# mysql -u root -p
创建用户:
[root@typecodes ~]# insert into mysql.user(Host,User,Password,ssl_cipher,x509_issuer,x509_subject)values(‘localhost‘,‘baochengwx‘,password(‘baochengwx‘),‘‘,‘‘,‘‘);
刷新权限:
[root@typecodes ~]# FLUSH PRIVILEGES;
创建数据库:
[root@typecodes ~]# create database companys;
分配数据库给用户
[root@typecodes ~]# grant all privileges on companys.* to companys identified by ‘companys‘;
修改密码
UPDATE user SET Password=PASSWORD(‘newpassword‘) where USER=‘root‘;
远程登陆
user表中 Host列 ‘localhost‘ 改成 ‘%‘ (也可以是固定ip、本地登陆localhost、%指不限登陆地址)
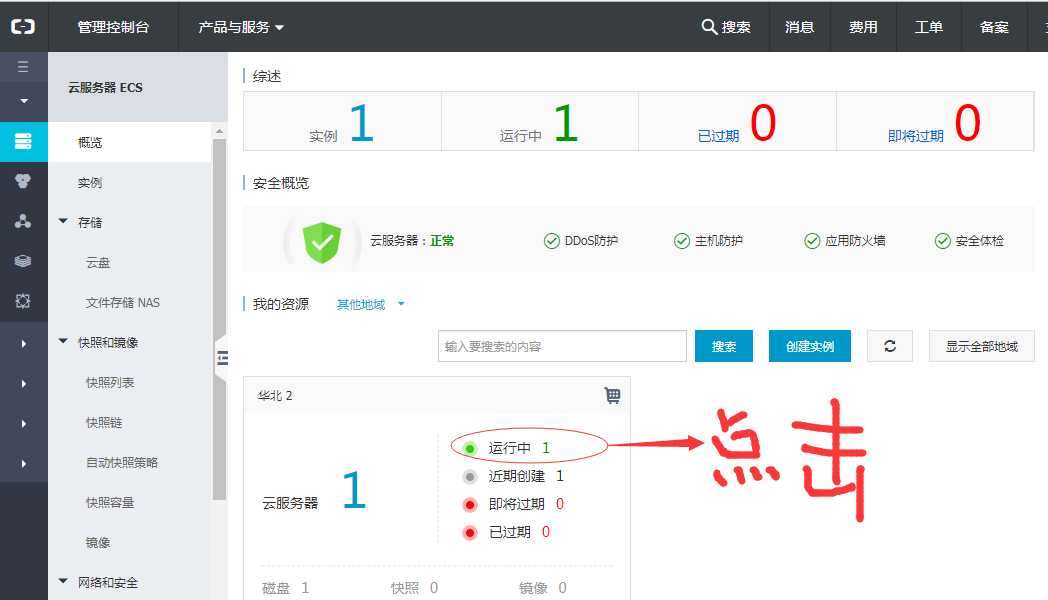
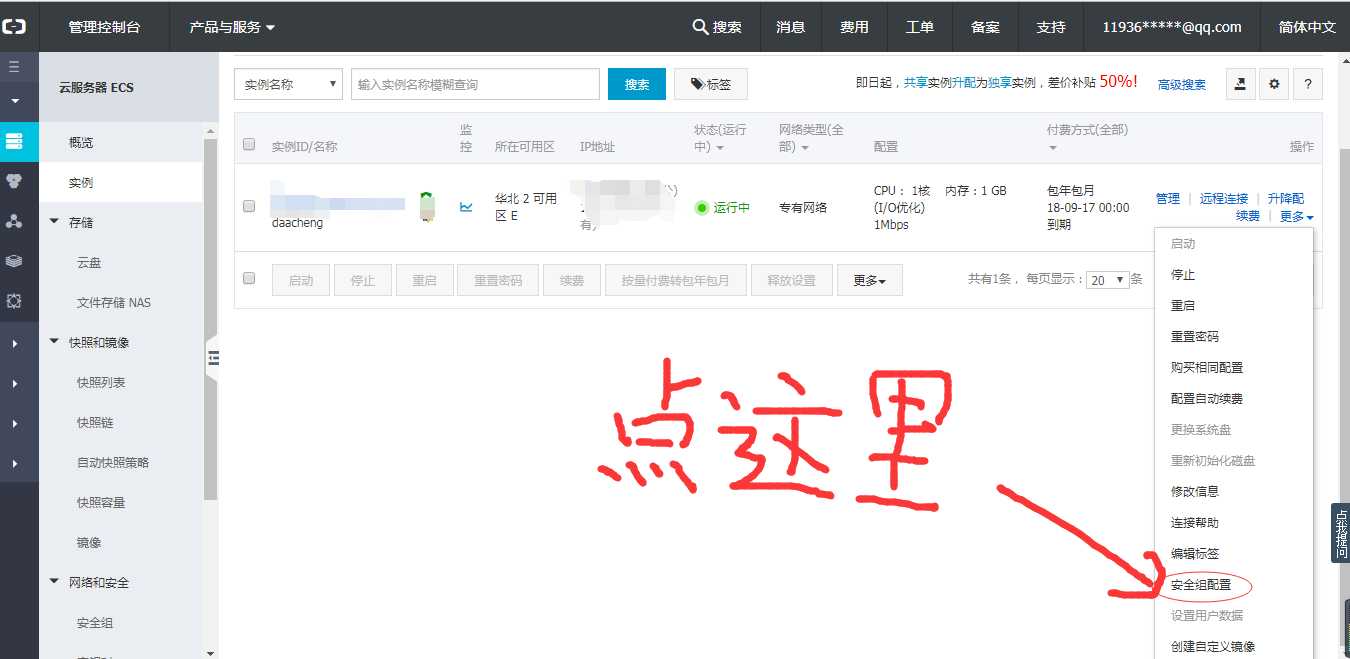
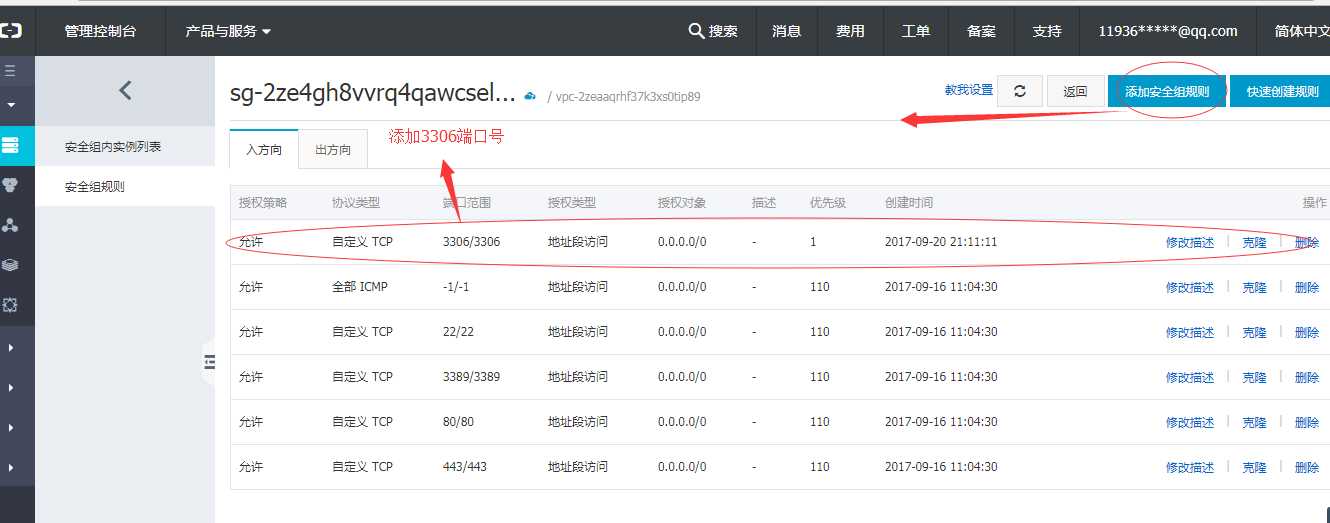
最后远程连接linux云服务器失败的话还要在阿里云上云服务器管理控制台上,步骤如下:


轻松,阿里云云服务器上安装mysql5.6,解决远程连接失败问题
标签:服务 版本 creat ## create 服务器 move system logs
原文地址:http://www.cnblogs.com/daacheng/p/7565322.html