标签:span instead tle rom margin format 文本 sys 图片
通常我们在使用虚拟机的时候需要挂载光盘,因为光盘中有许多我们使用的软件包等。那么我们今天就自己制作一个光盘。
1、首先新建一个目录,方便我们把所需要的文件统一的放在一块。
mkdir /app/iso
2、然后在其他光盘中拷贝一些启动光盘需要的文件,文件在光盘的isolinux这个目录下,里面包括boot.cat ,grub.conf, isolinux.bin ,memtest,TRANS.TBL,vmlinuz,boot.msg, initrd.img , isolinux.cfg , splash.jpg vesamenu.c32等文件
solinux.bin:光盘引导程序,在mkisofs的选项中需要明确给出文件路径,这个文件属于SYSLINUX项目。
isolinux.cfg: isolinux.bin的配置文件,当光盘启动后(即运行isolinux.bin),会自动去找isolinux.cfg文件。
vesamenu.c32:是光盘启动后的安装图形界面,也属于SYSLINUX项目, menu.c32版本是纯文本的菜单。
Memtest:内存检测,这是一个独立的程序
splash.jgp:光盘启动界面的背景图
vmlinuz是内核映像
initrd.img是ramfs (先cpio,再gzip压缩)
拷贝命令:
cp –r /misc/cd/isolinux/ /app/iso
3、写应答文件ks.cfg,也可以利用命令创建。
命令创建:先安装一个图形化工具:system-config-kickstart
安装:yum install system-config-kickstart
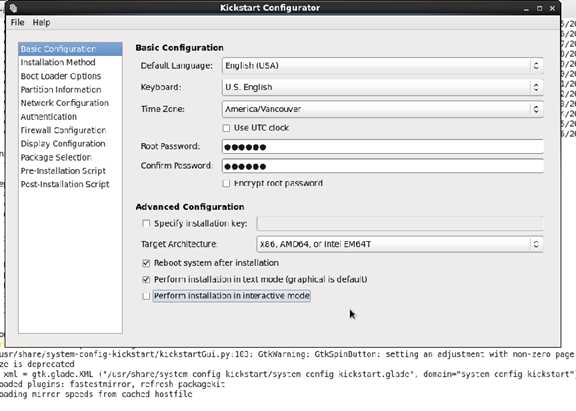
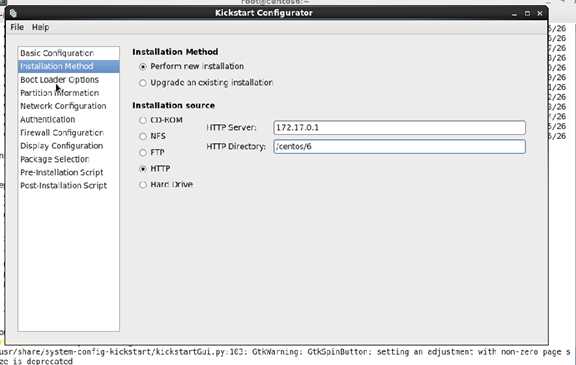
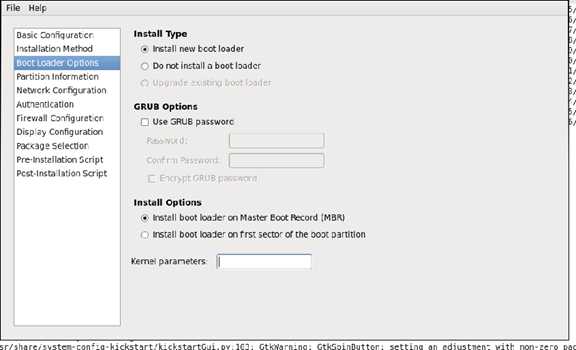
安装之后把图中最左边的选项都打开补齐里面内容即可。
例如第一个选项:Basic Configuration
第二个:
第三个:
第四个:
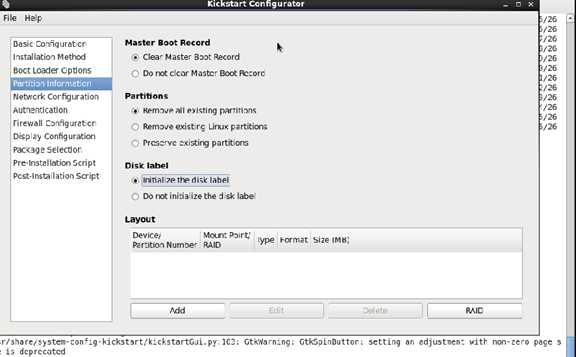
除了这些,还要分区,点击Add选项,先创建一个/boot分区,选择对应的系统类型即可。后面依次还要创建/分区和swap分区。之后点击Ok即可。
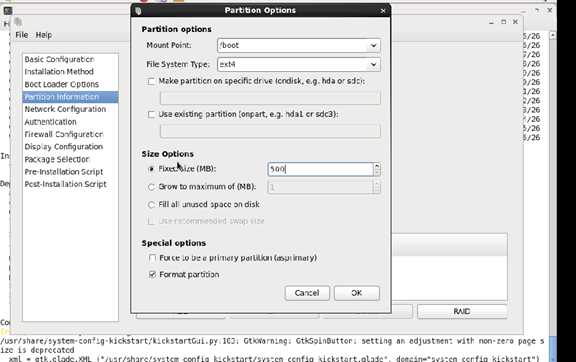
第五个:
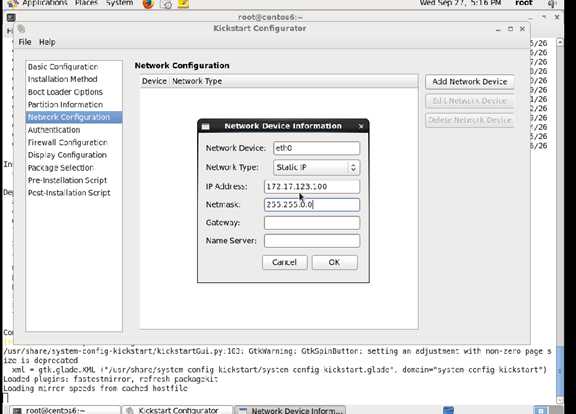
第六个:没什么需要填的
第七个:
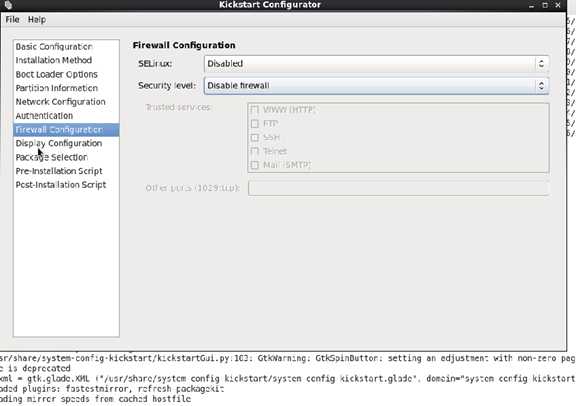
第八个:
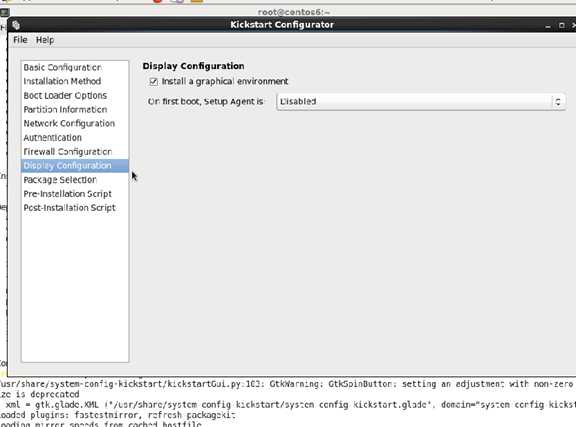
第九个:没什么需要填的
第十个:没什么需要填的
第十一个:创建后需要写的脚本,你可以在这里提前写好,也可以不写。
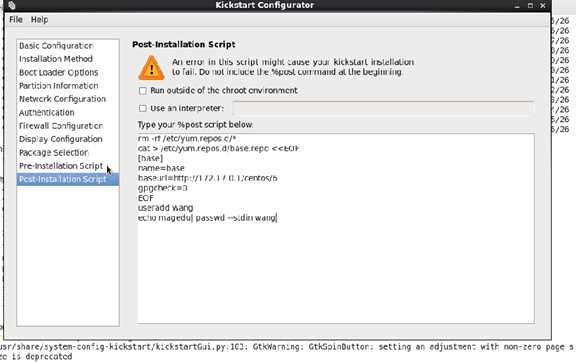
之后点击file>save>quit即可完成ks.cfg文件的创建。
不想用命令的话就可以自己手写一份,内容如下:
cd /app/iso
vim ks.cfg
#platform=x86, AMD64, or Intel EM64T
#version=DEVEL
# Firewall configuration
firewall --disabled
# Install OS instead of upgrade
install
# Use network installation
url --url="http://172.17.0.1/centos/6/"
# Root password
rootpw --plaintext magedu
# System authorization information
auth --useshadow --passalgo=sha512
# Use text mode install
text
firstboot --disable
# System keyboard
keyboard us
# System language
lang en_US
# SELinux configuration
selinux --disabled
# Installation logging level
logging --level=info
# Reboot after installation
reboot
# System timezone
timezone Asia/Shanghai
# Network information
network --bootproto=static --device=eth0 --ip=172.17.111.200 --netmask=255.255.0.0 --onboot=on
# System bootloader configuration
bootloader --location=mbr
# Clear the Master Boot Record
zerombr
# Partition clearing information
clearpart --all --initlabel
# Disk partitioning information
part /boot --fstype="ext4" --size=1000
part / --fstype="ext4" --size=20000
part swap --fstype="swap" --size=1024
%packages
@base
@chinese-support
@core
@debugging
@basic-desktop
@desktop-debugging
@desktop-platform
@directory-client
@fonts
%end
%post
rm -rf /etc/yum.repos.d/*
cat > /etc/yum.repos.d/base.repo <<EOF
[base]
name=base
baseurl=http://172.17.0.1/centos/6
gpgcheck=0
EOF
4、定制专属菜单
vim isolinux.cfg
default vesamenu.c32
#prompt 1
timeout 600
display boot.msg
menu background splash.jpg #定制背景图片,颜色大小尺寸
menu title Welcome to CentOS Autoinstall!
menu color border 0 #ffffffff #00000000
menu color sel 7 #ffffffff #ff000000
menu color title 0 #ffffffff #00000000
menu color tabmsg 0 #ffffffff #00000000
menu color unsel 0 #ffffffff #00000000
menu color hotsel 0 #ff000000 #ffffffff
menu color hotkey 7 #ffffffff #ff000000
menu color scrollbar 0 #ffffffff #00000000
label desktop #菜单选项,总共四项
menu label Auto Install a ^desktop system
kernel vmlinuz
append initrd=initrd.img ks=cdrom:/ks-desktop.cfg
label mini
menu label ^Auto Install a mini system
kernel vmlinuz
append initrd=initrd.img ks=cdrom:/ks-mini.cfg
label manual
menu label ^Manual install a system
kernel vmlinuz
append initrd=initrd.img
label local
menu default
menu label Boot from ^local drive
localboot 0xffff
注意:这里有最小化安装,桌面安装,都需要ks.cfg文件,但是两个文件不能一样,所以中间有些细微差别,可以在安装包的内容上有些改动。这里可以把ks.cfg复制两份,一份名为ks-desktop.cfg,一份名为ks-mini.cfg,然后在安装包的内容上改动一下就可以。
5、最后就可以刻光盘了,光盘后缀一般为.iso文件。

6、然后把光盘放到桌面上,方便以后使用
sz 放到桌面,
7、用的时候加载即可,完成
标签:span instead tle rom margin format 文本 sys 图片
原文地址:http://www.cnblogs.com/lilinlin/p/7614341.html