标签:2.4 md5 data- includes 文字 环境 tom 源地址 数据
Listen  80
Listen  8080
1 KeepAlive  On|Off    #注意,只有在keepAlive的状态为on时,下面的两项才是启用的;
2 KeepAliveTimeout  15
3 MaxKeepAliveRequests  100
测试:使用telnet工具
 1 yum install -y telnet    #安装telnet
 2 (keepalive off)
 3 [root@httpd ~]# telnet 192.168.1.16 80
 4 Trying 192.168.1.16...
 5 Connected to 192.168.1.16.
 6 Escape character is ‘^]‘.
 7 GET /test.html HTTP/1.1               #表示使用HTTP1.1的协议
 8 Host: 192.168.1.16                    #请求的主机是192.168.1.16;//此处回车两次出现结果
 9
10 HTTP/1.1 200 OK
11 Date: Thu, 27 Apr 2017 02:33:40 GMT
12 Server: Apache/2.2.15 (CentOS)
13 Last-Modified: Thu, 27 Apr 2017 02:18:59 GMT
14 ETag: "8023f-1e-54e1c94668f44"
15 Accept-Ranges: bytes
16 Content-Length: 30
17 Connection: close
18 Content-Type: text/html; charset=UTF-8
19
20 <h1>this www.linuxedu.top<h1>
21 Connection closed by foreign host.    #此处是断开的
22 (keepalive on)
23 [root@httpd ~]# telnet 192.168.1.16 80
24 Trying 192.168.1.16...
25 Connected to 192.168.1.16.
26 Escape character is ‘^]‘.
27 GET /test.html HTTP/1.1
28 Host: 192.168.1.16                    #此处回车两次出现结果
29
30 HTTP/1.1 200 OK
31 Date: Thu, 27 Apr 2017 02:34:56 GMT
32 Server: Apache/2.2.15 (CentOS)
33 Last-Modified: Thu, 27 Apr 2017 02:18:59 GMT
34 ETag: "8023f-1e-54e1c94668f44"
35 Accept-Ranges: bytes
36 Content-Length: 30
37 Content-Type: text/html; charset=UTF-8
38
39 <h1>this www.linuxedu.top<h1>
40                                      #此处是回车,并没有断开,但是受到MaxKeepAliveRequests以及KeepAliveTimeout的限制最终也会断开
1 [root@httpd ~]# ps  aux  | grep httpd
2 root       1658  0.0  0.2 177816  3872 ?        Ss   10:34   0:00 /usr/sbin/httpd
3 apache     1660  0.0  0.1 177816  2496 ?        S    10:34   0:00 /usr/sbin/httpd
4 apache     1661  0.0  0.1 177816  2496 ?        S    10:34   0:00 /usr/sbin/httpd
5 apache     1662  0.0  0.1 177816  2496 ?        S    10:34   0:00 /usr/sbin/httpd
默认使用的为/usr/sbin/httpd,其为prefork的MPM模块 ;
1 [root@httpd ~]# /usr/sbin/httpd -l
2 Compiled in modules:
3   core.c
4   prefork.c
5   http_core.c
6   mod_so.c
 1 [root@httpd ~]# httpd -M
 2 httpd: Could not reliably determine the server‘s fully qualified domain name, using 0.0.0.0 for ServerName
 3 Loaded Modules:
 4  core_module (static)
 5  mpm_prefork_module (static)
 6  http_module (static)
 7  so_module (static)
 8  auth_basic_module (shared)
 9  auth_digest_module (shared)
10 ...
 1 [root@httpd ~]# service httpd stop
 2 停止 httpd:                                               [确定]
 3 [root@httpd ~]# vim /etc/sysconfig/httpd
 4 [root@httpd ~]# cat /etc/sysconfig/httpd | grep ‘^HTTPD‘
 5 HTTPD=/usr/sbin/httpd.worker
 6 [root@httpd ~]# service httpd start
 7 正在启动 httpd:httpd.worker: apr_sockaddr_info_get() failed for httpd
 8 httpd.worker: Could not reliably determine the server‘s fully qualified domain name, using 127.0.0.1 for ServerName
 9                                                            [确定]
10 [root@httpd ~]# ps  aux  | grep httpd
11 root       1746  0.0  0.2 178024  4132 ?        Ss   10:56   0:00 /usr/sbin/httpd.worker
12 apache     1860  0.0  0.2 522284  5372 ?        Sl   10:56   0:00 /usr/sbin/httpd.worker
13 root       1889  0.0  0.0 103256   840 pts/0    S+   10:56   0:00 grep --color httpd
思考:为什么编辑/etc/sysconfig/httpd就会生效呢?先来了解一下什么是脚本的配置文件
1 [root@httpd ~]# cat useradd.sh
2
3 #!/bin/bash
4 #
5 [ -f /tmp/useradd.conf ] && source /tmp/useradd.conf
6 username=${username:-testuser}
7 echo $username
8 [root@httpd ~]# cat /tmp/useradd.conf
9 username=myuser
1 <IfModule prefork.c>    #条件式参数,表示如果模块是
2 StartServers       8
3 MinSpareServers    5
4 MaxSpareServers   20
5 ServerLimit      256
6 MaxClients       256
7 MaxRequestsPerChild  4000
8 </IfModule>
1 <IfModule worker.c>
2 StartServers         4
3 MaxClients         300
4 MinSpareThreads     25
5 MaxSpareThreads     75
6 ThreadsPerChild     25
7 MaxRequestsPerChild  0
8 </IfModule>
注意:这里虽然定义的StartServers是4个,但是每次查看都是3个,我们可以通过以下查看
1 ps aux | grep httpd
2 service httpd restart
3 watch -n.5 ‘ps aux | grep httpd‘         #每0.5秒监测一下发现会自动销毁一个


1 #LoadModule  <mod_name>  <mod_path>
2 LoadModule auth_basic_module modules/mod_auth_basic.so
1 lrwxrwxrwx. 1 root root 29 4月 27 09:41 modules -> ../../usr/lib64/httpd/modules
5、定义‘Main‘ server的文档页面路径
1 DocumentRoot "/var/www/html" #注意更改此路径时,一定要确定你的selinux是关闭的
1 DocumentRoot "/var/www/html"
2 <Directory "/var/www/html">
1 <Directory  "">
2    ...            #表示对该目录下的所有包含子目录生效
3 </Directory>
4 <File  "">
5    ...            #表示对单个文件进行访问控制
6 </File>
7 <FileMatch  "PATTERN">
8    ...            #表示对一类文件进行访问控制(被PATTERN匹配的一类文件)
9 </FileMatch>
(2)URL路径:
1 <Location  "">
2   ...             #表示对""中指定的位置下的所有做访问控制
3 </Location>
4
5 <LocationMatch "">
6   ...             #表示对匹配到的位置进行访问控制
7 </LocationMatch>
1 DirectoryIndex index.html index.html.var index.php
 1 DocumentRoot "/www/htdocs"
 2     http://www.magedu.com/download/bash-4.4.2-3.el6.x86_64.rpm     #正常情况下基于URL映射
 3         /www/htdocs/download/bash-4.4.2-3.el6.x86_64.rpm           #正常情况下基于文件系统映射
 4
 5 Alias  /download/  "/rpms/pub/"
 6     http://www.magedu.com/download/bash-4.4.2-3.el6.x86_64.rpm
 7         /rpms/pub/bash-4.4.2-3.el6.x86_64.rpm
 8
 9 http://www.magedu.com/images/logo.png
10     /www/htdocs/images/logo.png
1 LogFormat "%h %l %u %t \"%r\" %>s %b \"%{Referer}i\" \"%{User-Agent}i\"" combined
2 LogFormat "%h %l %u %t \"%r\" %>s %b" common
3 LogFormat "%{Referer}i -> %U" referer
4 LogFormat "%{User-agent}i" agent
1 <Directory "">
2     Options None
3     AllowOverride None
4     AuthType Basic
5     AuthName "String“
6     AuthUserFile  "/PATH/TO/HTTPD_USER_PASSWD_FILE"
7     Require  user  username1  username2 ...                #授权指定用户可以访问,如果需要让所有的人可访,改成Require valid-user
8 </Directory>
1 <Directory "">
2     Options None
3     AllowOverride None
4     AuthType Basic
5     AuthName "String“
6     AuthUserFile  "/PATH/TO/HTTPD_USER_PASSWD_FILE"
7     Require  valid-user              #授权指定用户可以访问,如果需要让所有的人可访,改成Require valid-user
8 </Directory>
 1 mkdir /var/www/html/admin
 2 echo "<h1>admin page</h1>" > index.html
 3 <Directory /var/www/html/admin/>
 4     Options None
 5     AllowOverride None
 6     AuthType Basic
 7     AuthName "Admin Realm"
 8     AuthUserFile "/etc/httpd/conf/.htpasswd"
 9     Require user tom
10 </Directory>
配置加密文件
1 cd /etc/httpd/conf/
2 [root@httpd conf]# htpasswd -c -m ./.htpasswd tom
3 New password:
4 Re-type new password:
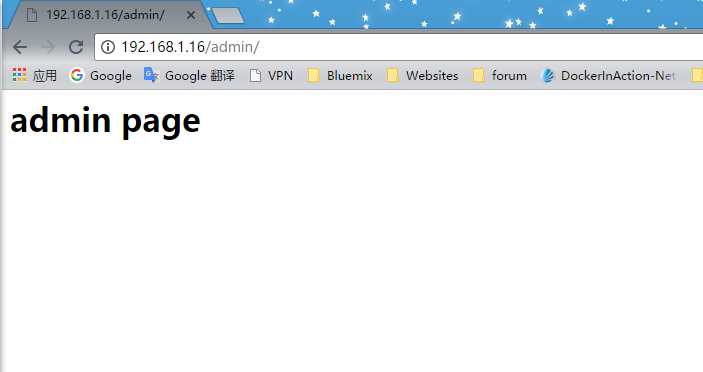
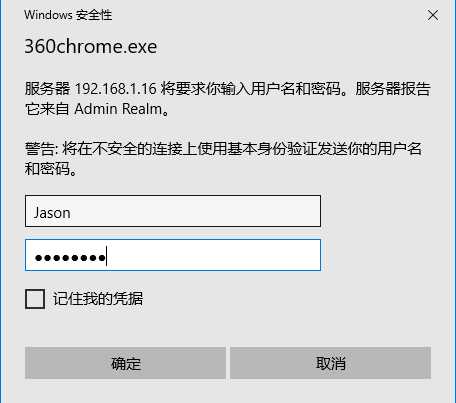
访问浏览器


1 <Directory "">
2   Options None
3   AllowOverride None
4   AuthType Basic
5   AuthName "String“
6   AuthUserFile  "/PATH/TO/HTTPD_USER_PASSWD_FILE"
7   AuthGroupFile "/PATH/TO/HTTPD_GROUP_FILE"
8   Require  group  grpname1  grpname2 ...
9 </Directory>
 1 mkdir /var/www/html/upload;cp /var/www/html/admin/index.html /var/www/html/upload/
 2 echo "<h1>upload page</h1>" > /var/www/html/upload/index.html
 3 <Directory /var/www/html/upload/>
 4     Options None
 5     AllowOverride None
 6     AuthType Basic
 7     AuthName "Admin Realm"
 8     AuthUserFile "/etc/httpd/conf/.htpasswd"
 9     AuthGroupFile "/etc/httpd/conf/.htgroup"
10     Require group mygroup
11 </Directory>
12 [root@httpd conf]# cat ./.htgroup
13 mygroup: tom Jason
14 othergroup: obama


1 <VirtualHost  IP:PORT>
2   ServerName FQDN
3   DocumentRoot  ""
4 </VirtualHost>
 1 <VirtualHost 172.16.100.6:80>
 2         ServerName www.a.com
 3         DocumentRoot "/www/a.com/htdocs"
 4     </VirtualHost>
 5
 6     <VirtualHost 172.16.100.7:80>
 7         ServerName www.b.net
 8         DocumentRoot "/www/b.net/htdocs"
 9     </VirtualHost>
10
11     <VirtualHost 172.16.100.8:80>
12         ServerName www.c.org
13         DocumentRoot "/www/c.org/htdocs"
14     </VirtualHost>
基于端口的虚拟主机
 1  <VirtualHost 172.16.100.6:80>
 2         ServerName www.a.com
 3         DocumentRoot "/www/a.com/htdocs"
 4     </VirtualHost>
 5
 6     <VirtualHost 172.16.100.6:808>
 7         ServerName www.b.net
 8         DocumentRoot "/www/b.net/htdocs"
 9     </VirtualHost>
10
11     <VirtualHost 172.16.100.6:8080>
12         ServerName www.c.org
13         DocumentRoot "/www/c.org/htdocs"
14     </VirtualHost>
基于FQDN的虚拟主机:
 1 NameVirtualHost 172.16.100.6:80
 2     <VirtualHost 172.16.100.6:80>
 3         ServerName www.a.com
 4         DocumentRoot "/www/a.com/htdocs"
 5     </VirtualHost>
 6
 7     <VirtualHost 172.16.100.6:80>
 8         ServerName www.b.net
 9         DocumentRoot "/www/b.net/htdocs"
10     </VirtualHost>
11
12     <VirtualHost 172.16.100.6:80>
13         ServerName www.c.org
14         DocumentRoot "/www/c.org/htdocs"
15     </VirtualHost>
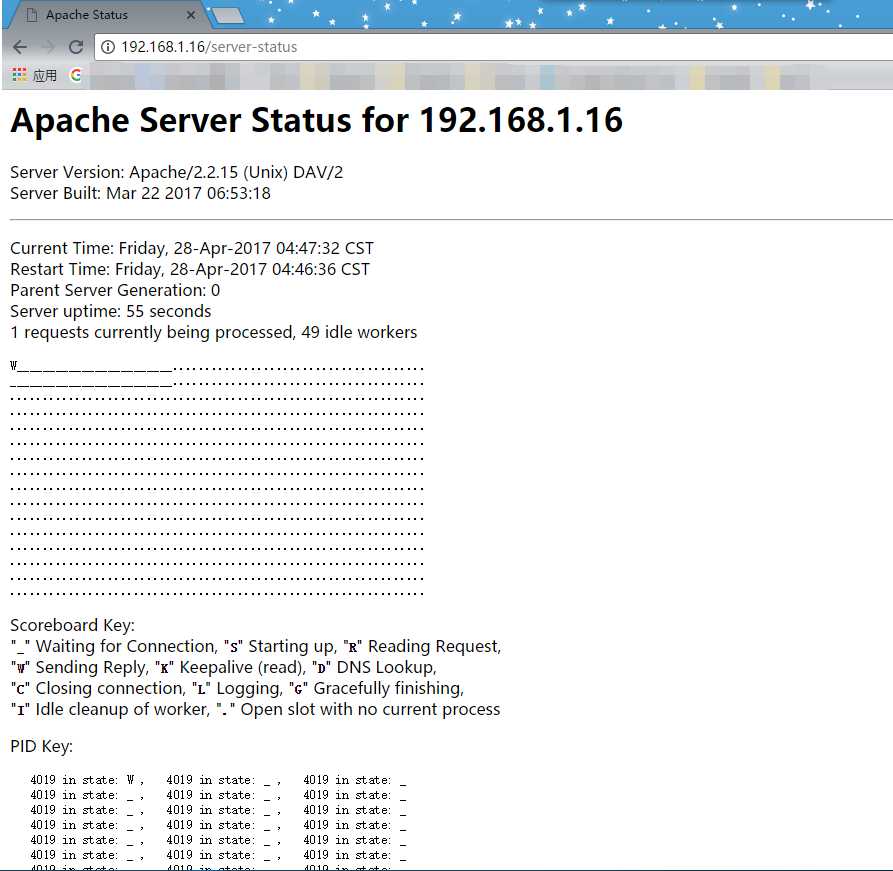
13、status页面
1 LoadModule  status_module  modules/mod_status.so
2     <Location /server-status>
3         SetHandler server-status
4         Order allow,deny
5         Allow from 172.16
6     </Location>

要实现一个Apache服务器上提供多个SSL虚拟主机,可以:
 1 NameVirtualHost 11.22.33.44:443
 2
 3 <VirtualHost 11.22.33.44:443>
 4 DocumentRoot "C:/Apache2.2/htdocs/www"
 5 ServerName www.domain.com
 6 SSLEngine on
 7 SSLCertificateFile "C:/Apache2.2/conf/server.cer"
 8 SSLCertificateKeyFile "C:/Apache2.2/conf/server.key"
 9 </VirtualHost>
10
11 <VirtualHost 11.22.33.44:443>
12 DocumentRoot "C:/Apache2.2/htdocs/ftp"
13 ServerName ftp.domain.com
14 SSLEngine on
15 SSLCertificateFile "C:/Apache2.2/conf/server.cer"
16 SSLCertificateKeyFile "C:/Apache2.2/conf/server.key"
17 </VirtualHost>
18
19 (2)另一种办法就是给每个网站分配不同的端口号;
20 <VirtualHost 11.22.33.44:443>
21 DocumentRoot "C:/Apache2.2/htdocs/www"
22 ServerName www.domain.com
23 SSLEngine on
24 SSLCertificateFile "C:/Apache2.2/conf/server.cer"
25 SSLCertificateKeyFile "C:/Apache2.2/conf/server.key"
26 </VirtualHost>
27
28 <VirtualHost 11.22.33.44:8443>
29 DocumentRoot "C:/Apache2.2/htdocs/ftp"
30 ServerName ftp.domain.com
31 SSLEngine on
32 SSLCertificateFile "C:/Apache2.2/conf/server.cer"
33 SSLCertificateKeyFile "C:/Apache2.2/conf/server.key"
34 </VirtualHost>
基于域名的虚拟主机只能使用同一个证书,或者说,即使有不同的证书,最终使用的都是排在前面的默认的第一个
2. Apache中一张网卡绑定不同IP实现多个HTTPS虚拟主机
一张网卡绑定多个ip,ifconfig eth0:0......
 1 <VirtualHost 220.181.75.109:8443>
 2      ServerAdmin lala@corp.net.com
 3      DocumentRoot /home/lala/apache/htdocs/test
 4      ServerName a.test.com
 5      SSLEngine on
 6      SSLCipherSuite ALL:!ADH:!EXPORT56:RC4+RSA:+HIGH:+MEDIUM:+LOW:+SSLv2:+EXP:+eNULL
 7      SSLCertificateFile /home/lala/apache/conf/ssl.key/server.crt
 8      SSLCertificateKeyFile /home/lala/apache/conf/ssl.key/server.key
 9      #Include /home/lala/apache/conf/ssl.conf
10      #ErrorLog logs/dummy-a.test.com-error_log
11      #CustomLog logs/a.test.com-access_log common
12 </VirtualHost>
13
14 <VirtualHost 220.181.75.65:8443>
15      ServerAdmin lala@corp.net.com
16      DocumentRoot /home/lala/apache/htdocs/test2
17      ServerName d.test.com
18      SSLEngine on
19      SSLCipherSuite ALL:!ADH:!EXPORT56:RC4+RSA:+HIGH:+MEDIUM:+LOW:+SSLv2:+EXP:+eNULL
20      SSLCertificateFile /home/lala/apache/conf/ssl.key/server2.crt
21      SSLCertificateKeyFile /home/lala/apache/conf/ssl.key/server2.key
22      #Include /home/lala/apache/conf/ssl.conf
23      #ErrorLog logs/dummy-a.test.com-error_log
24      #CustomLog logs/a.test.com-access_log common
25 </VirtualHost>
标签:2.4 md5 data- includes 文字 环境 tom 源地址 数据
原文地址:http://www.cnblogs.com/xuelong3/p/7628036.html