标签:epo cti -o 中文 weixin tags person attr element
该模块用于接收一个HTML或XML字符串,然后将其进行格式化,之后遍可以使用他提供的方法进行快速查找指定元素,从而使得在HTML或XML中查找指定元素变得简单。
|
1
2
3
4
5
6
7
8
9
10
11
12
13
14
15
16
17
18
19
20
21
22
23
24
25
26
27
28
|
from bs4 import BeautifulSouphtml_doc = """<html><head><title>The Dormouse‘s story</title></head><body>asdf <div class="title"> <b>The Dormouse‘s story总共</b> <h1>f</h1> </div><div class="story">Once upon a time there were three little sisters; and their names were <a class="sister0" id="link1">Els<span>f</span>ie</a>, <a href="http://example.com/lacie" class="sister" id="link2">Lacie</a> and <a href="http://example.com/tillie" class="sister" id="link3">Tillie</a>;and they lived at the bottom of a well.</div>ad<br/>sf<p class="story">...</p></body></html>"""soup = BeautifulSoup(html_doc, features="lxml")# 找到第一个a标签tag1 = soup.find(name=‘a‘)# 找到所有的a标签tag2 = soup.find_all(name=‘a‘)# 找到id=link2的标签tag3 = soup.select(‘#link2‘) |
使用示例:
|
1
2
3
4
5
6
7
8
9
10
11
|
from bs4 import BeautifulSouphtml_doc = """<html><head><title>The Dormouse‘s story</title></head><body> ...</body></html>"""soup = BeautifulSoup(html_doc, features="lxml") |
1. name,标签名称
|
1
2
3
4
5
|
# tag = soup.find(‘a‘)# name = tag.name # 获取# print(name)# tag.name = ‘span‘ # 设置# print(soup) |
2. attr,标签属性
|
1
2
3
4
5
6
|
# tag = soup.find(‘a‘)# attrs = tag.attrs # 获取# print(attrs)# tag.attrs = {‘ik‘:123} # 设置# tag.attrs[‘id‘] = ‘iiiii‘ # 设置# print(soup) |
3. children,所有子标签
|
1
2
|
# body = soup.find(‘body‘)# v = body.children |
4. children,所有子子孙孙标签
|
1
2
|
# body = soup.find(‘body‘)# v = body.descendants |
5. clear,将标签的所有子标签全部清空(保留标签名)
|
1
2
3
|
# tag = soup.find(‘body‘)# tag.clear()# print(soup) |
6. decompose,递归的删除所有的标签
|
1
2
3
|
# body = soup.find(‘body‘)# body.decompose()# print(soup) |
7. extract,递归的删除所有的标签,并获取删除的标签
|
1
2
3
|
# body = soup.find(‘body‘)# v = body.extract()# print(soup) |
8. decode,转换为字符串(含当前标签);decode_contents(不含当前标签)
|
1
2
3
4
|
# body = soup.find(‘body‘)# v = body.decode()# v = body.decode_contents()# print(v) |
9. encode,转换为字节(含当前标签);encode_contents(不含当前标签)
|
1
2
3
4
|
# body = soup.find(‘body‘)# v = body.encode()# v = body.encode_contents()# print(v) |
10. find,获取匹配的第一个标签
|
1
2
3
4
5
|
# tag = soup.find(‘a‘)# print(tag)# tag = soup.find(name=‘a‘, attrs={‘class‘: ‘sister‘}, recursive=True, text=‘Lacie‘)# tag = soup.find(name=‘a‘, class_=‘sister‘, recursive=True, text=‘Lacie‘)# print(tag) |
11. find_all,获取匹配的所有标签
|
1
2
3
4
5
6
7
8
9
10
11
12
13
14
15
16
17
18
19
20
21
22
23
24
25
26
27
28
29
30
31
32
33
34
35
36
37
38
39
40
41
42
43
44
45
46
47
48
49
50
51
52
53
54
|
# tags = soup.find_all(‘a‘)# print(tags)# tags = soup.find_all(‘a‘,limit=1)# print(tags)# tags = soup.find_all(name=‘a‘, attrs={‘class‘: ‘sister‘}, recursive=True, text=‘Lacie‘)# # tags = soup.find(name=‘a‘, class_=‘sister‘, recursive=True, text=‘Lacie‘)# print(tags)# ####### 列表 ######## v = soup.find_all(name=[‘a‘,‘div‘])# print(v)# v = soup.find_all(class_=[‘sister0‘, ‘sister‘])# print(v)# v = soup.find_all(text=[‘Tillie‘])# print(v, type(v[0]))# v = soup.find_all(id=[‘link1‘,‘link2‘])# print(v)# v = soup.find_all(href=[‘link1‘,‘link2‘])# print(v)# ####### 正则 #######import re# rep = re.compile(‘p‘)# rep = re.compile(‘^p‘)# v = soup.find_all(name=rep)# print(v)# rep = re.compile(‘sister.*‘)# v = soup.find_all(class_=rep)# print(v)# rep = re.compile(‘http://www.oldboy.com/static/.*‘)# v = soup.find_all(href=rep)# print(v)# ####### 方法筛选 ######## def func(tag):# return tag.has_attr(‘class‘) and tag.has_attr(‘id‘)# v = soup.find_all(name=func)# print(v)# ## get,获取标签属性# tag = soup.find(‘a‘)# v = tag.get(‘id‘)# print(v) |
12. has_attr,检查标签是否具有该属性
|
1
2
3
|
# tag = soup.find(‘a‘)# v = tag.has_attr(‘id‘)# print(v) |
13. get_text,获取标签内部文本内容
|
1
2
3
|
# tag = soup.find(‘a‘)# v = tag.get_text# print(v) |
14. index,检查标签在某标签中的索引位置
|
1
2
3
4
5
6
7
|
# tag = soup.find(‘body‘)# v = tag.index(tag.find(‘div‘))# print(v)# tag = soup.find(‘body‘)# for i,v in enumerate(tag):# print(i,v) |
15. is_empty_element,是否是空标签(是否可以是空)或者自闭合标签,
判断是否是如下标签:‘br‘ , ‘hr‘, ‘input‘, ‘img‘, ‘meta‘,‘spacer‘, ‘link‘, ‘frame‘, ‘base‘
|
1
2
3
|
# tag = soup.find(‘br‘)# v = tag.is_empty_element# print(v) |
16. 当前的关联标签
|
1
2
3
4
5
6
7
8
9
10
11
12
13
14
15
16
|
# soup.next# soup.next_element# soup.next_elements# soup.next_sibling# soup.next_siblings## tag.previous# tag.previous_element# tag.previous_elements# tag.previous_sibling# tag.previous_siblings## tag.parent# tag.parents |
17. 查找某标签的关联标签
|
1
2
3
4
5
6
7
8
9
10
11
12
13
14
|
# tag.find_next(...)# tag.find_all_next(...)# tag.find_next_sibling(...)# tag.find_next_siblings(...)# tag.find_previous(...)# tag.find_all_previous(...)# tag.find_previous_sibling(...)# tag.find_previous_siblings(...)# tag.find_parent(...)# tag.find_parents(...)# 参数同find_all |
18. select,select_one, CSS选择器
|
1
2
3
4
5
6
7
8
9
10
11
12
13
14
15
16
17
18
19
20
21
22
23
24
25
26
27
28
29
30
31
32
33
34
35
36
37
38
39
40
41
42
43
44
45
46
47
48
49
50
51
52
53
54
55
56
57
58
59
60
61
62
63
64
65
66
67
|
soup.select("title")soup.select("p nth-of-type(3)")soup.select("body a")soup.select("html head title")tag = soup.select("span,a")soup.select("head > title")soup.select("p > a")soup.select("p > a:nth-of-type(2)")soup.select("p > #link1")soup.select("body > a")soup.select("#link1 ~ .sister")soup.select("#link1 + .sister")soup.select(".sister")soup.select("[class~=sister]")soup.select("#link1")soup.select("a#link2")soup.select(‘a[href]‘)soup.select(‘a[href="http://example.com/elsie"]‘)soup.select(‘a[href^="http://example.com/"]‘)soup.select(‘a[href$="tillie"]‘)soup.select(‘a[href*=".com/el"]‘)from bs4.element import Tagdef default_candidate_generator(tag): for child in tag.descendants: if not isinstance(child, Tag): continue if not child.has_attr(‘href‘): continue yield childtags = soup.find(‘body‘).select("a", _candidate_generator=default_candidate_generator)print(type(tags), tags)from bs4.element import Tagdef default_candidate_generator(tag): for child in tag.descendants: if not isinstance(child, Tag): continue if not child.has_attr(‘href‘): continue yield childtags = soup.find(‘body‘).select("a", _candidate_generator=default_candidate_generator, limit=1)print(type(tags), tags) |
19. 标签的内容
|
1
2
3
4
5
6
7
8
9
10
11
12
13
|
# tag = soup.find(‘span‘)# print(tag.string) # 获取# tag.string = ‘new content‘ # 设置# print(soup)# tag = soup.find(‘body‘)# print(tag.string)# tag.string = ‘xxx‘# print(soup)# tag = soup.find(‘body‘)# v = tag.stripped_strings # 递归内部获取所有标签的文本# print(v) |
20.append在当前标签内部追加一个标签
|
1
2
3
4
5
6
7
8
9
10
|
# tag = soup.find(‘body‘)# tag.append(soup.find(‘a‘))# print(soup)## from bs4.element import Tag# obj = Tag(name=‘i‘,attrs={‘id‘: ‘it‘})# obj.string = ‘我是一个新来的‘# tag = soup.find(‘body‘)# tag.append(obj)# print(soup) |
21.insert在当前标签内部指定位置插入一个标签
|
1
2
3
4
5
6
|
# from bs4.element import Tag# obj = Tag(name=‘i‘, attrs={‘id‘: ‘it‘})# obj.string = ‘我是一个新来的‘# tag = soup.find(‘body‘)# tag.insert(2, obj)# print(soup) |
22. insert_after,insert_before 在当前标签后面或前面插入
|
1
2
3
4
5
6
7
|
# from bs4.element import Tag# obj = Tag(name=‘i‘, attrs={‘id‘: ‘it‘})# obj.string = ‘我是一个新来的‘# tag = soup.find(‘body‘)# # tag.insert_before(obj)# tag.insert_after(obj)# print(soup) |
23. replace_with 在当前标签替换为指定标签
|
1
2
3
4
5
6
|
# from bs4.element import Tag# obj = Tag(name=‘i‘, attrs={‘id‘: ‘it‘})# obj.string = ‘我是一个新来的‘# tag = soup.find(‘div‘)# tag.replace_with(obj)# print(soup) |
24. 创建标签之间的关系
|
1
2
3
4
|
# tag = soup.find(‘div‘)# a = soup.find(‘a‘)# tag.setup(previous_sibling=a)# print(tag.previous_sibling) |
25. wrap,将指定标签把当前标签包裹起来
|
1
2
3
4
5
6
7
8
9
10
11
|
# from bs4.element import Tag# obj1 = Tag(name=‘div‘, attrs={‘id‘: ‘it‘})# obj1.string = ‘我是一个新来的‘## tag = soup.find(‘a‘)# v = tag.wrap(obj1)# print(soup)# tag = soup.find(‘a‘)# v = tag.wrap(soup.find(‘p‘))# print(soup) |
26. unwrap,去掉当前标签,将保留其包裹的标签
|
1
2
3
|
# tag = soup.find(‘a‘)# v = tag.unwrap()# print(soup) |
更多参数官方:http://beautifulsoup.readthedocs.io/zh_CN/v4.4.0/
把下面代码,加入到代码中,可以下载网站源码到本地分析
with open(‘weixin.html‘,‘wb‘) as f:
    f.write(wx_login_page.content)

#!/usr/bin/env python
# -*- coding:utf-8 -*-
# Author: nulige

import requests
from bs4 import BeautifulSoup

response = requests.get(
    url=‘http://www.autohome.com.cn/news/‘
)

#解决爬虫乱码问题
response.encoding = response.apparent_encoding

# 生成Soup对象,
soup = BeautifulSoup(response.text, features=‘html.parser‘)


# find查找第一个符合条件的对象
target = soup.find(id=‘auto-channel-lazyload-article‘)

#find_all查找所有符合的对象,查找出来的值在列表中
li_list = target.find_all(‘li‘)

#循环拿到具体每个对象
for i in li_list:
    a = i.find(‘a‘)

    if a:
        print(a.attrs.get(‘href‘))   #    # .attrs查找到属性
        txt = a.find(‘h3‘).text  # 是对象
        img_url = a.find(‘img‘).attrs.get(‘src‘)
        print(img_url)
        # 再发一个请求
        img_response = requests.get(url=img_url)
        import uuid
        file_name = str(uuid.uuid4()) + ‘.jpg‘
        with open(file_name,‘wb‘) as f:
            f.write(img_response.content)


备注:
 # 找到第一个a标签
tag1 = soup.find(name=‘a‘) # 找到所有的a标签 tag2 = soup.find_all(name=‘a‘) # 找到id=link2的标签 tag3 = soup.select(‘#link2‘)#!/usr/bin/env python
# -*- coding: utf8 -*-
# __Author: "Skiler Hao"
# date: 2017/5/10 11:06
import requests
from bs4 import BeautifulSoup
# 第一次请求
first_request_response = requests.get(
url = ‘http://dig.chouti.com/‘,
)
# 获取第一次登录获取的cookie内容
firstget_cookie_dict = first_request_response.cookies.get_dict()
# 登录POST请求
post_dict = {
‘phone‘: ‘8618811*****‘, #86+手机号码
‘password‘: ‘******‘, #密码
‘oneMonth‘: 1
}
# 发送请求,携带cookie和数据
login_response = requests.post(
url = ‘http://dig.chouti.com/login‘,
data = post_dict,
cookies= firstget_cookie_dict
)
# 点赞请求
dianzan_response = requests.post(
url = ‘http://dig.chouti.com/link/vote?linksId=11832246‘,
cookies= firstget_cookie_dict
)
print(dianzan_response.text)
# 取消点赞
cancel_dianzan_response = requests.post(
url = ‘http://dig.chouti.com/vote/cancel/vote.do‘,
cookies= firstget_cookie_dict,
data={‘linksId‘:11832246}
)
print(cancel_dianzan_response.text)
# 获取个人信息
get_person_info_resonse = requests.get(
url = ‘http://dig.chouti.com/profile‘,
cookies= firstget_cookie_dict,
)
# 按照某种encoding方式编码
get_person_info_resonse.encoding = get_person_info_resonse.apparent_encoding
# 将其内容放入BS中进行解析
person_info_site = BeautifulSoup(get_person_info_resonse.text,features=‘html.parser‘)
# 找到之后可以做任何处理,获取配置中的nickname
nickname_tag = person_info_site.find(id=‘nick‘)
nickname = person_info_site.find(id=‘nick‘).attrs.get(‘value‘)
print(‘昵称:‘,nickname)
# 更新自己在抽屉上的个人信息
personal_info = {
‘jid‘: ‘cdu_49017916793‘,
‘nick‘: ‘努力哥‘,
‘imgUrl‘: ‘http://img2.chouti.com/CHOUTI_90A38B32473A49B7B26A49F46B34268C_W585H359=C60x60.png‘,
# http://img2.chouti.com/CHOUTI_BAE7F736FE7B48E49D1CEE459020F3B0_W390H390=48x48.jpg
‘sex‘: True,
‘proveName‘: ‘北京‘,
‘cityName‘: ‘澳门‘,
‘sign‘: ‘黑hi呃呃哈发到付‘
}
update_person_info_resonse = requests.post(
url = ‘http://dig.chouti.com/profile/update‘,
cookies= firstget_cookie_dict,
data=personal_info
)
print(update_person_info_resonse.text)
#########################Session方式登录抽屉#########################
session = requests.Session()
# 先登陆一下抽屉网
i1 = session.get(
url=‘http://dig.chouti.com/‘
)
# 模拟抽屉登录
login_post_dict = {
‘phone‘: ‘86188116*****‘, #86+手机号码
‘password‘: ‘******‘, #密码
‘oneMonth‘: 1
}
i2 = session.post(
url=‘http://dig.chouti.com/login‘,
data=login_post_dict,
)
#!/usr/bin/env python
# -*- coding: utf8 -*-
# date: 2017/5/10 16:32

import requests
from bs4 import BeautifulSoup
# GitHub是基于authenticity_token,具有预防csrf_token的功能

# 首先访问页面,获取页面上的authenticity_token
i1 = requests.get(‘https://github.com/login‘)
# print(i1.content)
login_page_res = BeautifulSoup(i1.content,features=‘lxml‘)
authenticity_token = login_page_res.find(name=‘input‘,attrs={‘name‘:‘authenticity_token‘}).attrs.get(‘value‘)
cookies1 = i1.cookies.get_dict()

# print(authenticity_token)
form_data = {
    ‘commit‘: ‘Sign in‘,
    ‘utf8‘: ‘?‘,
    ‘authenticity_token‘: authenticity_token,
    ‘login‘: ‘*****‘,
    ‘password‘: ‘******‘,
}

# 将数据封装在post请求中进行登录,而且要加上cookie
login_res = requests.post(
    url=‘https://github.com/session‘,
    data=form_data,
    cookies=cookies1
)
# print(login_res.text)
# 拿到页面中的自己的项目列表
login_page_res = BeautifulSoup(login_res.content,features=‘lxml‘)
list_info = login_page_res.select("span .repo")
for i in list_info:
    print(i.text)
cookies1 = i1.cookies.get_dict()
4、自动登录cnblog
博客园站用了一个rsa算法的加密模块,所以安装加密模块。才能验证登录。
pip3 install rsa
代码:
#!/usr/bin/env python
# -*- coding: utf8 -*-
# date: 2017/5/11 10:51
import re
import json
import base64
import rsa
import requests
from bs4 import BeautifulSoup

# 负责模仿前端js模块对账号和密码加密
def js_enrypt(text):
    # 先从博客园拿到public key
    public_key = ‘MIGfMA0GCSqGSIb3DQEBAQUAA4GNADCBiQKBgQCp0wHYbg/NOPO3nzMD3dndwS0MccuMeXCHgVlGOoYyFwLdS24Im2e7YyhB0wrUsyYf0/nhzCzBK8ZC9eCWqd0aHbdgOQT6CuFQBMjbyGYvlVYU2ZP7kG9Ft6YV6oc9ambuO7nPZh+bvXH0zDKfi02prknrScAKC0XhadTHT3Al0QIDAQAB‘

    # 将拿到的一串字符,转换成64进制
    der = base64.standard_b64decode(public_key)

    # 再将其转换成数字,作为公钥加载
    pk = rsa.PublicKey.load_pkcs1_openssl_der(der)

    # 运用公钥对传进来的文字进行加密
    v1 = rsa.encrypt(bytes(text,‘utf8‘),pk)

    # 对加密后的内容进行解码
    value = base64.encodebytes(v1).replace(b‘\n‘,b‘‘)

    value = value.decode(‘utf8‘)

    # 将其返回
    return value

session = requests.Session()

# 写个错误的用户名和密码,提交一下。就找到提交数据
post_data = {
    ‘input1‘: js_enrypt(‘******‘),
    ‘input2‘: js_enrypt(‘******‘),
    ‘remember‘: True
}

# 发送一次请求,获取ajax发送post时要发送的VerificationToken,需要将其放在请求头部
login_page = session.get(
    url=‘https://passport.cnblogs.com/user/signin‘,
)
VerificationToken = re.compile("‘VerificationToken‘: ‘(.*)‘")
v = re.search(VerificationToken,login_page.text)
VerificationToken = v.group(1)

# 发送请求,注意将数据json序列化,因为Accept:application/json
login_post_res = session.post(
    url=‘https://passport.cnblogs.com/user/signin‘,
    data=json.dumps(post_data),
    headers={
        ‘VerificationToken‘: VerificationToken,
        ‘X-Requested-With‘: ‘XMLHttpRequest‘,
        ‘Content-Type‘: ‘application/json; charset=UTF-8‘
    }
)

# 登录账号设置页
setting_page = session.get(
    url=‘https://home.cnblogs.com/set/account/‘,
)

soup = BeautifulSoup(setting_page.content,features=‘lxml‘)
name = soup.select_one(‘#loginName_display_block div‘).get_text().strip()
print(‘你的账号名为:‘,name)
5、自动登录知乎
#!/usr/bin/env python
# -*- coding: utf8 -*-
import requests
from bs4 import BeautifulSoup
session = requests.Session()
# 知乎会查看你的是否有用户客户端信息,没有不会让爬的
signin_page = session.get(
url=‘https://www.zhihu.com/#signin‘,
headers={
‘User-Agent‘: ‘Mozilla/5.0 (Macintosh; Intel Mac OS X 10_10_5) AppleWebKit/537.36 (KHTML, like Gecko) Chrome/54.0.2840.98 Safari/537.36‘,
}
)
# 拿到页面的_xrf为了防止csrf攻击,post数据的时候需要提供
signin_page_tag = BeautifulSoup(signin_page.content,features=‘lxml‘)
xsrf_code = signin_page_tag.find(‘input‘,attrs={‘name‘:‘_xsrf‘}).attrs.get(‘value‘)
# 从知乎服务器获取验证码照片,发送请求POST,发现需要传入以下三个参数
# r:1494416****
# type:login
# lang:cn
import time
current_time = time.time()
yanzhengma = session.get(
url=‘https://www.zhihu.com/captcha.gif‘,
params={
‘r‘: current_time,
‘type‘: ‘login‘,
# ‘lang‘: ‘en‘ # 使用不同的语言,cn最为复杂,不加的话,最容易识别,en为立体的英文也不好识别
},
headers={
‘User-Agent‘: ‘Mozilla/5.0 (Macintosh; Intel Mac OS X 10_10_5) AppleWebKit/537.36 (KHTML, like Gecko) Chrome/54.0.2840.98 Safari/537.36‘,
}
)
# 将从服务器收到的验证码写入文件,可以查看啦
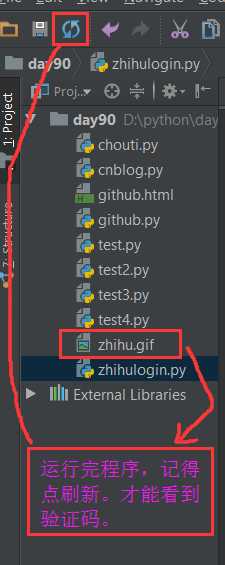
with open(‘zhihu.gif‘, ‘wb‘) as f:
f.write(yanzhengma.content)
captcha = input("请打开照片查看验证码:")
form_data = {
‘_xsrf‘: xsrf_code,
‘password‘: ‘********‘,
‘captcha‘: captcha,
# ‘captcha‘: ‘{"img_size": [200, 44], "input_points": [[40.2, 34.2], [156.2, 28.2], [138.2, 24.2]]}‘,
# ‘captcha_type‘: ‘cn‘, # 如果为中文的验证码比较复杂
‘phone_num‘: ‘***********‘, #填手机号码登录
# ‘email‘:"sddasd@123.com" # 邮箱登录的方式
}
login_response = session.post(
url=‘https://www.zhihu.com/login/phone_num‘, #前端会根据你的数据类型选择用邮箱或者手机号码登录
# url=‘https://www.zhihu.com/login/phone_num‘
data=form_data,
headers = {
‘User-Agent‘: ‘Mozilla/5.0 (Macintosh; Intel Mac OS X 10_10_5) AppleWebKit/537.36 (KHTML, like Gecko) Chrome/54.0.2840.98 Safari/537.36‘,
}
)
index_page = session.get(
url=‘https://www.zhihu.com/‘,
headers={
‘User-Agent‘: ‘Mozilla/5.0 (Macintosh; Intel Mac OS X 10_10_5) AppleWebKit/537.36 (KHTML, like Gecko) Chrome/54.0.2840.98 Safari/537.36‘,
}
)
index_page_tag = BeautifulSoup(index_page.content,features=‘lxml‘)
print(index_page_tag)
运行程序后,输入验证码。登录成功后,搜索用户名称,能找到我多个相同的用户名称,就说明登录成功。
标签:epo cti -o 中文 weixin tags person attr element
原文地址:http://www.cnblogs.com/zjltt/p/7700155.html