标签:rem super headers request map stack sans 关闭 jstl
经过两天的时间我终于把Android studio与eclipse和mysql进行了链接!!!因为是自学,哪个大神看到有问题指点一下。
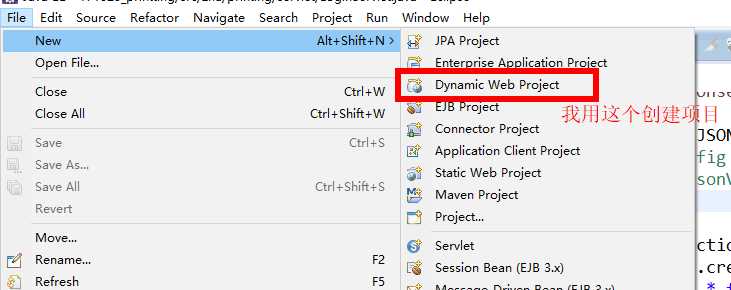
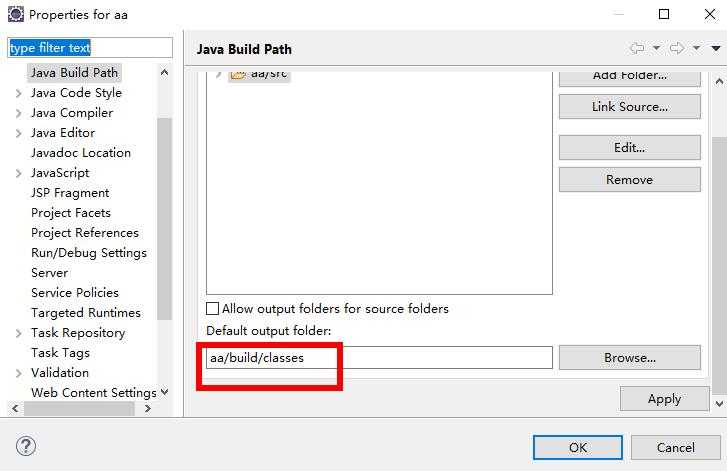
一:eclipse的配置
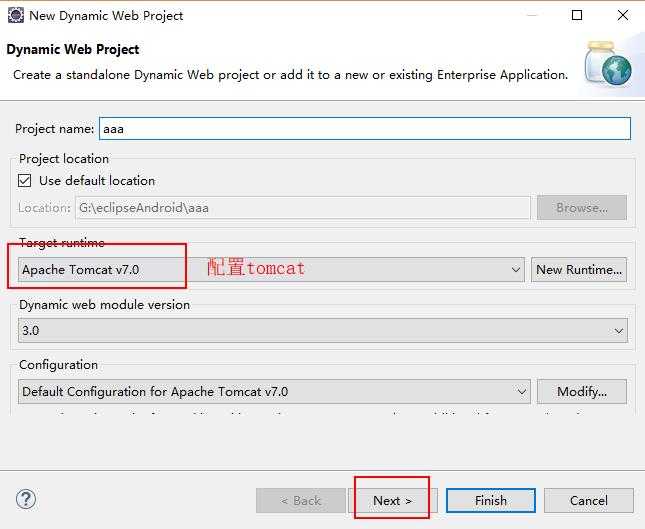
服务器:配置你的项目的tomca
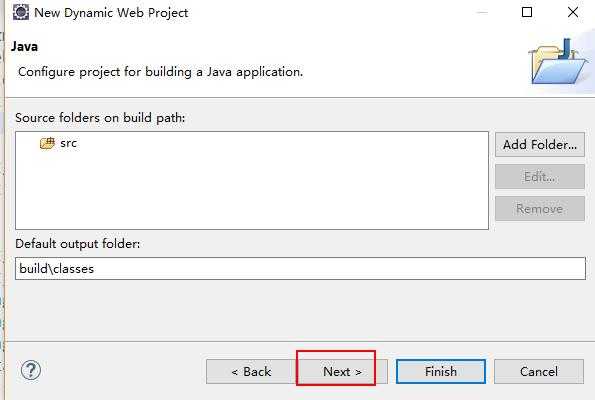
tomcat弄好之后不要着急点击 完成, 点击 下一步
不要着急点击 完成, 点击 下一步
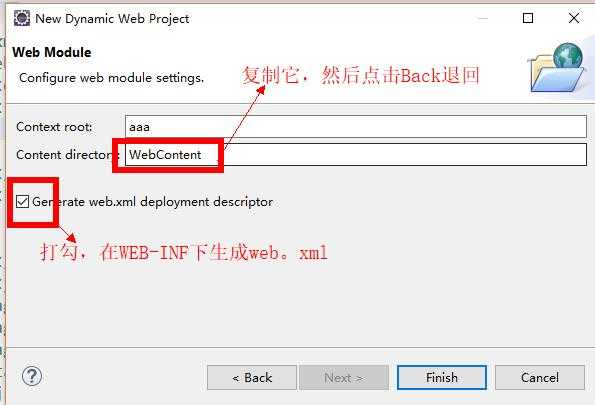
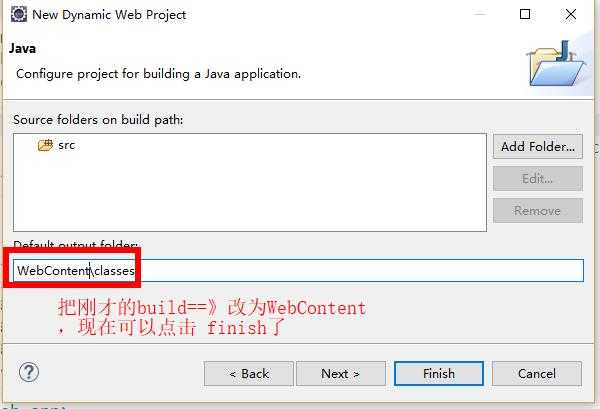
你也可不改,对比一下差别:
需要的jar包

MySQL创建数据库和表
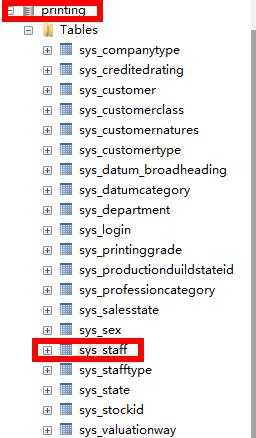
创建数据库
create database printing character set utf8 collate utf8_general_ci;
创建表:
use jdbc01;
create table sys_staff (
StaffID int primary key auto_increment,
Account varchar(40),
Password varchar(40)
)ENGINE=InnoDB DEFAULT CHARSET=utf8;
表创建好之后,给一条数据 。
我给账号和密码都为111
二:代码
1): eclipse与MySQL的链接
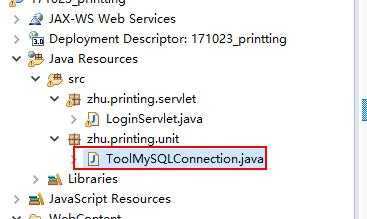
ToolMySQLConnection类

package zhu.printing.unit;

import java.sql.Connection;
import java.sql.DriverManager;
import java.sql.PreparedStatement;
import java.sql.ResultSet;
import java.sql.SQLException;

public class ToolMySQLConnection {
        public static final  String URL="jdbc:mysql://localhost:3306/printing";
        public static final String NAME = "root";
        public static final String PASSWORD = "root";
         public static final String DREIVER = "com.mysql.jdbc.Driver";


         static {
            try {
                //加载驱动器
                Class.forName(DREIVER);
            } catch (ClassNotFoundException e) {
                e.printStackTrace();
            }
        }

        public static Connection getConnection() {
            try {
                return  DriverManager.getConnection(URL, NAME, PASSWORD);//创建与数据库的链接
            } catch (SQLException e) {
                e.printStackTrace();
            }
            return null;
        }
//设置一个公共的关闭链接、释放资源的方法    .   因为每次只要进行了增,删,查,改 之后 都必须要 事件,  那么就设置一个公共的方法
        //而关闭资源要从 ResultSet先关闭-->,再到 PreparedStatement-->,最后到 Connection关闭
        public static void Close(ResultSet rs, PreparedStatement ps, Connection conn) {
            if (rs != null) {
                try {
                    rs.close();
                } catch (SQLException e) {
                    e.printStackTrace();
                }
            }

            if (ps != null) {
                try {
                    ps.close();
                } catch (SQLException e) {
                    e.printStackTrace();
                }
            }

            if (conn != null) {
                try {
                    conn.close();
                } catch (SQLException e) {
                    e.printStackTrace();
                }
            }
        }
}
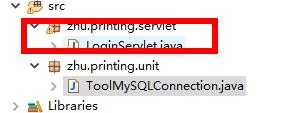
2):创建Servlet的类
package zhu.printing.servlet;

import java.io.IOException;
import java.io.PrintWriter;
import java.sql.Connection;
import java.sql.ResultSet;
import java.sql.Statement;

import javax.servlet.ServletException;
import javax.servlet.http.HttpServlet;
import javax.servlet.http.HttpServletRequest;
import javax.servlet.http.HttpServletResponse;
import net.sf.json.JSONObject;
import zhu.printing.unit.ToolMySQLConnection;

public class LoginServlet extends HttpServlet{

    private static final long serialVersionUID = 1L;

    @Override
    protected void doGet(HttpServletRequest req, HttpServletResponse resp) throws ServletException, IOException {
        doPost(req, resp);
    }

    @Override
    protected void doPost(HttpServletRequest request, HttpServletResponse response) throws ServletException, IOException {
         String ID = request.getParameter("ID"); //用于接收android前台的输入的值,此处参数必须要与你前台的值相对应
            String PW= request.getParameter("PW");
            boolean type=false;//用于判断账号和密码是否与数据库中查询结果一致
            response.setContentType("text/html; charset=UTF-8");
            PrintWriter out = response.getWriter();
            Connection con=null;
            JSONObject json = new JSONObject();
           //   JsonConfig jsonConfig = new JsonConfig();
           // jsonConfig.registerJsonValueProcessor(java.sql.Date.class,new JsonDateValueProcessor());
            try
            {
                con=ToolMySQLConnection.getConnection();
                Statement stmt=con.createStatement();
                String sql="select * from printing.sys_staff where Account="+ID+" and Password="+PW;
                ResultSet rs=stmt.executeQuery(sql);
                while(rs.next())
                {
                    type=true;
                }
            }
            catch(Exception ex)
            {
                ex.printStackTrace();
            }
            finally
            {
                ToolMySQLConnection.Close(null, null, con);
                json.put("msg",  type );
                //json.put("msg", JSONArray.fromObject(type,jsonConfig));
                response.getWriter().write(json.toString());
                out.flush();
                out.close();
            }
    }

}
3):配置servlet
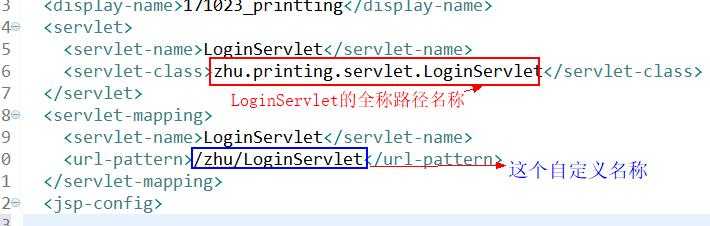
去WEB-INF文件夹下的web.xml配置刚刚新建的LoginServlet
  <servlet>
    <servlet-name>LoginServlet</servlet-name>
    <servlet-class>zhu.printing.servlet.LoginServlet</servlet-class>
  </servlet>
  <servlet-mapping>
    <servlet-name>LoginServlet</servlet-name>
    <url-pattern>/zhu/LoginServlet</url-pattern>
  </servlet-mapping>
4):创建jsp
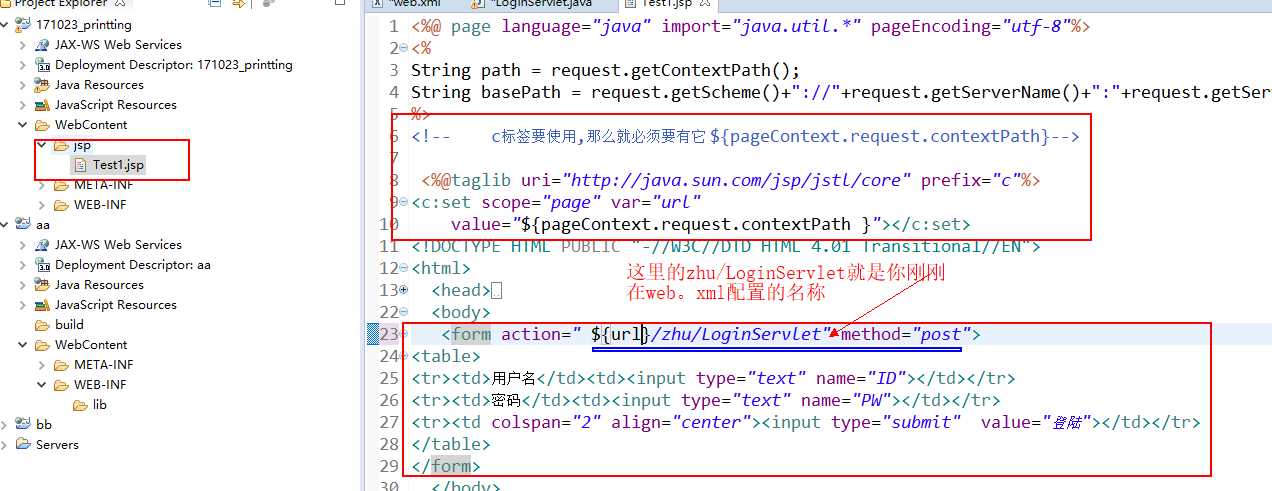
Test1.jsp的代码
<%@ page language="java" import="java.util.*" pageEncoding="utf-8"%>
<%
String path = request.getContextPath();
String basePath = request.getScheme()+"://"+request.getServerName()+":"+request.getServerPort()+path+"/";
%>
<!--    c标签要使用,那么就必须要有它 ${pageContext.request.contextPath}-->

 <%@taglib uri="http://java.sun.com/jsp/jstl/core" prefix="c"%>
<c:set scope="page" var="url"
    value="${pageContext.request.contextPath }"></c:set>
<!DOCTYPE HTML PUBLIC "-//W3C//DTD HTML 4.01 Transitional//EN">
<html>
  <head>
    <base href="<%=basePath%>">
    <title>My JSP ‘MyJsp.jsp‘ starting page</title>
    <meta http-equiv="pragma" content="no-cache">
    <meta http-equiv="cache-control" content="no-cache">
    <meta http-equiv="expires" content="0">
    <meta http-equiv="keywords" content="keyword1,keyword2,keyword3">
    <meta http-equiv="description" content="This is my page">
  </head>
  <body>
   <form action=" ${url}/zhu/LoginServlet" method="post">
<table>
<tr><td>用户名</td><td><input type="text" name="ID"></td></tr>
<tr><td>密码</td><td><input type="text" name="PW"></td></tr>
<tr><td colspan="2" align="center"><input type="submit"  value="登陆"></td></tr>
</table>
</form>
  </body>
</html>
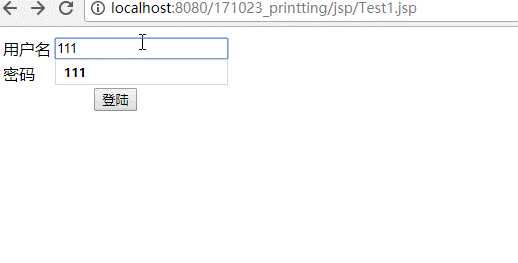
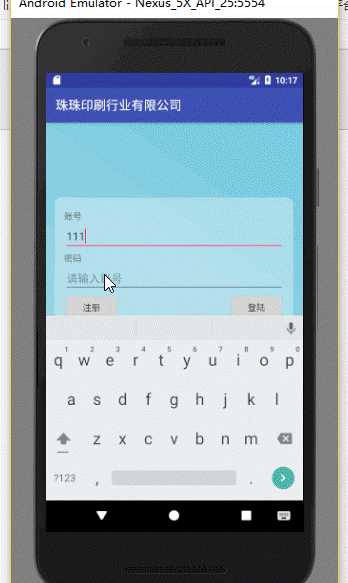
5):运行
我把数据设置为json的格式,因为这样容易在Android studio那边获取数据,
二:Android studio
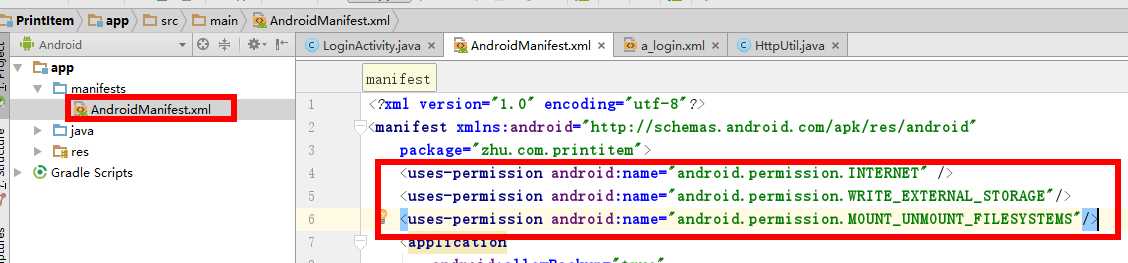
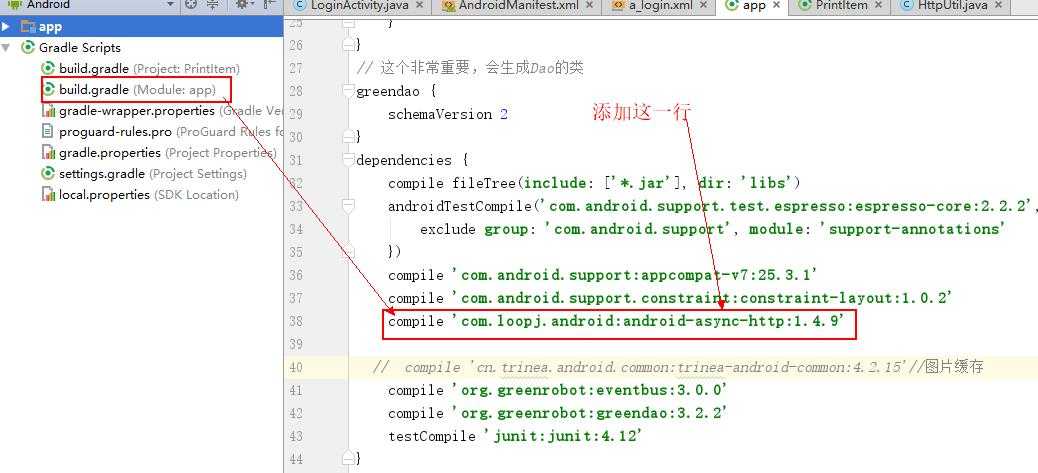
代码
1):创建一个a_login.xml文件
<?xml version="1.0" encoding="utf-8"?>
<RelativeLayout xmlns:android="http://schemas.android.com/apk/res/android"
    xmlns:app="http://schemas.android.com/apk/res-auto"
    xmlns:tools="http://schemas.android.com/tools"
    android:layout_width="match_parent"
    android:layout_height="match_parent"
    tools:context="zhu.com.printitem.LoginActivity"
    android:background="@drawable/background_login">

    <RelativeLayout
        android:id="@+id/kj_ct"
        android:layout_width="fill_parent"
        android:layout_height="wrap_content"
        android:layout_marginLeft="15dip"
        android:layout_marginRight="15dip"
        android:layout_marginTop="120dip"
        android:background="@drawable/background_login_radius"
        android:padding="15dip">
        <!-- 账号 -->
        <TextView
            android:id="@+id/kj_accountnumber_lb"
            android:layout_width="wrap_content"
            android:layout_height="wrap_content"
            android:layout_alignParentTop="true"
            android:layout_marginTop="5dp"
            android:text="账号" />

        <EditText
            android:id="@+id/kj_accountnumber_edittext"
            android:layout_width="fill_parent"
            android:layout_height="wrap_content"
            android:layout_below="@id/kj_accountnumber_lb"
            android:hint=" "
            android:inputType="text"
            android:singleLine="true" />
        <!-- 密码 text -->
        <TextView
            android:id="@+id/kj_password_lb"
            android:layout_width="wrap_content"
            android:layout_height="wrap_content"
            android:layout_below="@id/kj_accountnumber_edittext"
            android:layout_marginTop="3dp"
            android:text="密码" />

        <EditText
            android:id="@+id/kj_password_edittext"
            android:layout_width="fill_parent"
            android:layout_height="wrap_content"
            android:layout_below="@id/kj_password_lb"
            android:hint="请输入账号"
            android:inputType="textPassword"
             />
        <Button
            android:id="@+id/kj_register_btn"
            android:layout_width="wrap_content"
            android:layout_height="wrap_content"
            android:layout_below="@id/kj_password_edittext"
            android:text="注册" />
        <!-- 登录button -->
        <Button
            android:id="@+id/kj_login_btn"
            android:layout_width="wrap_content"
            android:layout_height="wrap_content"
            android:layout_alignRight="@id/kj_password_edittext"
            android:layout_below="@id/kj_password_edittext"
            android:text="登陆" />
    </RelativeLayout>


</RelativeLayout>
2):创建一个HttpUtil类
==》这个类 我是看这个文章的 http://blog.csdn.net/wangwei_cq/article/details/9453345
package zhu.com.printitem.util;

import com.loopj.android.http.AsyncHttpClient;
import com.loopj.android.http.AsyncHttpResponseHandler;
import com.loopj.android.http.BinaryHttpResponseHandler;
import com.loopj.android.http.JsonHttpResponseHandler;
import com.loopj.android.http.RequestParams;

/**
 * Created by XiaoZhu on 2017/10/24.
 */

public class HttpUtil {
    //实例话对象
    private static AsyncHttpClient client =new AsyncHttpClient();
    static {
        client.setTimeout(11000);   //设置链接超时,如果不设置,默认为10s
    }

    //用一个完整url获取一个string对象
    public static void get(String urlString,AsyncHttpResponseHandler res) {
        client.get(urlString, res);
    }
    //url里面带参数
    public static void get(String urlString, RequestParams params, AsyncHttpResponseHandler res)
     {
        client.get(urlString, params,res);
     }
    //不带参数,获取json对象或者数组()
    public static void get(String urlString,JsonHttpResponseHandler res)
  {
    client.get(urlString,res);
    }
    //带参数,获取json对象或者数组()
    public static void get(String urlString,RequestParams params,JsonHttpResponseHandler res)
    {
        client.get(urlString, params,res);
    }
    //下载数据使用,会返回byte数据
    public static void get( String uString, BinaryHttpResponseHandler bHandler)
    {
        client.get(uString, bHandler);
    }
    public static AsyncHttpClient getClient()
         {
                     return client;
                 }
}
3):登录界面LoginActivity类
package zhu.com.printitem;


import android.content.Intent;
import android.support.v7.app.AppCompatActivity;
import android.os.Bundle;

import android.util.Log;
import android.view.View;
import android.widget.Button;
import android.widget.EditText;
import android.widget.Toast;

import com.loopj.android.http.AsyncHttpClient;
import com.loopj.android.http.JsonHttpResponseHandler;
import com.loopj.android.http.RequestParams;

import org.json.JSONException;
import org.json.JSONObject;

import cz.msebera.android.httpclient.Header;
import zhu.com.printitem.util.HttpUtil;


public class LoginActivity extends AppCompatActivity implements View.OnClickListener {
    Button btn_login,btn_register;
    EditText et_accountnumber,et_passwrod;
    AsyncHttpClient m_HttpClient;

    @Override
    protected void onCreate(Bundle savedInstanceState) {
        super.onCreate(savedInstanceState);
        setContentView(R.layout.a_login);
        m_HttpClient = new AsyncHttpClient();
        btn_login= (Button) findViewById(R.id.kj_login_btn);
        btn_register= (Button) findViewById(R.id.kj_register_btn);
        et_accountnumber= (EditText) findViewById(R.id.kj_accountnumber_edittext);
        et_passwrod= (EditText) findViewById(R.id.kj_password_edittext);
        btn_login.setOnClickListener(this);
        btn_register.setOnClickListener(this);
    }
      public void connectionURL(String id, String pw){
          /*这里192.168.191.2==》表示你当前使用的网络ip
          * 171023_printting==》你在eclipse创建的项目名称
          * zhu/LoginServlet==》表示在eclipse的web.xml配置servlet的地址
          * */
      String url="http://192.168.191.2:8080/171023_printting/zhu/LoginServlet";
        RequestParams params = new RequestParams(); // 绑定参数
        params.put("ID",id);
        params.put("PW",pw);
          HttpUtil.get(url,params,new JsonHttpResponseHandler(){
              @Override
              public void onSuccess(int statusCode, Header[] headers, JSONObject response) {
                 if (statusCode==200){
                     try {
                         if(response.getBoolean("msg")==true){
                             Toast.makeText(LoginActivity.this, "登录成功", Toast.LENGTH_SHORT).show();
                         }
                         else {
                             Toast.makeText(LoginActivity.this, "登录失败!", Toast.LENGTH_SHORT).show();
                         }
                     } catch (JSONException e) {
                         e.printStackTrace();
                     }
                 }
              }
          });

    }

    @Override
    public void onClick(View v) {
        switch (v.getId()) {
            //登陆
            case R.id.kj_login_btn:
                Intent it0=new Intent();
                it0.setClass(LoginActivity.this,MainInterfaceActivity.class);
                String uid=et_accountnumber.getText().toString().trim();
                String pw=et_passwrod.getText().toString().trim();
                connectionURL(uid,pw);
              //  startActivity(it0);
                break;
            case R.id.kj_register_btn:
                Intent it=new Intent();
                it.setClass(LoginActivity.this,RegisterActivity.class);
                startActivity(it);
                break;
        }       ;
    }


}
//子进程
    /*    new Thread(new Runnable() {
            @Override
            public void run() {
            }
        }).start();*/

    /*
HttpUtil.get(url,params,  new AsyncHttpResponseHandler(){

              @Override
              public void onSuccess(int statusCode, Header[] headers, byte[] responseBody) {
                  try {
                      JSONObject jsonObject = new JSONObject(new String(responseBody));
                      JSONArray jsonArray = jsonObject.getJSONArray("msg");
                      Log.v("Code",jsonArray+"");
                  } catch (JSONException e) {
                      e.printStackTrace();
                  }
              }

              @Override
              public void onFailure(int statusCode, Header[] headers, byte[] responseBody, Throwable error) {
                  Toast.makeText(LoginActivity.this, "链接eclipse失败", Toast.LENGTH_SHORT).show();
              }
          });
    * */
4):运行Android studio之前必须要运行eclipse的项目
源码:http://pan.baidu.com/s/1bppnmLT
原文地址:http://www.cnblogs.com/zhu520/p/7724524.html
android+eclipse+mysql+servlet(Android与mysql建立链接)
标签:rem super headers request map stack sans 关闭 jstl
原文地址:http://www.cnblogs.com/zhu520/p/7724524.html
