标签:include 兴趣 动态链接 pos cep support main system sys
cmd使用java -help可以看到关于agent参数:
1  -agentlib:<libname>[=<选项>]
2                加载本机代理库 <libname>, 例如 -agentlib:hprof
3                另请参阅 -agentlib:jdwp=help 和 -agentlib:hprof=help
4  -agentpath:<pathname>[=<选项>]
5                按完整路径名加载本机代理库
6  -javaagent:<jarpath>[=<选项>]
7                加载 Java 编程语言代理, 请参阅 java.lang.instrument
其实这三个参数做的事情是一样的,都是java代理。
-agentlib和-agentpath使用的是本地代理也就是c/c++写的本地库(例如动态链接库dll和静态链接库lib),
而-javaagent使用java语言编写的jar。
关于这两种用法,我举两个具体的例子供大家参考,具体如下:
1.使用-agentlib和-agentpath加载本地库
我们使用C++来编写本地库,需要用到jdk中相关的头文件,这里需要用到的6个头文件在如下如下目录中:
%JAVA_HOME%\include目录下的:jawt.h, jni.h, jvmti.h, jvmticmlr.h
%JAVA_HOME%\include\win32目录下的:jawt_md.h, jni_md.h
我们使用visual studio 2017来编写我们的项目:
首先新建一个dll项目,如下
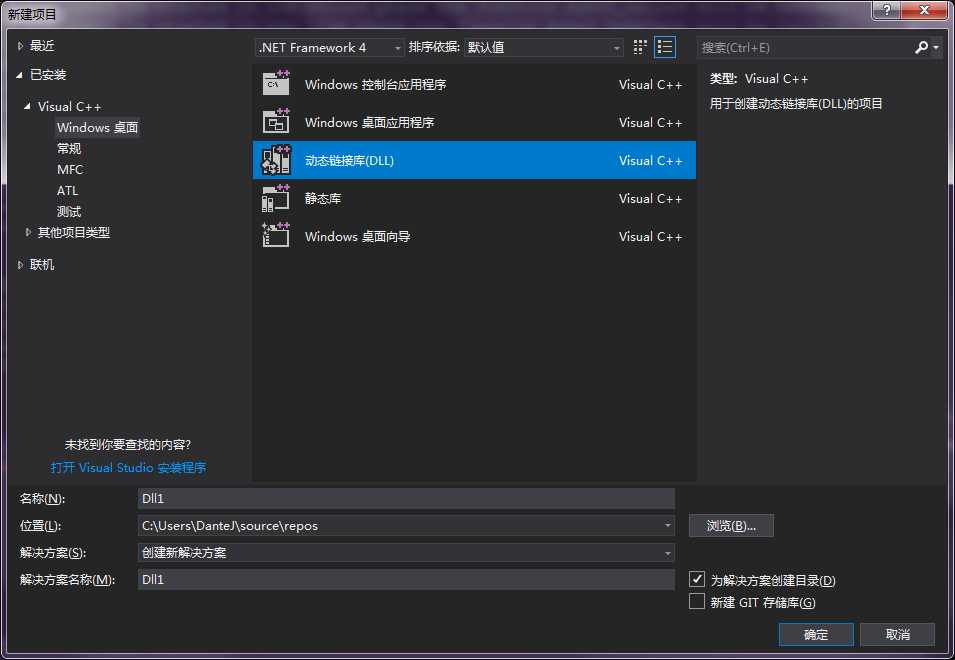
点击确定生成项目,然后把我们之前的6个头文件添加进项目中,后项目结构如下:
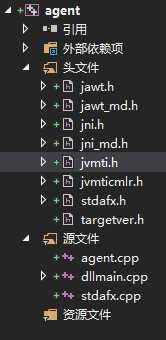
然后查看jvmti.h文件中的三个函数,并将其copy到我们的agent.cpp中去实现(需要在cpp文件中引入我们的头文件)

这里需要说明一点:
java agent有2个启动函数分别为Agent_OnLoad和Agent_OnAttach
* Agent_OnLoad在onload阶段被调用
* Agent_OnAttach在live阶段被调用
* 但是每个agent只有一个启动函数会被调用。
具体实现代码如下:
  1 // Dll.cpp : 定义 DLL 应用程序的导出函数。
  2 //
  3 /*
  4 * The VM starts each agent by invoking a start-up function.
  5 * If the agent is started in the OnLoad phase the function Agent_OnLoad will be invoked.
  6 * If the agent is started in the live phase the function Agent_OnAttach will be invoked.
  7 * Exactly one call to a start-up function is made per agent.
  8 * 中文总结一下上面的含义:
  9 * java agent有2个启动函数分别为Agent_OnLoad和Agent_OnAttach
 10 * Agent_OnLoad在onload阶段被调用
 11 * Agent_OnAttach在live阶段被调用
 12 * 但是每个agent只有一个启动函数会被调用
 13 */
 14 #include "stdafx.h"
 15 #include "jvmti.h"
 16 #include <iostream>
 17
 18 /*
 19 * 此阶段JVM还没有初始化,所以能做的操作比较受限制
 20 * JVM参数都无法获取
 21 * The return value from Agent_OnLoad is used to indicate an error.
 22 * Any value other than zero indicates an error and causes termination of the VM.
 23 * 任何非零的返回值都会导致JVM终止。
 24 */
 25
 26
 27 JNIEXPORT jint JNICALL
 28 Agent_OnLoad(JavaVM *vm, char *options, void *reserved) {
 29     jvmtiEnv* jvmti;
 30     jvmtiCapabilities capabilities;
 31     options = options == nullptr ? "" : options;
 32     jint error = vm->GetEnv((void**)&jvmti, JVMTI_VERSION);
 33     if (error) {
 34         std::cout << "get jvmtiEnv error!\n";
 35     }
 36     else {
 37         jvmti->GetCapabilities(&capabilities);
 38         std::cout << "capabilities.can_access_local_variables : "
 39             << capabilities.can_access_local_variables
 40             << std::endl;
 41     }
 42
 43     std::cout << "Agent_OnLoad\n" << "options ===== " << options << std::endl;
 44
 45
 46
 47
 48     return 0;
 49 }
 50 /*
 51 * Any value other than zero indicates an error.
 52 * An error does not cause the VM to terminate.
 53 * Instead the VM ignores the error, or takes some implementation specific action -- for example it might print an error to standard error, or record the error in a system log.
 54 *
 55 */
 56 JNIEXPORT jint JNICALL
 57 Agent_OnAttach(JavaVM* vm, char* options, void* reserved) {
 58     options = options == nullptr ? "" : options;
 59     std::cout << "Agent_OnAttach\n" << "options ===== " << options << std::endl;
 60
 61     jvmtiEnv *jvmti;
 62     jint result = vm->GetEnv((void**)&jvmti, JVMTI_VERSION);//获取jvmti指针
 63     jint count;//用于保存加载类的数量
 64     jclass* klasses;//指向保存已加载的类的指针
 65     jvmtiError error = jvmti->GetLoadedClasses(&count, &klasses);//获取已加载的类和数量
 66     std::cout << "jvmtiError : " << error << std::endl;
 67     if (error)
 68         std::cout << "get loadedClasses error!\n";
 69     else {
 70         std::cout << "signatures : \n";
 71         for (int i = 0; i < count; i++) {//循环打印类的签名
 72             char* signature;
 73             jvmti->GetClassSignature(klasses[i], &signature, NULL);
 74             std::cout << signature << std::endl;
 75         }
 76         std::cout << "signatures end! ------------------\n";//已加载类签名打印结束标志
 77     }
 78
 79
 80
 81     jint threadCount;//用于保存线程数量
 82     jthread* threads;//指向保存线程信息的指针
 83     error = jvmti->GetAllThreads(&threadCount, &threads);//获取到线程信息
 84     if (error)
 85         std::cout << "get all threads error!\n";
 86     else {
 87         jvmtiThreadInfo threadInfo;//保存每个线程的信息,它是一个结构体的指针
 88         for (size_t i = 0; i < threadCount; i++) {
 89             error = jvmti->GetThreadInfo(threads[i], &threadInfo);
 90             if (error)
 91                 std::cout << "第 " << i << " 线程获取出错!\n";
 92             else
 93                 std::cout << "thread name:" << threadInfo.name << std::endl;
 94         }
 95         std::cout << "thread info end! ---------------------\n";
 96     }
 97
 98
 99     return 0;
100 }
101 /*
102 * This function can be used to clean-up resources allocated by the agent.
103 */
104 JNIEXPORT void JNICALL
105 Agent_OnUnload(JavaVM *vm) {
106     std::cout << "*********Agent_OnUnload**********\n";
107
108 }
代码编写完之后生成项目:

这里注意下,生成的本地库根据需要选择生成X86和X64版本,我们这里选择生成的是X64版本。生成的文件既有dll又有lib:

这两个文件都可以使用,我们这里选择使用dll文件。
下一步我们编写一个java的main方法,然后在启动jvm时加载我们的本地库:
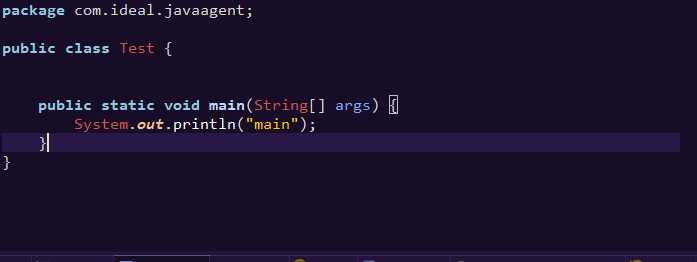

运行结果如下:

调用了Agent_OnLoad函数和Agent_OnUnload函数,因为Agent_OnLoad和Agent_OnAttach函数在一个agent中只有一个会被调用,如果你希望在JVM启动时做些事情的话,就使用onload函数,如果希望有外部链接JVM时做一些工作的话就使用attach函数,unload函数在JVM关闭时调用。对于attach函数我们也可以在JVM运行时动态加载本地库并且调用。这需要用到jdk中的tools.jar包,在%JAVA_HOME%\lib目录中。举一个例子:
我们先写一个无限循环的小程序跑着
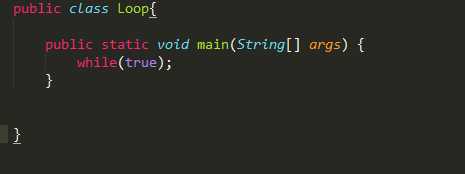
然后通过jps找到它的进程号

进程号为10748
下面是我们的代码
 1 public class Test {
 2
 3
 4     public static void main(String[] args) throws AgentLoadException, AgentInitializationException, IOException, AttachNotSupportedException {
 5         attach();
 6     }
 7
 8     public static void attach() throws AgentLoadException, AgentInitializationException, IOException, AttachNotSupportedException{
 9         String pid = "10748";//java进程号
10         String agentPath = "C:\\Users\\DanteJ\\source\\repos\\agent\\x64\\Debug\\agent.dll";//本地库路径
11         System.out.println("attaching....pid="+pid);
12         VirtualMachine virtualMachine = VirtualMachine.attach(pid);//attach JVM
13         virtualMachine.loadAgentPath(agentPath);//加载本地库
14         virtualMachine.detach();//断开
15     }
16 }
下面是我们运行Loop的JVM打印的attach函数的运行结果
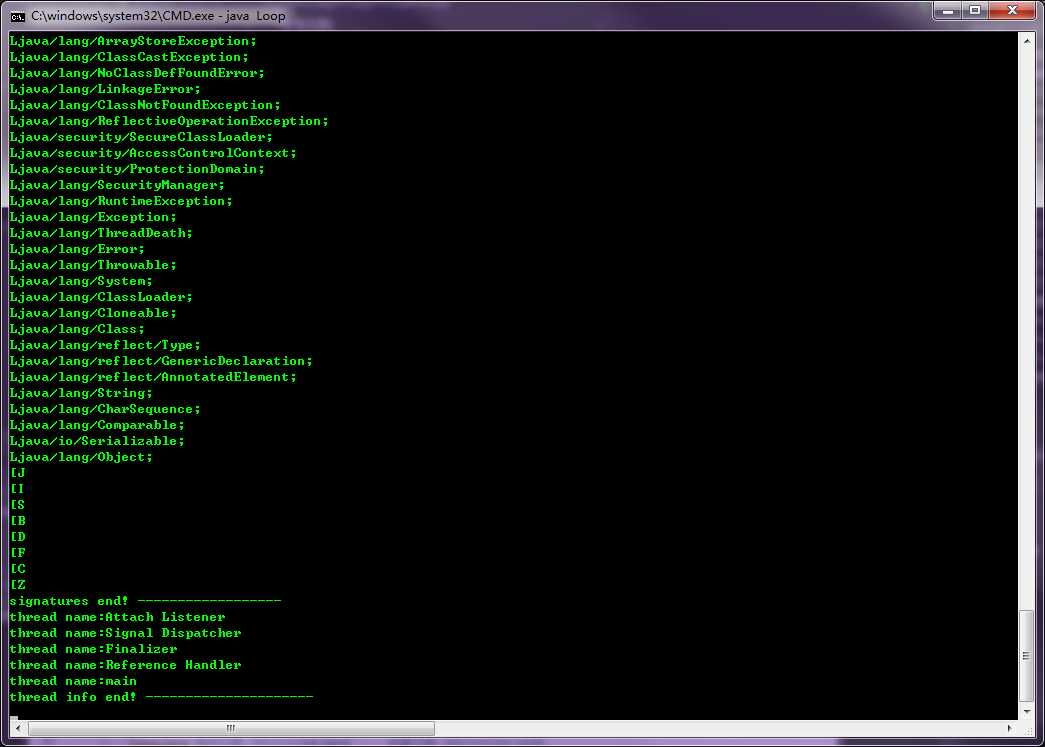
由此可见,我们可以动态的在已经运行的JVM中加载我们的本地代码。
下面我们再来看-javaagent
这里需要用到一个叫做premain的方法,它就像入口函数main方法一样是一个固定用法,其函数原型申明如下:
public static void premain(String agentArgs, Instrumentation ins)
我们编写一个测试类来作为演示
public class Agent {

    public static void premain(String agentArgs, Instrumentation ins){
        System.out.println("--------------javaagent-----------------");
    }

}
然后编写MANIFEST.MF文件,必须要指定Premain-Class参数值
Manifest-Version: 1.0
Premain-Class: com.ideal.javaagent.Agent
然后将我们的测试项目打包成jar,然后下面代码执行时在JVM参数上添加-javaagent:C:\Users\DanteJ\Desktop\test.jar,其中test.jar是我们刚才打好的包。
public static void main(String[] args) throws AgentLoadException, AgentInitializationException, IOException, AttachNotSupportedException {
        System.out.println("main");
    }
运行结果如下

成功地在main方法执行前,执行了我们的jar包中的premain方法,有关premain方法中的java.lang.instrument.Instrumentation参数,提供了很多获取JVM参数的接口方法,这里
就不做深入了,如感兴趣可以自行查阅资料。
有关java agent的用法就介绍到这里,如果有什么解释不到或者有误的地方希望大神们指出。共同进步!!
标签:include 兴趣 动态链接 pos cep support main system sys
原文地址:http://www.cnblogs.com/CLAYJJ/p/7992064.html