一、选择器
1、* 通配符选择器
这个选择器是匹配页面中所有的元素,一般用来清除浏览器的默认样式.
|
1
|
*{margin:0; padding:0} |
2、元素选择器
通过标签名来选择元素。
|
1
|
div{width:100px; height:100px;} |
3、class选择器
class选择器 / 类选择器 / 用class属性给元素命名,在页面中可以出现很多次,相当于人的名字。
|
1
2
3
4
|
.box{width:100px; height:100px;}<div class="box"></div><p class="box"></p> |
4、 id选择器
以id属性来命名,在页面中只能出现一次,具有唯一性,并且权重值最高,相当于一个人的身份证。
|
1
2
3
|
#box{width:100px; height:100px;}<div id="box"></div> |
二、高级选择器 一
1、 E F 后代选择器
匹配到E元素下面的所有的F元素(包括子、孙),空格隔开。
|
1
2
3
4
5
6
7
8
|
div ul li {width:100px; height:100px;}<br>//匹配到div下面的所有ul,且ul的所有后代li<div> <ul> <li></li> <li></li> </ul></div> |
2、 E,F 多元素选择器
同时匹配到E元素和F元素,用逗号隔开。
|
1
2
3
4
|
div,#box{width:100px; height:100px; background:#000;}//同时匹配到下文中的div标签和id为box的p标签<div></div><p id="box"></p> |
3、E>F 子元素选择器
选择到E元素的直接子代F,只选择子代。
|
1
|
ul>li{width:100px; height:100px;}<br><br><ul><br> <li><br> </li><br></ul> |
4、E+F(毗邻选择器) 相邻兄弟选择器
紧接在E元素后面的同级元素F,相邻兄弟选择器,有相同的父级。
|
1
2
3
4
5
6
7
8
|
div+.box{width:100px; height:100px; background:pink;}//这个只能选择到下面第二行的那个p元素 最后一个不满足紧接在div元素后面这个条件 <div></div> <p class="box"></p> <p class="box"></p> <div></div> <p></p> <p class="box"></p> |
|
1
2
3
4
5
6
7
8
9
10
11
12
13
|
div p + p{ width:100px; height:100px; margin-top:2px; background:pink;} //这个可以选择到下面除了第一个p元素外其他所有的元素。 <div> <p></p> <p></p> <p></p> <p></p> </div> |
三、高级选择器 二 属性选择器
1、 E[attr] 匹配具有attr属性的E元素
|
1
2
3
4
5
6
7
8
9
|
div[title]{ width:100px; height:100px; margin-top:2px; background:pink;} //匹配到下文中的第一个和第三个div元素 因为他们含有title属性 <div title="width"></div> <div></div> <div title="height"></div> |
2、E[attr=val]
匹配具有attr属性且值只为val的的E元素(注意 属性值要用引号引起来,我自己试了试好像不用括号也可以。)
|
1
2
3
4
5
6
7
8
|
div[title="height"]{ width:100px; height:100px; margin-top:2px; background:pink;<br>} //匹配到下文中的第三个div元素 <div title="width"></div> <div></div> <div title="height"></div> |
3、E[attr~=val]
匹配属性值为attr,并包含这个值的E元素,用于选取属性值中包含指定词汇的元素。
|
1
2
3
4
5
6
7
8
9
10
|
div[class~="c1"]{ width:100px; height:100px; margin-top:2px; background:pink;} //选择到下方第一个和第二个div元素 <div class="c1"></div> <div class="c1 c2"></div> <div class="c2c1"></div> |
4、E[attr|=val]
匹配所有属性为attr,值为val或者以 var- 开头的E元素
|
1
2
3
4
5
6
7
8
9
10
|
div[class|="c1"]{ width:100px; height:100px; margin-top:2px; background:pink;}//选择到下面当中的第一个和第三个元素 <div class="c1"></div> <div class="c1cs"></div> <div class="c1-c2"></div> |
5、E[attr][attr2=val]匹配所有 有attr1属性 且有attr2属性,且attr2的值为val的E元素,这个就是写出几个属性选择器,并且都要同时满足他们的条件。
|
1
2
3
4
5
6
7
8
9
|
div[title="width"][class]{ width:100px; height:100px; margin-top:2px; background:pink;} //选择到下面的第一个div元素 <div title="width" class="box"></div> <div title="width"></div> |
四、a伪类选择器
|
1
2
3
4
5
6
7
8
|
1、 :link 匹配所有未被点击的链接 a:link{ color: green; }2、:hover 匹配鼠标悬停在其上的元素 a:hover{ color: gold; }3、:active 匹配鼠标按下还没有释放的元素 a:active{ color: blue; }4、:visited 匹配所有已经被点击的链接a:visited{ color: red; } |
hover的使用,只是一个选择器,一定是他的后代。
|
1
2
3
4
5
6
7
8
9
10
11
12
|
.box{ width:100px; height: 100px; color:#fff; background: #000;}<br>.box:hover p{ color:red;}//鼠标移动div上,p字体的颜色改变 <div class="box"> <p>我的字体</p> </div> |
2. a伪元素选择器
1> :before 在元素
|
1
2
3
4
|
div:before{ content: "before插入的元素";}//在div所有元素的最前面插入这个 |
<div>
<p>这个是p</p>
<ul>
<li></li>
<li></li>
<li></li>
</ul>
</div>
2> :after 在元素后面插入内容,插到最后一个子元素的后面。
|
1
2
3
|
div:after{content:"";}<div></div> |
css3新增的选择器
五. 关联选择器
E1~E2(选择E1后面的兄弟E2)
|
1
2
3
4
5
6
7
8
9
10
11
|
div~p{ width:100px; height: 100px; margin-top: 2px; background: #000;} //div后面的三个p元素都选择到了 <div></div> <p></p> <p></p> <p></p> |
六、 属性选择器新增
1. [attr^=" .."] 以....开头的元素
|
1
2
3
4
5
6
7
8
9
10
|
div[class^="de"]{ width:100px; height: 100px; margin-top: 2px; background: #000;} //选择到了前面三个div元素 <div class="de1"></div> <div class="de"></div> <div class="dedkjsfkld"></div> <div class="1fde"></div> |
2. [attr$="... "] 以...结束的元素
|
1
2
3
4
5
6
7
8
9
10
11
|
div[class$="de"]{ width:100px; height: 100px; margin-top: 2px; background: #000;} //选择到了前三个 <div class="de1de"></div> <div class="de"></div> <div class="dedkjsfklde"></div> <div class="1f"></div> |
3. [attr*=""] 选择到包含值的元素
|
1
2
3
4
5
6
7
8
9
10
11
|
div[class*="de"]{ width:100px; height: 100px; margin-top: 2px; background: #000;} //选择到下面的 1 2 4 都包含de字母 <div class="de1de"></div> <div class="de"></div> <div class="dld"></div> <div class="1def"></div> |
七、伪类新增的选择器 下面都用p来举例子,其他的也一样
下面当中就举一个例子,其他的那些自己去实验一下,可以用这个例子来实验
这里是有of的是从p元素当中选p
1. :first-of-type
|
1
2
3
4
5
6
7
8
9
10
11
12
13
|
p:first-of-type{ width:100px; height:100px; background: #000;}//父级下面所有p元素的第一个 <div> <p></p> <p></p> <p></p> <p></p> <p></p> </div> |
2. :last-of-type
p:last-of-type 父级下面所有p元素的最后一个
3. only-of-type
p:only-of-type 父级下面只有一个p元素,其他的元素不能是p,如果有其他元素那么会选不中。
4. :nth-of-type
p:nth-child(n) 选中父级元素中第n个p
5. :nth-last-of-type(n)
选择p,父级元素中倒数第n个p元素
下面是没有of的是在子元素中选择
6. :only-child
p:only-child 选择p,p必须为他们各自父级的唯一一个子元素
|
1
2
3
4
5
6
7
8
9
10
11
12
13
14
15
16
17
18
|
p:only-child{ width:100px; height: 100px; background: #000;}<br> //下面的这个只能选择到第一个div当中的p <div> <p></p> </div> <div> <p></p> <span></span> </div> <div> <p></p> <p></p> <p></p> </div> |
7. :last-child
p:last-child 选择p,p必须为父级的最后一个子元素
8. nth-child(n)
p:nth-child(n) 父元素的第n个元素,叫p元素
9 nth-last-child(n)
p:nth-last-child(n) 选择p,也就是父级的倒数第n个元素,叫p。
后面的伪类没有什么规律了,别着急,一个一个慢慢来。
只是举例子,不要以为括号里面的内容是固定的。
1. :not(.c1) 选择到class除了c1的p 括号里面的内容还可以是id等
|
1
2
3
4
5
6
7
8
9
10
11
12
13
|
p:not(.c1){ width:100px; height: 100px; margin-top: 2px; background: #000;<br>}//下面的元素当中除了第一个class为c1的p元素其他的都被选中了。 <div> <p class="c1"></p> <p class="c2"></p> <p id="box"></p> <p></p> <p></p> </div> |
2. :empty 选择倒标签内容为空的规定元素
|
1
2
3
4
5
6
7
8
9
10
11
12
13
14
|
p:empty{ width:100px; height: 100px; margin-top: 2px; background: #000;}//会选择到下面的第二个p元素,因为他没有内容 <div> <p>11</p> <p></p> <p>11</p> <p>11</p> <p>1</p> </div> |
3. p:target 选择倒当前被锚点激活的p
|
1
2
3
4
5
6
7
8
9
10
11
|
p:target{ width:100px; height: 100px; margin-top: 2px; color:#fff; background: #000;} //点击a的内容,p标签的样式会被选中激活 <a href="#a1">点我</a> <div></div> <p id="a1">p标签的内容</p> |
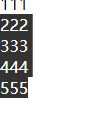
4. ::selection 被用户选中的p 这句话什么意思呢,来看下面的截图效果
|
1
2
3
4
5
6
7
8
9
10
11
12
13
|
p::selection{ width:100px; height: 100px; margin-top: 2px; color:#fff; background: #000;} <p>111</p> <p>222</p> <p>333</p> <p>444</p> <p>555</p> |


5. input:disable
选择到不能被操作的input框
6. input:enable
选择到能被cao操作的input框
|
1
2
3
4
5
6
7
8
9
10
|
input:enabled{ background:yellow;}input:disabled{ background:red;} //一般可以写内容的都是可以被操作的,加上disabled的属性和disabled的值的是不可以被操作的 <input type="text" value=""> <input type="text"> <input type="text" disabled="diabled"> |
7. input:checked
选择到被选中的input,一般用于js
|
1
2
3
4
5
6
7
|
input:checked{ width:40px; height:40px;}//就是框被打上对勾,被选中的元素会被选中 <input type="checkbox" checked="" value="">足球 <input type="checkbox" value="">篮球 |
