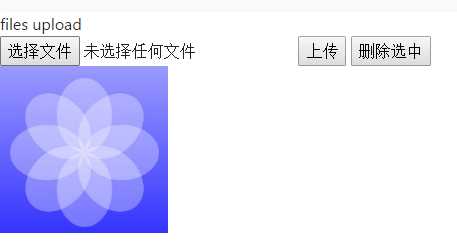
angular-file-upload 怎么设置加载环境,随便一搜索一大堆,我就不写了.
主要写一下现实功能:
1.单个图片文件上传,上传完成之后显示图片,同时清空选择的文件,在上传时需要重新选择.【多选,什么参数之类,请参考其它博客】
2.C#编写webapi 保存前端传过来的文件.返回保存的网页路径.
前端代码:
{{title}}
<div>
    <!--<input type="file" ng2FileSelect [uploader]="uploader" (change)="selectedFileOnChanged($event)" multiple />-->
    <input type="file" #nguploader ng2FileSelect [uploader]="uploader" (change)="selectedFileOnChanged($event)" />
    <input type="button" (click)="uploadFile(picId,nguploader)" value="上传" />
</div>
<div>
    <img #picId>
</div>
 1 import { Component, OnInit } from ‘@angular/core‘;
 2 import { FileUploader } from ‘ng2-file-upload‘;
 3
 4 @Component({
 5     templateUrl: ‘app/app-fileupload/fileupload.component.html‘
 6 })
 7
 8 export class FileUploadComponent implements OnInit {
 9
10     title = ‘files upload‘;
11     mysrc: string;
12     constructor() { }
13     ngOnInit(): void { }
14     //初始化定义uploader变量,用来配置input中的uploader属性
15     public uploader: FileUploader = new FileUploader({
16         url: "http://localhost:52513/api/uploads",
17         removeAfterUpload: true,
18     });
19     //定义事件,选择文件
20     selectedFileOnChanged(event: any) {
21         // 打印文件选择名称
22         // console.log(event.target.value);
23
24     }
25     //定义事件,上传文件
26     //为什么要把前端控件传过来,而不是用一个变量在前端用{{value}}的方法呢?
27     //因为onSuccess内部所写的数据和外部不一个作用域,在后面改数据的值前台无反映,具体为啥,我也不知道。
28     uploadFile(picId: HTMLImageElement, nguploader: HTMLInputElement) {
29         if (nguploader.value == "") {
30             alert(‘You have not select file!‘);
31             return;
32         }
33         //上传跨域验证
34         this.uploader.queue[0].withCredentials = false;
35         //成功之后的回调函数
36         this.uploader.queue[0].onSuccess = function (response, status, headers) {
37             if (status == 200) {
38                 // 上传文件后获取服务器返回的数据
39                 //let tempRes = JSON.parse(response);
40                 this.mysrc = response;
41                 picId.src = response.replace(‘"‘, ‘‘).replace(‘"‘, ‘‘);
42                 nguploader.value = "";
43             }
44         };
45         this.uploader.queue[0].upload(); // 开始上传
46     }
47 }
webapi代码:
 1         [Route("api/uploads")]
 2         public IHttpActionResult PostUpload()
 3         {
 4             //多文件
 5             //HttpFileCollection myHttpFileCollection = HttpContext.Current.Request.Files;
 6             //单文件
 7             HttpPostedFile myHttpPostedFile = HttpContext.Current.Request.Files[0];
 8             string sPath = HttpContext.Current.Server.MapPath("/UploadFiles/");
 9             if (!Directory.Exists(sPath))
10             {
11                 Directory.CreateDirectory(sPath);
12             }
13             myHttpPostedFile.SaveAs(sPath + myHttpPostedFile.FileName);
14             string sReturn = "http://" + HttpContext.Current.Request.Url.Authority.ToString() + "/UploadFiles/" + myHttpPostedFile.FileName;
15             return Ok(sReturn);//成功
16         }

转自:http://www.cnblogs.com/cxd1008/p/7879676.html

