在虚拟机上安装mysql走了不少弯路,在此备份。。。
首先感谢下这几篇博客提供的帮助:
https://www.cnblogs.com/pythonal/p/6141516.html
http://blog.csdn.net/typa01_kk/article/details/49059729
http://blog.csdn.net/skywalker_leo/article/details/47274441
1.官网下载mysql:
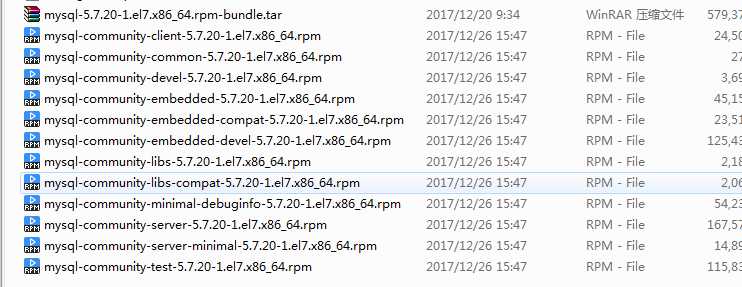
mysql-5.7.20-1.el7.x86_64.rpm-bundle.tar
mysql分了好多版本,有linux和ubuntu等等的,个人感觉最方便的是红帽;
2.解压:
tar -xvf mysql-版本号

解压后有很多个,但是我们只需要安装4个(有项目依赖,需要关注下顺序);
3.安装:
安装前先卸载自带的mariadb-lib(必须卸载,不然会碰到依赖错误,别问我怎么知道的。。。)
备注:如果删不掉的话可以试试这条命令:yum remove mysql-libs
然后依次安装:
#rpm -ivh mysql-community-common-版本.el6.x86_64.rpm
#rpm -ivh mysql-community-libs-版本.el6.x86_64.rpm
#rpm -ivh mysql-community-client-版本.el6.x86_64.rpm
#rpm -ivh mysql-community-server-版本.el6.x86_64.rpm
4.数据库初始化:
为了保证数据库目录为与文件的所有者为 mysql 登陆用户,如果你是以 root 身份运行 mysql 服务,需要执行下面的命令初始化
mysqld --initialize --user=mysql

systemctl start mysqld.service

mysql -uroot -p
第一次不用输入密码直接登录,如果输入密码了或者碰到如下错误:
Access denied for user ‘root‘@‘localhost‘ (using password:YES)
请参考这篇博客解决:
http://blog.csdn.net/skywalker_leo/article/details/47274441;
[root@wshCentOS ~]# mysql -uroot -proot123
mysql: [Warning] Using a password on the command line interface can be insecure.
Welcome to the MySQL monitor. Commands end with ; or \g.
Your MySQL connection id is 19538
Server version: 5.7.20 MySQL Community Server (GPL)
Copyright (c) 2000, 2017, Oracle and/or its affiliates. All rights reserved.
Oracle is a registered trademark of Oracle Corporation and/or its
affiliates. Other names may be trademarks of their respective
owners.
Type ‘help;‘ or ‘\h‘ for help. Type ‘\c‘ to clear the current input statement.
mysql>
修改之后登录成功,可能需要重置密码;
以上;
