对于ubuntu14.04操作系统,可以在/usr/src/linux-headers-4.4.0-31/include/linux/sched.h文件中看到进程控制块的结构体,如下
struct task_struct {
        volatile long state;    /* -1 unrunnable, 0 runnable, >0 stopped */
        void *stack;
        atomic_t usage;
        unsigned int flags;     /* per process flags, defined below */
        unsigned int ptrace;

#ifdef CONFIG_SMP
        struct llist_node wake_entry;
        int on_cpu;
        unsigned int wakee_flips;
        unsigned long wakee_flip_decay_ts;
        struct task_struct *last_wakee;

        int wake_cpu;
#endif
        ......
        ......
        pid_t pid;
        pid_t tgid;
        ......
        ......
}
可以看到,里面定义了两个字段,pid和tgid,其中pid就是这个轻量级进程lwp的id,而tgid是lwp组的id,即主lwp的id
原文:http://blog.csdn.net/u012398613/article/details/52183708
1、pid,tid,真实pid的使用
进程pid: getpid()
线程tid: pthread_self()     //进程内唯一,但是在不同进程则不唯一。
线程pid: syscall(SYS_gettid)     //系统内是唯一的

#include <stdio.h>
#include <pthread.h>
#include <sys/types.h>
#include <sys/syscall.h>

struct message
{
    int i;
    int j;
};

void *hello(struct message *str)
{
    printf("child, the tid=%lu, pid=%d\n",pthread_self(),syscall(SYS_gettid));
    printf("the arg.i is %d, arg.j is %d\n",str->i,str->j);
    printf("child, getpid()=%d\n",getpid());
    while(1);
}

int main(int argc, char *argv[])
{
    struct message test;
    pthread_t thread_id;
    test.i=10;
    test.j=20;
    pthread_create(&thread_id,NULL,hello,&test);
    printf("parent, the tid=%lu, pid=%d\n",pthread_self(),syscall(SYS_gettid));
    printf("parent, getpid()=%d\n",getpid());
    pthread_join(thread_id,NULL);
    return 0;
}
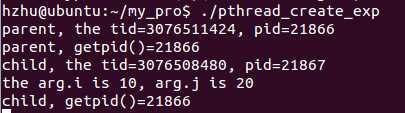
getpid()得到的是进程的pid,在内核中,每个线程都有自己的PID,要得到线程的PID,必须用syscall(SYS_gettid);
pthread_self函数获取的是线程ID,线程ID在某进程中是唯一的,在不同的进程中创建的线程可能出现ID值相同的情况。
#include <stdio.h>
#include <pthread.h>
#include <stdlib.h>
#include <unistd.h>
#include <sys/syscall.h>

void *thread_one()
{
    printf("thread_one:int %d main process, the tid=%lu,pid=%ld\n",getpid(),pthread_self(),syscall(SYS_gettid));
}

void *thread_two()
{
    printf("thread two:int %d main process, the tid=%lu,pid=%ld\n",getpid(),pthread_self(),syscall(SYS_gettid));
}

int main(int argc, char *argv[])
{
    pid_t pid;
    pthread_t tid_one,tid_two;
    if((pid=fork())==-1)
    {
        perror("fork");
        exit(EXIT_FAILURE);
    }
    else if(pid==0)
    {
        pthread_create(&tid_one,NULL,(void *)thread_one,NULL);
        pthread_join(tid_one,NULL);
    }
    else
    {
        pthread_create(&tid_two,NULL,(void *)thread_two,NULL);
        pthread_join(tid_two,NULL);
    }
    wait(NULL);
    return 0;
}

2、pid与tid的用途
Linux中,每个进程有一个pid,类型pid_t,由getpid()取得。Linux下的POSIX线程也有一个id,类型pthread_t,由pthread_self()取得,该id由线程维护,其id空间是各个进程独立的(即不同进程中的线程可能有相同的id)。你可能知道,Linux中的POSIX线程库实现的线程其实也是一个进程(LWP),只是该进程与主进程(启动线程的进程)共享一些资源而已,比如代码段,数据段等。
有时候我们可能需要知道线程的真实pid。比如进程P1要向另外一个进程P2中的某个线程发送信号时,既不能使用P2的pid,更不能使用线程的pthread id,而只能使用该线程的真实pid,称为tid。
有一个函数gettid()可以得到tid,但glibc并没有实现该函数,只能通过Linux的系统调用syscall来获取。使用syscall得到tid只需一行代码,但为了加深各位看官的印象,简单提供下面场景。
有一簇进程,其中一个进程中另外启了一个线程。各进程共享一个数据结构,由shared_ptr指明,其中保存有线程的tid。在各个进程的执行过程中,需要判断线程是否存在,若不存在则(重新)创建。
首先,在线程函数的开始,需要将自己的tid保存至共享内存,
点击(此处)折叠或打开
- #include <sys/syscall.h>
- #include <sys/types.h>
- void*
- thread_func(void *args)
- {
- //~ lock shared memory
- shared_ptr->tid = syscall(SYS_gettid); //~ gettid()
- //~ unlock shared memory
- //~ other stuff
- }
点击(此处)折叠或打开
- //~ lock shared memory
- pthread_t id;
- if (shared_ptr->tid == 0) { //~ tid is initialized to 0
- pthread_create(&id, NULL, thread_func, NULL);
- } else if (shared_ptr->tid > 0) {
- int ret = kill(shared_ptr->tid, 0); //~ send signal 0 to thread
- if (ret != 0) { //~ thread already died
- pthread_create(&id, NULL, thread_func, NULL);
- }
- }
- //~ unlock shared memory
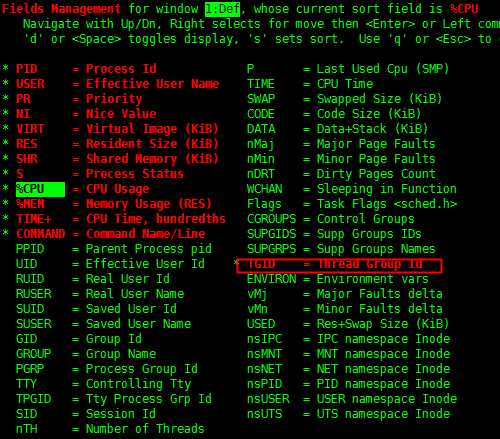
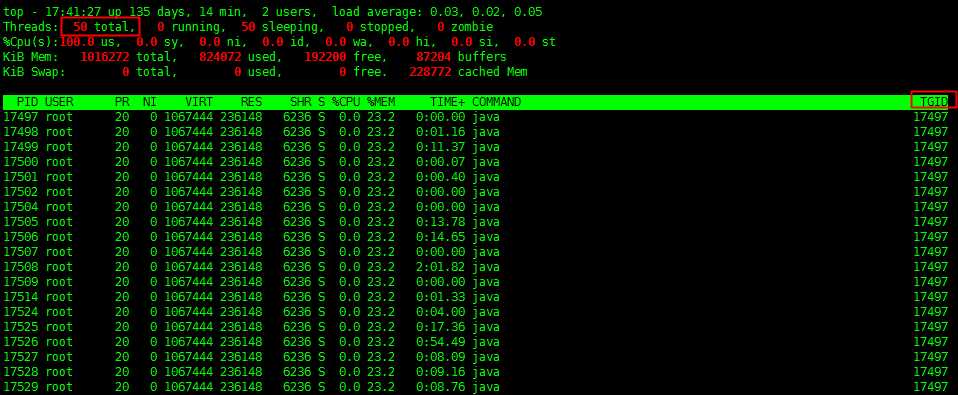
3、linux 系统中查看pid,tid的方法
线程进程都会有自己的ID,从操作系统来讲,这个ID就叫做PID
引用原文
The four threads will have the same PID but only when viewed from above. What you (as a user) call a PID is not what the kernel (looking from below) calls a PID.
In the kernel, each thread has it‘s own ID, called a PID (although it would possibly make more sense to call this a TID, or thread ID) and they also have a TGID (thread group ID) which is the PID of the thread that started the whole process.
Simplistically, when a new process is created, it appears as a thread where both the PID and TGID are the same (new) number.
When a thread starts another thread, that started thread gets its own PID (so the scheduler can schedule it independently) but it inherits the TGID from the original thread.
That way, the kernel can happily schedule threads independent of what process they belong to, while processes (thread group IDs) are reported to you.
关于线程继承关系图如下:
              USER VIEW
 <-- PID 43 --> <----------------- PID 42 ----------------->
                     +---------+
                     | process |
                    _| pid=42  |_
                  _/ | tgid=42 | \_ (new thread) _
       _ (fork) _/   +---------+                        /                                        +---------+
+---------+                                    | process |
| process |                                    | pid=44  |
| pid=43  |                                    | tgid=42 |
| tgid=43 |                                    +---------+
+---------+
 <-- PID 43 --> <--------- PID 42 --------> <--- PID 44 --->
                     KERNEL VIEW
在这里你可以清晰的看到,创建一个新的进程会给一个新的PID和TGID,并且2个值相同,
当创建一个新的线程的时候,会给你一个新的PID,并且TGID和之前开始的进程一致。
Linux通过进程查看线程的方法 1).htop按t(显示进程线程嵌套关系)和H(显示线程) ,然后F4过滤进程名。2).ps -eLf | grep java(快照,带线程命令,e是显示全部进程,L是显示线程,f全格式输出) 3).pstree -p <pid>(显示进程树,不加pid显示所有) 4).top -Hp <pid> (实时) 5).ps -T -p <pid>(快照)推荐程度按数字从小到大。