webService是用于解决分布式系统通信的一种解决方案。Apachecxf是当前主流的webService开发框架,由Apache提供。
Apachecxf的webService开发,主要分为两种服务提供方式:Ws和Rs。JAX-WS传输数据使用的是xml格式,基于soap协议,而JAX-RS传输数据使用的是xml或者json,基于http协议。首先,来看一下JAX-WS的独立服务使用:
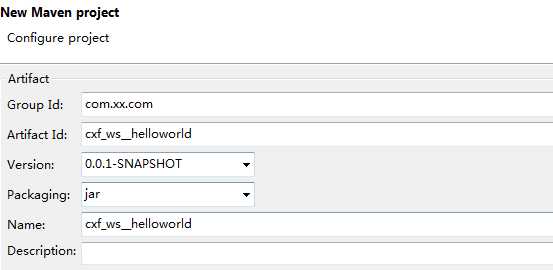
1.建立一个maven的java项目

2.在项目中导入cxf的jar包

使用maven的坐标
<!-- 使用jax-ws进行开发 -->
  		<dependency>
			<groupId>org.apache.cxf</groupId>
			<artifactId>cxf-rt-frontend-jaxws</artifactId>
			<version>3.0.1</version>
		</dependency>
	<!-- 内置jetty服务器 -->
		<dependency>
			<groupId>org.apache.cxf</groupId>
			<artifactId>cxf-rt-transports-http-jetty</artifactId>
			<version>3.0.1</version>
		</dependency>
3.编写服务器端程序
编写实体类
package com.xx.cn.cxf_ws__helloworld.domain;

public class Car {
	private Integer id;
	private String carName;
	private Double price;

	public Integer getId() {
		return id;
	}

	public void setId(Integer id) {
		this.id = id;
	}

	public String getCarName() {
		return carName;
	}

	public void setCarName(String carName) {
		this.carName = carName;
	}

	public Double getPrice() {
		return price;
	}

	public void setPrice(Double price) {
		this.price = price;
	}

	@Override
	public String toString() {
		return "Car [id=" + id + ", carName=" + carName + ", price=" + price + "]";
	}

}
package com.xx.cn.cxf_ws__helloworld.domain;

import java.util.ArrayList;
import java.util.List;

public class User {
	private Integer id;
	private String username;
	private String city;

	private List<Car> cars = new ArrayList<Car>();

	public Integer getId() {
		return id;
	}

	public void setId(Integer id) {
		this.id = id;
	}

	public String getUsername() {
		return username;
	}

	public void setUsername(String username) {
		this.username = username;
	}

	public String getCity() {
		return city;
	}

	public void setCity(String city) {
		this.city = city;
	}

	public List<Car> getCars() {
		return cars;
	}

	public void setCars(List<Car> cars) {
		this.cars = cars;
	}

}
编写服务
package com.xx.cn.cxf_ws__helloworld.service;

import java.util.List;

import javax.jws.WebMethod;
import javax.jws.WebService;

import com.xx.cn.cxf_ws__helloworld.domain.Car;
import com.xx.cn.cxf_ws__helloworld.domain.User;

//编写webService服务器端接口

@WebService
public interface IUserService {
	@WebMethod
	public String sayHello(String name);
	@WebMethod
	public List<Car> findCarsByUser(User user);
}
package com.xx.cn.cxf_ws__helloworld.service;

import java.util.ArrayList;
import java.util.List;

import javax.jws.WebService;

import com.xx.cn.cxf_ws__helloworld.domain.Car;
import com.xx.cn.cxf_ws__helloworld.domain.User;

//编写webService接口实现类
@WebService(endpointInterface="com.xx.cn.cxf_ws__helloworld.service.IUserService",serviceName="userService")
public class IUserServiceImpl implements IUserService{

	public String sayHello(String name) {
		// 简单参数传递
		return "Hello" + name;
	}

	public List<Car> findCarsByUser(User user) {
		// 复杂参数传递
		List<Car> cars = new ArrayList<Car>();
		Car car = new Car();
		car.setId(1);
		car.setCarName("大众");
		car.setPrice(200000d);
		cars.add(car);
		user.setCars(cars);
		return cars;
	}

}
发布服务
package com.xx.cn.cxf_ws__helloworld.server;

import javax.xml.ws.Endpoint;

import com.xx.cn.cxf_ws__helloworld.service.IUserService;
import com.xx.cn.cxf_ws__helloworld.service.IUserServiceImpl;

//发布jax_ws服务
public class CXFServer {
	public static void main(String[] args) {
		//服务实现对象
		IUserService userService = new IUserServiceImpl();
		//发布服务地址
		String address = "http://localhost:9909/userService";
		//发布服务
		Endpoint.publish(address, userService);

		System.out.println("服务已经启动...");
	}
}
服务访问地址
http://localhost:9909/userService?wsdl
编写客户端操作
package com.xx.cn.cxf_ws__helloworld.client;

import org.apache.cxf.interceptor.LoggingInInterceptor;
import org.apache.cxf.interceptor.LoggingOutInterceptor;
import org.apache.cxf.jaxws.JaxWsProxyFactoryBean;

import com.xx.cn.cxf_ws__helloworld.service.IUserService;

//WS客户端
public class WSClient {
	public static void main(String[] args) {
		//编写客户端调用发布的webService服务
		JaxWsProxyFactoryBean jaxWsProxyFactoryBean = new JaxWsProxyFactoryBean();
		jaxWsProxyFactoryBean.setAddress("http://localhost:9909/userService");
		jaxWsProxyFactoryBean.setServiceClass(IUserService.class);
		//添加日志监控
		jaxWsProxyFactoryBean.getInInterceptors().add(new LoggingInInterceptor());
		jaxWsProxyFactoryBean.getOutInterceptors().add(new LoggingOutInterceptor());
		//创建远程代理对象
		IUserService proxy = (IUserService) jaxWsProxyFactoryBean.create();
		//调用代理对象任何一个方法,都将通过网络调用web服务
		System.out.println(proxy.sayHello("琼华派"));
	}
}
接下来,介绍一下WS整合spring进行开发
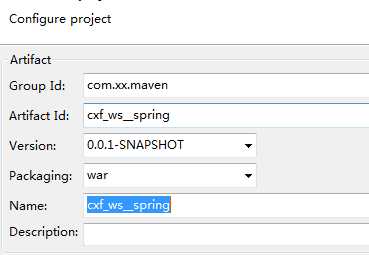
1.建立mavenweb工程

2.基于maven导入坐标
 <dependencies>
		<dependency>
			<groupId>org.apache.cxf</groupId>
			<artifactId>cxf-rt-frontend-jaxws</artifactId>
			<version>3.0.1</version>
		</dependency>

		<dependency>
			<groupId>org.springframework</groupId>
			<artifactId>spring-context</artifactId>
			<version>4.1.7.RELEASE</version>
		</dependency>

		<dependency>
			<groupId>org.springframework</groupId>
			<artifactId>spring-web</artifactId>
			<version>4.1.7.RELEASE</version>
		</dependency>

		<dependency>
			<groupId>org.springframework</groupId>
			<artifactId>spring-test</artifactId>
			<version>4.1.7.RELEASE</version>
		</dependency>

		<dependency>
			<groupId>junit</groupId>
			<artifactId>junit</artifactId>
			<version>4.12</version>
		</dependency>

	</dependencies>

	<build>
		<plugins>
			<plugin>
				<groupId>org.codehaus.mojo</groupId>
				<artifactId>tomcat-maven-plugin</artifactId>
				<version>1.1</version>
				<configuration>
					<port>9800</port>
				</configuration>
			</plugin>
		</plugins>
	</build>
3.配置web.xml文件
<?xml version="1.0" encoding="UTF-8"?>
<web-app xmlns:xsi="http://www.w3.org/2001/XMLSchema-instance"
	xmlns="http://java.sun.com/xml/ns/javaee"
	xsi:schemaLocation="http://java.sun.com/xml/ns/javaee http://java.sun.com/xml/ns/javaee/web-app_2_5.xsd"
	id="WebApp_ID" version="2.5">

	<!-- spring配置文件位置 -->
	<context-param>
		<param-name>contextConfigLocation</param-name>
		<param-value>classpath:applicationContext.xml</param-value>
	</context-param>
	<!-- spring核心监听器 -->
	<listener>
		<listener-class>org.springframework.web.context.ContextLoaderListener</listener-class>
	</listener>

	<servlet>
		<servlet-name>CXFService</servlet-name>
		<servlet-class>org.apache.cxf.transport.servlet.CXFServlet</servlet-class>
		<load-on-startup>1</load-on-startup>
	</servlet>
	<servlet-mapping>
		<servlet-name>CXFService</servlet-name>
		<url-pattern>/services/*</url-pattern>
	</servlet-mapping>

	<welcome-file-list>
		<welcome-file>index.html</welcome-file>
		<welcome-file>index.htm</welcome-file>
		<welcome-file>index.jsp</welcome-file>
		<welcome-file>default.html</welcome-file>
		<welcome-file>default.htm</welcome-file>
		<welcome-file>default.jsp</welcome-file>
	</welcome-file-list>

</web-app>
4.导入先前写好的domain和service
5.在spring中配置cxf服务发布
<?xml version="1.0" encoding="UTF-8"?>
<beans xmlns="http://www.springframework.org/schema/beans"
	xmlns:xsi="http://www.w3.org/2001/XMLSchema-instance" xmlns:jaxws="http://cxf.apache.org/jaxws"
	xsi:schemaLocation="
	http://www.springframework.org/schema/beans http://www.springframework.org/schema/beans/spring-beans.xsd
	http://cxf.apache.org/jaxws http://cxf.apache.org/schemas/jaxws.xsd">

	<!-- address:客户端访问服务路径
		 serviceClass:配置接口
		 serviceBean:配置实现类 -->
	<jaxws:server id="userService" address="/userService" serviceClass="com.xx.cn.cxf_ws__helloworld.service.IUserService">
		<jaxws:serviceBean>
			<bean class="com.xx.cn.cxf_ws__helloworld.service.IUserServiceImpl" />
		</jaxws:serviceBean>
	</jaxws:server>

</beans>
访问地址
http://localhost:9800/cxf_ws__spring/services/userService?wsdl
6.整合spring,编写客户端
<?xml version="1.0" encoding="UTF-8"?>
<beans xmlns="http://www.springframework.org/schema/beans"
	xmlns:xsi="http://www.w3.org/2001/XMLSchema-instance" xmlns:jaxws="http://cxf.apache.org/jaxws"
	xsi:schemaLocation="
	http://www.springframework.org/schema/beans http://www.springframework.org/schema/beans/spring-beans.xsd
	http://cxf.apache.org/jaxws http://cxf.apache.org/schemas/jaxws.xsd">

	<jaxws:client id="userServiceClient" serviceClass="com.xx.cn.cxf_ws__helloworld.service.IUserService"
		address="http://localhost:9800/cxf_ws__spring/services/userService" >
		<jaxws:inInterceptors>
			<bean class="org.apache.cxf.interceptor.LoggingInInterceptor"/>
		</jaxws:inInterceptors>
		<jaxws:outInterceptors>
			<bean class="org.apache.cxf.interceptor.LoggingOutInterceptor" />
		</jaxws:outInterceptors>
	</jaxws:client>
</beans>
package cxf_ws__spring.test;

import org.junit.Test;
import org.junit.runner.RunWith;
import org.springframework.beans.factory.annotation.Autowired;
import org.springframework.beans.factory.annotation.Qualifier;
import org.springframework.test.context.ContextConfiguration;
import org.springframework.test.context.junit4.SpringJUnit4ClassRunner;

import com.xx.cn.cxf_ws__helloworld.domain.User;
import com.xx.cn.cxf_ws__helloworld.service.IUserService;

@RunWith(SpringJUnit4ClassRunner.class)
@ContextConfiguration(locations = "classpath:applicationContext-test.xml")
public class UserService_WS_Test {
	@Autowired
	@Qualifier("userServiceClient")
	private IUserService userService;

	@Test
	public void testCall() {
		System.out.println(userService.sayHello("琼华派"));
		User user = new User();
		user.setUsername("xiaoming");
		System.out.println(userService.findCarsByUser(user));
	}

}
