整体流程图

配置Server1 新建两块网卡 一块网卡设置为桥接模式,另外一块设置为仅主机模式
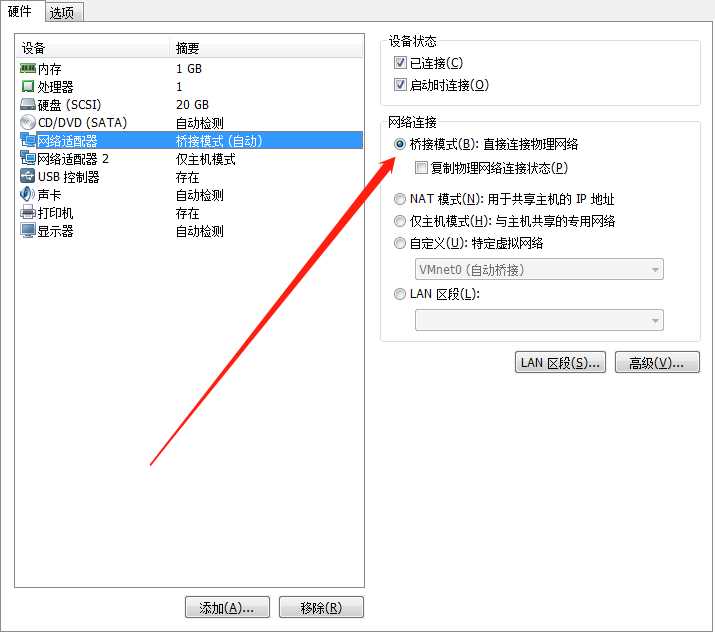
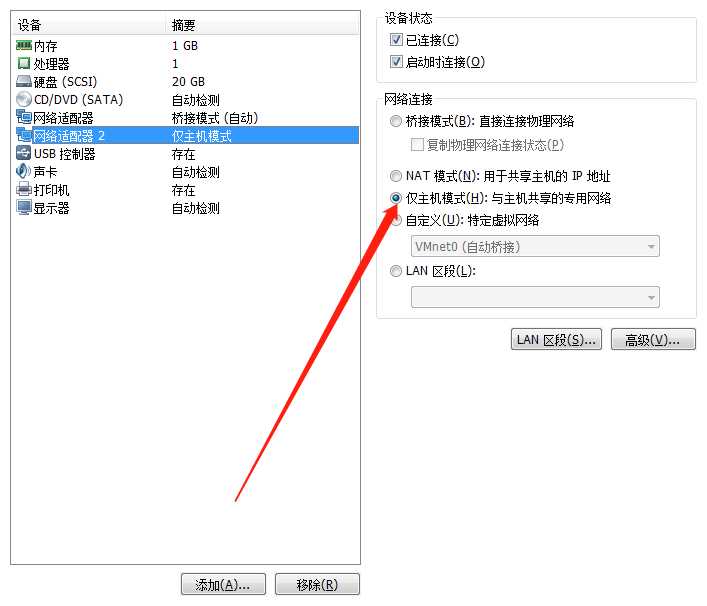
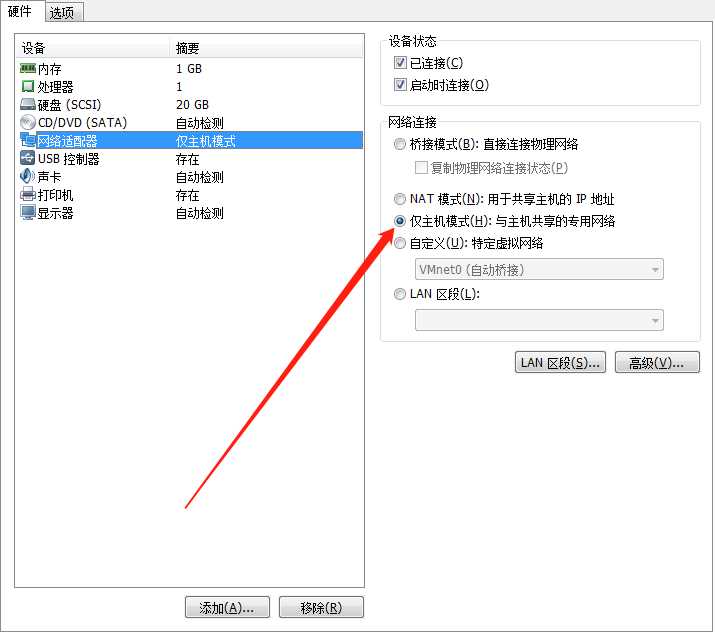
查看两块网卡配置
root@ubuntu:~# ifconfig
ens33     Link encap:Ethernet  HWaddr 00:0c:29:42:81:1c
          inet addr:192.168.31.159  Bcast:192.168.31.255  Mask:255.255.255.0
          inet6 addr: ffff::fff:29ff:fe42:811c/64 Scope:Link
          UP BROADCAST RUNNING MULTICAST  MTU:1500  Metric:1
          RX packets:163 errors:0 dropped:0 overruns:0 frame:0
          TX packets:421 errors:0 dropped:0 overruns:0 carrier:0
          collisions:0 txqueuelen:1000
          RX bytes:20177 (20.1 KB)  TX bytes:35945 (35.9 KB)
打开interfaces查看ens33配置 DHCP 方式
auto ens33
iface ens33 inet dhcp
查看网卡名称
root@ubuntu:/etc/network# ip link show
root@ubuntu:/etc/network# ip link show
2: ens33: <BROADCAST,MULTICAST,UP,LOWER_UP> mtu 1500 qdisc pfifo_fast state UP mode DEFAULT group default qlen 1000
    link/ether ff:ff:ff:ff:81:1c brd ff:ff:ff:ff:ff:ff
3: ens38: <BROADCAST,MULTICAST> mtu 1500 qdisc noop state DOWN mode DEFAULT group default qlen 1000
    link/ether 00:0c:29:42:81:26 brd ff:ff:ff:ff:ff:ff
设置内网为静态ip
auto ens38
iface ens38 inet static
address 192.168.232.101
netmask 255.255.255.0
配置Server3 ip为静态ip且和上一步配置的内网ip在一个网段
auto ens33
iface ens33 inet static
address 192.168.232.103
netmask 255.255.255.0
测试内网
root@ubuntu:/etc/network# ping 192.168.232.101
PING 192.168.232.101 (192.168.232.101) 56(84) bytes of data.
64 bytes from 192.168.232.101: icmp_seq=1 ttl=64 time=12.0 ms
64 bytes from 192.168.232.101: icmp_seq=2 ttl=64 time=1.61 ms
设置Server3 默认网关为Server1的内网ip
route add default gw 192.168.110.134修改/etc/sysctl.conf文件 打开ip限制
net.ipv4.ip_forward = 1
sysctl -p /etc/sysctl.conf
设置iptables转发功能
iptables -P FORWARD DROP
iptables -t nat -A POSTROUTING -s 192.168.232.0/24 -j SNAT --to 192.168.31.159
iptables -A FORWARD -s 192.168.232.103 -j ACCEPT
具体解释 请参考这篇博客
http://xstarcd.github.io/wiki/Linux/iptables_forward_internetshare.html查看转发iptables转发规则
iptables -t nat -nvL

root@ubuntu:/home/guolin# iptables -t nat -nvL
Chain PREROUTING (policy ACCEPT 108 packets, 7306 bytes)
 pkts bytes target     prot opt in     out     source               destination

Chain INPUT (policy ACCEPT 0 packets, 0 bytes)
 pkts bytes target     prot opt in     out     source               destination

Chain OUTPUT (policy ACCEPT 4 packets, 288 bytes)
 pkts bytes target     prot opt in     out     source               destination

Chain POSTROUTING (policy ACCEPT 4 packets, 288 bytes)
 pkts bytes target     prot opt in     out     source               destination
  103  7035 SNAT       all  --  *      *       192.168.232.0/24     0.0.0.0/0            to:192.168.31.159
    0     0 SNAT       all  --  *      *       192.168.232.0/24     0.0.0.0/0            to:192.168.31.159
    0     0 SNAT       all  --  *      *       192.168.232.0/24     0.0.0.0/0            to:192.168.31.159
    0     0 SNAT       all  --  *      *       192.168.232.0/24     0.0.0.0/0            to:192.168.31.159
ping 公共DNS域名解析系统
root@ubuntu:/etc/network# ping 114.114.114.114
PING 114.114.114.114 (114.114.114.114) 56(84) bytes of data.
64 bytes from 114.114.114.114: icmp_seq=1 ttl=58 time=5.07 ms
64 bytes from 114.114.114.114: icmp_seq=2 ttl=58 time=47.3 ms
如果有问题 可以traceroute 公司运维大神教我另外一个指令
mtr 114.114.114.114设置域名解析系统
nameserver 114.114.114.114大功告成 测试一下
root@ubuntu:/etc/network# ping qq.com
PING qq.com (61.135.157.156) 56(84) bytes of data.
64 bytes from 61.135.157.156: icmp_seq=1 ttl=43 time=73.7 ms
64 bytes from 61.135.157.156: icmp_seq=2 ttl=43 time=63.9 ms