前篇我们讲了怎样创建一个自动化账户以及创建时候“Run As Account”选项背后的奥秘。这一篇针对在Azure自动化账户中使用Powershell Runbook的用户讲一下怎样更新powershell 模块。
更新Powershell模块
首先,我们需要先了解一下Azure Automation的系统架构。我们已经知道用户可以通过运行Runbook来实现自动化运维,Runbook运行则是在Azure Automation的沙盒里执行的,沙盒是一组由Azure管理的虚机资源, 我们可以把其当做是Azure的一个PaaS服务。Pass服务自然是需要提供可伸缩高可用多租客隔离的运行环境。显然,我们需要能够为Runbook的运行环境指定所需要的Powershell模块和版本。同时,我们还需要能够升级更新相关的powershell模块。
打开我们前面创建的azpoctest自动化账户,在左边菜单选择“共享的资源”-》“模块”。
非常好,用户可以添加自定义的模块“添加模块”,也可以升级已有模块版本“更新Azure模块”。用户还可以浏览powershell模块库来导入新模块。
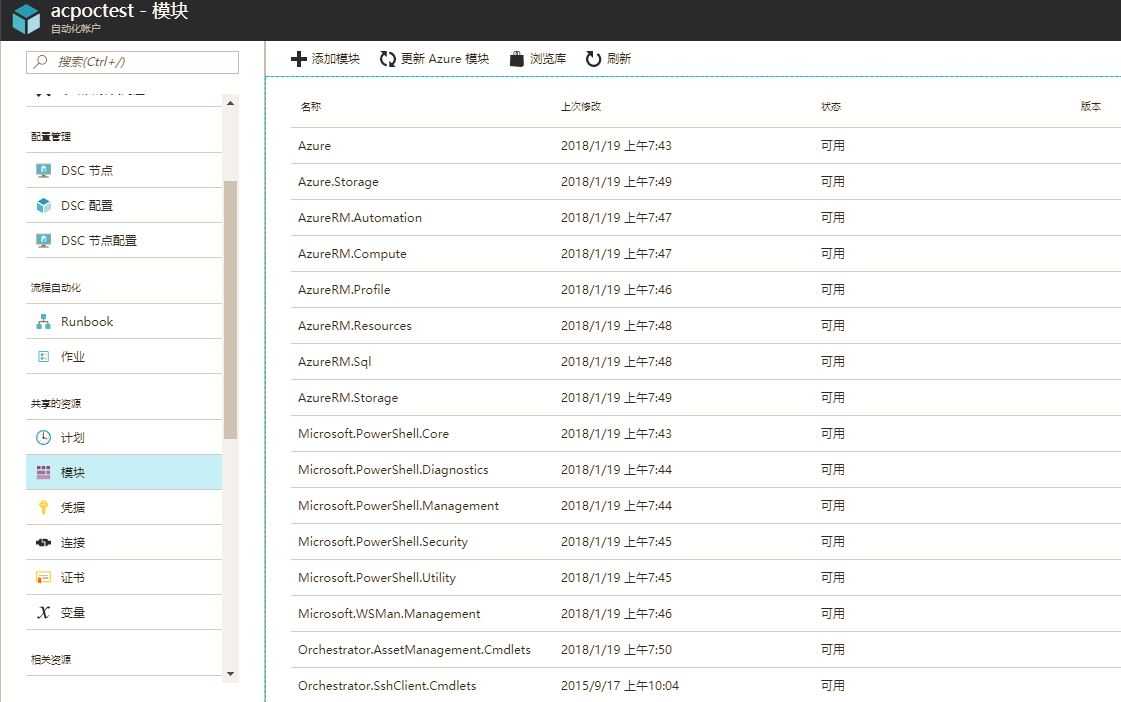
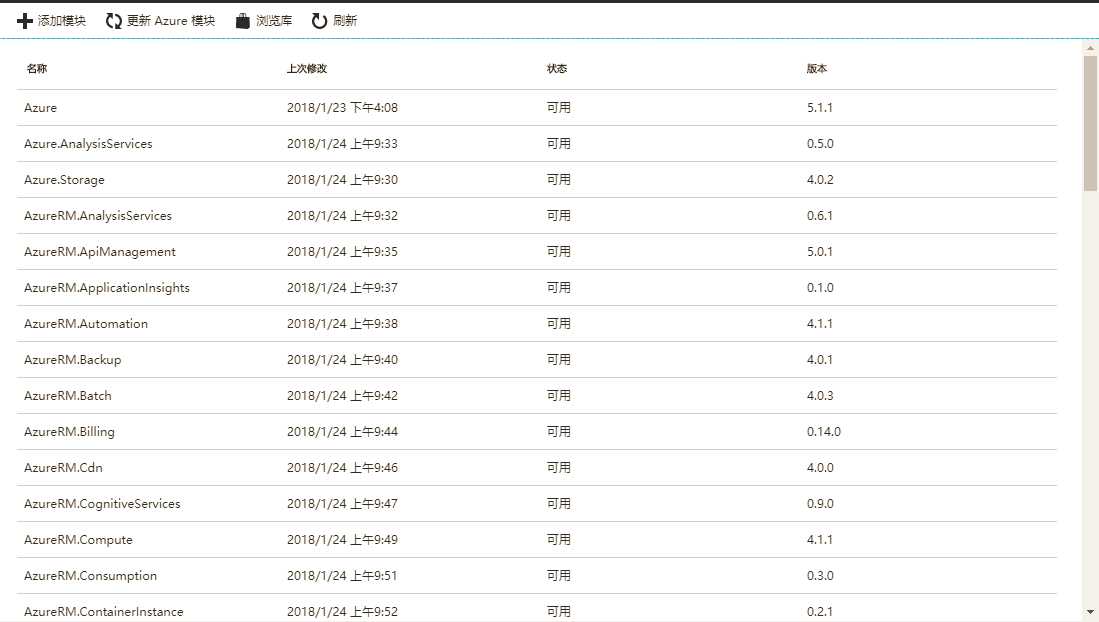
仔细研究一下这个页面,目测创建自动化账户时候自带的模块远少于目前Azure已经release的Powershell模块。如果需要运行Runbook来自动化运维Azure资源的话,目前这些模块是远远不够的。
记得光是ARM相关的powershell模块就有几十个,一个个导入的话工作量实在太大,那我们能不能像在powershell 命令行那样,用Install-Module和Import-Module两条命令就可以完成所有AzureRM
相关的模块安装呢?
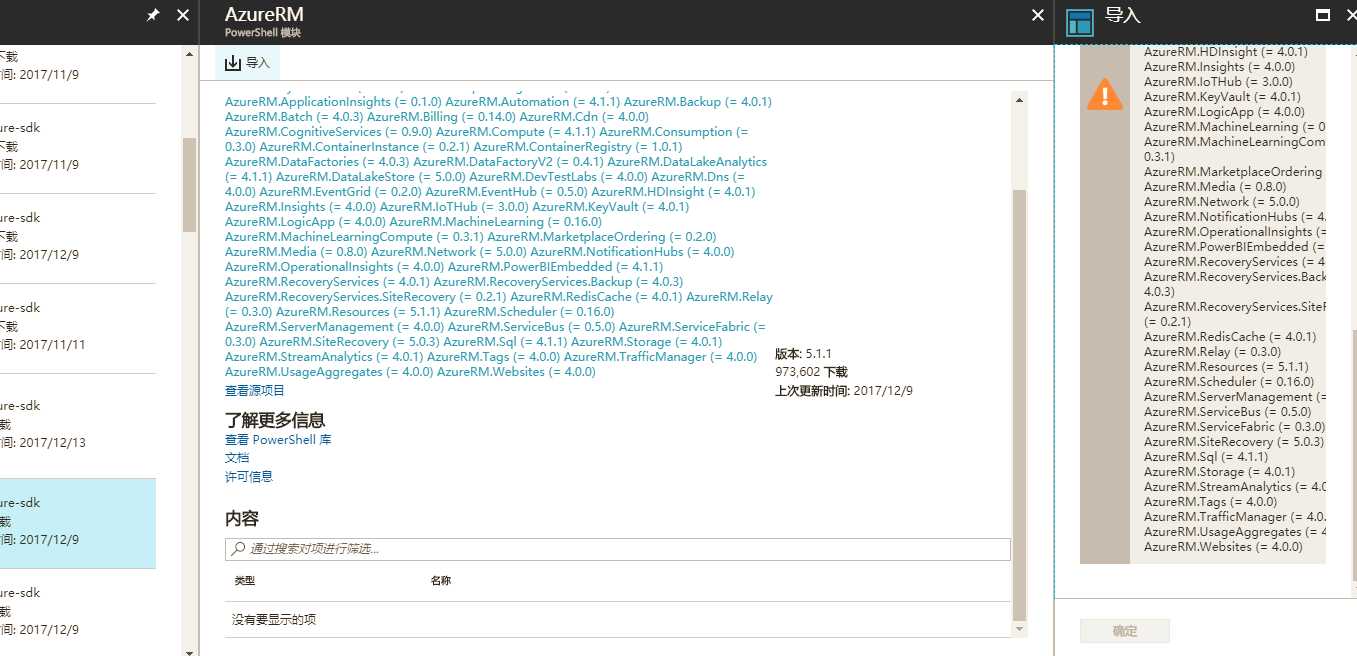
点击“浏览库”,选择“AzureRM”,点击“导入”。“确定”按钮是灰色的,显然在Azure Portal中不支持有依赖关系的模块集中导入。
记得16年在Global做Automation Account的时候,毫无怨言地填坑,手动一个个把这些模块导入。今天我们换个填坑的法子
接下来我们会写一个Runbook,用脚本来导入AzureRM的Powershell模块
创建Runbook
在自动化账户左边菜单选取“流程自动化”-》“Runbook”-》“添加Runbook“ ,创建一个新的Runbook
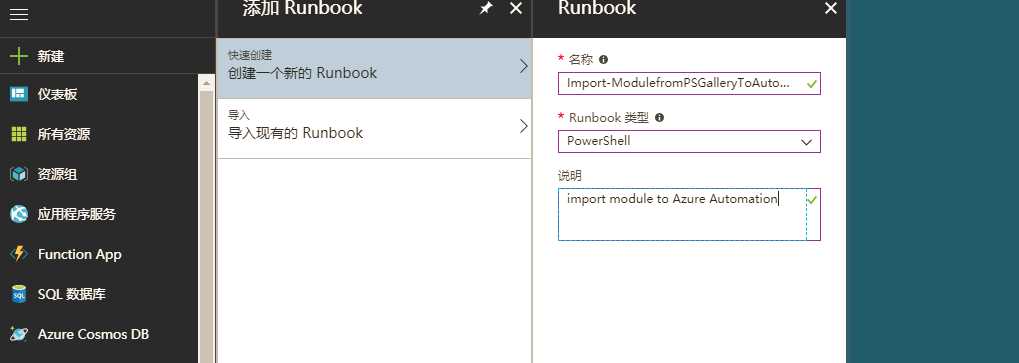
创建成功后,浏览器会自动跳转到Runbook编辑器,我们可以开始写Powershell脚本了
首先,因为Runbook是运行在一个多租户的沙盒中,我们需要登录这个自动化账户所在的Azure订阅才能为这个自动化账户导入模块。
登录的代码可以reuse我们在上一篇提到的Runbook模板
$connectionName = "AzureRunAsConnection"
try
{
    # Get the connection "AzureRunAsConnection "
    $servicePrincipalConnection=Get-AutomationConnection -Name $connectionName

    "Logging in to Azure..."
    Add-AzureRmAccount `
        -ServicePrincipal `
        -TenantId $servicePrincipalConnection.TenantId `
        -ApplicationId $servicePrincipalConnection.ApplicationId `
        -CertificateThumbprint $servicePrincipalConnection.CertificateThumbprint `
        -EnvironmentName AzureChinaCloud
 }
catch {
    if (!$servicePrincipalConnection)
    {
        $ErrorMessage = "Connection $connectionName not found."
        throw $ErrorMessage
    } else{
        Write-Error -Message $_.Exception
        throw $_.Exception
    }
}
接下来,我们需要在Powershell Gallery里查找导入模块及其版本,如果存在,我们会先去找一个模块实际存储的Blob Storage地址,用New-AzureRmAutomationModule这条命令来导入
如果有Dependency的模块,脚本会首先去导入Dependency模块。下文脚本包含了资源组,自动化账户,模块(AzureRM)和模块版本(最新),考虑到模块和模块版本在不同时期可能有变化,这2部分其实可以做参数化,由Automation的variable来存储。那样脚本就不需要经常修改。
param(
    [Parameter(Mandatory=$true)]
    [String] $ResourceGroupName,

    [Parameter(Mandatory=$true)]
    [String] $AutomationAccountName,

    [Parameter(Mandatory=$true)]
    [String] $ModuleName,

    [Parameter(Mandatory=$false)]
    [String] $ModuleVersion
)

$ModulesImported = @()

function _doImport {
    param(
        [Parameter(Mandatory=$true)]
        [String] $ResourceGroupName,

        [Parameter(Mandatory=$true)]
        [String] $AutomationAccountName,

        [Parameter(Mandatory=$true)]
        [String] $ModuleName,

        # if not specified latest version will be imported
        [Parameter(Mandatory=$false)]
        [String] $ModuleVersion
    )

    $Url = "https://www.powershellgallery.com/api/v2/Search()?`$filter=IsLatestVersion&searchTerm=%27$ModuleName%27&targetFramework=%27%27&includePrerelease=false&`$skip=0&`$top=40"
    $SearchResult = Invoke-RestMethod -Method Get -Uri $Url -UseBasicParsing

    if($SearchResult.Length -and $SearchResult.Length -gt 1) {
        $SearchResult = $SearchResult | Where-Object -FilterScript {
            return $_.properties.title -eq $ModuleName
        }
    }

    if(!$SearchResult) {
        Write-Error "Could not find module ‘$ModuleName‘ on PowerShell Gallery."
    }
    else {
        $ModuleName = $SearchResult.properties.title # get correct casing for the module name
        $PackageDetails = Invoke-RestMethod -Method Get -UseBasicParsing -Uri $SearchResult.id

        if(!$ModuleVersion) {
            # get latest version
            $ModuleVersion = $PackageDetails.entry.properties.version
        }

        $ModuleContentUrl = "https://www.powershellgallery.com/api/v2/package/$ModuleName/$ModuleVersion"

        # Make sure module dependencies are imported
        $Dependencies = $PackageDetails.entry.properties.dependencies

        if($Dependencies -and $Dependencies.Length -gt 0) {
            $Dependencies = $Dependencies.Split("|")

            # parse depencencies, which are in the format: module1name:module1version:|module2name:module2version:
            $Dependencies | ForEach-Object {

                if($_ -and $_.Length -gt 0) {
                    $Parts = $_.Split(":")
                    $DependencyName = $Parts[0]
                    $DependencyVersion = $Parts[1]

                    # check if we already imported this dependency module during execution of this script
                    if(!$ModulesImported.Contains($DependencyName)) {

                        $AutomationModule = Get-AzureRmAutomationModule `
                            -ResourceGroupName $ResourceGroupName `
                            -AutomationAccountName $AutomationAccountName `
                            -Name $DependencyName `
                            -ErrorAction SilentlyContinue

                        # check if Automation account already contains this dependency module of the right version
                        if((!$AutomationModule) -or $AutomationModule.Version -ne $DependencyVersion) {
                            $DependencyVersion = $DependencyVersion.Split("[")[0].Split("]")[0]
                            Write-Output "Importing dependency module $DependencyName of version $DependencyVersion first."


                            # this dependency module has not been imported, import it first
                            _doImport `
                                -ResourceGroupName $ResourceGroupName `
                                -AutomationAccountName $AutomationAccountName `
                                -ModuleName $DependencyName `
                                -ModuleVersion $DependencyVersion

                            $ModulesImported += $DependencyName
                        }
                    }
                }
            }
        }

        # Find the actual blob storage location of the module
        do {
            $ActualUrl = $ModuleContentUrl
            $ModuleContentUrl = (Invoke-WebRequest -Uri $ModuleContentUrl -MaximumRedirection 0 -UseBasicParsing -ErrorAction Ignore).Headers.Location
        } while(!$ModuleContentUrl.Contains(".nupkg"))

        $ActualUrl = $ModuleContentUrl

        Write-Output "Importing $ModuleName module of version $ModuleVersion from $ActualUrl to Automation"

        $AutomationModule = New-AzureRmAutomationModule `
            -ResourceGroupName $ResourceGroupName `
            -AutomationAccountName $AutomationAccountName `
            -Name $ModuleName `
            -ContentLink $ActualUrl

        while(
            $AutomationModule.ProvisioningState -ne "Created" -and
            $AutomationModule.ProvisioningState -ne "Succeeded" -and
            $AutomationModule.ProvisioningState -ne "Failed"
        )
        {
            Write-Verbose -Message "Polling for module import completion"
            Start-Sleep -Seconds 10
            $AutomationModule = $AutomationModule | Get-AzureRmAutomationModule
        }

        if($AutomationModule.ProvisioningState -eq "Failed") {
            Write-Error "Importing $ModuleName module to Automation failed."
        }
        else {
            Write-Output "Importing $ModuleName module to Automation succeeded."
        }
    }
}

_doImport `
    -ResourceGroupName "chdaiAC" `
    -AutomationAccountName "acpoctest" `
    -ModuleName "AzureRM" `
    -ModuleVersion $ModuleVersion
编辑完成,点击保存。随后继续点击“测试窗格”。这个功能将测试我们刚完成的Runbook。
在输出窗口会看到后台沙盒运行脚本把AzureRM的dependency模块一个个被导入到自动化账户
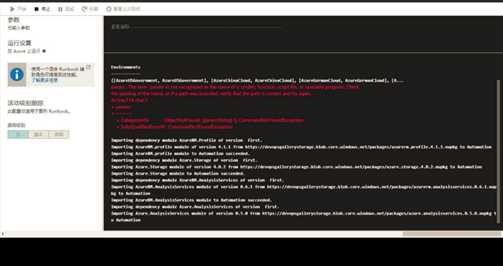
最后导入AzureRM的时候运行会报错,这个没有关系。AzureRM模块本身不包含任何功能。所以ARM管理的Powershell命令都在AzureRM的Dependency 模块里。
现在回到模块列表,可以看到AzureRM相关模块已经全部导入了
现在万事具备,下一篇我们可以开始在日常工作中运用Azure自动化账户