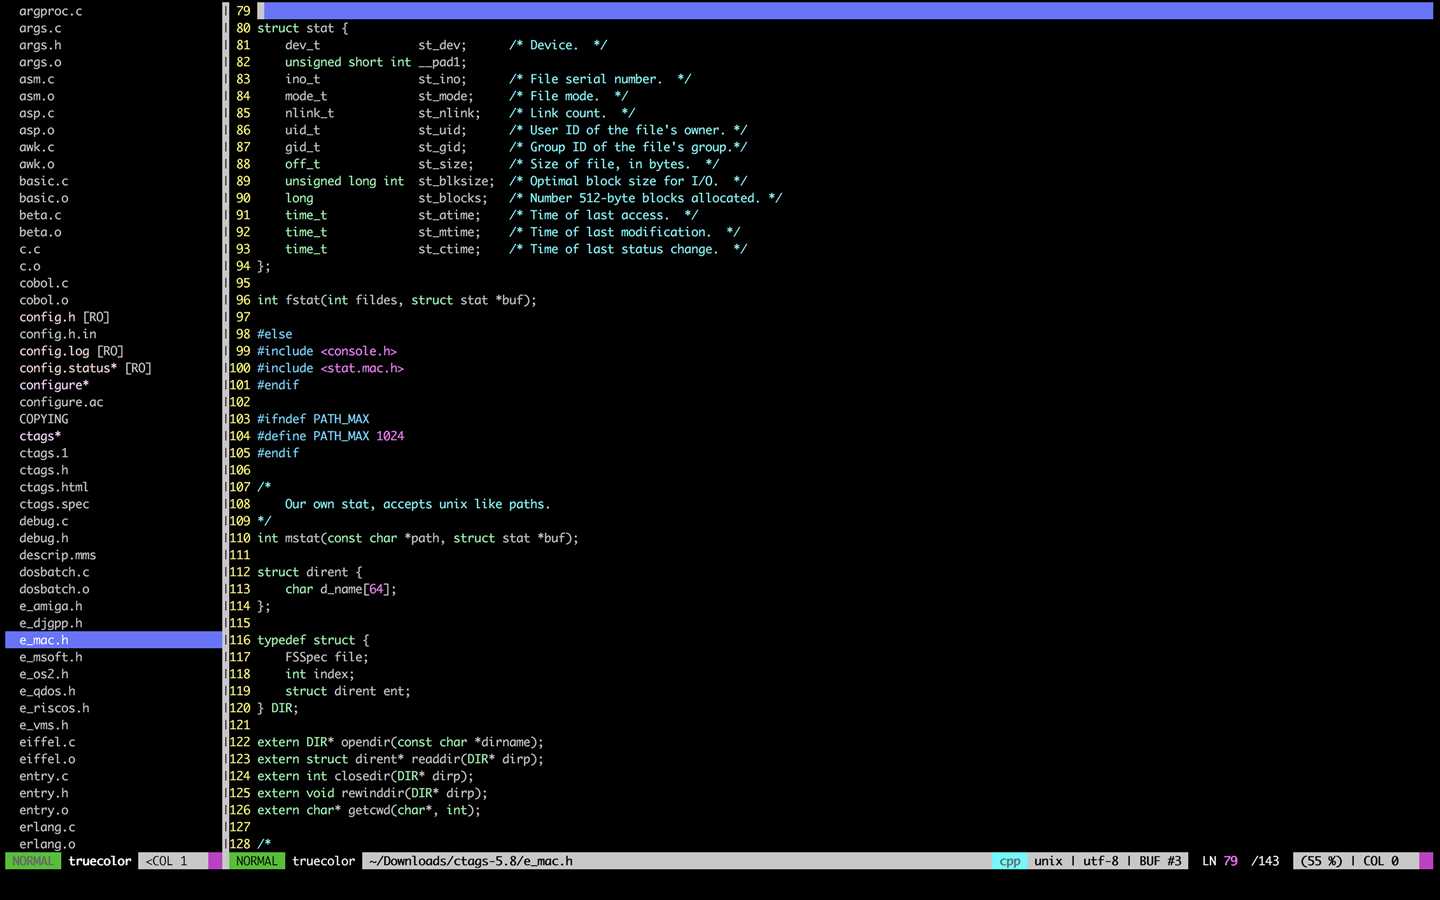
MAC下的IDE实在是不好用,最终放弃了IDE准备直接用vim来看代码了,那么就需要设置一下vim。
将家目录下面.vim中的vimrc用下面的内容替换:
" Set vundle settings here
" git clone https://github.com/VundleVim/Vundle.vim.git ~/.vim/bundle/Vundle.vim
set nocompatible              " be iMproved, required
filetype off                  " required

" set the runtime path to include Vundle and initialize
set rtp+=~/.vim/bundle/Vundle.vim
call vundle#begin()
" alternatively, pass a path where Vundle should install plugins
"call vundle#begin(‘~/some/path/here‘)

" let Vundle manage Vundle, required
Plugin ‘VundleVim/Vundle.vim‘        "https://github.com/VundleVim/Vundle.vim

" Custom plugins
Plugin ‘scrooloose/nerdtree‘         "https://github.com/scrooloose/nerdtree
Plugin ‘MattesGroeger/vim-bookmarks‘ "https://github.com/MattesGroeger/vim-bookmarks
Plugin ‘maciakl/vim-neatstatus‘      "https://github.com/maciakl/vim-neatstatus

" All of your Plugins must be added before the following line
call vundle#end()            " required
filetype plugin indent on    " required
" To ignore plugin indent changes, instead use:
"filetype plugin on
"
" Brief help
" :PluginList       - lists configured plugins
" :PluginInstall    - installs plugins; append `!` to update or just :PluginUpdate
" :PluginSearch foo - searches for foo; append `!` to refresh local cache
" :PluginClean      - confirms removal of unused plugins; append `!` to auto-approve removal
"
" see :h vundle for more details or wiki for FAQ
" Put your non-Plugin stuff after this line


" Vim5 and later versions support syntax highlighting. Uncommenting the
" following enables syntax highlighting by default.
if has("syntax")
    syntax on   " 语法高亮
endif
" Uncomment the following to have Vim jump to the last position when
" reopening a file
if has("autocmd")
    au BufReadPost * if line("‘\"") > 1 && line("‘\"") <= line("$") | exe "normal! g‘\"" | endif
"have Vim load indentation rules and plugins according to the detected
"filetype on
"filetype plugin indent on
endif

set number
set autoindent
set softtabstop=4    " 设置软制表符的宽度
set shiftwidth=4     " (自动) 缩进使用的4个空格
set tabstop=4        " 设置制表符(tab键)的宽度
set expandtab        " 行首tab转换为4个空格
set cindent          " 使用 C/C++ 语言的自动缩进方式
set cinoptions={0,1s,t0,n-2,p2s,(03s,=.5s,>1s,=1s,:1s     "设置C/C++语言的具体缩进方式
set showmatch        " 设置匹配模式,显示匹配的括号
set linebreak        " 整词换行
set whichwrap=b,s,<,>,[,] " 光标从行首和行末时可以跳到另一行去
set ruler            " 标尺,用于显示光标位置的行号和列号,逗号分隔。每个窗口都有自己的标尺。如果窗口有状态行,标尺在那里显示。否则,它显示在屏幕的最后一行上
set showcmd          " 命令行显示输入的命令
set showmode         " 命令行显示vim当前模式
set incsearch        " 输入字符串就显示匹配点
set enc=utf-8        " 文件编码
set cursorline
highlight CursorLine   cterm=NONE ctermbg=blue ctermfg=white guibg=NONE guifg=NONE
" highlight CursorColumn cterm=NONE ctermbg=green ctermfg=NONE guibg=NONE guifg=NONE

" NERDTree settings
autocmd StdinReadPre * let s:std_in=1
autocmd VimEnter * if argc() == 0 && !exists("s:std_in") | NERDTree | endif

" vim-bookmarks settings
let g:bookmark_auto_close = 1
let g:bookmark_save_per_working_dir = 1
let g:bookmark_highlight_lines = 1
let g:bookmark_center = 1
let g:bookmark_location_list = 1

" key mapping
:inoremap { {}<ESC>i
:map <f2> :NERDTreeToggle<CR>
然后手动下载如下文件:
git clone https://github.com/VundleVim/Vundle.vim.git ~/.vim/bundle/Vundle.vim
之后在打开的vim中输入:PluginInstall来安装相应的插件,等待完成后就可以使用了。
配置好的环境如下图所示:

